5 Minute Guide to Quilt Pressing Tools
Pressing isn't the most glamorous aspect of quilting, but it's incredibly important. Getting flat seams not only leads to better accuracy, but a more successful and enjoyable sewing experience! With so many different brands and notions out there, where should you start? We're here with answers to your burning hot iron questions in our latest 5 Minute Guide to quilt pressing tools.
This 5 Minute Guide series is designed to provide you with valuable information in one centralized location. We always hope you find something new to try! Set your timer for 5 minutes...ready, set, GO!
You May Also Like...

Pictured above is the Laurastar ironing system.
Irons
Unless you want to finger press every single seam in your quilts, you'll need a trusty iron. And trust us when we say that finding the perfect iron can take some time, research, and careful thought.
One quilter's favorite iron might not be best for you. Reading reviews is always helpful. But if you're in a quilt guild or other sewing group, you could always ask to try out your friend's iron to see what you like best before taking the plunge. Keep reading for Suzy's favorite iron and mine!
Trending patterns!


Quilt Patterns


Quilt Patterns


Quilt Patterns


Quilt Patterns


Quilt Patterns


Quilt Patterns


Quilt Patterns


Quilt Patterns


Quilt Patterns

Oliso Pro Plus SmartIron — Suzy's Favorite!
One of the most popular irons available for quilters, the Oliso has some incredible features that other irons lack. Quilters with tendonitis, wrist pain, or arthritis swear by the auto lift feature — tiny feet that pop out of the bottom of the iron so that you do not need to rotate your wrist every time you set the iron down.
As Oliso says, "Simply touch the handle, and the iron lowers, ready to work. Take your hand off and the iron lifts, preventing scorches, burns, and tipping. It’s not only safer, but also saves time as well as your wrists!"
Oliso irons also have particularly long cords, allowing them to be plugged in very far from where they are used. However, note that these special features contribute to Oliso irons tending to be heavier than other irons. While the auto lift can be a huge help to quilters with wrist and arm pain, the weight is a big trade off.
Panasonic Cordless Iron — Laura's Favorite!
A newer iron on the market, this Panasonic iron also has features specifically for quilters. The most exciting thing about this quilt is that it's cordless! The cord is connected to the base instead of the iron itself, meaning you can plug it in close to your wall and move your iron literally anywhere.
The cord is retractable, which means that when you're not using it, the cord goes back into the iron base which is wonderfully tidy. The iron slides into the base using wheels, making this iron also very easy on hands, wrists, and arms.
If you quilt on the go at retreats, workshops, or even just a friend's house, you'll love this iron because it comes with a carrying case that can even be used while the iron is still hot.
The biggest downside of the Panasonic Cordless Iron is that it does not get quite as hot as an Oliso iron. However, I personally like that because I starch all of my fabric so this reduces my chances of scorching my fabric.

Miniature Irons
Not only are miniature irons adorable, they are also great for two main reasons. First, it's very easy to pack a miniature iron when sewing somewhere other than your own house. And second, because they are very light, these can be an even better option for quilters dealing with pain. Note that most miniature irons do not get as hot as full-sized irons.
Our Favorite
The Oliso mini iron may not have the auto lift feature, but it does come with a heat resistant resting mat so you don't have to rotate your wrist as you're using it, very similar to the full-sized Oliso. If you're in need of an even more ergonomic option, check out the Dritz Petite Press.

Ironing Board
When looking for a great ironing board for quilting, here are some things to keep in mind. First, you'll want to make sure the ironing board cover is thick. The more you use your ironing board, the more pressure is placed on the cover. Eventually, it might get so thin that you're pressing close to the metal part of the ironing board.
And second, make sure the ironing board has a small shelf for your iron. Trust us, that's a dealbreaker! And last, a wire shelf below the ironing board (like you can see above) is very helpful for holding fabric or pressed blocks.
Our Favorite
This Reliable ironing board checks all the boxes — thick cover, small shelf for your iron, and wire shelf below. The one annoying thing about this iron is that the attachable extender creates a bump and it's tough to iron well over the bump.

Clothes Rack
What? We're not making clothes, are we? Nope, but a collapsable clothes rack is still very useful when making quilts. Imagine you pressed all your rows for a quilt, then set them aside for a bit. The next time you get the rows out, you have to press them all over again because they have wrinkles!
Hanging your quilt rows on a clothes rack will eliminate that. And when you're not using it, just collapse it and store it in your closet!
Our Favorite
Suzy loves this bamboo clothes rack, which is shown above holding rows from her Gather quilt.

Wool Pressing Mat
If you're looking for flat seams, wool pressing mats are a great place to start. These thick wool mats absorb heat and release it quickly so your seams are actually pressed from both sides — the iron side and the wool mat side. One of our creative contributors even likes to use two wool pressing mats when quilting to get the flattest seams!
A downside of using wool pressing mats is they can sometimes smell like wet wool if you're using steam or starch. But if that doesn't bother you, wool mats will be a game changer. Check out our full review of wool pressing mats here.
Our Favorite
This wool pressing mat comes with an iron rest, which is a wonderful bonus! If you use a wool pressing mat, you may want to invest in this wool mat cleaning tool, which removes the thread, hair, or pet fur that may accumulate on your wool mat over time.
Table Top and Travel Pressing Mats
If you don't have enough space in your sewing area to keep a full ironing board out all the time, or if you frequently attend workshops or retreats, you'll want a small pressing mat. These fit on just about any table where you'll sew and the heat does not go all the way through them, so your table will be safe.
Our Favorites
My personal favorite table top pressing mat is the June Tailor Cushioned Square n' Blocker. I use this every time I sew. It even has a handle which makes it portable. If you'd prefer a smaller version of the same mat, this version also has a cutting surface on the back. This two-in-one pressing and cutting station with handles from Omnigrid is also a very popular travel mat.
Pressing Safety Tools
Irons are made to do one main thing — get super hot. That means that if you're not extra careful, you may mildly burn your fingers or burn or scorch your lovely fabric. We have some favorite safety tools to share, but first, we want to share one of the biggest safety rules about irons with you.
According to electricians, it is always safest to plug an iron into a wall socket and you should avoid ever plugging an iron into a power strip because it risks an electrical fire. Here are some more helpful pressing safety tools!
Our Favorites
Here is a list of our favorite safety tools for pressing:
- Heat Resistant Protective Finger Guards: These help keep your fingers safe from burns if they get too close to an iron.
- Clover Hold It Precision Stiletto: This heat resistant tool allows you to hold seams in place when pressing without putting your fingers in danger of burns.
- Heat Resistant Mat: Usually used for hair styling tools, a large mat like this allows you to put your iron down while in use without burning your ironing board cover. A large mat like this instead of an iron shaped one means you don't need to be as precise when you put your iron down.

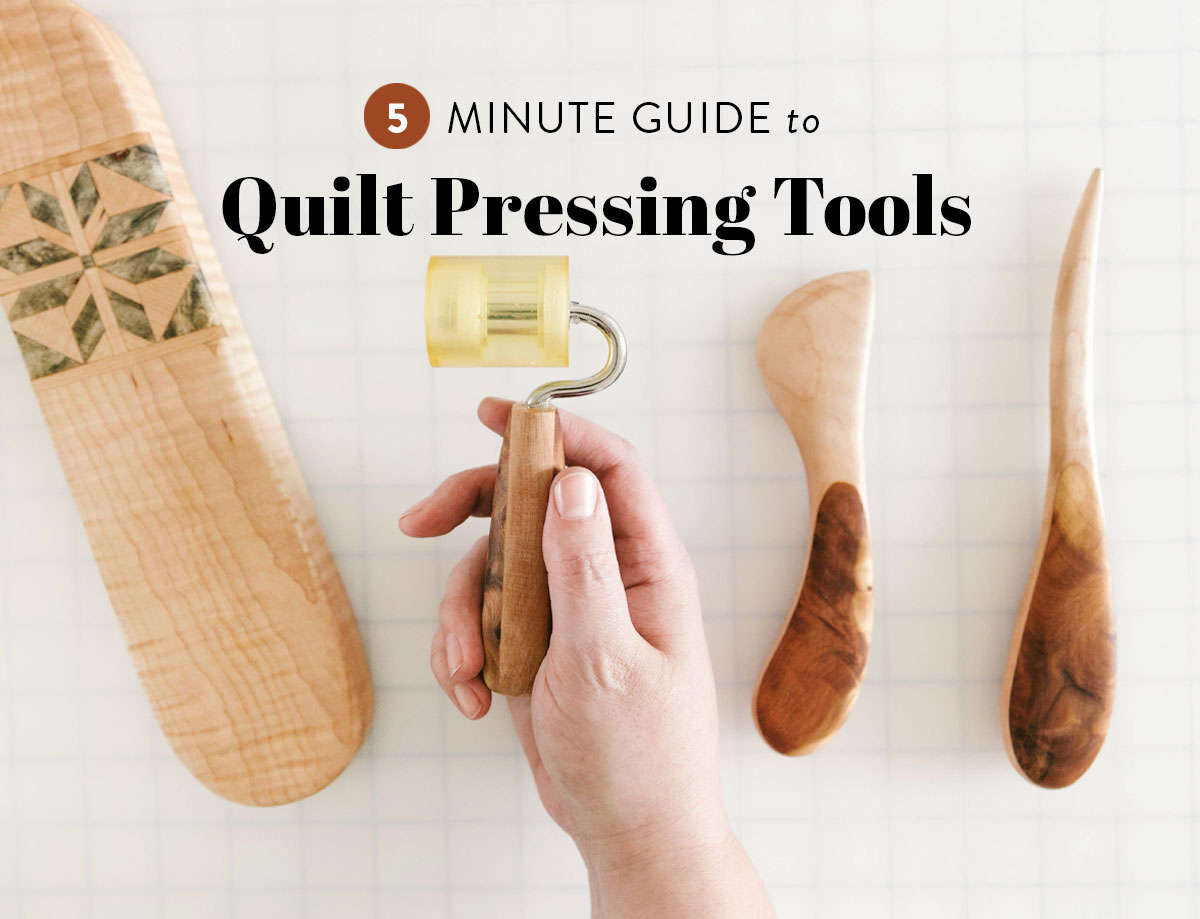
Tailor's Clapper
If you're looking for a tool that will completely change the game for your seams, this is it. A tailor's clapper is a piece of wood that helps your seams stay flat. It's not magic — it's science! After pressing with steam, rest a clapper over your seam until it cools.
As materials scientist Mitch Hopper (yep, my husband!) explained in this interview, "Heat and steam make fabric fibers flexible, and when they dry and cool to room temperature they stay in the shape they were when hot. That’s why pressing works in the first place!
But when you’re just pressing, you remove the pressure of your iron while the fabric is still hot, so the fibers can relax out of shape before they cool and stiffen. So a tailor’s clapper keeps the heat and steam trapped for an extended period of time, which gives the fibers more time to get into the desired shape — meaning perfectly flat — and then holds them in that exact shape while they cool."
Our Favorite
The handmade, heirloom quality tailor's clappers made by Modern American Vintage can't be beat. They are both functional and elegant — a sophisticated addition to any sewing space.

Seam Roller
If you want to give your seams a quick press without needing to turn your iron on, a seam roller is great. With a wheel instead of a blunt edge, seam rollers distort fabric less than pulling something like a hera marker across a seam.
Our Favorite
One of the newest offerings at Modern American Vintage, their seam rollers are beautiful and have the best wheel around — a polyurethane roller with velvet smooth internal bearings. It glides across fabric so smoothly!

Starch and Spray Bottles
To starch or not to starch? That is...a very frequent question here at Suzy Quilts. We're big fans of pre-washing any fabric that is not a pre-cut, and we love using textured yarn-dyed fabrics.
That means that starch is a beloved and useful tool for most quilts our team makes! It's not required to make a quilt, however, and you can read this article and decide for yourself if starch will be right for you. If you decide that you want to use starch, check out our favorites below!
Our Favorites
We love classic starch, but also want to recommend a great spray bottle. Here are our favorite starch and spray tools:
- Continuous Water Mister: Made primarily for hair dressers, a continuous mist bottle creates a more even distribution of liquid over your fabric before pressing than the spray caps that come with starch. I have two — one for water and one for starch.
- Best Press: Unscented Best Press starch is a classic. If you don't like how stiff it makes your fabric, experiment with diluting it with water.
Iron Cleaner
Over time, our irons get dirty. There's no way to avoid it! Residue from starch, interfacing, or other chemicals can build up. Do you ever feel like your iron is dragging as you press, or feel resistance as you move it across fabric? That probably means it's time for a good cleaning!
Our Favorite
Dritz Iron-Off removes residue or build up from starch, fusible webbing, and other chemicals and adhesives.
What's Your Favorite Quilt Pressing Tool?
What's your essential pressing tool? Did you find something new to try in this 5 Minute Guide? Or do you have any questions about pressing your fabric or quilts? Let us know in the comments to keep the conversation about quilt pressing tools going!


Thank you for ALL of these guide segments. Each one is so informative. I have seen long tailor clappers. Do you prefer one of another?
I own a few different sizes and switch based on the size of seam I’m pressing. For example, when I sew a long seam for joining large backing pieces I’ll use be extra long clapper (it’s about 12”).
What a great blog today! Got lots of new info about the products you included. Thank you. I’m keeping this for future reference.
It’s an excellent idea to save this post for future reference! I’m so happy to hear that you got a lot out of this one! Is there a 5 Minute Guide topic you’d like to see us cover next?
Great info- very helpful tips, even for a 40 year quilter. I agree- a clapper a total game changer!
I love hearing that even extremely experienced quilters like you are finding our 5 Minute Guides helpful! If there’s a topic you’d like to see us cover in the future, let us know!
Thank you for sharing so much information via your emails. It is wonderful you do this, for those of us who not do Facebook, I stagram, etc.
You’re welcome! It’s definitely a great benefit of the Suzy Quilts blog that it can be accessed without social media. Stay tuned for more 5 Minute Guides and let us know if there are any topics you want to see us cover!
How did I ever quilt without a tailor’s clapper?? I love my beautiful tailor’s clapper from Modern American Vintage! I am an improv quilter and not that at all concerned about precision — would never even think about starch!- but I love my wool mat and tailor’s clapper to flatten seams. Thank you, Suzy for introducing me to Modern American Vintage.