Free Quilted Slippers Tutorial
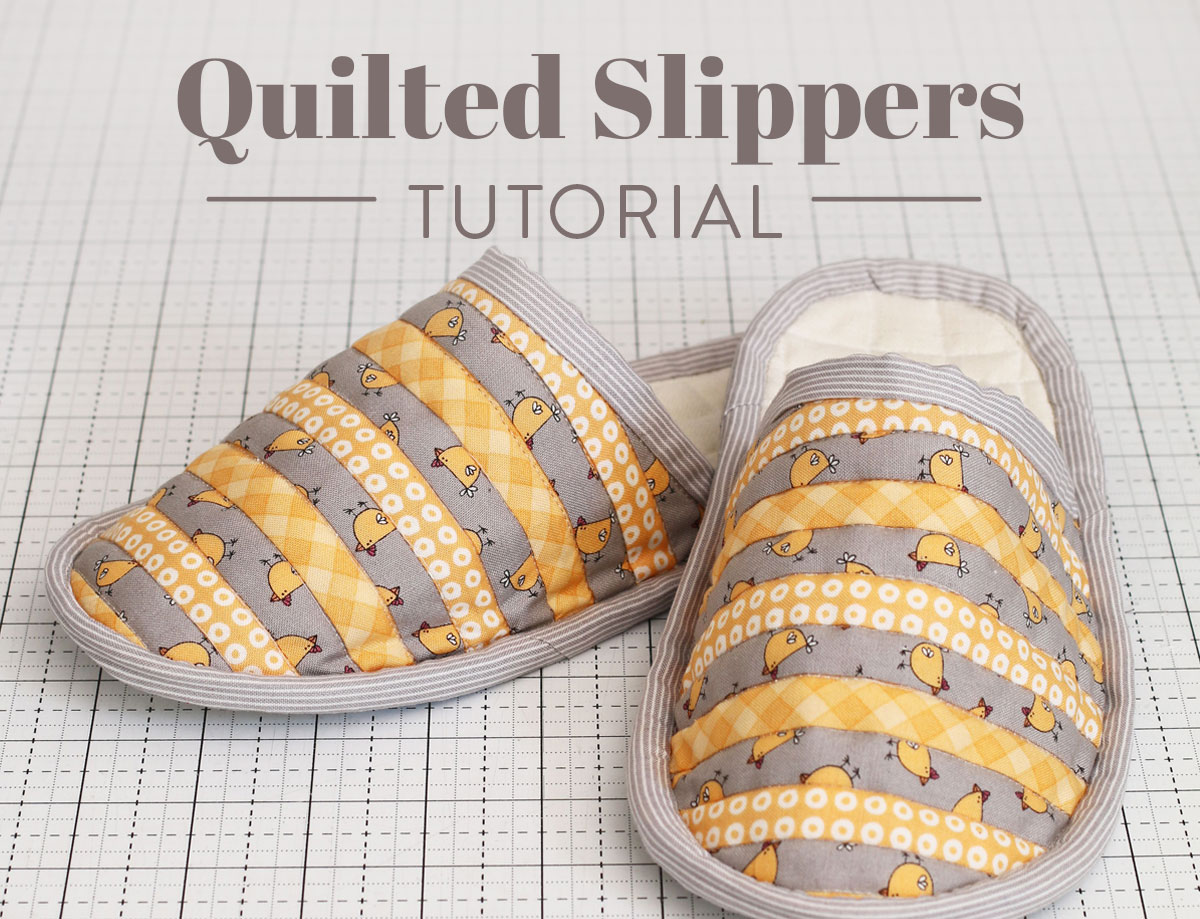
Looking for the perfect combination of coziness and style? This quilted slippers tutorial is for you! They are quick and easy to make and look good with any fabrics. Plus they’ll keep you nice and warm during crisp fall nights!
We are thrilled to welcome guest contributor Kymona Tracey of Kreative Kymona to the blog for an easy-to-follow and beginner-friendly tutorial. Kymona works full-time in a hospital by day and still manages to be a talented crafter focused on sewing and papercrafts. Her tutorial will have your feet feeling snug in no time. Ready to make your own pair of quilted slippers? Keep reading to learn how Kymona made hers. Take it away, Kymona!

You Might Also Like...
Quilting has become so fashionable that it even made it to the Met Gala. Did you see that? When I saw that, I squealed because I knew how to make that quilt. Since then, I've been thinking about how I can make quilting fashionable too. As a crafter who loves to try new things and recently completed a pair of handmade shoes, I thought sewing a pair of quilted slippers would be fun and fashionable to make.
This quilted slipper tutorial is a great way to make a pair of fashionable shoes to wear at home or make as a quick cool weather gift for friends and family!

These quilted slippers are comfortable and safe to wear on slippery floors. Not only do they have great padding, but they also have an anti-skid gripper fabric bottom. The quilting can be as simple as straight lines or complex as you prefer. The best part is that you draft the pattern based on your current foot measurement or the soles of a comfortable pair of shoes, so they are completely customized to you!
Quilted Slippers Materials
This tutorial is for a pair of slippers in your foot size. The slippers in this tutorial are based on a 6.5 - 7 shoe size. If your shoe size is different, you can either scale up or down on the fabric measurements. I made a muslin sample of the slipper's upper (the part that goes around the top of your foot) and sole (the part you walk on) to ensure my foot measurements were correct before making my final quilted slippers.
Trending patterns!


Quilt Patterns


Quilt Patterns


Quilt Patterns


Quilt Patterns


Quilt Patterns


Quilt Patterns


Quilt Patterns


Quilt Patterns


Quilt Patterns
- Your custom template (see step 1)
- Quilted Upper Fabric: Three Fat Quarters. I used Sweetwater Spring Chicken fabric in Spring Chicken Gray, Spring Chicken Yellow Cherrios, and Spring Chicken Yellow Gingham.
- Quilted Upper Fabric Back: Two pieces of 11″ x 13″ linen fabric. I used a scrap piece of linen.
- Quilted Sole: Two pieces of 11″ x 13″ linen fabric. I used a scrap piece of linen.
- Quilted Sole Bottom: Two pieces of 11″ x 13″. I used Dritz Anti-Skid Gripper Fabric.
- Batting: Six pieces of 11″ x 13″ for the shoe sole. For the slipper uppers, cut the batting slightly bigger than the finished pieced top. I used The Warm Company Warm & White Craft Size.
- Binding: Six 2.5″ x WOF strips. I used a fat quarter of the Sweetwater Spring Chicken Gray Stripe Fabric. If you're feeling adventurous, try making your own bias binding!
- Coordinating Thread: I used Auriful 6711 50wt thread.
- Basic Quilting Supplies

Step 1: Create Your Slipper Uppers and Soles Pattern
Start by placing your foot on a piece of paper and loosely trace around your foot or trace the sole of a flat pair of shoes.
For the uppers, use a string or cloth measuring tape and measure around the top of the sole from where you want the upper to start to the other side in about the same spot. Measure the string (mine was 15″).

Then measure from the middle of the sole to the top of the sole. That will give you the arc upper (mine was 6.5″). Draw a line from the bottom of the paper to the arc measurement, which is 6.5″ for me. Roughly draw your arc from that middle point down both sides. You can use the string to measure the arc that will touch your sole. Cut out that pattern.
Step 2: Cut and Piece the Upper Quilt Top
Cut and piece 1″ x WOF strips together using a 1/4″ seam allowance for the upper quilt top, alternating the fabrics. Make the quilt top slightly bigger than your upper-patten pieces.

Step 3: Quilt the Upper and the Sole Sandwich
Starting with the slipper soles, make a quilt sandwich using the quilt top right side up, two pieces of batting for extra cushioning in the middle, and the anti-skid gripper fabric facing down. Quilt the entire sandwich with straight-ish lines. For the uppers, sandwich the quilt top, two pieces of batting, and the backing fabric together. Quilt the uppers by stitching in the ditch.

Step 4: Cut the Fabric Using Your Patten
Place both sole patterns, left and right, on top of the quilted sandwich. With a fabric pen, trace both pattern pieces. Once that is done, use a rotary cutter to cut out each piece.

Since the quilt sandwich is a bit thick, make sure you cut through each layer. Repeat this step for the quilt upper pattern pieces.

Step 5: Sew the Binding to the Upper Pieces
For the binding, stitch the six WOF strips together as you would with quilt binding to create one long strip. Iron the strip to make a double-fold binding strip.
Now, it's time to sew the binding to the shorter raw edge of both upper pieces. Open up the strip and place one raw edge on the raw edge of the upper on the top side of the upper piece. Stitch a straight stitch using a 1/4″ seam allowance. Once the strip is sewn to the upper piece, cut the excess fabric strip off.

Fold the binding to the back and over the 1/4″ stitch line by 1/8″ and stitch from the front. Place the needle right up against the fold stitch and sew to the end. Repeat for the second upper piece.

Step 6: Stitch the Upper Pieces to the Sole
Position the upper on the top of the sole as evenly as possible and clip in place. Try them on! Carefully place your foot inside and make sure the fit is comfortable. Stitch the upper to the sole using a 1/4″ seam allowance. Repeat for the second foot.

Step 7: Sew the Binding to the Slippers
We made it to the last step! You should start to see real slippers take shape now. All you need to do is add the binding to complete your new comfy pair of custom quilted slippers.
Open up the rest of the binding strip and pin or clip the raw edge of the binding strip to the raw edge of the slipper. Using the binding method you prefer, stitch the binding to the edge of the slipper, taking your time around the front and back curves.

Fold the binding over to the bottom of the slipper. The binding may not turn so easily on the front of the slipper. If that is the case, use a pair of scissors to clip some of the bulk, and then fold the binding over.
Make sure the binding passes the 1/4″ stitch line by 1/8″. Pin in place. Stitch the binding in place on the top side of the slipper. Place the needle up against the fold and stitch around the slipper. Repeat for the second slipper.

Wear Your New Quilted Slippers and Show Them Off!
Yay, you made a pair of fashionable quilted slippers! Strut your stuff throughout your house in your new anti-slid quilted slippers. Be prepared for family members asking you to make them a pair.
Once you put your new quilted slippers on, post your picture to Instagram using the #SuzyQuiltsBlog hashtag!


And to think I was worried about supply chain issues this year. Instead of ordering gifts I’ll just be over here making everyone slippers 😂
Brilliant!
Thank you both Kymona and Suzy for the pattern. Just what I need to add to my shoe ‘collection’.
Adorbs! Scale it down for little feets. I used to make a similar slipper for my lil’ ones and the non-slip fabric was essential especially on hardwood floors.
These slippers are cute and functional!! Thank you Kymona Tracey for the easy to understand tutorial. And thanks Suzy too. I definitely want to make these. They would make a nice gift.
Wow these are fantastic! I will definitely try to make a pair. I wonder if I even put some nubby dust-attracting fabric as the sole, if they would act like “swiffer shoes” 🙂
Ha! I love that idea! You could probably get some hard-to-reach dust bunnies that way 😉
What??? I’ve been feeling a bit blue about the coming holidays. I needed this free tutorial badly. So excited to use up my left over ends and bits to creat some fun slippers for family. THANK YOU!
Thank you so much for the slipper pattern and instructions. I’ve purchased so many slippers but they are getting so expensive and I have bins of scraps to use! Also, my feet are not 5-6, nor 7-8! I’m a size 6 1/2 or 7 and most slippers are made for the larger size, which makes these sizes too small or too large. It’s so frustrating, but now I’ll always have a warm pair of slippers that fit me and as many pair as I like! My poor too small slippers are nearly worn out so this pattern came just in time!!!
I would love to make these for my Grandkids. Is there a way to add a back piece around the heel so they stay on better for little ones?
Not just children. I can never keep this sort of slipper on my feet, either. I was wondering about adding a piece of elastic that goes around the heel, like a strap. Don’t know how that would work.
Im trying to add the binding strip to the upper part of the slipper.. and I’m very confused 🙂 is this the exact same method as traditional quilt binding? My binding width on my sleep seems very wide when I open up the binding and sew with the raw edge down first ..
Thank you for a creative tutorial! I have had problems with quilting the bottom, no skid fabric. It doesn’t go through the machine easily and the quilting looks really “beginner”. Any tips? I’d love to make these for my girlfriends as a gift for an upcoming trip.
What size needle are you using? If you have an 80/12 in your machine from quilt piecing, bump that up to a 90/14. I think that should help. You also can try using your walking foot for more grip on the layers. This post may help – https://suzyquilts.com/universal-needles/
If the no skid fabric is catching to the needle plate add a piece of tissue paper between the non skid and the sewing machine bed.
New to your blog,
Not sure how to doanload the
free slipper tutorial.
Thanks
Hey there! The free slipper tutorial is not a PDF download, so you will need to revisit this post whenever you want to make it. I suggest bookmarking it in your web browser so you can easily find it any time 🙂
These are so cute! Thank you. Since I am prone to tripping, I think in addition to grippy fabric, I will add some elastic to keep these puppies from falling off! Mama gets a new pair of slippers!!
Again, thank you!
Thanks for sharing your lovely slipper tutorial. Just what I wanted and needed. They look so comfortable. Even ordinary slippers are getting so expensive and my old slippers are nearly thread-bare. I’m putting these slippers on “top of the heap”, first priority. You’ve made my day.
Thank you!!!
Hi, I’m new to quilting. Can you explain what WOF strips are?
Of course! WOF is an acronym for Width of Fabric. Typical quilting cotton measures 42″ from selvage to selvage, so that is the assumed width of fabric, or WOF. So if you ever see a measurement that reads 3″ x WOF, you can assume the instructions want you to cut from selvage to selvage to get a strip that is 3″ x 42″. For a video tutorial, check this out — https://www.youtube.com/watch?v=bOcySrnpmow
I was trying to figure out how you arrived at the width of the arc upper, but I’m assuming the piece of paper you used was 8 1/2 x 11
Yep, that’s right! Then you’ll just follow the instructions in Step 1 to use a string to figure out the size for your specific upper!
I’m interested in making these but am wondering if I can substitute fabric on the inside of the slipper for something cozier – maybe fleece or something fluffy? Any recommendations for what to use or how to make it work?
You could definitely do that! If you do a search on our site for “flannel” or even “minky” you will find lots of good info about stitch length and needle size.
unfortunately I can’t find a pattern anywhere
The step-by-step instructions in this tutorial are the pattern! If you follow the instructions as they’re laid out in this post, you’ll have your own cozy slippers before you know it 🙂