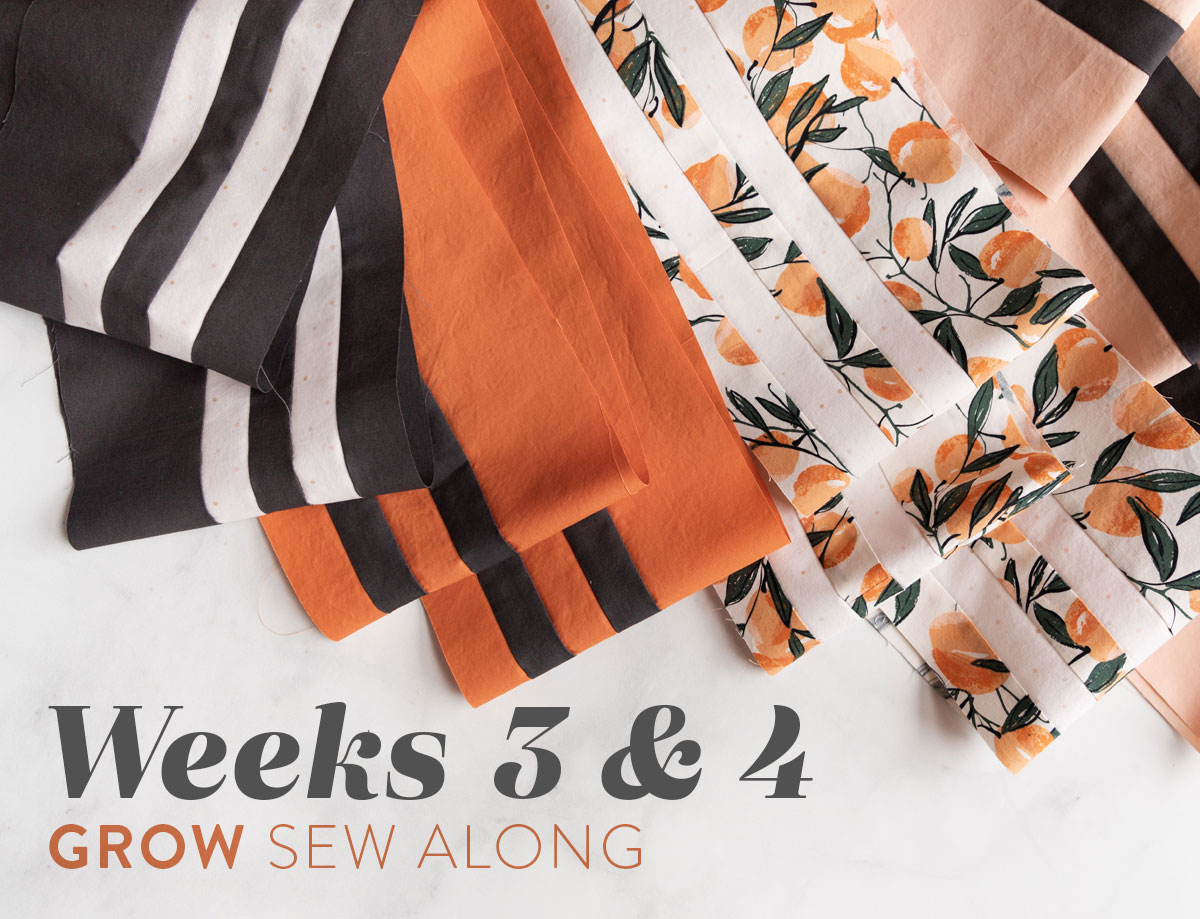
Grow Sew Along Weeks 3 & 4: Sewing Blocks
Welcome to Weeks 3 and 4 of the Grow sew along! If you're thinking, "Suzy, are you slackin' on us and trying to get out of writing a blog post for each week?" The short answer is yes. BUT the longer and better answer is you don't need two posts!
In Weeks 3 and 4 of this sew along our assignment is the exact same thing, just broken up into two different weeks. In Week 3 we sew half of our blocks and in Week 4 we sew the other half. Actually, while we're talking about the weekly sew along schedule, why don't I post it again so you have it handy.
Grow Sew Along Weekly Schedule
- Week 1, April 1: Task: Pick fabric, gather supplies and choose your pattern layout (if different from the original)
Optional Meditation: What is your intention for this time? To learn? To relax? To get your creative juices flowing? To work through some anxious energy? Sit for a moment and set a clear intention. This can change day to day! - Week 2, April 8: Task: Cut all strips and borders
Optional Meditation: Hold some of your fabric in your hands, close your eyes, and feel its weight and texture. What do you love about fabric? How has that changed since you started sewing? - Week 3, April 15: Task: Sew Blocks A-D
Optional Meditation: Before turning on your iron or sewing machine, pause for a minute to close your eyes and take some deep breaths. Listen to your body’s natural rhythm. How have you personally grown as a creative person? No judgement here. Only love. - Week 4, April 22: Task: Sew Blocks E-H
Optional Meditation: Close your eyes. Let your shoulders relax. How have you grown as a friend to others? How have you grown as a friend to yourself? Remember, no judgement 😉 - Week 5, April 29: Task: Sew Fig. 6-12
Optional Meditation: Sit by your sewing machine. Breathe in with the count of one and out with the count of two. After counting to ten, start again. Do this a few times or until you feel relaxed. Think about how grateful you are for your sewing machine. What a blessing it is! - Week 6, May 6: Task: Sew Fig. 13-18
Optional Meditation: After taking some breaths and feeling at ease, lift your heart up and picture warm sunshine streaming onto your face. Enjoy this sense of warmth and lightness. Enjoy the feeling of being happy in your accomplishments!

Optional Meditation
Just as the title says, these weekly meditations are optional. Meditation may not be your jam, it's just something that I have found very helpful since becoming a mom. I typically don't have a "goal" for my daily meditations. I usually do it to unclench.
I know that sounds funny, but if I can unclench my jaw, my shoulders, my brain, my butt (lol), for 10-20 minutes a day I am a much more patient person the rest of the time. I think I was born without the "patience gene," so for someone like me, a daily practice in slowing down has been, well, at the risk of sounding dramatic, life changing.
If you want to take a moment and unclench with me, start by sitting in a chair with both feet on the floor and the palms of your hands resting on either leg. Scan down from the top of your head to your jaw, your neck, your tummy, your booty, your thighs and all the way to your toes. You can pause here and just listen to the gentle rhythm of your breath or, without any judgement, think about how you have grown in creativity.
Trending patterns!


Quilt Patterns


Quilt Patterns


Quilt Patterns


Quilt Patterns


Quilt Patterns


Quilt Patterns


Quilt Patterns


Quilt Patterns


Quilt Patterns
After spending some time meditating on that, possibly on a different day, think about how you have grown as a friend, to others and to yourself. Maybe even picture a friend in your mind. Picture him or her doing something they love and being filled with happiness. Let yourself smile and enjoy sending those positive thoughts toward your friend.
Once you open your eyes and are ready to sew, keep that feeling of happiness and lightness.

Next Stop: Sew City!
Hop in the car, gang, cause the next stop in this sew along is Sew City! We take our perfectly straight strips from Week 2 and sew those suckers into some beautimous blocks. But before speeding off into the sunset on your sewing machine, be sure to keep your strips organized and maybe even labeled. I don't want you trimming strips to the wrong size by accident.

Block Assembly
At the risk of boring you by repeating the pattern, I want to quickly review the next step after cutting all of those long strips.
- Look at the block chart on page 4.
- Only if your block is longer than 42" (the width of your fabric) sew the strips together from end to end.
- For most fabrics, you can sew all of your strips together into one long strip and then trim that down as needed.
- Before sewing your strips together to make the blocks, trim your strips to the right length. For example, if you are making Block E in the throw quilt, your block needs to be 53" long. First sew all of your Color 5 strips together from end to end to make one long strip. Then, if you haven't already, do the same with your Color 7 strips. Trim 2 skinny Color 7 strips down to 53" and 2 skinny Color 5 strips down to 53". Lastly, trim one fat Color 5 strips down to 53".
- Once your strips are the right length, sew them into blocks.
Now that you have your strips cut, organized and ready to go, I have tips! The best part about these tips is that even the most grabby one-year-old toddler hands can't mess up your seams if you follow them. Your seams are about to become unmess-upable.

Strong Seams = A Strong Quilt = A Lifetime Heirloom
Quiltketeers, I want your quilts to last forever. To make quilts that last forever, we need to build them on a strong foundation. Quality fabric, yes, and strong seams.
3 Tips Get the Strongest, Most Durable Seams
- Set your stitch length to 2.5. This one isn't complicated, just make sure your stitch length isn't much longer than 2.5 or your seams will get stretchy. Stretchy seams = loose seams = torn seams = don't DO IT!
- Use quality thread. I know it's tempting to fish out the old wooden spool of thread handed down to you from great-granny's sewing basket, but don't. Treat yourself to some thread that was made in the last 10 years. Just like a builder wouldn't use old mortar to lay bricks, don't use old thread.
- Press well. If you're into quilting vernacular let me tell you the difference between ironing and pressing. When you pull fabric out of the dryer and run a hot steamy iron back and forth over its surface you are ironing.
When you press a seam open, first open up the seam with you fingers then lay the hot iron on top of the seam. If you're very bold you can gently nudge the seam open with the nose of your iron but ONLY if you do it gently. Pressing seams is a NO STRETCH ZONE.
The main takeaway is not to make stretchy seams – not with a long stitch length or crummy thread or a hot steamy iron.

You May Also Like...
Supplies
I use some extra supplies in this tutorial, however you don't need any of these unless you like collecting sewing gadgets and notions. I do highly recommend getting a tailor's clapper, though. Keep reading to find out why.
- Tailor's clapper
- Wool pressing mat
- Oliso mini iron
- Spray bottle of water (or steam function on your iron)
Pressing Seams for the Grow Quilt
So you want the perfect press? Sure you do! I basically scared you into thinking that your quilt's going to fall apart if you don't press well 😉 So let's wrestle these strips into submission together. Here's a quick video!
1. Sew Your Strips Together
If you are making Grow quilt blocks that are longer than the width of your fabric (if using quilting cotton it will be ~42" wide), you need to sew those strips together. You can actually sew all of your like-strips together first so they are ready to be measured and trimmed as needed.
In the picture below you can see that I gathered all of my Color 4 strips and chained them together. Once I got moving and grooving, I actually chained all of my strips in one go without cutting my thread.
If you're new to quilting and are unfamiliar with chain piecing, check out this video tutorial. When chain piecing strips, just make sure that you are always keeping right sides together. It's easy to mix this up when working with solids, so keep checking to make sure your raw seams are all on the same side of your long continuous strip.
After sewing two strips together, take the tail of the top strip and place it right sides together on top of another strip. You can keep sewing like this until you run out of thread or strips!

I trimmed off the selvages after sewing all of my seams.

2. Press Your Seams to the Side
If you are sewing vertical strips, I recommend pressing to the side. If you are sewing 45-degree angle seams, press either open or to the side. It doesn't really matter.
The reason I say that is because when sewing a vertical seam in these skinny strips it's a really short seam. With such a short seam it's easy for those stitches to unravel. An open seam adds pull and pressure to that seam which makes it more vulnerable to coming apart.

So I can sew and press and sew and press forever without having to stand up or move my body at all, I set up a small pressing station next to my sewing machine. Below I use my Oliso mini iron and wool pressing mat.

3. Sew Your Strips into Blocks
Place right sides together and go for it! Well, not too fast. Sew fast enough to keep life interesting but not so fast that you go off the rails and end up with a seam that vacillates between a 1/2" and an 1/8".
Basically, stay accurate but have fun! And don't pin. You don't need to pin if you're sewing slowly enough to keep your edges lined up.

4. Press Your Seams Toward the Darker Fabric
This is where I like to add some steam and set the seam under my tailor's clapper. For a video on how I use the clapper, check out this post. If you don't have a clapper the next best thing is to press your seam and then let it mostly cool before moving it.

And there you have it! Easy as 1-2-3...4!
The rest is just following the pattern. If you've got ironing, pressing or sewing questions, ask me in the comments!
Grow Quilt Commonly Asked Questions
Q: I just ripped my fabric so it's on grain, however now my selvages don't line up. Should I line up the selvages or the ripped edge when cutting?
A: Sometimes even if you prewash your fabric it still remains a bit warped from being stretched and pulled its entire life. We won't hold it against the fabric. 😉 To avoid bowing at the center of your strips, line up your ruler with the ripped edge of the fabric. If you notice your strips begin to bow in the center, snip and rip your fabric again to get the edge back on grain.
Q: After ripping my fabric a little bit I see that it is very off grain. I'm worried I will lose inches and won't have enough fabric if I keep ripping.
A: If you are worried you won't have enough fabric, don't rip it. It's not imperative that your strips be on grain. You may experience a little bit of warping in your blocks if your strips have a lot of bowing, but that won't affect the integrity of your quilt – it will just need some extra pressing.
Remember, "imperfections" will quilt out during the finishing stages of basting and quilting. In the future if you plan on ripping your fabric, add and 1/8 or 1/4 yd. to your purchase so you will have wiggle room in case you need it.
Q: Are the sizes in the quilt schematics on pages 9-13 the finished block sizes? Should I add 1/2" to every block in the schematic? For example, if I'm making the Throw size, should I trim my center block to 5 1/2" or 6" long?
A: The sizes in the quilt schematics are the unfinished sizes so those are the exact sizes you should CUT your blocks. If you are following the bloc chart on page 4, your blocks will all be a bit big. This is so that in Weeks 5 and 6 when you are assembling the quilt top you can sew and then trim.
If you look at the second paragraph under Quilt Assembly on page 4 it says, "For clarity, the figure illustrations show trimmed blocks; however, it is recommended that you trim the blocks as you sew them." This will ensure that your blocks aren't too small. Since your blocks are all a little big, you will have the wiggle room to fudge the sizes a bit.
To answer your question, if you're making the Throw size, trim your center block to 5 1/2". For those who already trimmed their blocks to 6" and it's too late to turn back, the math will still work, they just won't have wiggle room for trimming.
If you look under Quilt Assembly on page 4 the instructions say, "...reference the quilt schematics on pages 9-13 for the unfinished block lengths for each quilt." Unfinished means the sides of the blocks have not been sewn, so don't add any seam allowance.


The Week 3 Prize
This week's prize is another exciting one. Are you ready? FREE edge-to-edge longarm quilting by Eleventh House Quilt Studio! And what's really awesome is even if you don't win this prize you still get 15% off longarm services if you mention this Grow sew along. (Offer expires May 12, 2020)
How to Win
- Post a pic to Instagram. The photo prompt for Instagram this week is to post a picture of some cut fabric or if you are still gathering fabric, a picture of that. Basically, unless you post a really off-topic pic just use #GrowQuiltSA in the caption and you're entered in the giveaway.
- You must have a public Instagram profile to participate.
- Each photo posted is an entry and you can enter as many times as you want in a single week. Once the week is over, those posts do not count in the next week's giveaway. Every week we start fresh.
- Your photo must be posted between 12:00 a.m. CT on Wednesday, April 15, 2020 and 1:00 p.m. CT on Tuesday, April 21, 2020.
- This prize is open internationally!
- The winner will be picked randomly from all qualifying posts and announced at approximately 4:00 p.m. CT on Tuesday, April 21, 2020.
The Week 4 Prize
Week 4 offers TWO prizes, people! Our first sponsor is Modern Makes Subscription Box and they are giving away a single FREE Modern Makes Box! Included in each box is a modern mini quilt kit. Each kit contains everything you need including the pattern, fabric, and batting.
Until May 12, 2020 you also get 15% off your first subscription box with coupon code SUZY15!
The second prize is $50 off longarm quilting at Handmade Longarm Quilting. Heather, the owner, offers one week turnaround time, so if you are in a pinch and need some fast quilting, she's your girl! From now until July 31, 2020 get 20% off longarm quilting services for all Grow quilts!
How to Win
The same rules apply as above except for a couple alterations...
- These prizes are only available to those in the USA.
- Your photo must be posted between 12:00 a.m. CT on Wednesday, April 22, 2020 and 1:00 p.m. CT on Tuesday, April 28, 2020.
- The winner will be picked randomly from all qualifying posts and announced at approximately 4:00 p.m. CT on Tuesday, April 28, 2020.
Sew Along Coupons
- Oliso - 20% off all smart irons with coupon code SUZYQUILTS20 - an awesome ongoing deal!
- Eleventh House Quilt Studio - 15% off longarm services if you mention this Grow sew along. Expires May 12, 2020.
- Modern Makes Box - 15% off your first subscription box. Coupon includes monthly, 3 month, and 6 month subscriptions. Enter SUZY15 at checkout. Expires May 12, 2020.
- Handmade Longarm Quilting - 20% off longarm quilting services for all Grow quilts. Expires July 31, 2020.
- Sweet Little Quilts - 20% off longarm quilting for all Grow quilts. Must mention this sew along on order form. Discount does not apply on return shipping. Expires May 31, 2020.


Thank you for having this sew along; it’s great to have another project. The pattern says to iron your seams open after sewing the strips, but your blog says press to the side. I think I’m going to press to the side, as your suggestion that this makes the short seams stronger seems reasonable, right?
You’re right! That is very confusing of me. When I sew seams on the diagonal I press the seams open, but when I sew them straight up and down I press the seams to the side. I can see how that’s misleading in the pattern. Good catch!
is it better to make the smaller blocks from the original cut strips and then sew what’s left of the strip onto the remaining strips to get longer strips?? Then make the longer blocks?
That’s a wonderful plan!
Should we sew with a 1/4” or scant 1/4” seam? Does it not matter as long as we are consistent?
That’s exactly right. As long as you are consistent it doesn’t matter for this pattern.
Have you shared where your fabric is from and what it’s called? I’d especially love to buy the sage green with gold filigree design you used in your Pressing Seams video. You joined it with a pale pink. They’re so pretty together!
My original Grow quilt for this sew along has all of the fabric listed in the Week 1 post – https://suzyquilts.com/grow-quilt-sew-along-week-1-pick-your-fabric/ Since I ended up making that one too fast, I started another one for these video tutorials. The pretty metallic fabric here is by Rifle Paper Co. from their new Primavera line.
Hi Susie! In sewing class in high school (ages ago), we used to straighten the grain of the fabric by “stretching” it on the diagonal. Do people still do this? Thanks for all the tips and fun commentary 😊
Hmmmm…I have a vague memory of that from the little bit of garment sewing I’ve done. I think you’re onto something.
I was just watching a YouTube tutorial and it did say to cut your fabric at a 90* angle because it allows more give in fabric. I think this is particularly true to knits. It’s amazing how much more stretch it gives!
What size is your clapper? I have to get one!
It’s about 8″ long 🙂
What fabric are you using for the backing of this quilt?
I’m using a print from Art Gallery Fabrics called Dot’s Green Thumb. You can find my entire list of fabrics in the Week 1 post – https://suzyquilts.com/grow-quilt-sew-along-week-1-pick-your-fabric/
In the cutting instructions color 1 has a, b, and c strips, but I only see a and b strips discussed in block assembly. Where do we use color 1, strip c?
Hi Kendra! You’ll use color 1 piece c in the border as shown in Fig. 18. Enjoy making your quilt!