Holiday Party Quilt Sew Along Weeks 4 & 5: Assemble Blocks
Quiltketeers, welcome to Weeks 4 and 5 of the Holiday Party quilt sew along! These are without a doubt the best weeks in the entire sew along. Over the next 14 days you get to watch as each of your blocks magically come together to create...wait for it...a holiday party!
Cue the (fabric scrap) confetti, flip on the twinkle lights, blast the Christmas music—it's time to get dooown with your bad self! And by "bad self" I mean your inner Buddy the Elf. Spread that holiday cheer, people! I want you to get out. of. CONTROL with Christmas spirit while making these blocks. That's an order!
For a full rundown on what a sew along is and how it works, check out the Week 1 Holiday Party sew along post. In a nutshell, we are making this pattern together over a six week period of time and you can win prizes along the way by posting pics to IG using #HolidayPartyQuiltSA. Woot!
Holiday Party Sew Along Schedule
- Week 1, October 12: Pick and cut fabric
Sponsor: Global Fiber Textiles & Notions - 31 Day Fabric Advent Calendar Box which contains 62 fat quarters, a pattern, and fun extras AND The Gather Quilt Shop - 3 Holiday party throw quilt kits - Week 2, October 19: Make HSTs
Sponsor: Sewing Arts Center - $100 gift certificate - Week 3, October 26: Sew and trim all Template A units
Sponsor: Lavender Fields Co. - Free longarm quilting for one Holiday Party quilt plus 20% off for any other Holiday Party quilts made during the sew along - Week 4, November 2: Assemble 8 blocks
Sponsor: DuckaDilly Liberty Fabrics - $100 gift certificate - Week 5, November 9: Assemble 8 blocks
Sponsor: Lamb & Loom Fabrics - $100 gift certificate - Week 6, November 16: Assemble the quilt top
Sponsor: Trace Creek Quilting, Modern American Vintage and Aurifil

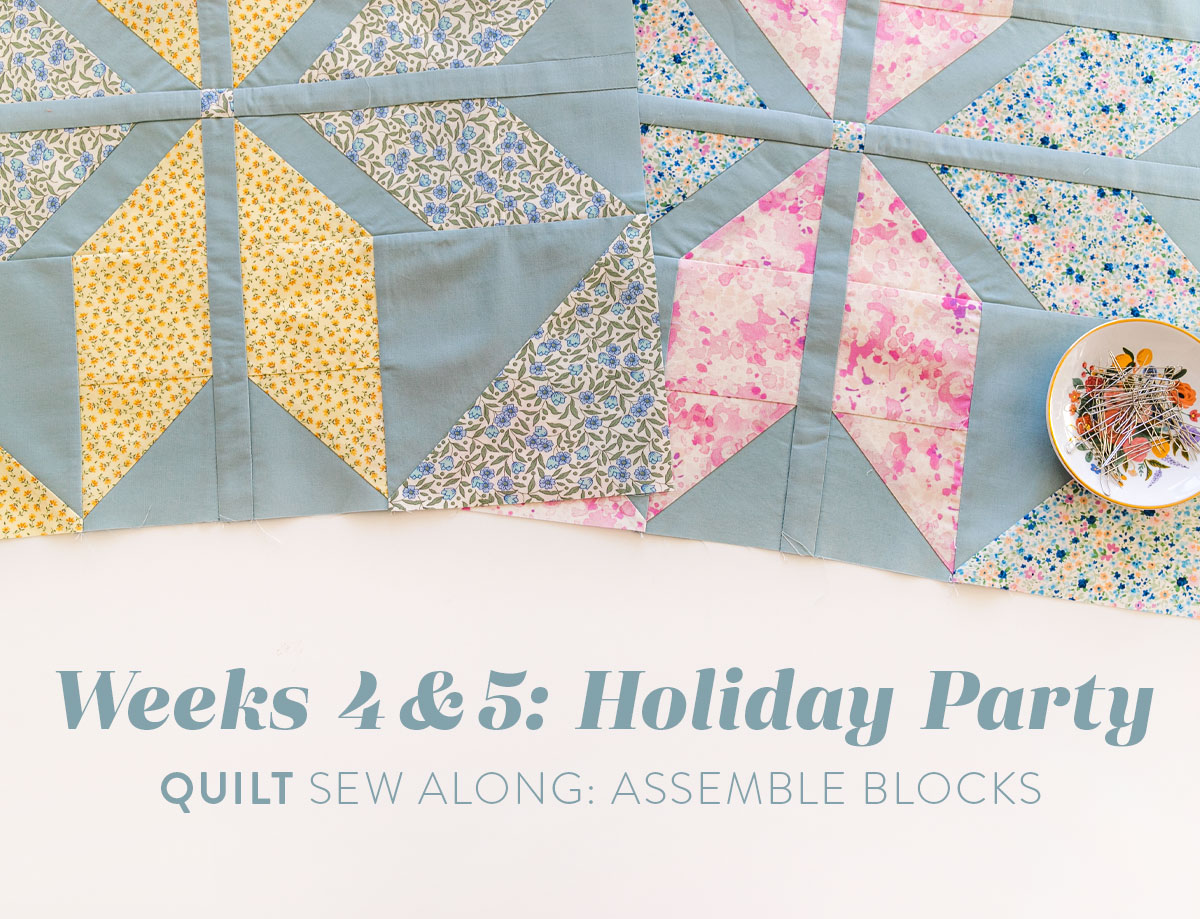
Weeks 4 & 5 Assignment: Assemble Blocks
Just like last week my best tip for you is to watch the Holiday Party tutorial video. I'll add some troubleshooting tips, but most of what I say here will be reviewing what's seen in the video.
Trending patterns!


Quilt Patterns


Quilt Patterns


Quilt Patterns


Quilt Patterns


Quilt Patterns


Quilt Patterns


Quilt Patterns


Quilt Patterns


Quilt Patterns
Tip #1: Lay out your block pieces.
I like to lay out my blocks next to my sewing machine so I don't have to travel far when moving back and forth from my piles to my machine.

Tip #2: Stack as many blocks as you can while staying organized.
Since my fabrics are all really different and I've made this quilt a handful of times now, I thought I'd try out chain piecing all of my blocks at the same time. I can now say that is definitely the fastest approach. However, if you have any doubt that you can stay organized while chain piecing that many blocks, don't do it. Just stick with one or two. Eventually you can work up to four!


Tip #3: Chain piece!
If you are stacking multiple blocks on top of each other and chain piecing like me, I suggest doing whatever you need to do to stay organized. If that means sewing one unit, pressing that one unit and then moving on to the next, do that. If you think you can sew multiple units at once then press and still stay organized, try it!


You can see that I sewed a handful of units, then pressed those before moving on. It got a little random, but I still was able to keep everything in order, which is the most important thing.

Troubleshooting Tip!
Wonky piece? Edges aren't lining up? In this example my HST is a little small on the edge so I line up the two corners and sew a 1/4" seam based on the larger piece of fabric. That means part of the seam allowance will be a little shy of a 1/4", but that's fine. By doing this, I'm maintaining accuracy in my block instead of trimming things down to fit, which would make the entire block off.

Tip #4: Nest seams when possible and pin as much as you need.
There's no getting around it, you have some seams to match when making these Holiday Party blocks. The goal here is NOT perfection. Repeat that back to me.
The goal is not perfection.
The goal is improvement and matching seams so they are close enough. Are your seams in block #15 matching together better than your seams in block #2? Probably! Good work! Are your seams matching close enough that once all 400 of them are sewn together no one will notice and it will look awesome? Most definitely.
Now that we have that out of the way, below are a couple ways to help your seams get really close to matching every time. The first area to match works best by nesting your HSTs. You did this in Week 2 when you made you HSTS. I suggested pressing the seams toward the same fabric so when they are placed right sides together the seams are going opposite directions.

This second area to pay attention to will take a little practice, but I'm sure you'll get there. Stick a pin a 1/4" away from the edge and line the two seams up so they intersect. Once they are intersecting at the 1/4" mark place a pin right there.
It also should be noted that I pin pointy end out...which is a little, how do I put this, unconventional. But, it's how I like to do it so don't judge. 😉

Use as many pins as you need to get those two pieces lined up well. I typically end up with four.


Things are starting to come together...


Tip #5: Pin your sashing strips.
This is so so important. It's very common that when laying out a sahing strip on top of a block, the sashing strip will be slightly larger. That's typically because even though the math is correct in the pattern and you did everything perfectly (cause you're perfect, duh), the more seams you sew the more chance there is for things to get slightly off due to wide seam allowances, pressing, fabric stretching, fabric shrinking during pressing, bla bla bla.
Basically I'm just taking a really long time to tell you that even if every single one of your sashing strips is a little bit longer than your block units, that's OK, you didn't do anything wrong. It just happens. This is why you NEED TO PIN.
First line up the corners and pin. Then give everything a slight stretch so it all lines up and lays flat. I would normally do this with two hands, but I'm holding a camera in one hand for this photo. Lastly stick a pin in the middle. If the sashing is looking a bit bubbly, stick more pins in it.

This naughty strips needed FIVE pins to calm itself down. Sheesh!

Troubleshooting Tip!
Your block got wonky, how can you possibly line it up with the sashing? Easy answer! You don't. Line those edges up as well as you can, but don't sew a jagged seam to stay true to a wonky edge. Just sew your 1/4" seam based on the straightest edge. Spoiler: that will be the sashing edge.


Tip #6: Use a leader piece when chaining the center sashing rows.
If you're not familiar with "leaders" prepare yourself to squeal with nerdy delight. Leaders will solve a handful of issues you've most likely struggled with while chain piecing. Wave goodbye to nasty thread bunches or "bird's nests." Say sayonara to your feed dogs eating the corner of your first piece of fabric.
By using either a scrap piece of fabric first in the chain, or in this case, just a larger piece of fabric, you will avoid those annoying problems when chain piecing your tiny squares to the narrow sashing rows. Not only will this prevent the issues I mentioned it will also ensure a 1/4" seam from the edges of your strips. Eeeeek!


Tip #7: Try fork pins.
Have you tried these yet? You really should. Are they perfect? No. I wish they were finer, but, c'est la vie. Some day I will craft and sell exquisitely fine fork pins so they slide in and out of your fabric like warm butter, but until then, these work well enough.
Who am I kidding? I adore these pins. You literally get perfectly matching seams every time which is incredibly gratifying, especially when it's a center square smack dab in the middle of each block!

Tip #8: Use a tailor's clapper.
It wouldn't be a SQ sew along if I didn't bombard you with tailor's clapper propaganda. Muhahaha! And OMG, look at my newest clapper! It's a Holiday Party block! Ahhhhh!!!
Chris, founder of Modern American Vintage, made this for me and will have more in stock after Thanksgiving. It's big and beautiful and perfectly weighted. It might just be the prettiest thing I own.


Weeks 4 & 5 Sponsors & Prizes
Our Week 4 sponsor is your one-stop shop for the best selection of Liberty of London fabrics. You already know who I'm talking about so let's give it up for Duckadilly!! I have a deep deeeeep well of love for these fabrics and an even deeper appreciation for the kind and generous shop owner, Lesley.
You can purchase bundles, kits, single FQs, yardage and even sign up for a fun membership program. This week's winner will get a $100 gift certificate!
Lamb & Loom Fabrics is our Week 5 winner and once again I'm sure you already know about this fabulous shop. Clint and Linli are a husband and wife duo who make sure their online store is fully stocked with all of the latest fabric collections, sewing notions and specialty bundles. You can find a variety of quit kits in their shop as well, including this Holiday Party quilt kit!
The Week 5 winner will get a $100 gift certificate!
How to Win
- Post a pic to Instagram. The photo prompt for Instagram this week is to post a picture of your sew along progress. Use #HolidayPartyQuiltSA in the caption.
- You must have a public Instagram profile to participate.
- Each photo posted is an entry and you can enter as many times as you want in a single week. Once the week is over, those posts do not count in the next week's giveaway. Every week we start fresh.
- Your photo for Week 4 must be posted between Tuesday, November 2 and Tuesday, November 9. Your photo for Week 4 must be posted between Tuesday, November 9 and Tuesday, November 16. The winner of each week will be picked randomly from all qualifying posts and announced at approximately 4:00 p.m. Central on the final day of that week. Good luck!


I pin out like that too! I thought that was the normal way!!!!! 🤣 🤷♀️
Haha! Maybe WE are the normal ones and everyone else is weird. 😉
I pin the same way; makes it easier to pull them out when you get close to the presser foot while sewing.
I find it’s easier to put them in this way too!
Hi! I was kind of wild and crazy while sewing, and now the sides of my finished blocks are wonky and don’t have a nice crisp straight edge. (The interior points looks great!). Any advice before getting to the sashing? Is trimming them all to the same size my only option?
Hey Natalie,
I love wild and crazy sewing! haha! Sounds like you were having fun 😉 Before trimming down your blocks, I suggest “fudging” (technical term) the seams while sewing your sashing. It’s ok if parts of the seam are a little thick while others are a little scant. You can also stretch fabric slightly and pin, pin, pin!
I love fork pins also. I found that Taylor Seville has Magic fork pins that are fine and go through the fabric so much more smoothly….I love them!,,
Was it really a year and a half ago that we were doing the Holiday Party sew along?? I finally just made it to weeks 4 & 5, LOL! I am so glad the instructions and videos for every sew along are alive and well on the SQ website. It’s good to know that guidance and tips are always available if life throws a surprise or two your way during a SAL Thanks, SuzyQuilts Team!!