How to Hang a Quilt
With more modern textile shows in circulation than ever, there is one thing that's hard to avoid sewing – quilt sleeves. If you have ever wanted your quilt in a magazine, quilt show or even if you’ve made so many quilts you’ve now decided to cover your walls with them, sewing a basic hanging sleeve on the back of a quilt is a good skill to know.
For quilt shows and magazines, a standard requirement is a 4” fabric sleeve on the top back of your quilt. Over the summer, I made an instructional video on how to do that. Check it out!
If you watched that vid and got a little judgy about the quality...and maybe a little sick from the bouncing camera, just know that I cut a hole in a stretchy headband and wore an inexpensive camera on my forehead to make that video happen...so...impressed? no? Maybe a smidge less judgy, though?
Cool! I can settle for that. 🙂

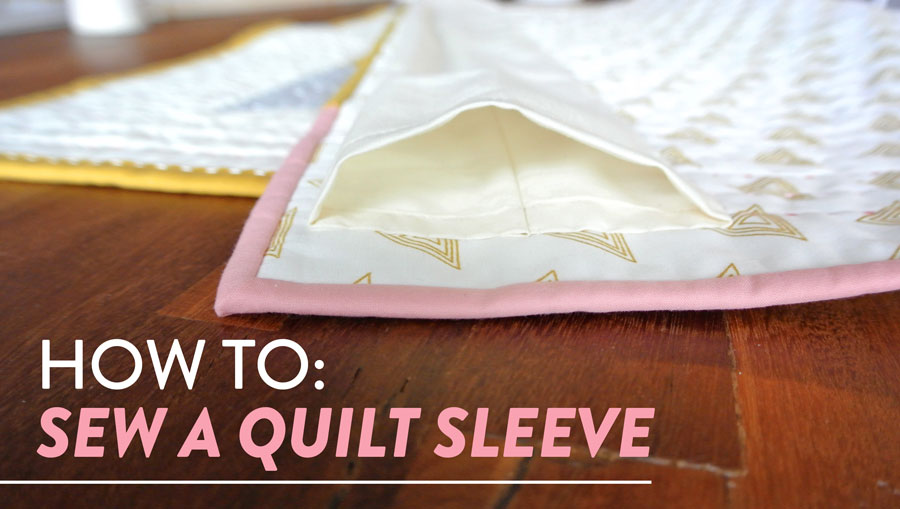
How to Sew a Quilt Sleeve
- Measure the width of your quilt.
- Cut a strip 8 ½” x width of quilt minus 2” (eg. Your quilt is 56” wide: Cut 2 strips 8 ½” x Width of Fabric (approximately 42”). Sew strips together to create one long strip. Trim the long strip down to 8 ½” x 54”).
- Hem each edge of the 8 ½” strip by turning in the edges a ¼” and then another ¼”. Iron the creases flat and pin in place.
- Sew as close to the edge of the folded fabric as possible.
- Fold the strip in half, wrong sides together (right side of fabric is facing up), and iron a crease in the center. Tip! Use starch to help get those creases nice and crisp.
- Open the strip up so that the wrong side of the fabric is facing up. Fold the edges toward the center crease until they meet in the middle.
- Press at the folds so that a crease is well defined.
- Unfold again and match the raw edges together, wrong sides together (right side of fabric is up). Pin and sew a ¼” seam.
- Iron the center seam open. At this point, re-press the creases created in Step-7. When these are nice and flat, it is easier to pin in the next step.
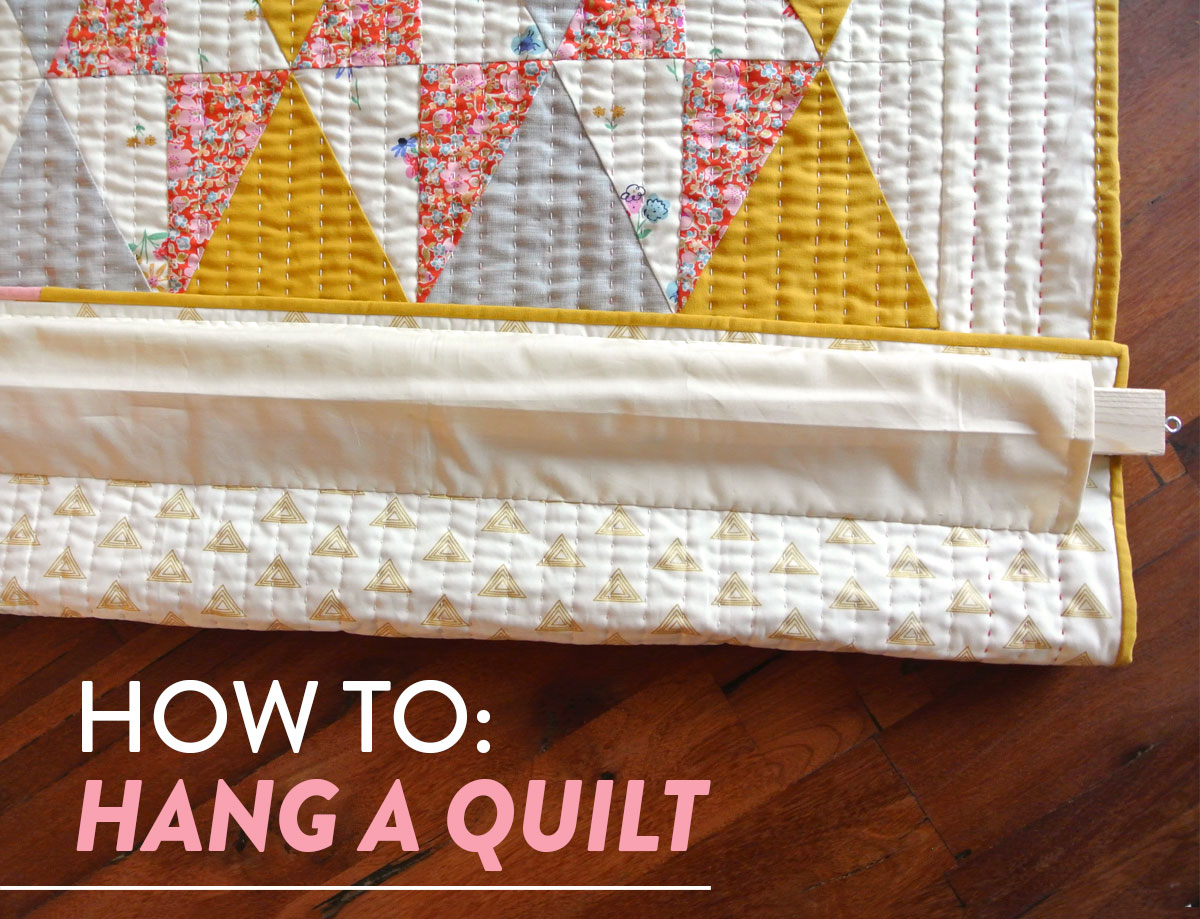
- Place the sleeve, seam side down, on the top back of your quilt – about an inch from the top and sides. Notice in the above pictures that there is extra space in the sleeve so that a rod can easily fit.
- Pin the sleeve to the quilt using safety pins (regular straight pins will poke you if you try to sit on the couch and move this around) Tip! This is very important: Do NOT stitch all the way through the quilt. You do not want these stitches to be seen from the front. Also, if this sleeve is being sewn just for a show and is temporary, sew large stitches so that you finish it more quickly and have an easier time ripping it off once you get the quilt back.
If your one reason for sewing a sleeve is for a show or magazine, congrats! You’re finished and can go get yourself a celebratory glass of rosé! Tootles!
Trending patterns!


Quilt Patterns


Quilt Patterns


Quilt Patterns


Quilt Patterns


Quilt Patterns


Quilt Patterns


Quilt Patterns


Quilt Patterns


Quilt Patterns
However, if you would like to hang this quilt on a wall, this next tutorial is the cheapest and easiest way to do it.
How to Hang a Quilt
Supplies:
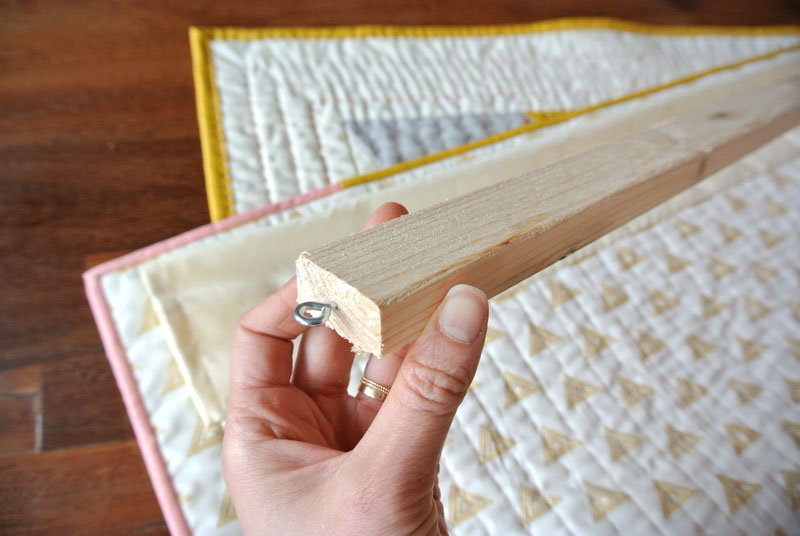
- Wooden Rod - cut to the exact size of the sleeve. The thicker the rod is, the further away the quilt will hang off the wall.
- Screw Eyes
- Drill
- Nails
- Hammer
Instructions
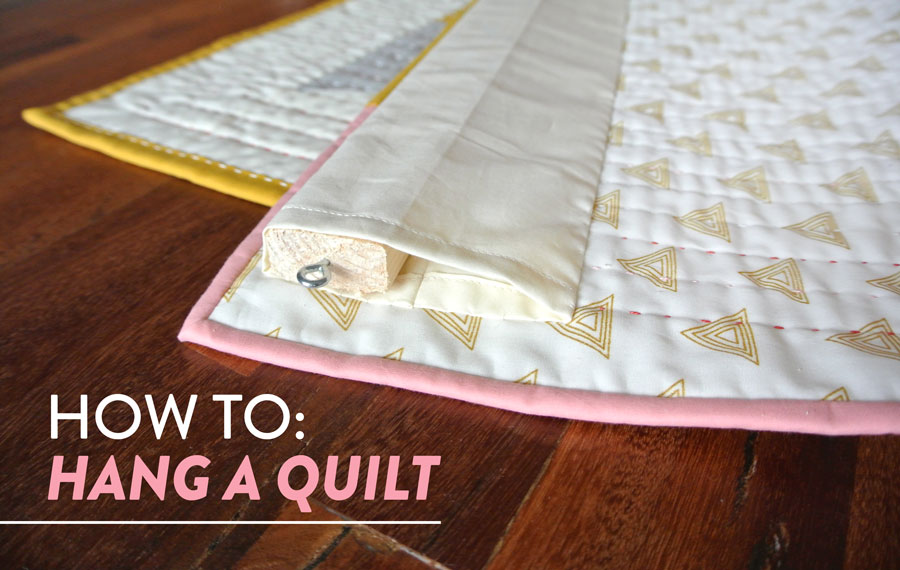
- Drill 1 small hole into each end of the wooden rod.
- Screw in the screw eyes.
- Slip the wooden rod into the sleeve.
- Use a level to make sure your quilt will hang straight. Hammer a nail through each screw eye.
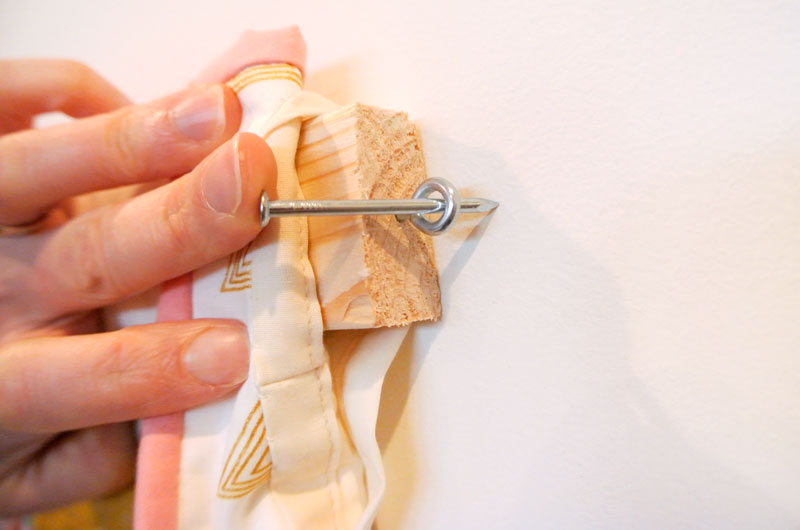
Tada! Easy-peasy and with no fancy tools.
Please excuse the terrible lighting on some of these photos. It's winter here in Chicago and that means maaajor cloud cover. Le sigh...we do the best we can, right?

When I first looked into hanging quilts, I found these Magnetic Invisible Quilt Hangers. Although I have no doubt they work well, I was hanging five quilts for a gallery show – at $40/pack, I needed to find a cheaper option.
If you have only one quilt to hang, you may want to skip the hassle of drills and rods and just use the magnets. If you HAVE tried these magnetic hangers, I’m very curious to hear what you think – so leave a comment below.
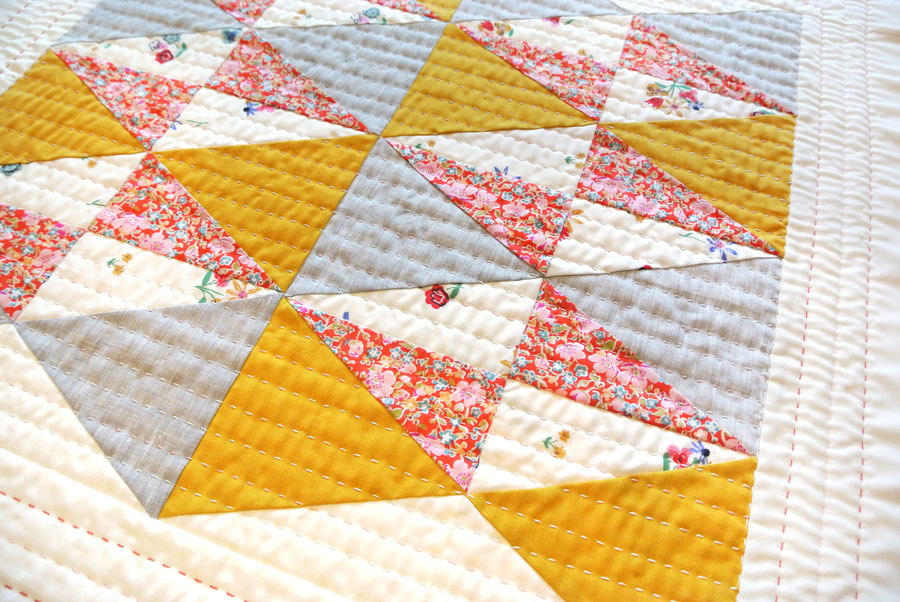
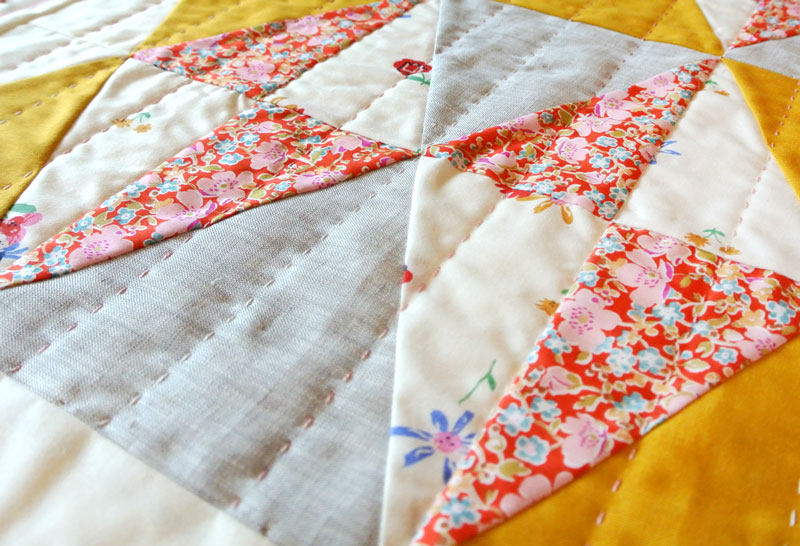
On a totally different note, have you tried hand quilting? Guys, it's been a long journey for me cause I loooove speed, but handing quilting is kinda the best...just look at it!
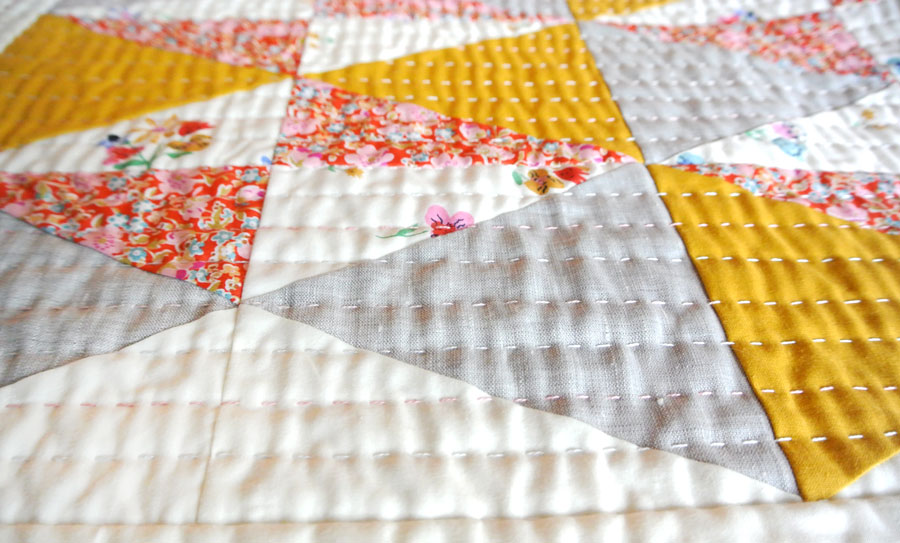
If you're at all interested in learning, check out this blog post (with video) on how to hand quilt! I list out the supplies I use on the FAQ page. I also have video tutorials in both the Sew Mojo #1 pattern and coming out with the Sew Mojo #3 pattern (releasing December 8!!!)


no excuse now for me to hang a couple of wall hangings now thank you
hahaha well, I can usually think of a couple excuses, but now it my seem a bit easier? 😉
Just finished a sleeve (my first) for a quilt show. It was so easy! Thank you Suzy!
Suzy, do you have a video tutorial for PIN BASTING. I usually use spray, but with 6 tops that need quilting the spray is SOOOOO expensive! I’m scared to pin baste, but I know it’s a way more cost effective method. More $$ saved means more fabric I can buy. . .just don’t tell the hubby heehee!!
I’m with you girl! That basting spray is obnoxiously expensive and I can’t make myself buy it when pin basting works just as well. I have a step by step list of how I baste in this blog post. Check it out and let me know if you have any more Qs. I’m not saying I’ll know the answer, but I’ll try 😉
Try our fusible batting – no spray or pin basting needed! Steph
Does it adhere through ironing? Is steam involved?
Buy a long arm quilting machine and you bast no more. I’m enjoying mine.
Suzy, Do you use a hoop when you hand quilt? If so, do you have a preference regarding size? Thx
I usually just lay the quilt flat on a table rather than using a hoop. However, if I’m traveling, I use the largest hoop I can comfortably fit on my lap. I believe mine is 14″ in diameter.
Hi Suzy! I just joined your site and I was EXTREMELY HAPPY to find this article on how to hang a quilt. I’ve been trying. off and on, for the past 7 or 8 years to find a site that explains how to hang a quilt. I was very surprised to find your article today. I had googled “Mattress Sizes”, found your site, joined right away and then found this article. I have a quilt made by my Great-Grandmother and now I know how to hang it, thanks to You! My Great-Grandmother died in 1929 when my Mother was just 5 years old. The quilt is just beautiful, done in pale purple and white. As soon as I finish a few other projects, I will be making a sleeve for this beautiful quilt. It will hang above my sewing area out on the 2nd floor of our barn.
Sounds lovely! I’m so happy to be helpful and I hope to see a picture of your great-grandmother’s quilt once it’s hanging on display. Thanks, Mary!
suzy, i am so in love with this fabric combo!! can you tell me what fabrics you used? pretty please?
Of course! Let me see what I can remember…The white floral is part of the Wonderland line by Birch Fabrics. The background cream is Solid Cream Poplin also by Birch. The backing of the mini uses AGF gold metallic Prisma fabric. The red floral is a Liberty of London tana lawn. The mustard is actually something random I found at Joann Fabric. And lastly the linen I purchased from Purl Soho.
Suzy, Do you pre-wash your quilts before sending them off for a magazine shoot?
I don’t. I think they photograph better if they look flat rather than crinkled.
Thank you for this great tutorial! I always had a hard time getting my quilt to hang right!
Great tutorials! How do you knot/finish when you are sewing with a single thread?
I finish by “backstitching” – meaning I sew through the same spot a few times.
What a great video. That made so much sense. Thanks for taking the time to make it for us. x
My pleasure!
Hi Suzy, Thanks so much for your tutorial on making a sleeve and hanging a quilt. I followed your instructions to a tee, and now the beautiful quilt my Mum made is hanging beautifully in my hallway. The You Tube filming wasn’t too shaky, and together with the written instructions, easy peasy! I can sew but I don’t, lol. Never done anything to do with quilts. You made it enjoyable for me to get it done and it’s a million times more satisfying having done it properly rather than trying to figure it out by myself. Thanks again!
So happy to be helpful! Thanks, Nicola 🙂
Hola, Suzy! Thank you for your helping and sharing in quilt world! I am thinking now how to hang my quilt better if i whant to change sides of it time by time.. I mean on the wall. And also – if you sell your quilt do you append this wooden stick to it? Or customers will do it by themself?
I think if you are selling a quilt as a wall handing, a sewn sleeve is enough. Trying to ship a long wooden rod would be a huge pain.
You are brilliant!
Hi,
Like others, I’ve been trying to find a way to hang an unusual quilt. Short story about it – I have cancer and have been in treatment for 5.5 years. People have been sending fun socks that whole time so last year a friends mom took a hundred pairs, found the ones that worked the best and sewed them onto patches. So I have a cancer sock quilt that is 68”x 54” with a 3 inch sleeve. I definitely want to hang it this way and was wondering if you could recommend the size piece of wood I should get to put in it. It’s probably between 5 and 10 lbs. I know it needs to be 53” long (sleeve length) but how thick and wide?
Thank you!
I piece of wood similar to the one I used in this demo should work well. Something that’s about 1″ – 1/2″ in width.
This is so funny to me. I literally just sat down from hanging two quilts with the magnetic hangers and read this article! Well, I have invested in several packages and I will use those but I may use your idea for the rest. The magnets do work well without damaging the walls. However, you can hang a whole lot of quilts your way with the same look and way, way less the price.
Thank you again for another interesting tutorial!
Do you have a pattern for the quilt that you used to illustrate the hanging method? I may have missed it.
I love your blogs and your work.
I sure do! And lucky for you, it’s free 😉 Scroll to the bottom of this post – https://suzyquilts.com/bernina-570-qe/
Hi! I know this post is old and maybe I missed it but what pattern is the quilt featured here? Thank you!!
Nevermind!!! Found it!!
Thanks for explaining that we can get a thicker wooden rod if we want the quilt to have distance from the wall when it hangs. My husband and I want to decorate our beach home with a tropical theme and think a Hawaiin quit would be the perfect wall decor for the living room. I’m glad I read your article so I can discuss the specifics with my husband tonight and start getting the materials we’ll need for the job!
I made 2 quilted wall hangings for my son and decided on this inexpensive way to hang them: Command strips to hold a decorative curtain rod on the wall, then curtain clips with rings to hold the wall hangings on the curtain rod.