How To Make a Creamy Glitter & Glow Quilt
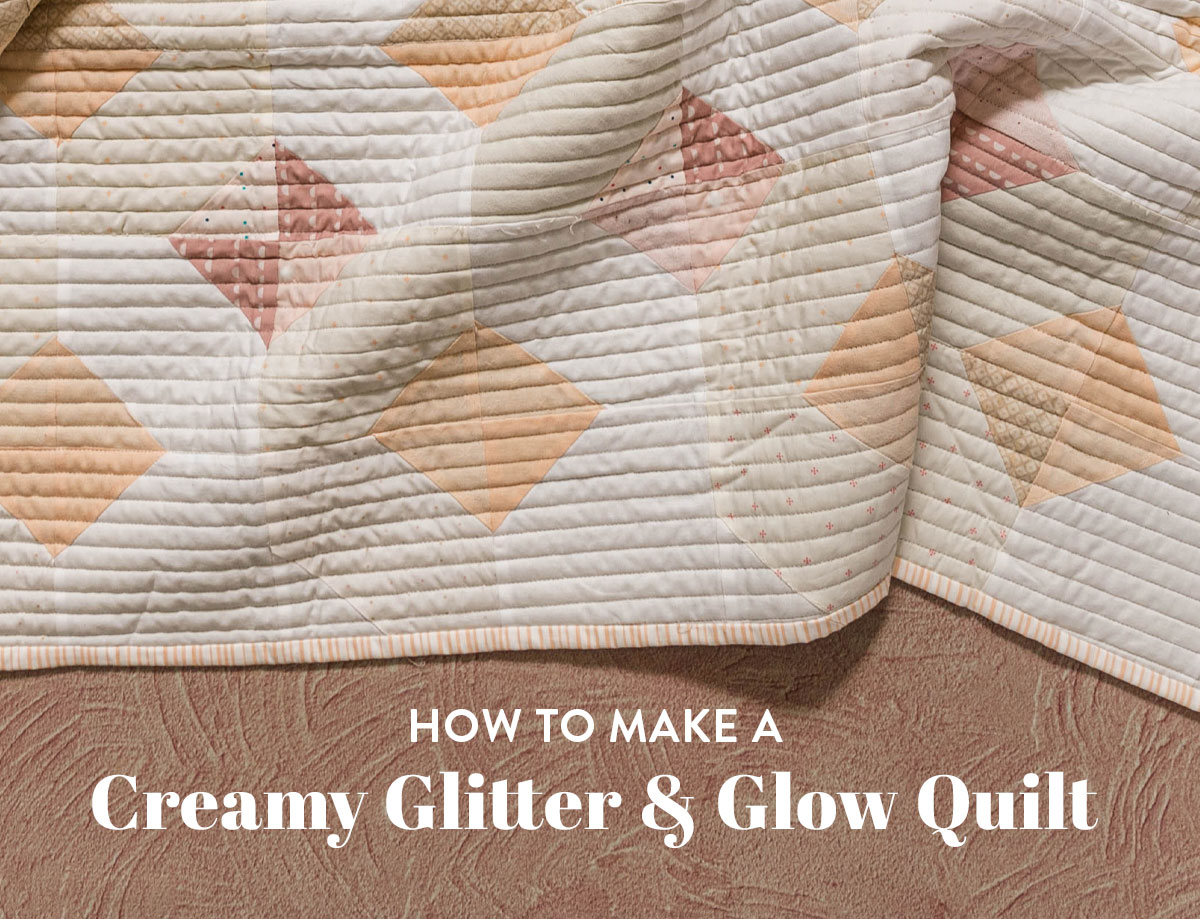
In this blog post, you'll learn how to make your own creamy low volume version of the Glitter & Glow quilt. I'll walk you through how to select fabrics, how to adjust the fabric and cutting instructions, and how to lay out your quilt. And for a limited time, you can even buy kits to make a warm or cool creamy Glitter & Glow quilt! But don't worry if they're sold out, because we also have all the fabric names included in this blog post.
Now, let's take a journey back in time. Glitter & Glow was first released in 2018. A unique pattern in the Suzy Quilts collection, Glitter & Glow is two patterns in one. Glow is a limited color quilt, and Glitter is the same design but scrappy!
When Glitter & Glow was released, quilt shops made kits to accompany the brand new pattern. One of those kits has become a Suzy Quilts cult classic — the Creamy Quiet Glitter Throw Quilt. The only problem is that while this quilt follows the pattern instructions in Glitter & Glow, it has different fabric and cutting requirements. What's a quilter to do?
This scrappy variation of the quilt uses different fabric and cutting requirements to get the scrappy look, and since it was originally released in 2018, one of our most frequently asked questions is how to make the Creamy Quiet Glitter Throw Quilt. We're here to help!

The original creamy quit, made in 2018 with a now-retired kit from Cottoneer, is shown above. So stunning! Part of the problem with attempting to recreate a quilt from four years ago is that some fabric is printed once which means it can't be found once it sells out. This means that some of the fabrics from the original quilt are hard or impossible to find today.
Trending patterns!


Quilt Patterns


Quilt Patterns


Quilt Patterns


Quilt Patterns


Quilt Patterns


Quilt Patterns


Quilt Patterns


Quilt Patterns


Quilt Patterns
For this tutorial, we've partnered with Global Fiber Textiles & Notions to create two new versions of the quilt! They will have kits available in warm and cool colors for a limited time. And keep reading to get a list of the fabrics used in each version.
Here's the brand new Warm Creamy Glitter and Glow quilt! This quilt was made by Laura Parry, owner of Global Fiber Textiles & Notions, and quilted with straight lines by Trace Creek Quilting.

We've also designed a new Cool Creamy Glitter and Glow quilt option for quilters who love blues! This quilt was made by me and quilted using the Geometric Diamonds Edge-to-Edge panto by Winberie Quilting Studio.

You Might Also Like...

Creamy Glitter & Glow Fabric Requirements
Once you've downloaded your Glitter & Glow pattern, choosing fabric is the next step. The original pattern requires four different colors, but to make a Creamy version, you'll use 12. Here's how to divide them up!

Instead of four colors, you'll use four color groups that correspond to the fabric requirements and cutting requirements on page 2 of the pattern. The color groups will be:
- Color Group 1: Background cream-colored fabric
- Color Group 2: Neutral fabrics
- Color Group 3: Coral/grey fabrics for warm, green/grey fabrics for cool
- Color Group 4: Pink fabrics for warm, blue fabrics for cool
Dividing up your fabrics like this will ensure that you have a neutral but scrappy background and alternating diamonds that go back and forth between two colors, just like the original quilt.
After you've worked through this tutorial, you'll use the color groups as the four colors in the pattern to make your blocks as outlined on page 3.

Here are the fabric requirements for each color group:
- Color Group 1 (Color 1): 2 1/8 yard
- Color Group 2 (Colors 2-5): 4 half yards
- Color Group 3 (Colors 6-8): 3 fat quarters
- Color Group 4 (Colors 9-12): 4 fat quarters
Here's how the color groups break down for the cool Creamy Glitter & Glow quilt.

Color Group 1 is the creamy background fabric. Make sure to use an off-white or cream in a solid color.

Color Group 2 is all neutrals with the smallest pop of color. These colors will also be in the background, allowing the floating diamond illusion to pop in your finished quilt. Using minimal off-white and creamy prints for Color Group 2 gives the quilt more scrappy texture and visual interest!

For the cool Creamy Glitter & Glow quilt, Color Group 3 is dusty greens and one grey solid to help these diamonds fade into the background a bit and let the next color group *ahem* glow. For the warm Creamy Glitter & Glow, use corals for Color Group 3.

Color Group 4 is full of the brightest colors that you want to pop. To keep your quilt quiet and calm, don't go too wild with your choices. Make sure to stay light and airy. Use blues for the cool quilt, and pinks for the warm quilt.

And here's the whole cool lineup!

And here are all four color groups for the warm version! Want to know the exact fabrics that were used in each quilt? Here you go!

Cool Creamy Glitter & Glow Fabrics
Color Group 1
- Art Gallery Fabrics (AGF) Pure Solids in White Linen
Color Group 2
- AGF Gridden Seeds Pure
- AGF Planted Seeds Luminous
- Essex Speckled Linen in Cream
- AGF Decostitch Elements in Airy
Color Group 3
- AGF Serenity Fusion in + Your Heart Serenity
- AGF Decostitch Elements in Skyline Blue
- Birch Organic Fabric Double Gauze in Breezy
Color Group 4
- Birch Organic Fabric Jenny Ronen Basics Cloudy Powder
- Essex Speckled Linen in Sky
- Studio E Peppered Cotton in Lake
- Birch Organic Fabric Linen in Breezy

Warm Creamy Glitter & Glow Fabrics
Color Group 1
- Cotton Couture in Soft White
Color Group 2
- AGF Faint Charms Nectarine
- AGF Tails & Threads in Cross-stitching Rose
- Studio E Peppered Cotton in Oyster
- AGF Ballerina Fusion in Dotted Veil
Color Group 3
- Fableism Sprout Woven in Almond
- AGF Serenity Fusion in Seeds of Serenity
- Birch Organic Fabric Double Gauze in Bellini
Color Group 4
- AGF Ballerina Fusion in Positively Ballerina
- AGF Foresta Fusion in Stay Humble Foresta
- Essex Speckled Linen in Gelato
- AGF Everlasting in Dotted Veil

Creamy Glitter & Glow Cutting Requirements
Time to cut! We'll be using the exact same cutting instructions on page 2, just dividing up each cut based on how many fabrics are in each color group. The easiest way to keep track of what you're cutting is to label each of your fabrics 1-12 and keep them separated for now. Here are the cutting instructions for all 12 colors:
- Color 1 (background): 72 - 5 1/2″ squares, 11 3 1/2″ squares, 3 - 3 1/2″ x WOF strips
- Color 2: 18 - 5 1/2″ squares
- Color 3: 18 - 5 1/2″ squares
- Color 4: 18 - 5 1/2″ squares
- Color 5: 18 - 5 1/2″ squares
- Color 6: 24 - 3 1/2″ squares
- Color 7: 24 - 3 1/2″ squares
- Color 8: 24 - 3 1/2″ squares
- Color 9: 12 - 3 1/2″ squares
- Color 10: 12 - 3 1/2″ squares
- Color 11: 13 - 3 1/2″ squares
- Color 12: 13 - 3 1/2″ squares

Make It Scrappy!
To make the Creamy Glitter & Glow quilt, you'll follow the instructions on pages 3 and 4 of the pattern! But first, it's time to combine your cut colors back into the color groups so you can continue using the instructions as you would if you were only working with four colors. Time to get scrappy!
Combine your fabrics back into their color groups, but do it randomly to get a super scrappy look. Shuffle them like a deck of very floppy cards! Spin them like a salad! Toss them in the air and let them rain down around you! However you do it, make sure to keep your color groups together as follows:
- Color Group 1: No need to shuffle since this is just one color
- Color Group 2: Shuffle Colors 2, 3, 4, and 5
- Color Group 3: Shuffle Colors 6, 7, and 8
- Color Group 4: Shuffle Colors 9, 10, 11, and 12

Having the fabrics in your color groups be in random order ensures that your quilt will not only be scrappy but will also be uniquely you. No other Glitter & Glow quilt will look exactly the same, and you'll be experimenting with scrappy quilting!
Now, follow the instructions for making the blocks on page 3, using Color Groups 1-4 for Colors 1-4.

Assembling the Creamy Glitter & Glow Quilt
Follow the assembly instructions on page 4 of the Glitter & Glow quilt pattern. There is a diagram of how to place the blocks in a baby quilt on that page. But if you'd like to see a full throw block placement diagram, I've included one below.

Quilting the Creamy Glitter & Glow Quilt
The original Creamy Glitter & Glow quilt has straight line quilting, which adds to the beautiful minimalism of the quilt. Here's the quilting on the new warm version!

Edge-to-edge quilting looks great on the Creamy Glitter & Glow quilt too. Here's a pantograph with diamonds that echoes the floating diamond illusion on the cool Creamy Glitter & Glow variation.

Make Your Own Creamy Glitter & Glow Quilt!
Now it's your turn! It's time to dip your toes into scrappy quilting and make a beautiful, calming, creamy quilt! Do you like the warm or cool quilt? Let us know in the comments!


Thank you.
Do you really mean coral/GREY for the warm color- way (group 3)?
In your fabric pick, there are no grey fabrics for this quilt, which has confused me.
Regards
Yep! That’s included there because the original Creamy Glitter & Glow quilt had grey diamonds. So if a reader wanted to do a pick like the original quilt from four years ago, they’d choose soft grey fabrics.
Thank you Laura. This is such a useful guide. I love both the warm and cool shades, but the blue/greens are my favourite.
Thank you for your reply.
Hi again, I sent a message this morning asking to be directed to where I could find a list of the fabrics in the original creamy Glitter and Glow — I found it. Thanks!
Where did you find the list of original fabrics? Can you post it here please?
Hi Susan! We replied to your other comment as well, but you can find the original creamy fabrics listed in this blog post. Many of these fabrics are not available any longer since the original quilt was made in 2018, so we worked with Global Fiber Shop to update the fabrics and create new kits this year!
https://suzyquilts.com/glitter-glow-quilt-pattern-use-scraps/
Are there kits available?
Yep! You can click the links above the full pictures of each quilt (the links that say “Warm Creamy Glitter & Glow quilt” and “Cool Creamy Glitter & Glow quilt). Here’s a direct link! https://globalfibershop.com/products/glitter-and-glow-by-suzy-quilts-creamy-scrappy-bundles
What size quilt does the fabric requirements listed in this post produce?
It’s the throw size 🙂
I stumbled on the glitter&glow pattern in 2020 and fell in love with the picture of that creamy glitter quilt. The kits were long gone by then, so I pulled together the fabrics myself, subbing where I had to. It came out wonderfully. I then made a second version with different fabrics/colors, much scrappier and altering the pattern somewhat (I eliminated every other row of squares, mostly because I got tired of cutting LOL), and that turned out to be my favorite quilt ever. I gave it to my best friend for her birthday, so now I need to make another for myself. 🙂 Thanks to Suzy for a great pattern.
Do you have a photo to share? That sounds awesome!
Where did you find the list of original fabrics? Can you post it here please?
Hi Susan! The original fabrics are listed in the original Glitter & Glow blog post which was published in 2018, and is linked at the beginning of this new tutorial. Here’s the direct link to the old post for you! But as noted, many of the fabrics from 2018 are unavailable now which is why we worked with Global Fiber Shop to create new kits 🙂
https://suzyquilts.com/glitter-glow-quilt-pattern-use-scraps/
Thank you so much for this tutorial! My son has requested a quilt and he found the Creamy quilt. I bought the pattern and was trying to guess at color combos–you have solved my problem! This is a beautiful, quiet quilt and I’m excited to get started!
Just wondering how you would adjust this for the baby size? I was thinking something like:
Color Group 1 (Color 1): 1 1/4 yard
Color Group 2 (Colors 2-5): 4 quarter yards (fat quarters?)
Color Group 3 (Colors 6-8): 3 1/8 yard
Color Group 4 (Colors 9-12): 4 1/8 yard
And any help on how many squares of each I’ll need to cut? Thank you!!
For Color Group 2, you’ll need to use FQs or 1/3-yard cuts (unless you have a WOF of 44″ or more, in which case 1/4-yard cuts will work). Fat eighths will also work for Color Groups 3 and 4 if that helps. For Color 2, you’ll cut 8 of each fabric, Color 3 will use 11 of two fabrics and 10 of the third fabric, and Color 4 will use 5 of two fabrics and 4 of the other two fabrics.