Modern Quilted Table Runner Tutorial with the Rocksteady Pattern
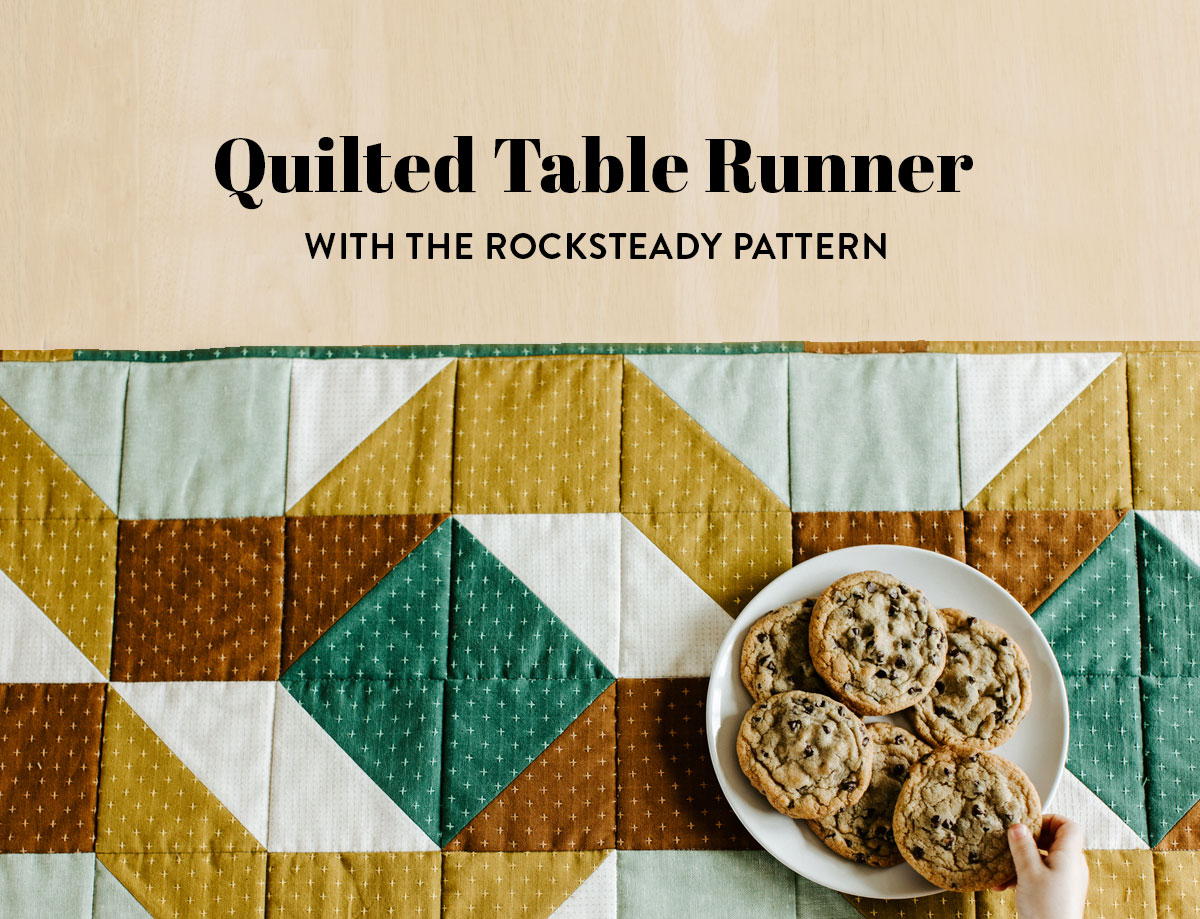
This free modern quilted table runner tutorial can be customized to fit any table size and any color scheme. It's a simple enough pattern that a beginner sewist can make it and is a fast enough finish that you can make multiple table runners for those inevitable spills and necessary spins through the washing machine.
If you know me, you know that the Rocksteady quilt pattern might be my all-time favorite pattern from the Suzy Quilts library. I've made Rocksteady quilts for my kids, myself, and my Rocksteady stocking tutorial was the very first blog post I ever wrote as a creative contributor!
So of course, I had to find a way to get a Rocksteady into another room in my house—the dining room! And thus, the modern quilted table runner tutorial featuring the Rocksteady pattern was born.

This modern quilted table runner tutorial will walk you through the steps to creating a one-of-a-kind piece that adds a pop of color to wherever it ends up! I chose to color coordinate mine with the painting above our table to add a bit of springy color that pulled those colors into my dining room.

Modern Quilted Table Runner Supplies
- Rocksteady Quilt Pattern
- Simple sewing machine
- Thread
- Cutting mat
- Ruler
- Rotary cutter
- Straight pins
- Disappearing ink pen
- Iron & ironing board
Optional Supplies (that'll make things easier)
- Best Press starch
- Wonder Clips
- Walking foot for sewing machine
- Fork pins
Fabric Requirements
- We will be using the baby quilt size as our placement guide for this modern quilted table runner tutorial, but use the following as the fabric requirements:
- Color 1: 1 FQ
- Color 2: 1 FQ
- Color 3: 1 FQ
- Color 4: 1/3 yd
- Color 5: 1 FQ
- Binding: 1/4 yd
- Backing: 1 piece of fabric measuring 24" x 56"
- Batting: 1 piece of batting measuring 24" x 56" - this is a great project to use scraps of batting pieced together!

Step 1: Cutting the Fabric
Let's dive right into this "rockin'" (pun intended) project!
Trending patterns!


Quilt Patterns


Quilt Patterns


Quilt Patterns


Quilt Patterns


Quilt Patterns


Quilt Patterns


Quilt Patterns


Quilt Patterns


Quilt Patterns
Referring to the cutting diagram at the bottom of page 2 of the Rocksteady pattern for the baby-sized quilt, divide each quantity by three. For example, if the pattern calls for 12 small squares, you will need 4.
Additionally, cut the following:
- Color 2: 1 additional large square, 2 additional smaller squares
- Color 4: 2 additional large squares, 2 additional smaller squares
- Color 5: 1 additional square

Step 2: Sewing the HST's
After you have cut all of your squares, it's time to sew up the HST's using the two-at-a-time method!
Following Figure 1 at the top of page 3 of the Rocksteady pattern, divide each quantity by 3. For example, if it asks for 9 squares of Color 1 matched with 9 squares of Color 3, you will need 3 squares of Color 1 and 3 squares of Color 3.
Additionally, you will need to sew the following pairs:
- One additional Color 2 and Color 4 set
- One additional Color 4 and Color 5 set
After sewing them together, cut down the center line, press, then trim them to size. This step will go pleasantly quickly compared to trimming all the HST's for an entire quilt!

Step 3: Assembling the Table Runner Top
Now that your HST's are perfectly trimmed, let's assemble the top of our quilted table runner!
Using the baby size diagram on Page 2 of the Rocksteady pattern, assemble columns 4, 5, 6, and 7. Press the seams of 4 and 6 to the right, and 5 and 7 to the left, so they nest when sewing them together.
Next, sew columns 4 and 5 together, as well as columns 6 and 7. Then join the 4/5 section to 6/7.

Step 4: Baste!
Now, I have some good news and some bad news. Bad news first: this step in the modern quilted table runner tutorial is probably not your favorite. Does anyone really enjoy basting?? But the good news is, that it goes SO much quicker on a table runner than on an actual quilt!
Using spray baste or basting pins, baste your table runner top, batting, and backing together.

Step 5: Quilt
After you're done basting, it's time to quilt the table runner! If you have ever wanted to try your hand (literally) at hand quilting, this would be such a great project to experiment on! I thought my fabrics had quite a bit of texture going on already so I just stitched in the ditch, but if you're using solids, the quilting can definitely add another dimension to your table runner.

Step 6: Binding
When I got to this point, I realized that I actually did not have enough fabric in any of my colors to make the binding for my modern quilted table runner. So, instead, I cut a bunch of 2 1/4" strips in various lengths and sewed them together to create a fun, scrappy binding!
If you are using yardage for your binding, you will need to cut four 2 1/4" x WOF strips. Three strips will get veeeeery close, but I'd recommend going with four just to be safe. Create the binding, and attach it to your quilt.
If this is your first time binding, this post has all the details you'll need!

Tada! This modern quilted table runner tutorial is one you'll want to make again and again—I'm already dreaming up color combos for each season to change up my decor!


And if you've gotten this far and are salivating over this plate of chocolate chip cookies, my very secret recipe is the one printed on the side of every Nestlé Toll House bag of chocolate chips. 😉


So pretty but would love a pdf file to print pattern. Thanks
Hi Sally! The first link under the heading “Modern Quilted Table Runner Supplies” takes you to the download page for the Rocksteady quilt pattern that is needed to make this tutorial. Here’s that link! https://suzyquilts.com/shop/rocksteady-quilt-pattern-download/
If you mean you’d like this table runner post as a PDF, we are not able to make our free weekly tutorials and blog posts into PDFs because of the time it takes to layout patterns (we work on PDF quilt patterns behind the scenes for three or four months before they’re released!). But you can always refer to the blog post online and even print it out if you’d like, though it would be very long because we work hard to make sure our blog tutorials have pictures showing each step 🙂
Any chance of seeing the reverse side?
It’s so hard to pick a favourite Suzy Quilts pattern, but Rocksteady works so well in other projects! I’ve made Rocksteady as cushion covers in several colourways and they sew up so quickly and look so effective. Thank you for another great tutorial!
Thank you for this! I love the textured fabric used. Would you be willing to identify it?
Most of the fabric used in this tutorial is Manchester Embroidered Cotton: https://www.cottoneerfabrics.com/product-category/shop-by-type/textured-cotton-wovens/manchester-embroidered-cottons/
Hello! Sorry if I have missed but what are the finished dimensions of this table runner? Thanks!
Hi Susan,
This specific one is based off the baby size Rocksteady pattern and finishes roughly 16″ x 48″, but you can make any size you’d like, just add more blocks to the end 🙂
I love the giant runner on your Instagram. Would I just use 8” or 10” blocks to achieve this size?
Hi Pamela! You can definitely adjust the block size if you’d like to make this larger! I believe the version you’re mentioning was made by someone else and shared in our stories, so we’re not sure how much they enlarged the blocks. Experiment as much as you’d like!