Starling Quilt Sew Along Week 4: Sew Flying Geese Units
Hey Quiltketeers, and welcome to Week 4 of the Starling quilt sew along! Is it me or is this sew along flying by? Maybe I've just got aeronautics on the brain because my husband made me watch the new Top Gun movie with him last night and this week we're sewing flying geese! Which, now that I think about it, Goose is a character in Top Gun...woah. It's all connected!!
If you don't know what I'm talking about, that's OK. It's not even a little bit relevant to our Week 4 assignment. What is relevant is page 5 of your Starling pattern. Use that as a reference when making your flying geese. There is also a hyper link to a flying geese tutorial on that page. I've embedded that same video below.
OH! Don't forget to mark your calendars for Tuesday, May 2 @ 2pm Central because I'm going LIVE on Instagram to discuss block assembly. I cover most everything in the videos below, but it will still be nice to catch up. Save your questions for then or pop them in the comments and I'll be sure to cover them.
If you're just popping into this sew along — welcome! You can find all of the posts in the Sew Along tab forever and always. Even if you can't make this quilt during the schedule time listed below, that's OK! Follow along at your own pace whenever it works for you.
However, if you are following along in real time, don't forget to post your progress on Instagram using #StarlingQuiltSA so you can be entered to win prizes each and every month. Skip to the bottom of this post for the sponsor and prize this week.
Trending patterns!


Quilt Patterns


Quilt Patterns


Quilt Patterns


Quilt Patterns


Quilt Patterns


Quilt Patterns


Quilt Patterns


Quilt Patterns


Quilt Patterns
Starling Quilt Sew Along Schedule
- Week 1, March 31: Gather fabric
Sponsor: Lamb & Loom - Starling Quilt Kit (Gemstone) + surprise backing
IG LIVE - @suzyquilts: Monday, April 3 @ 2pm Central - We discussed fabric selection + Q&A. - Week 2, April 7: Cut fabric
Sponsor: Global Fiber - Flowering Trees by Oana Befort fabric bundle - Week 3, April 14: Sew square-in-square units
Sponsor: Art Gallery Fabrics - two winners getting two FQ bundles 🙂 - Week 4, April 21: Sew flying geese units
Sponsor: Thai Charm - throw size quilting - Week 5, April 28: Assemble blocks
Sponsor: Sewing Arts Center - $100 gift card
IG LIVE - @suzyquilts: Tuesday, May 2 @ 2pm Central - We will discuss block assembly + a demo on 3 different ways to pin a block to get your seams to align. - Week 6, May 5: Finish quilt top
Sponsor: Trace Creek Quilting - throw sized quilting

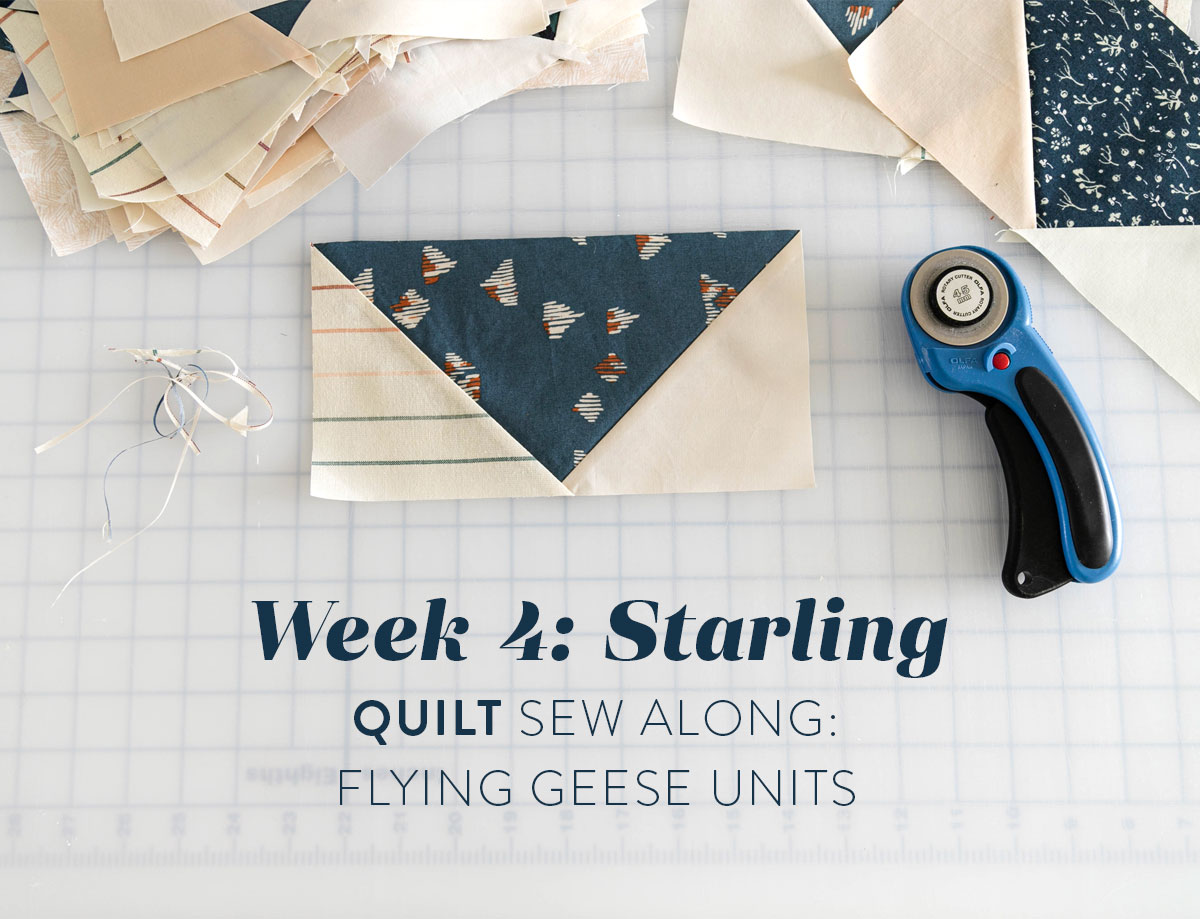
Week 4 Assignment: Flying Geese Units
Everything you need to know about sewing and trimming flying can be found in the video below. If you missed the pressing video from last week and need a refresher on using a tailor's clapper, I suggest you fly back to Week 3 and check it out.
Layer Cake Flying Geese Video Below
If you are using a Layer Cake and following the instructions from this blog post variation, this video below will be more applicable. It's almost exactly the same as the video above, except the measurements for the no-waste flying geese are different.
Tip # 1: Use the chart on page 4 to determine your number of geese.
On the top of page four of the Starling pattern is a chart listing out the number of square-in-square units and flying geese units you need for each quilt size. I'm making the throw size, so I need 56 geese that measure 9 1/4" x 4 7/8" once they are trimmed.
Side note: 9 1/4" x 4 7/8" sounds weirder than it is. I promise two things: once you get the hang of trimming flying geese to these dimensions they won't feel weird anymore and also the math really does work out and in the end your blocks will fit together beautifully.
Tip # 2: Crease your guidelines.
I've got a lot of e 5 1/2" squares and I really don't want to draw a diagonal guideline on each one. What I'm going to do instead is take my pile of 5 1/2" squares over to my ironing board and iron a crisp diagonal crease in them. With a hot iron, I should be able to stack at least four on top of each other and get them creased and ready for sewing in a couple minutes.

One thing I recommend if you choose to crease your squares, is to turn off the light on your sewing machine. This will seem counter intuitive, but the absence of such a harsh little light should help you see the crease better.

If spring has sprung and the warmer weather has you steering clear of your iron, a roller is another option. This will be a slower option, so it's not my first choice.


Caveat! Creases can be hard to see. Because of this, creasing is not usually my go-to way of marking guidelines, however its speed, in this case, is why I chose it. I suggest doing a test — crease one square with your fingers, take it to your sewing machine, and see if whether or not the crease is visible enough for you to actually use it as a helpful guideline.
Tip # 3: Pin for the first couple seams.
In this four-at-a-time flying geese method we sew two long seams and then four shorter seams. I suggest pinning, at least at first, during those first passes through your machine. Once you get to the next step (Fig. 15 in the pattern) pinning is more optional based on your sewing accuracy. (I probably won't pin then.)

Pssst! Don't forget to chain piece!

Tip # 4: Use your best pressing skills.
Remember those fabulous pressing skills from last week? Just keep doing what you've been doing and these geese will turn out chef's kiss PERFECT!

Tip # 5: Save time by stacking.
This is just a fun little hack if you want to save a bit of time. If you're new and unsure about this process, no need to do this. However, if you do choose to stack your units before slicing, line up the seams so you don't accidentally slice through one of them.

I found that stacking three at a time was the perfect number for me. Not too many that I messed up, but enough that it did make the process go quickly.


Tip # 6: Prepare you ruler.
Just like I mention in the video, preparing your ruler with some tape and a mark at the goose's beak will make your trimming a lot easier. If you don't want to use a sharpie on your ruler, a dry erase marker will work too.


Do you see the goose beak Sharpie mark? It's tiny and you may have to zoom in, but it's there. That dot is the first thing I line up. I then wiggle the ruler around to line everything up.
Let me know how your geese turn out in the comments below! Have some flying geese tips of your own? Share them with us!
Week 4 Sponsor & Prize
Our Week 4 sponsor is Sandy from Thai Charm. We love Thai Charm for more than the beautiful fabric and fantastic quilt kits — Sandy is an amazing longarm quilter too! The winner of Week 4 will get FREE longarm quilting on a throw quilt from Sandy. Good luck!
How to Win
- Post a pic to Instagram. The photo prompt for Instagram this week is to post a pic of your Starling progress. Use #StarlingQuiltSA in the caption.
- You must have a public Instagram profile to participate.
- Each photo posted is an entry and you can enter as many times as you want in a single week. Once the week is over, those posts do not count in the next week's giveaway. Every week we start fresh.
- Your photo must be posted between Friday, April 21 and Friday, April 28. The winner will be picked randomly from all qualifying posts and announced at approximately 4:00 p.m. Central on the 28th.


I went ahead of week four and made my flying geese. But I pressed my seams toward the darker color like Suzy suggested with the squares in week three. Now realizing I should have waited. What I have is one seam pressed in and one out. Will I be ok or should I rip them apart and redo?
You’ll be fine, but you may wind up with some bulkier seams in places. With four-at-a-time geese, you’ll always want to press out (toward the triangles).
Hi Suzy, I know in the past you have posted winners on Instagram for the sew alongs. Is that still the case or are you posting them somewhere else? Oh and I love your sense of humor “It’s all connected” 🪿 😂
Yes! This past Friday was a topsy turvy day because Art Gallery Fabrics revealed my two new fabric collections, so I announced the winners in my stories rather than how I typically do it in my feed. In the future you will be able to find the posts there. I’m happy you noticed!! 😉
My question is, was your demo with the updated pattern or the first pattern? None of my geese were almost perfect like the ruler measurement. In fact, the 9 1/4 inch length doesn’t reach tip to tip on the bottom. I made my geese before your tutorial and drew lines according to the instruction. The only thing I can think made the difference is that cutting according on the line created imperfect 1/4 inch seam allowances. Again, I wished I had waited for the tutorial. I liked your creasing method more. I sent an earlier comment on how I pressed my seams to the darker fabric which left me with one seam pressed in and one out. I really wished I had waited. Hopefully all will work out.
Thank you
Hi Patsy! I’m sorry things aren’t working out perfectly. If you’re using the original version of the pattern, it’s more like the layer-cake modification mentioned in the post. The measurements are all correct, but there’s no room for error, so if your 1/4″ seam is a bit off, etc., your geese may come up short. That’s why we tweaked the pattern a bit to give more wiggle room for trimming. Creasing as Suzy does here versus drawing your lines shouldn’t make a difference in terms of accuracy. If you’ve already made all the geese, your best bet at this point is to trim them to the largest size you can, then adjust your center units and c squares to match that size. Everything will still work out; your quilt will just be a bit smaller. If your geese are off by just a little bit, then you’re probably safe using them as is; any minor inconsistencies will be “eaten up” in the seam allowance when you sew the units together. Hope that helps!
Hi Suzy! Have you ever heard of Deb Tucker’s Wing Clipper? It’s a really handy ruler I was recently introduced to for trimming flying geese. Deb Tucker also has another ruler called the Tucker Trimmer, which is incredible for trimming HSTs, combination units and hourglass blocks. Just thought I’d let you know 🙂
New to me, but I just bought one cause it looks awesome! I can’t resist a new ruler!!
Hey there Suzy!
Question on blocks a, b & c (I’m finished with the geese).
What should each block finish at after I assemble centers, flying geese & corners?
Thanks for any guidance. 😘
Good work getting through the geese! The block sizes are all listed in the pattern. Block A measures 18″ square, Block B measures 13 5/8″ x 18″, and Block C measures 9 ¼” x 18″.
Will you provide guidance on how to “square up” your finished blocks in Week 5? I’m a first time quilter and am having SO MUCH FUN with this! I’m hooked!
The great thing about these blocks is there is no need to square them up at the end. In the Week 5 post I have two video tutorials for you that will ensure you get great results 🙂
I’m wondering what brand the blue ruler is you’re holding in you hand? It looks handy for the starling quilt. I am finishing up my first starling quilt and my points are terrible! Maybe I’m just out of practice.
Flying geese can be tricky if one of your steps gets off. This is a really old 6″ x 12″ ruler by Le Summit. I’m not sure it’s sold anymore, but any 6″x 12″ quilting ruler would work just as well. Here is a video on making flying geese from page 5 of the pattern – https://www.youtube.com/watch?v=WMKa4KLzQME