Simple Steps for Quilt Fabric Organization
If you’ve been following along with our fabric organization series, you’ve already learned about quality storage materials and folding your fabrics, and now it’s time to talk about quilt fabric organization!
Before I started working in the quilt industry, I was a museum curator. Many people don’t know this until they meet a curator, but being in charge of a museum collection’s preservation is a lot like being a professional organizer. In one of my biggest museum collections reorganization jobs, I spent two years reorganizing over 20,000 objects onto custom made shelving!
Maybe I started loving organizing because of my training in museums, or because I grew up in a home that was always neat and clean. However it happened, it stuck. Organizing is such a fun task, and any time I see a space that can function better, I want to figure out a way to fix it. It’s like a fun mind puzzle! And being well organized is a great way for me to reduce stress.

You Might Also Like...
If you want to learn even more about home organization, there are two popular books I can recommend, and both are also shows on Netflix! Marie Kondo’s The Life-Changing Magic of Tidying Up (and the Netflix show Tidying Up with Marie Kondo), and The Home Edit Life (and the Netflix show Get Organized with the Home Edit) share excellent tips that can be applied to your sewing room and every other space in your home.
I’ve learned a lot about organization between my work in museums and my hobby-like interest in home organization. Keep reading to learn the 5 best tips I’ve learned for quilt fabric organization!
Trending patterns!


Quilt Patterns


Quilt Patterns


Quilt Patterns


Quilt Patterns


Quilt Patterns


Quilt Patterns


Quilt Patterns


Quilt Patterns


Quilt Patterns

Tip #1: Destashing Unwanted Fabric
We all have fabric we regret buying. The longer we quilt, the more our tastes evolve and refine, and that is great! It demonstrates creative growth. Over time, trends also change. Fabric that you loved five years ago might just be taking up space on your shelves now.
Why do we keep unwanted fabric for so long? Are we really ever likely to use it if it's been lingering on our shelves for years? There’s a big difference between fabric we keep with intention - special fabrics that have meaningful memories and are saved for special projects - and fabric that we keep without any plans to include in a quilt.
Sometimes we love old fabrics, and you should keep those! But often we cling to fabrics we don’t like anymore out of guilt. When we spend money on something, we feel like we can’t get rid of it because that would be a waste! But I truly believe that a well-organized fabric stash begins with keeping fabrics that you’ll use and destashing others. And there are plenty of ways to do that that will benefit others!

If you want to get some of your money back, you could sell your fabrics on a website like Feel Good Fibers. If you’d rather donate your fabric, you could offer it to a local quilt guild, charity quilting group, children's art program, or home economics class.
You could even consider gifting some unwanted fabric to the newest quilter you know or to a new longarm quilter to use as practice fabric. All of these are great ways to clear some space in your room while helping others. Once your fabric collection is more highly focused on your favorite fabrics that you’re likely to use, you can get started on organizing it!

Tip #2: Create a Categorization System That Works for You
You may have already folded your fabric using the Ultimate Guide to Folding Fabric. If you haven’t, set aside some time to do that! Folding your fabric neatly helps to maintain any organization system since it’s easier to keep your space tidy.
Creating a system to categorize your fabric helps to make sure that all of it has a home. That way, when you pull fabric to cut just a little bit or audition it for a quilt, you can easily put it back where it belongs instead of putting it onto a pile and having to search your sewing space for it again later. That takes up valuable quilting time! Putting the effort into an organizational system up front helps you concentrate on quilting without disruptions.
Here’s the organizational system I think works best, in the order of how you should start dividing up your fabrics:
- Material: If you use a lot of different materials, it’s best to keep them together so you can easily notice if you’re running low. The material categories in my stash are cotton, linen, wovens, double gauze, and wool. You can skip this step if you quilt using mostly cotton.
- Size: Within your material categories, if you have them, separate your fabrics by size. On my shelves, I keep fabric separated by fat quarters, half yards, and yardage. Scraps go in separate bins (we’ll tackle scraps in a future post). Check out the Ultimate Guide to Folding Fabric for more on this!
- Color: Organize your fabric in color order, and you will always know where to put it back on your shelves! Plus it looks beautiful.
Categorizing is your first step in finding a system that works uniquely for you. Take some time to consider how you work with your fabrics. For example, I use linen more than any other fabric, so I put my linen fabrics closest to my cutting table so they’re always close by.

Tip #3: Quilt Fabric Organization Supplies
Now you’re ready to get your fabric onto shelves! Everyone’s sewing space is different, so work within your own space to find containers and shelving units that will work for you. I use a five by five compartment Kallax from IKEA to hold my stash, and that is divided into what The Home Edit team calls zones. Each zone is a material type that is sub-organized by size and color.
For yardage, I use magazine or comic book boards to create mini bolts and store them vertically just like fabric shops do. Horizontal fabric organization can be a recipe for disorganization because it’s harder to pull individual cuts of fabric from your stash that way.
Half yards and fat quarters can be stored in clear plastic containers. My quilting completely changed when I started using this system and could so easily see all of the fabric I had! Between getting all your yardage onto mini bolts, and your smaller cuts into clear containers, you should be able to see all of your material. You may find yourself using a greater variety of fabrics now that you can clearly see everything!

Tip #4: Maintain Your Quilt Fabric Organization System
Here are some tips for maintaining your quilt fabric organization:
- When you buy new fabric, make sure to fold it before putting it on your shelf.
- Don’t exceed your storage space - if you don’t have a place to put fabric, don’t buy it or destash some other fabric.
- Use clear containers to hold as much of your fabric as possible so it’s easy to see what you have to work with.
- Think about how you use your stash! Everyone interacts with their fabric stash differently, and you want to create a unique system that works for you. Using containers for your fabric is also helpful because you can try out organizational systems for a few weeks and make easy adjustments until you find the perfect fit!

Tip #5: When to Reevaluate Your Quilt Fabric Organization
Just as your taste in prints may have changed over time, the way you make quilts may also change. Maybe you’ve never used linen before, and the first time you do, you get hooked! That’s a great example of when you might want to take a little time to reevaluate your quilt fabric organization. Shift some things around on your shelf, but maintain the basics of organization! Here is a list of what I believe are the most important basics of quilt fabric organization:
- Neatly fold fabric so it’s easy to pull off and put back onto your shelves.
- Categorize fabric by material type.
- Organize fabric by size and color.
- Store fabric in containers on your shelves.
- Always fold new fabric before putting it on your shelves.
- Don’t exceed your storage space - either wait to buy new fabric or destash some to make space.
Apply these tips to your fabric stash, and keep using them any time you need to reorganize, and your sewing space will be tidier than ever before! What organizational system will you use for your fabrics? Tell us in the comments, and let us know what other quilting organization posts you’d like to see in the future!


Thank you for this article. Over the past 2 years, I have been organizing my fabric. I was overwhelmed at first. I donated 3 bags of fabric. I was asked to participate in the charity sewing group. What a pleasant feeling to meet a new group of people; to know that fabric I now had collected will be used to benefit others.
I go to “my space” to create with a better feeling now.I no longer waste time searching for that piece of fabric I knew it was somewhere.
Thank you for the encouragement. Thank you taking the time to share your organizational ideas with us.
Happy Sewing.
What a great story! Donating fabric and seeing it used for charity projects is a very fulfilling feeling, I agree. And I’m glad that step helped you feel better while you quilt! 🙂
Thank you for the extremely helpful tips! I do some of the same but haven’t separated my half-yards and yardage…I think that will be a big help. I also use the IKEA Kallax bookshelves so I am eager to know… what kind of plastic boxes you use for your fat quarters and half yards?
You’re in luck, because there’s a link to the containers I use for fat quarters and half yards under Tip #3! Sometimes they sell out, but they always restock. So if they’re out, make sure to check back later 🙂
I too like the Kallax by IKEA and was wondering if the plastic bins are from IKEA. I haven’t been in the store lately, so maybe they are new!
Hi Martha! The containers are from Amazon – there’s a link to them under Tip #3. Sometimes they are out of stock, but they always restock, so keep checking!
Hi Babs! Just a reminder as I mentioned to Martha above that there is a link to the storage containers in Tip #3 which is all about supplies. Any clear container works, I just linked to the one I use! The ones that I use are 2 for $30, so they are $15 each. They are also linked in the blog post on folding in the last paragraph! 🙂
I’m really loving all of these organization tips – thank you! I spent some time a couple weekends ago folding and sorting all of my fabric based on your previous tutorial, and I LOVE the results. Can’t wait for your tips on organizing scraps!
So glad you like your folded fabric! It’s a total game changer to be able to see it all. Scrap organization is so hard. But I’m working on it and there will be a future post for sure!
when I find a pattern I want to make or fabric I want to sew I collect ALL the components in to a clear box and label the outside with painters tape. I stack the differnt seasons together. I, then know if I.m working with precuts or yardage. All my blenders are in color coded boxes.
That’s an excellent way to organize your projects, love that, Barbara!
What size are the plastic bins? After reading your tips I am motivated to get better organized!
That’s great, Jaymie! There’s a link to the bins under Tip #3 – they are 12x12x4, so they fit nicely on a Kallax. If you have a different shelf, you can use a different clear container that will fit nicely! I find that as long as the clear container is 4 inches high, the other dimensions can be adjusted to your particular space. Your folded fat quarters and half yards will be just over 4 inches, so it’s a great height!
Do you worry about fabric getting dusty or faded when stored “in the open” like this?
Hi Molly! I don’t, and that’s partly because I actively use my stash. I have some old fabrics, but not many, and I try to grab from what I have before getting new fabrics as much as possible. I also have some tips on avoiding light damage in my post on best practices for fabric storage! Dust won’t do any harm to fabric, so I don’t worry about that either. Having worked in the preservation field for most of my career, I have a good sense of what I want to very carefully preserve (old family heirlooms) and what I don’t want to put that effort into. Hope that helps!
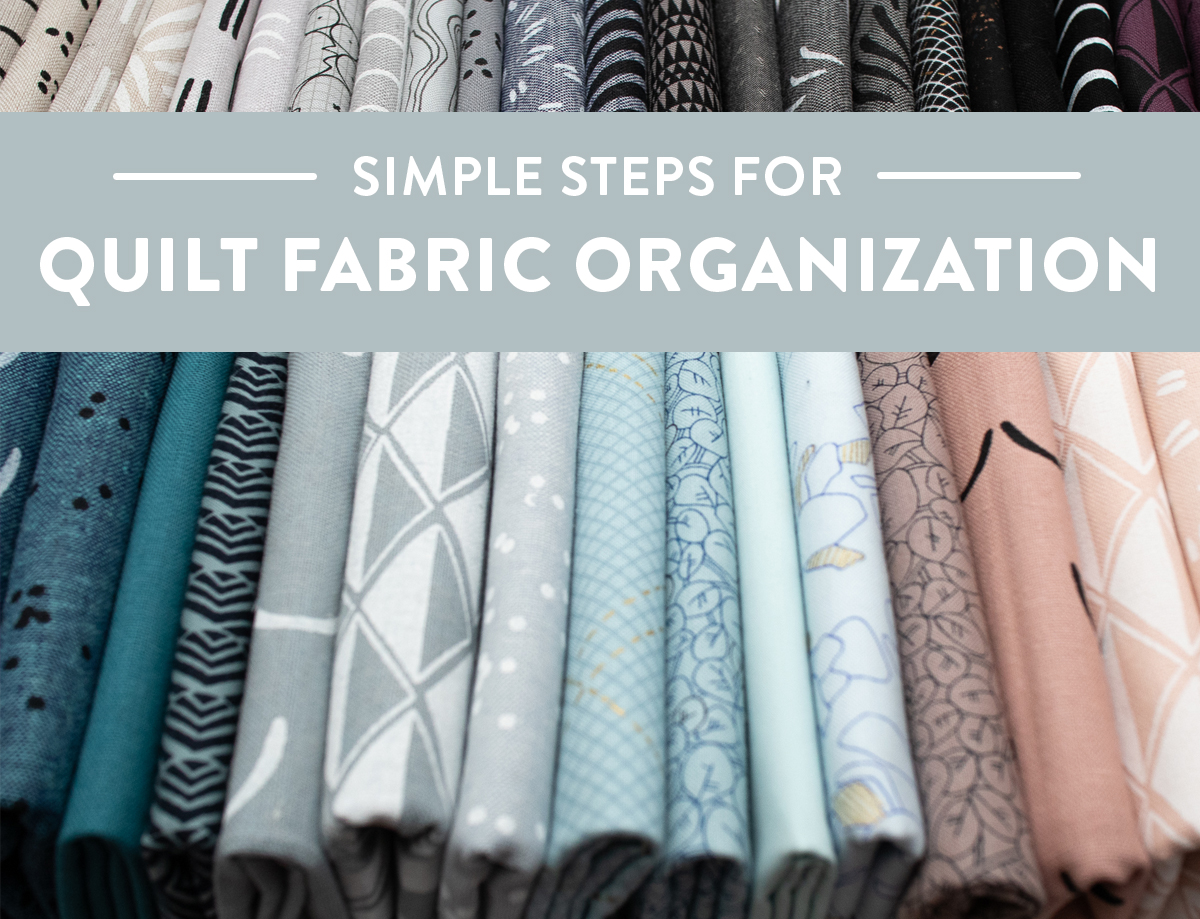
What line of fabic is in these pictures?
Aren’t they great Peggy? I pulled some of my favorites for this post! It’s a big mix of different fabrics not all from one line, but most are by Cotton and Flax (sorry, those are all out of print) and Carolyn Friedlander. Glad you like them!
It took me too many years to learn this rule you mentioned: if you don’t have a place to put fabric, don’t buy it or destash some other fabric.
Since I have been doing that I find my projects are more focused, and I am too. This was a helpful post.
It’s a total game changer! We accumulate so much that we forget what we have, and being able to see everything and have a specific place to put it really helps make sure you’re using or passing along fabric. So glad that you already learned this lesson and it’s working for you!
Just as another person commented, if I know of a particular project I’m going to work on, I gather all of the fabrics along with the pattern and put them in a clear scrapbook paper box from Michael’s. Then I use my label maker to label the box. Often I’ll go ahead and cut all of my fabrics out before I do this, so when I’m ready to do that particular project, it’s ready to go! The boxes stack nicely on my shelves and I can see at a glance what I have. I love all of your organizing ideas for fabric. Your shelves look beautiful, yet efficiently organized, too. Nice!
That’s a great way to store your projects! I’m so glad you have a great system that’s working for you! 🙂
I’m loving this series. Thank you. One question – do you store your fat quarters and half yards in the same storage containers?
So glad you like this series, thanks! Sometimes I keep fat quarters and half yards together since I’m short on space. So if I have a half yard and fat quarter of the same fabric, I’ll keep them together! But I will usually buy fabric in one size or the other, and then trim my half yards down to a fat quarter and move them. So it depends! Whatever works best for your space!
Thank you for all these helpful hints. I long to be organized like this. With all of your practical advice I’m encouraged to get started. The videos and pictures help so much! We moved in the last year and I’ve been wanting to get my sewing space together. I hope to get to a place where it’s less stressful and much more enjoyable. Thank you again. Happy Sewing😊
Moving can make organization so difficult! You’re adjusting to a new space, and that takes some time to learn about. I like to think of my organization as adjustable – once part of it stops working for me, I look for a new way to stay tidy! That’s how I got to this point 🙂
What about storing fabrics that go together for a possible project? This is where I get confused. I sort by color, but there are those pieces that have been picked because they work together and will hopefully be used for some future project. Or the sets that are sold by Moda, Riley Blake, etc., that are all mixed colors, yet should be kept together. Shouldn’t they? Help!
The best thing you can do is whatever works best for you! Much of the info in this article is about that — not all quilters quilt the same, so not all organization systems have to be the same. For example, I don’t keep fabric collections together because I don’t use all of the same collection in my quilts. Organizing everything by color works for me. If you want to keep them together because that’s how you like to quilt, go for it! 🙂