Easy Flying Geese Quilt Block Tutorial
The Flying Geese quilt block is simple, versatile, and relatively quick to make. You can make them one at a time using small pieces of fabric, or even 4-at-a-time to speed up the process.
Flying Geese can stand alone as a single block, stacked on top of each other to give the appearance of geese flying in the sky, or can be used to make many other famous quilt blocks — the Sawtooth Star being one of them.
In the ever-growing catalog of patterns here at Suzy Quilts, we have some really fun patterns using this classic quilt block. Some of those patterns include:
- Shining Star Quilt Pattern (Download)
- Stars Hollow Quilt Pattern (Download)
- Starling Quilt Pattern (Download) - available on March 1!
- FREE Reverse Sawtooth Star Pattern Tutorial
4-at-a-Time Flying Geese Tutorial
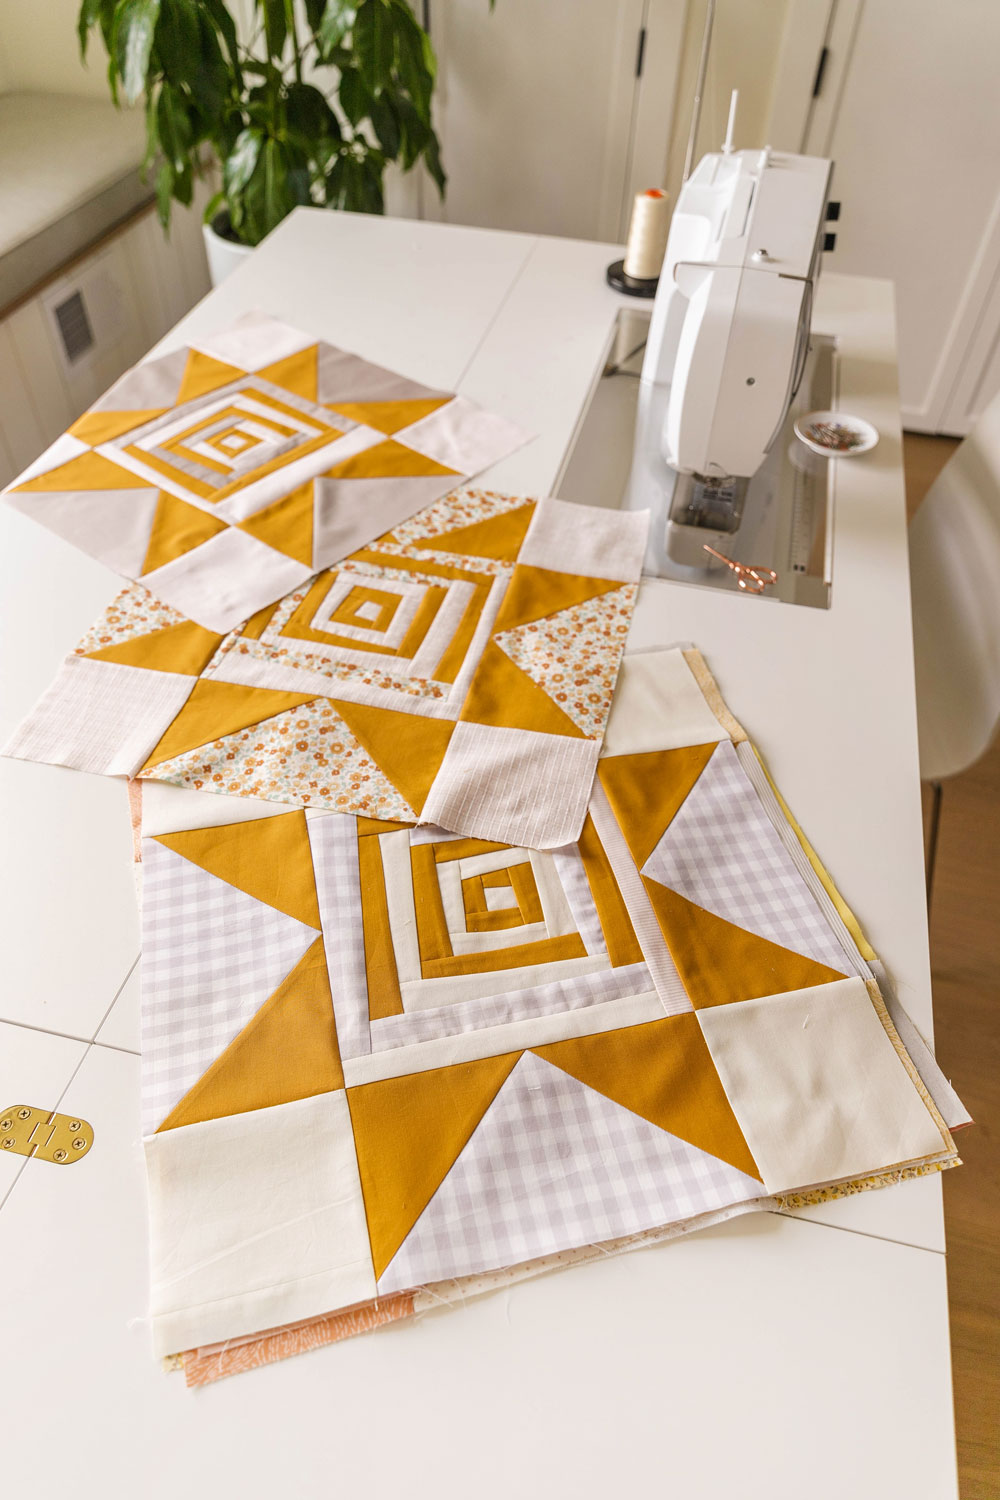
There are a couple ways to make Flying Geese blocks, however as mentioned before, the fastest way is the 4-at-a-time method. This tutorial uses the Shining Star quilt pattern to make four Flying Geese from one large square and four smaller squares of fabric.
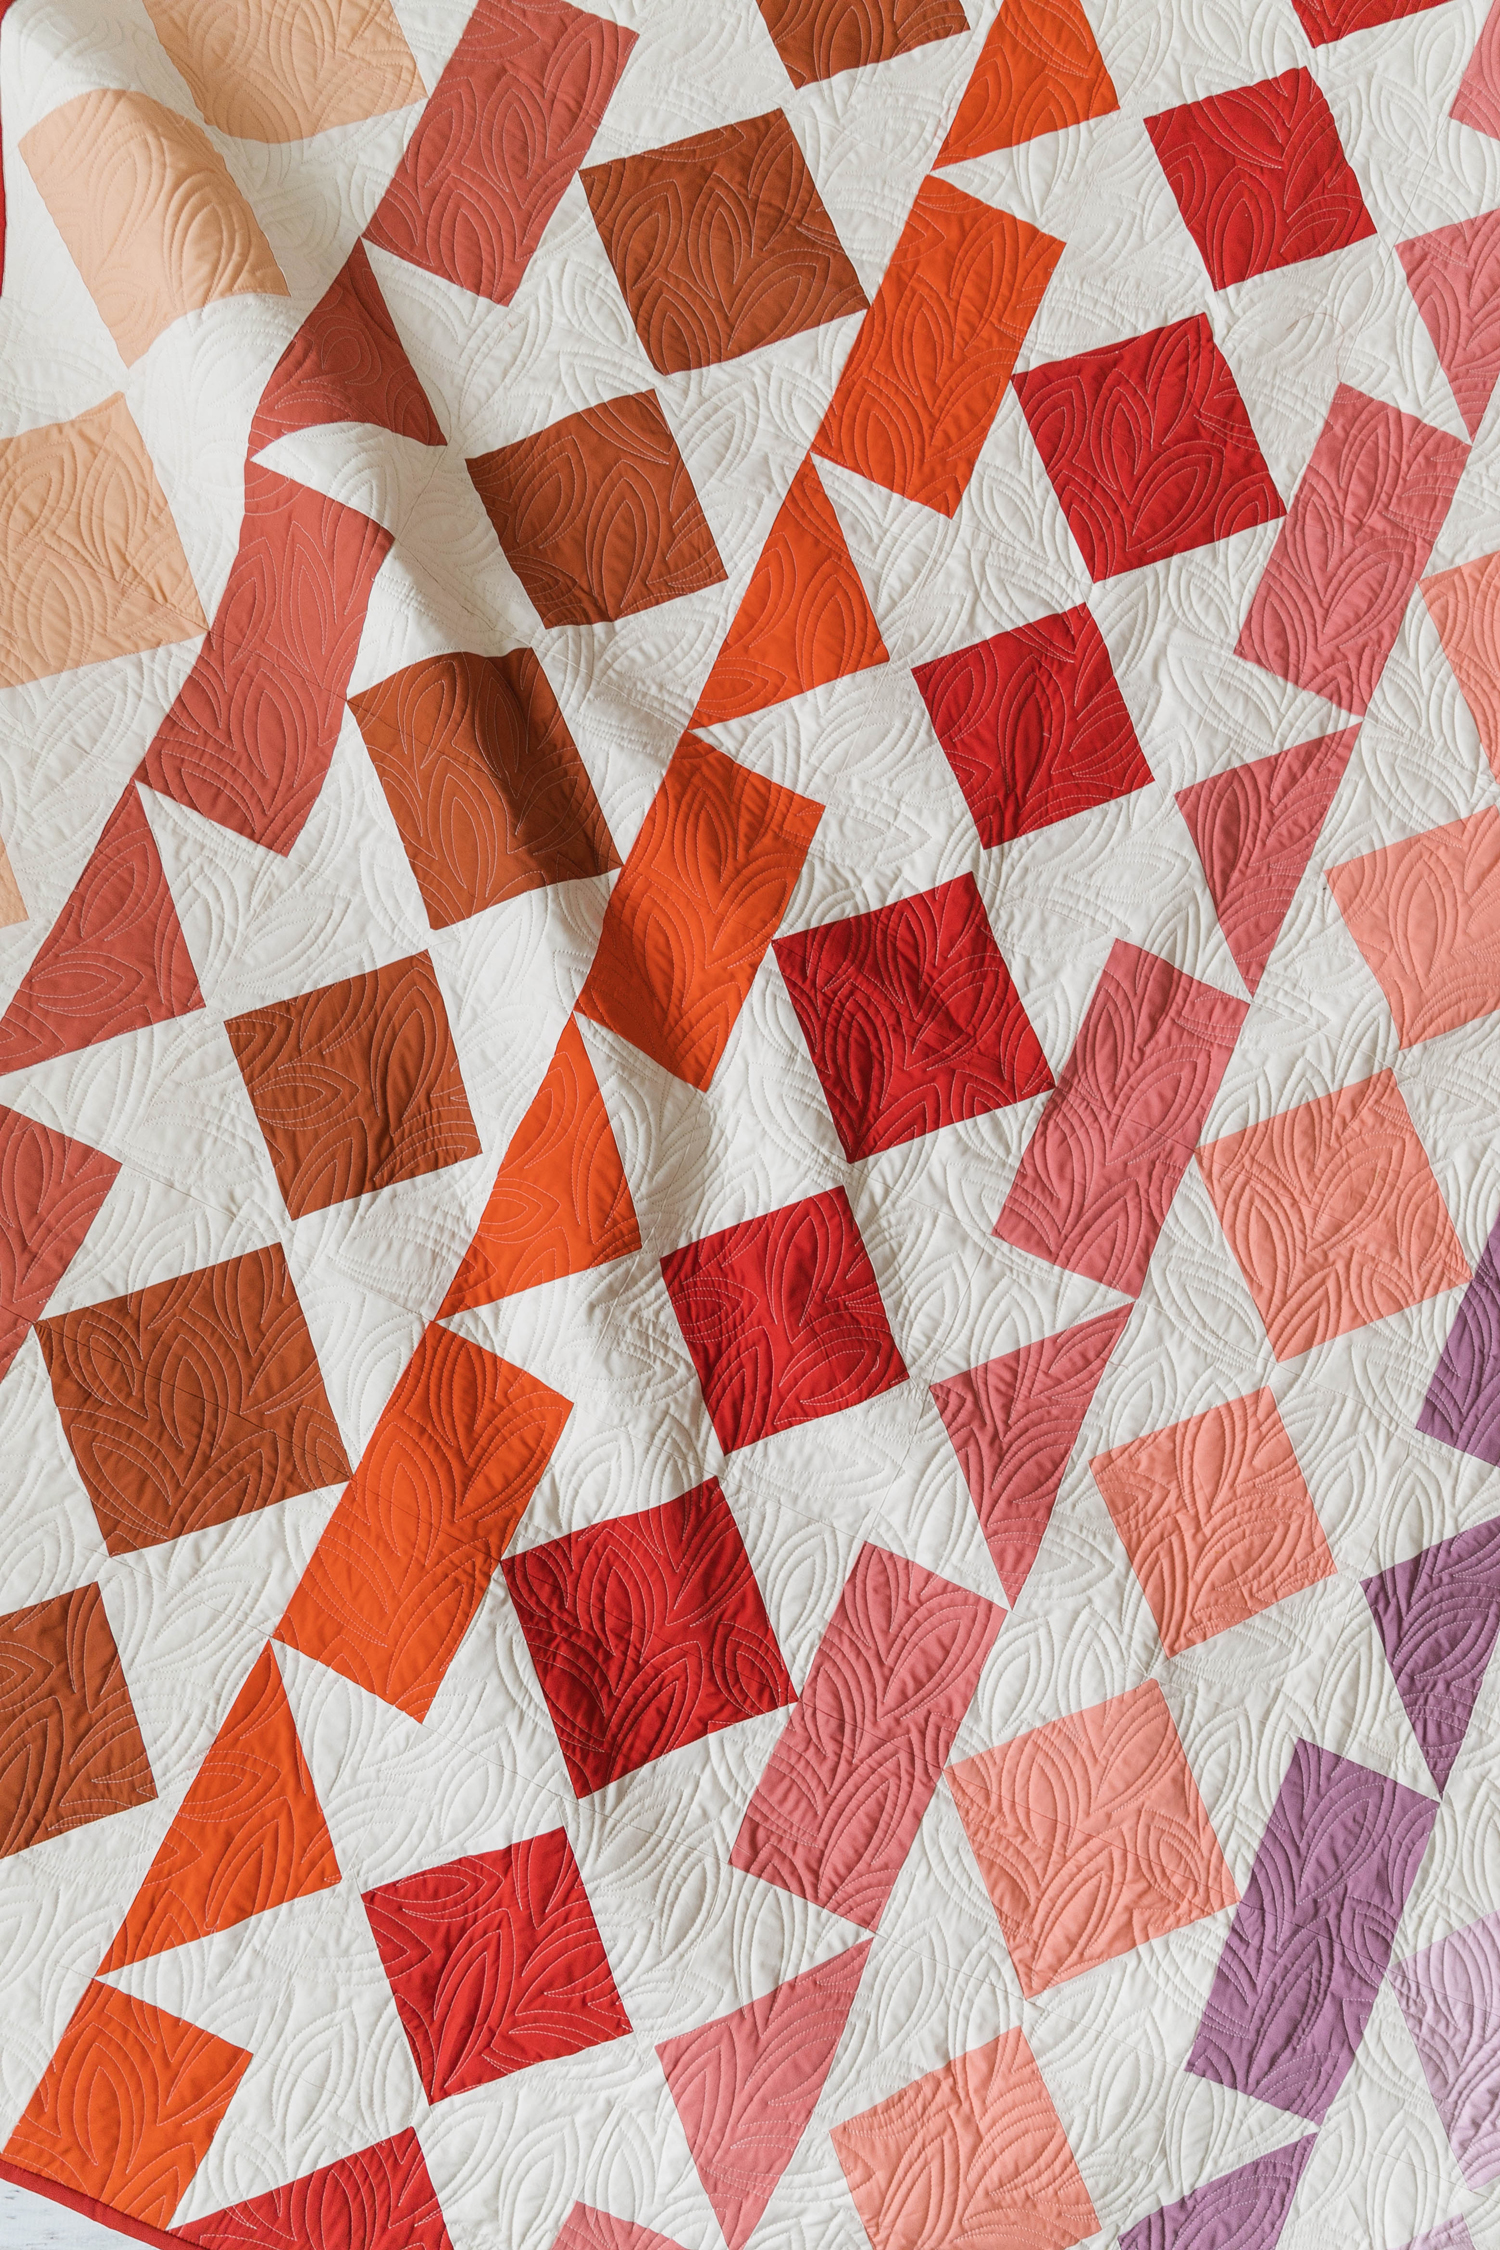
Above is the Shining Star quilt pattern, available in the shop!
Trending patterns!
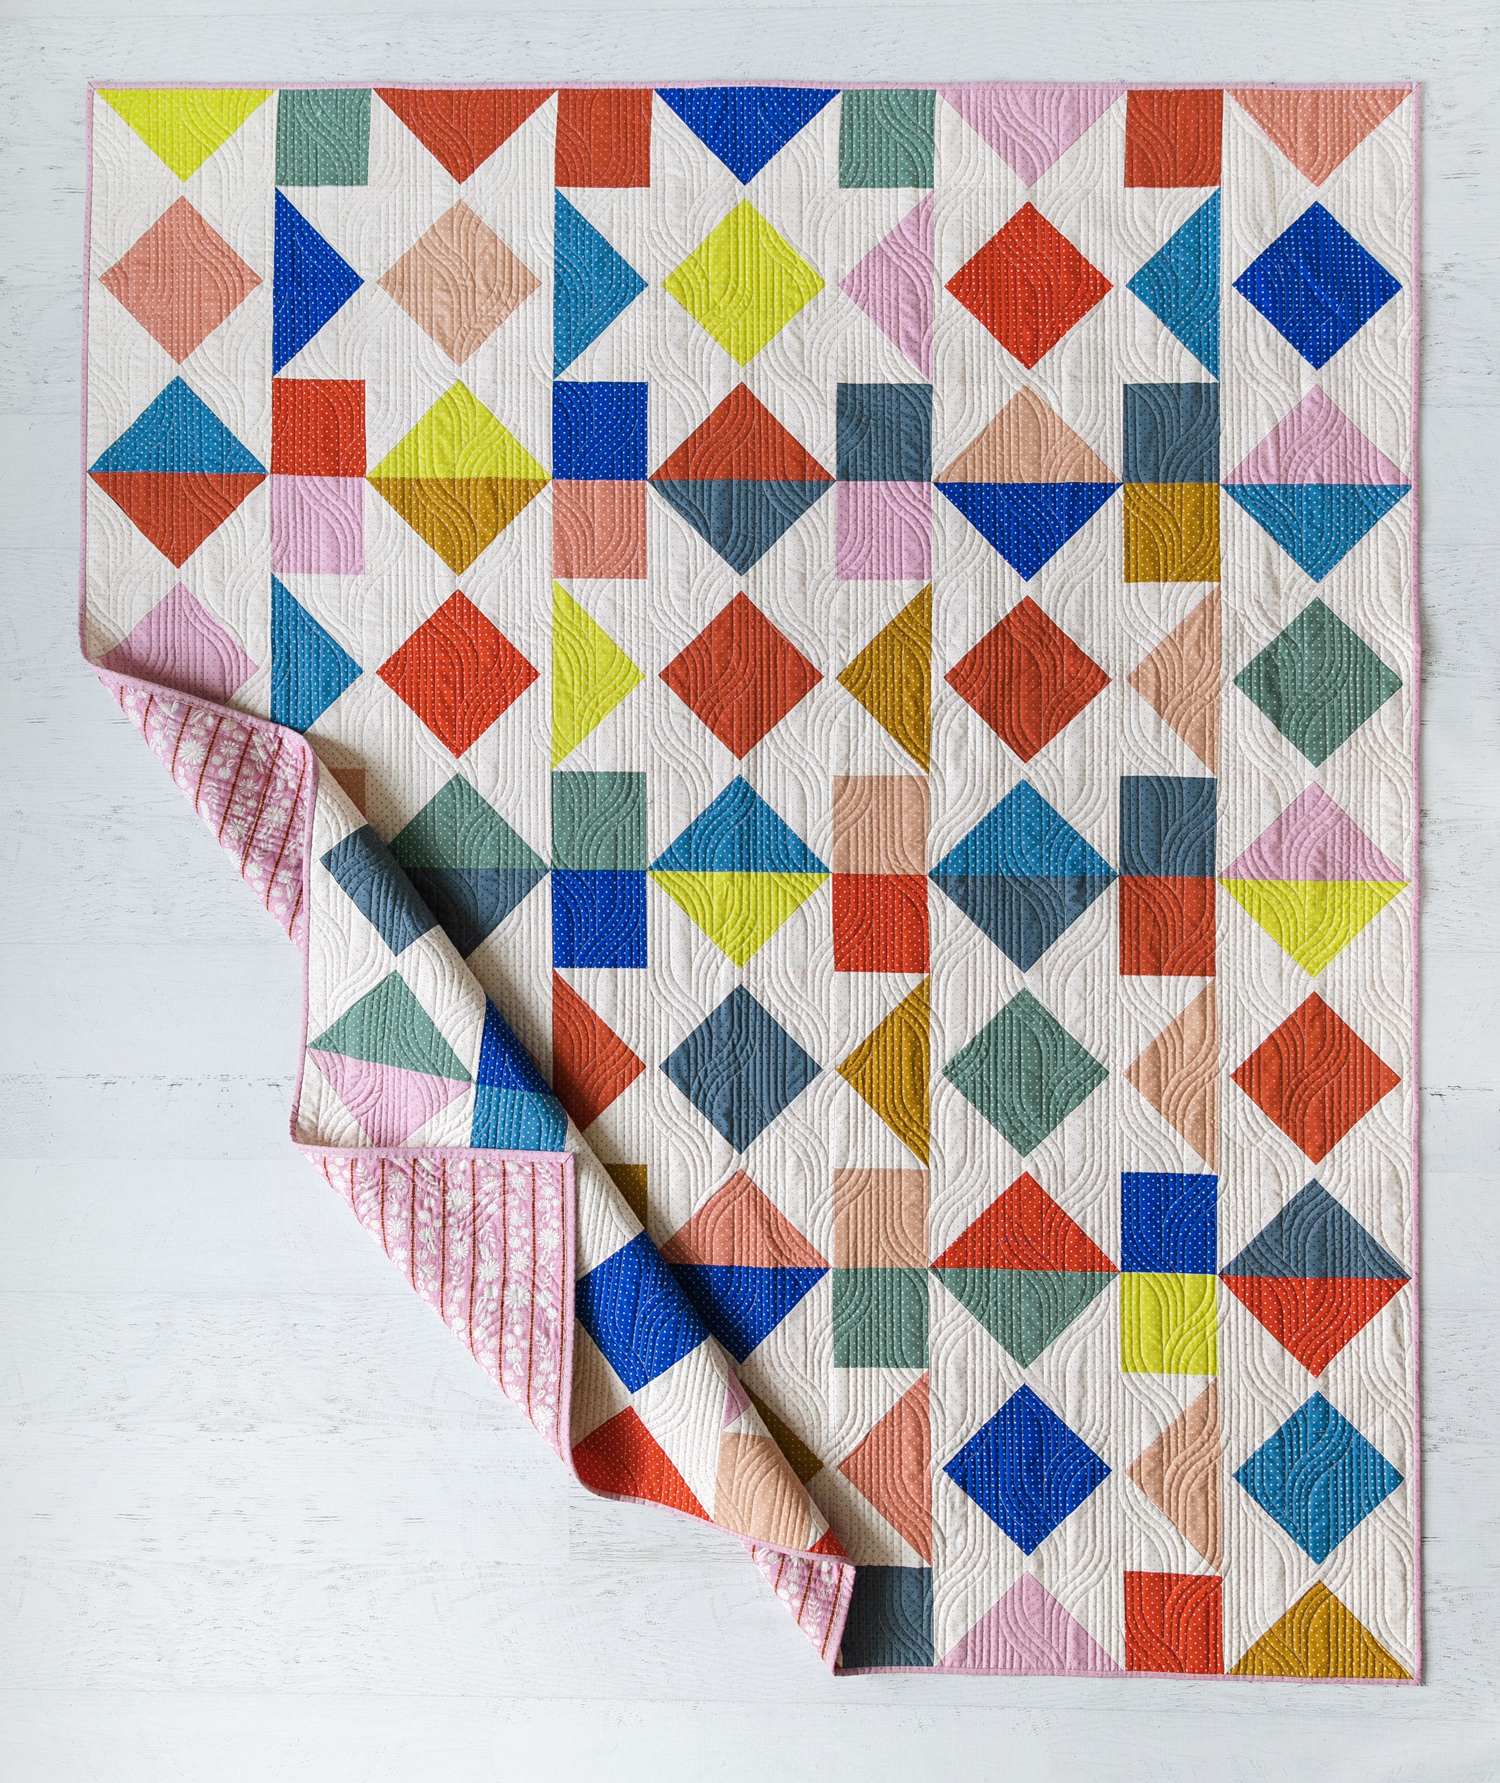
Above is the Starling quilt pattern, available in the shop on March 1!
Make Your Own Flying Geese Quilt Blocks
Flying Geese Supplies
- Two Fat Quarters OR two large scraps of fabric
- Rotary Cutter
- Ruler
- Iron
- Ironing Board
- Pins
- Sewing Machine
Flying Geese Tutorial Steps
Below are instructions on how to make Flying Geese blocks two different ways.
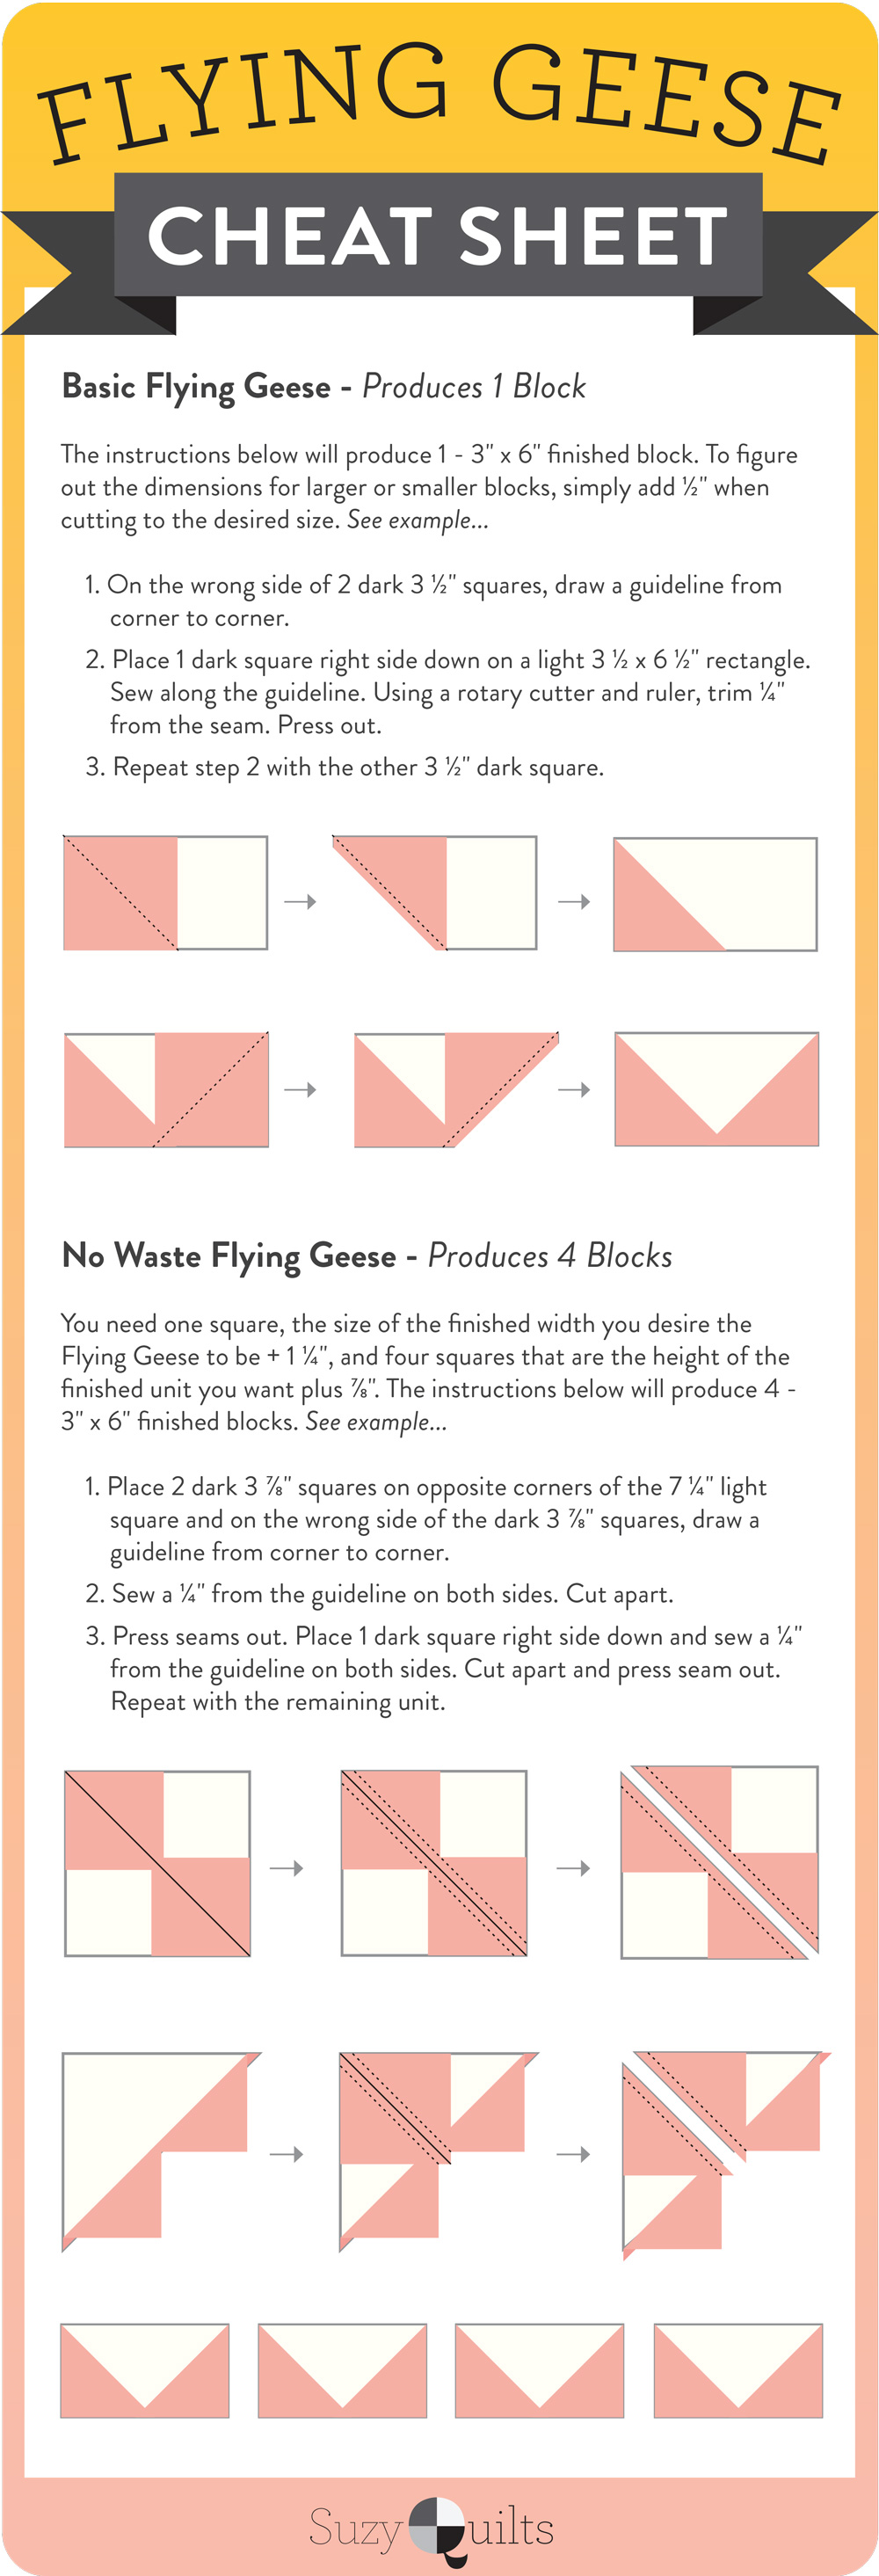
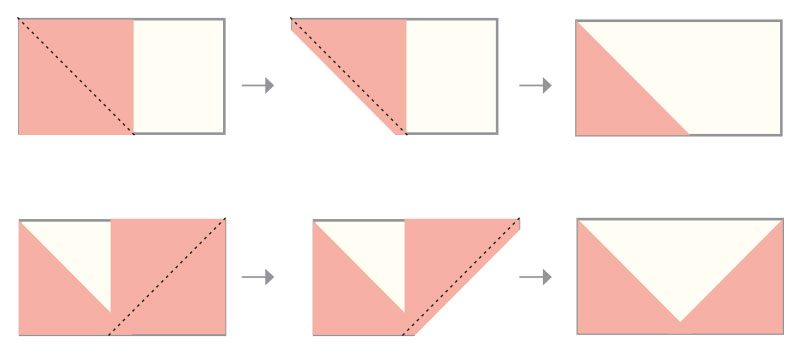
Basic Flying Geese Tutorial - Produces 1 Block
The instructions below will produce 1 - 3” x 6” finished block. To figure out the dimensions for larger or smaller blocks, simply add ½” when cutting to the desired size. See example...
- On the wrong side of 2 dark 3 ½” squares, draw a guideline from corner to corner.
- Place 1 dark square right side down on a light 3 ½” x 6 ½” rectangle. Sew along the guideline. Using a rotary cutter and ruler, trim ¼” from the seam. Press out.
- Repeat step 2 with the other 3 ½" dark square.
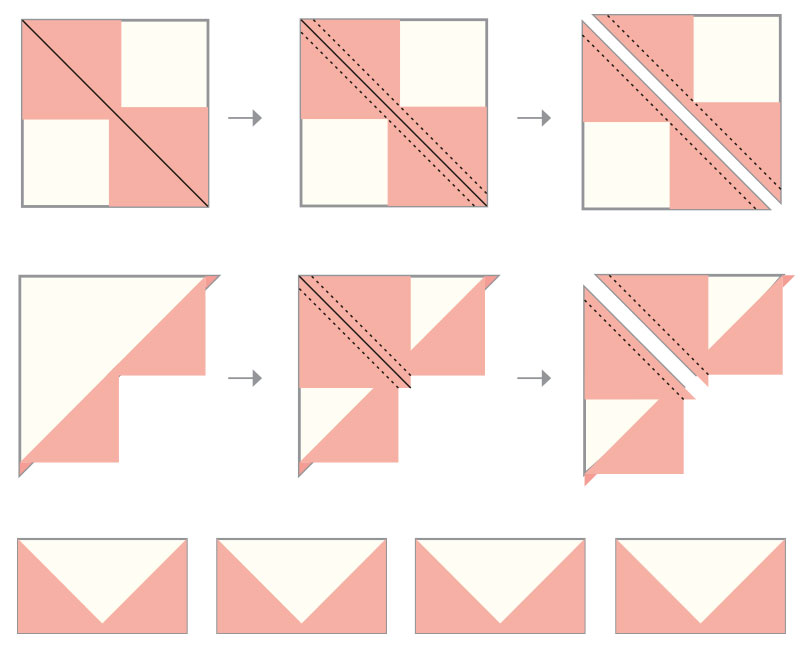
No Waste Flying Geese Tutorial - Produces 4 Blocks
You need one square, the size of the finished width you desire the Flying Geese to be + 1 ¼”, and four squares that are the height of the finished unit you want plus ⅞”. The instructions below will produce 4 - 3” x 6” finished blocks. See example.
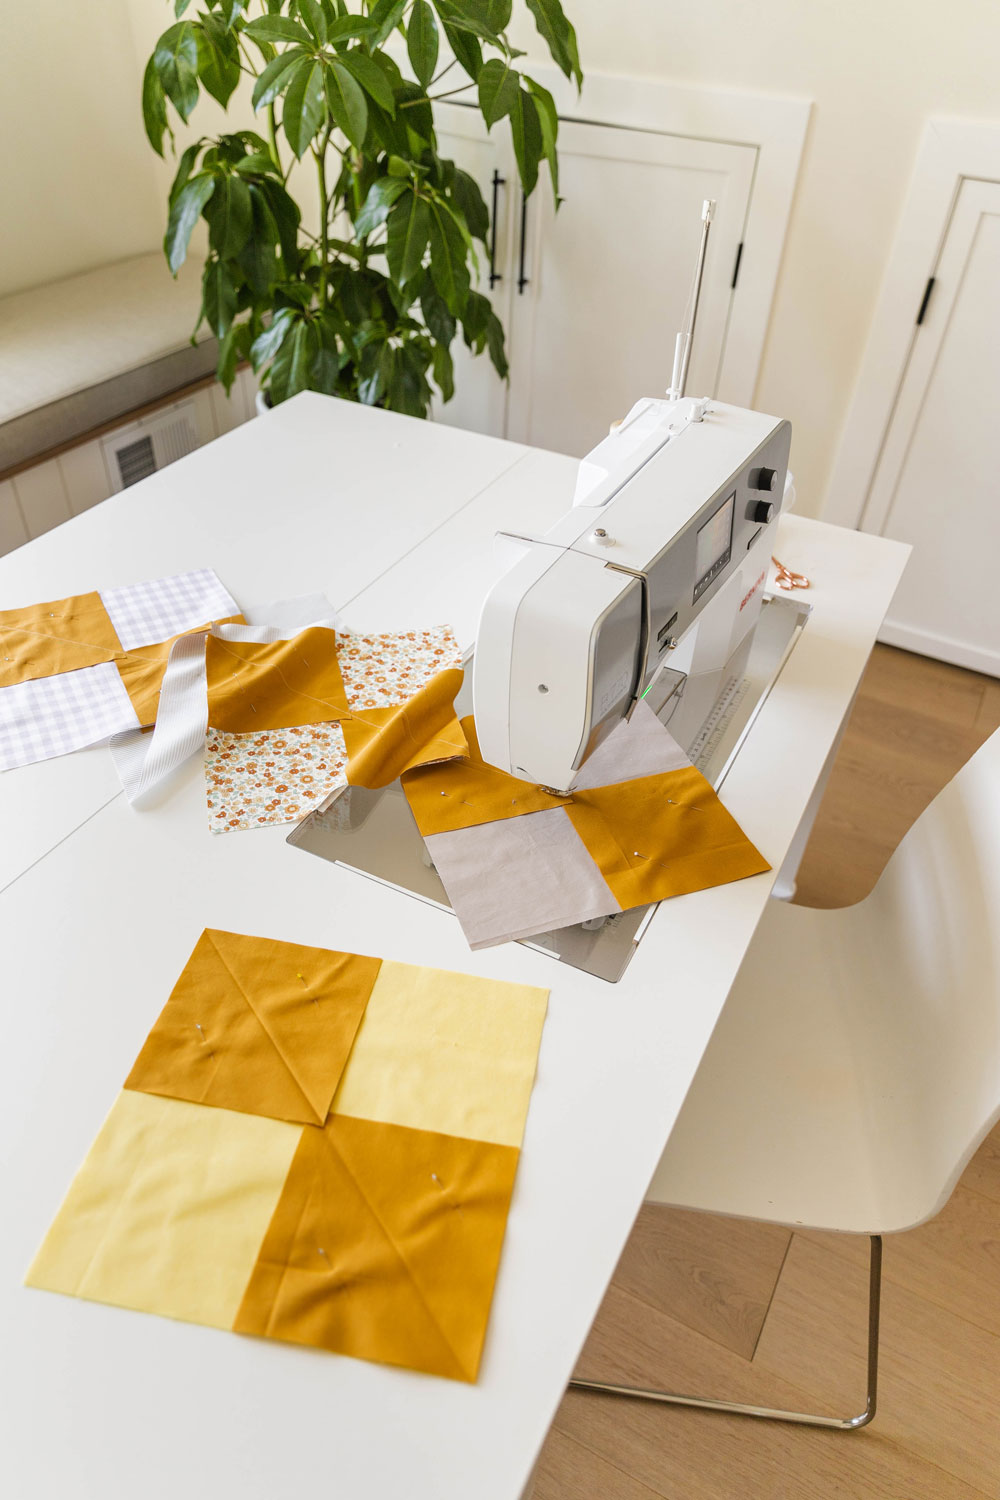
- Place 2 dark 3 ⅞” squares on opposite corners of the 7 ¼” light square and on the wrong side of the dark 3 ⅞” squares, draw a guideline from corner to corner.
- Sew a ¼” from the guideline on both sides. Cut apart.
- Press seams out. Place 1 dark square right side down and sew a ¼” from the guideline on both sides. Cut apart and press seam out. Repeat with the remaining unit.
Flying Geese Tip #1: There are 3 different ways to mark fabric.
I mark fabric differently based on how big it is and how many pieces there are. For a full rundown on marking fabric and quilts, check out this post, Quilt Marking Tools: Different Ways To Draw Guidelines.
For the Shining Star throw quilt, there are quite a few of these flying geese squares, so for the first batch of sewing on the large square I mainly used the creasing method.
Later on I switched to the sewing tape method, but I'm getting ahead of myself. Let's break these methods down.
Method 1: Marker
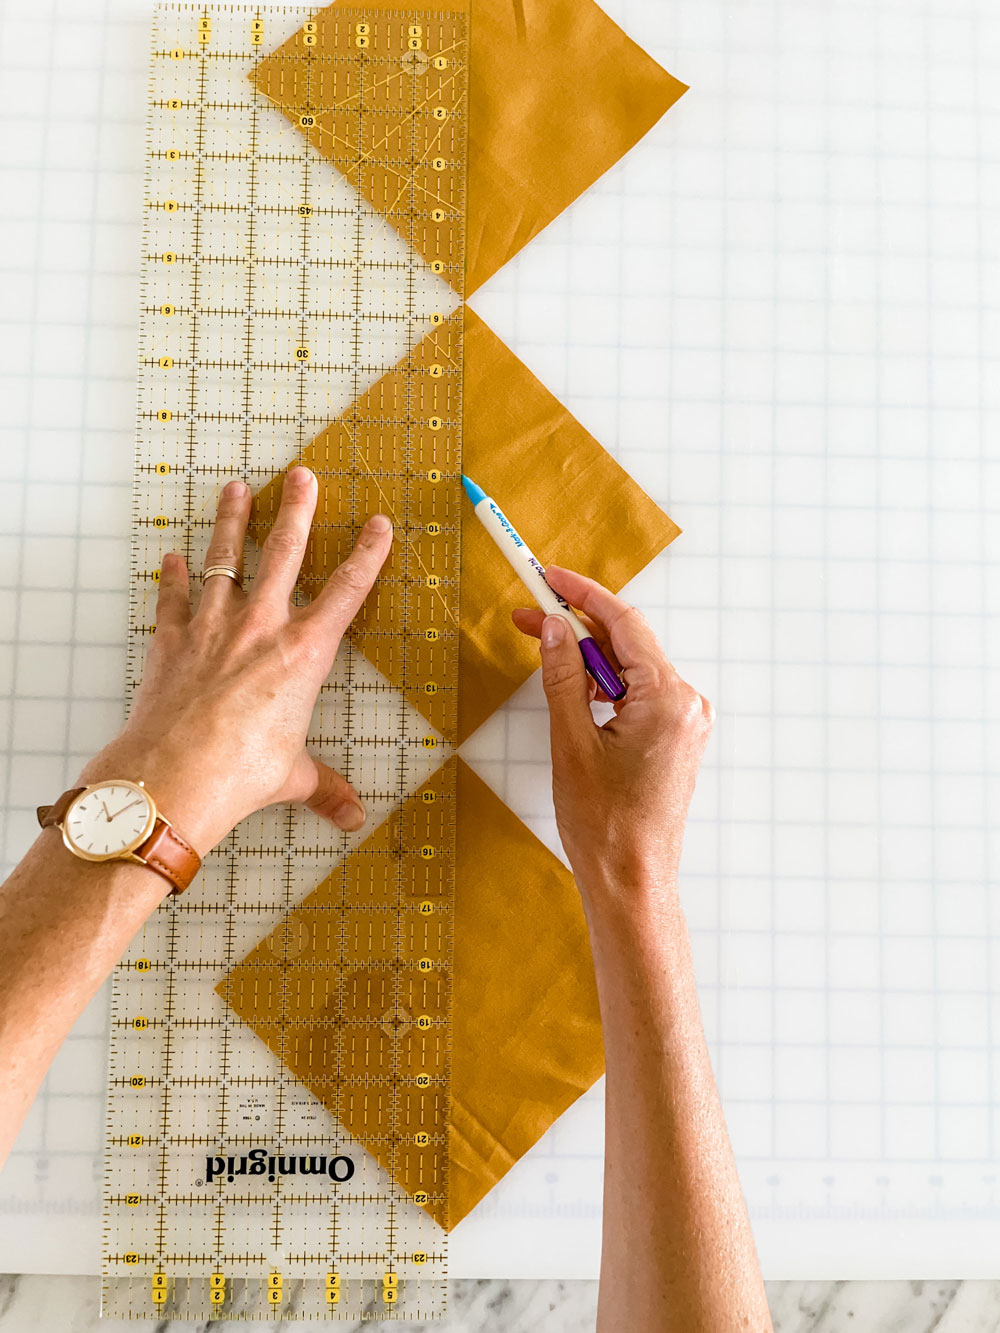
This Dritz water soluble marker is very easy to see and washes away with water. I like to line up a few, point to point, and mark them all at the same time.
Method 2: Crease
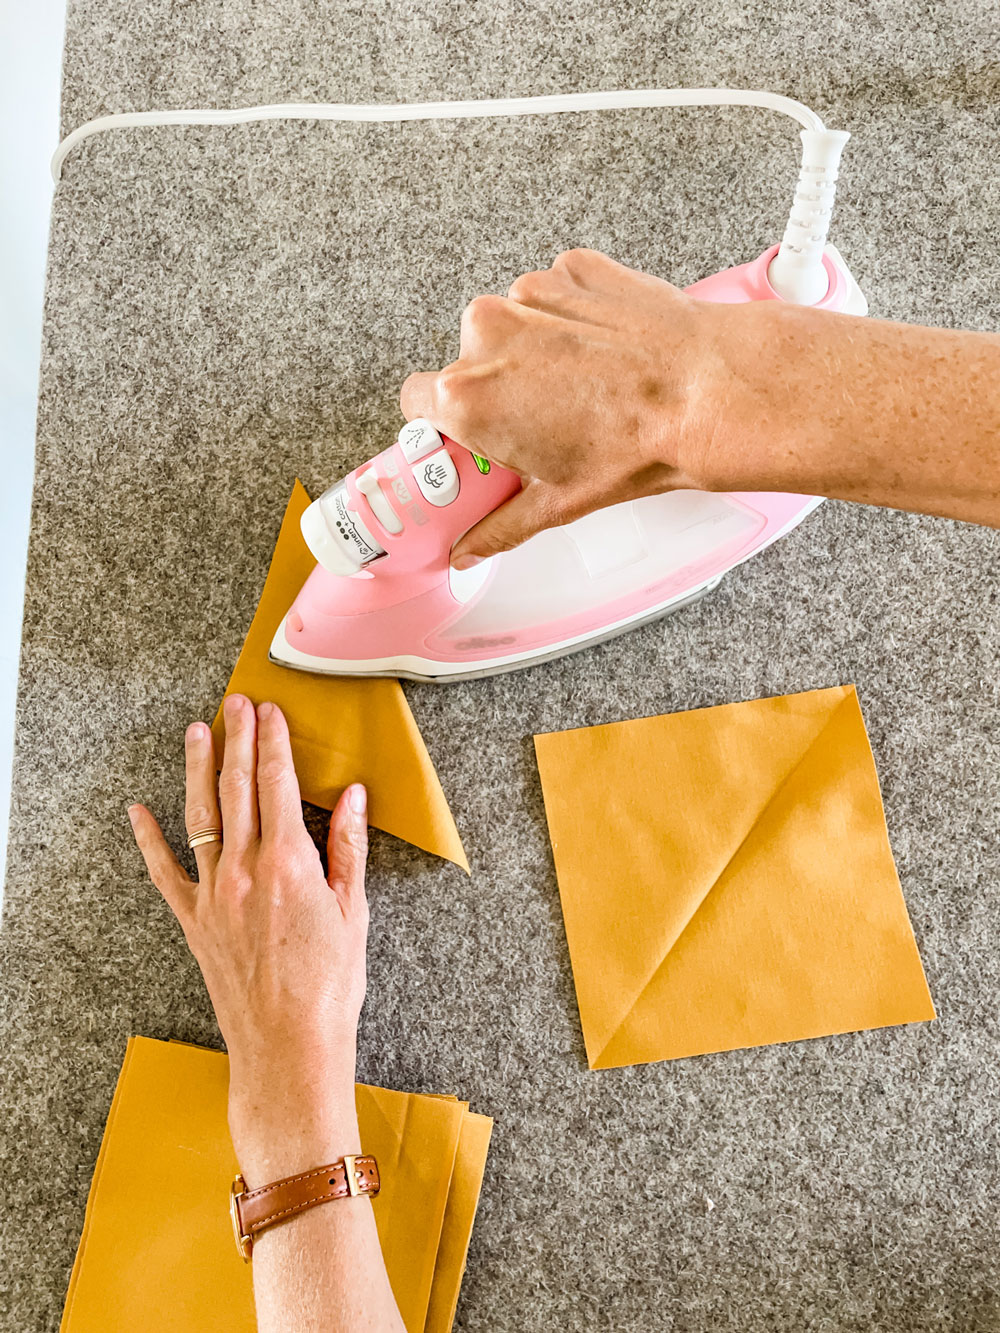
You can use a hera marker or even just your finger nail to make creases. With this many squares, I chose to take them over to my pressing mat and use my iron. I found that if I stacked a couple on top of each other, I could crease them two at a time.
Method 3: Sewing Tape
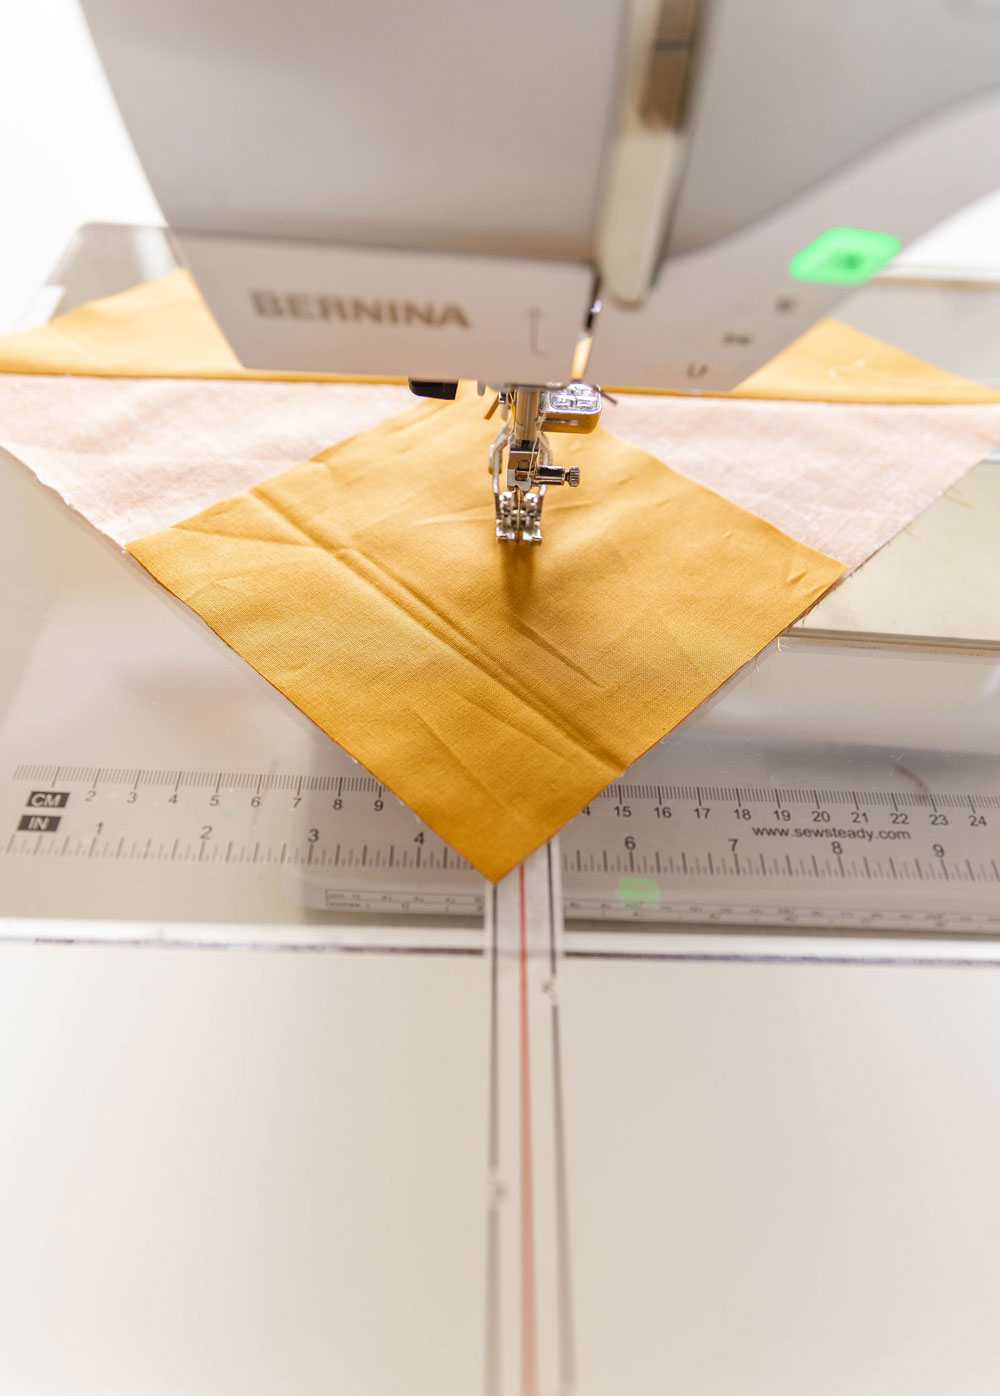
Depending on your sewing surface this tape may or may not work for you. I switched over to using the sewing tape as a guide once I started sewing just a single square to the flying geese units. When I was sewing two squares to a large square, the fabric was so big I couldn't see the tape.
Flying Geese Tip #2: Pin. (At least at first)
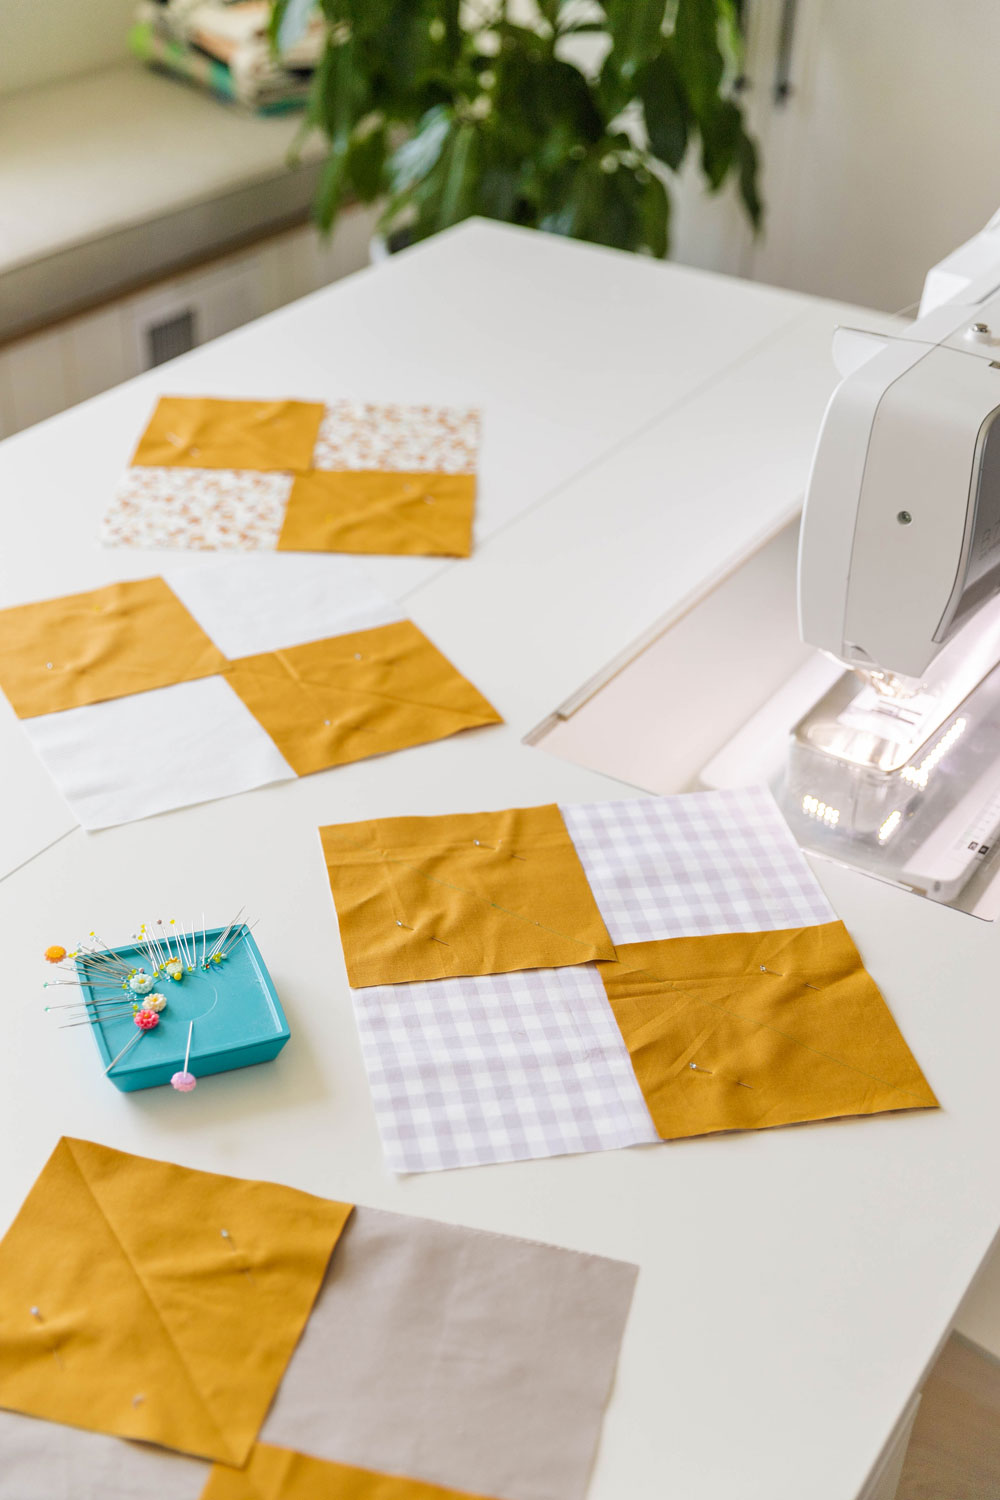
Here's the thing with pinning and I'm sure you already know it—the larger the sewing area the more you need to pin because fabric shifts as it makes its way through a sewing machine. When sewing two squares to these large square pieces, you probably should pin.
I mean, maybe if you sew really slowly you can get away with not pinning, but who wants to sew really slowly? Not I!
Flying Geese Tip #3: Chain piece your flying geese units.
This is a great opportunity to lay out your units, pin and then chain piece them all at once. The more you can pin, sew and press in batches, the speedier the process. (Chain piecing is when you continually sew without snipping your thread.)
(If you're wondering about my sewing cabinet, I wrote a review on it here, The Best Sewing Cabinet For Quilting & Crafting.)
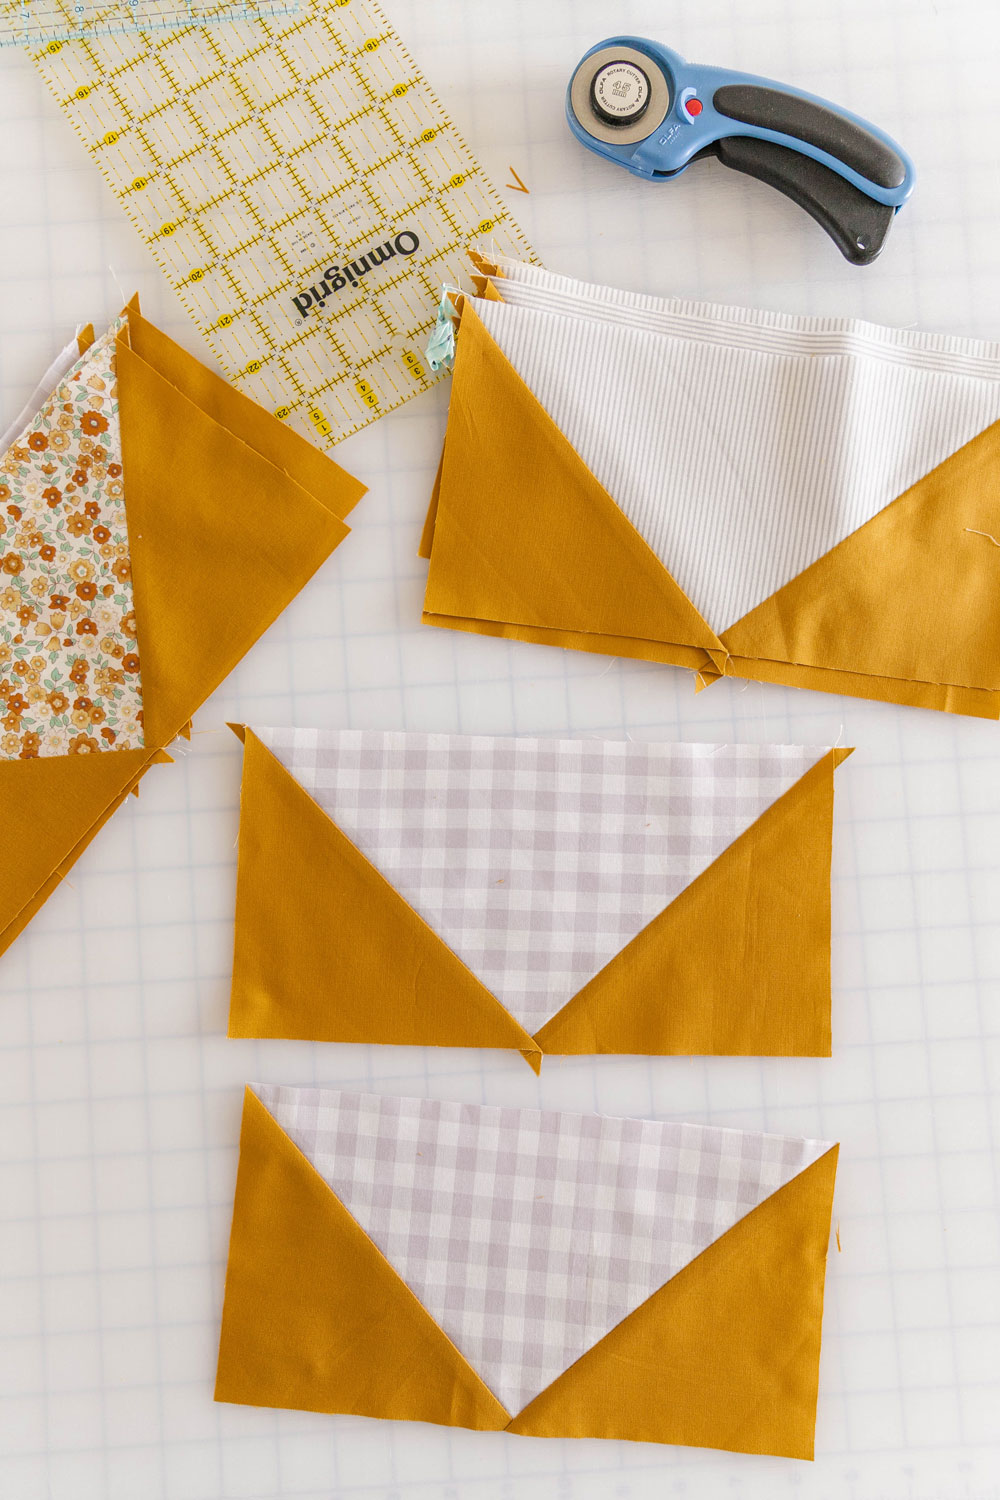
Flying Geese Tip #4: Don't just trim the dog ears.
I know it's tempting to go snip snip with your scissors and move on to the next step, but many times flying geese units finish ever so slightly larger than what they should be for the pattern. So, yes, you really do have to trim them down.
I'm sorry, I'm sorry! But I promise just some slight trimming will make you MUCH happier when it's time to assemble these blocks. Plus this way your geese finish sooooo tidy and perfect.
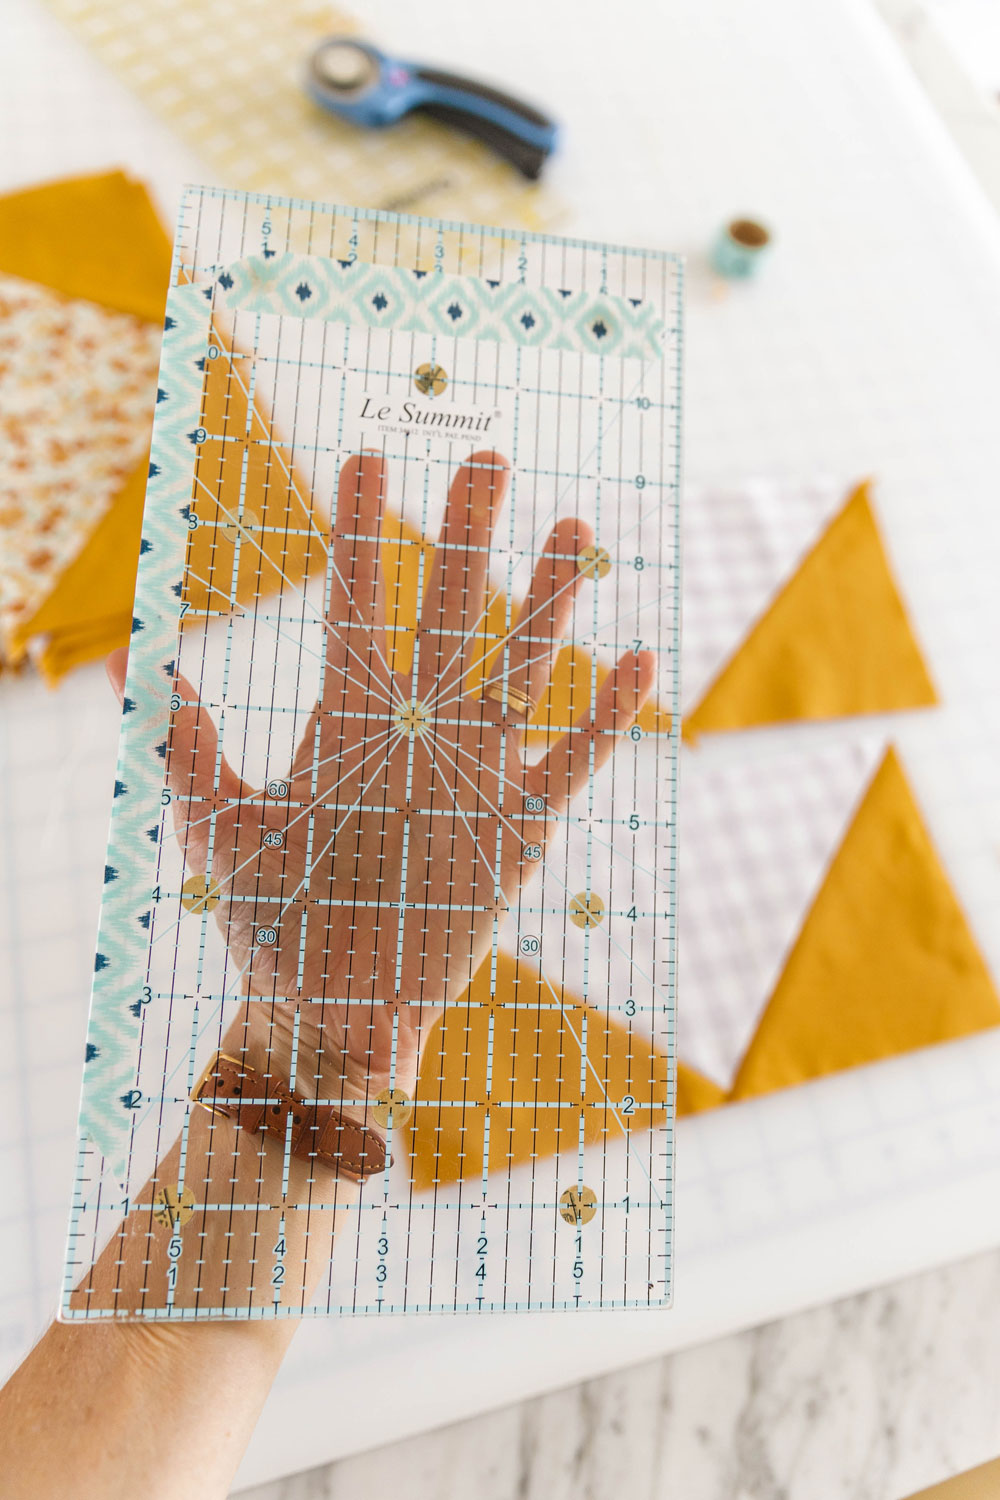
Flying Geese Tip #5: Add some tape to your ruler.
If you are having trouble knowing what to line up on your ruler when trimming the flying geese, add some guides with washi tape or painter's tape. I even use a Sharpie sometimes to draw dots, lines and arrows to help me see what's what. With some soap and water the Sharpie marks wash off.
Got questions about cutting or making flying geese? Ask them below in the comments or in the Suzy Quilts Patterns Facebook group! We are here to help and send some encouragement your way.




love it!! i want to try one soon. maybe a table runner as a starter
Thank you for the Flying Geese info!
-Jean💟
Ꮩery great post. I just stumbled upon your blog and wanted to say that I have really
enjoyed browsing уour blog posts. After all I’ll be subscribіng for
your feed and I am hoрing you write again sօon!
I especially like the cheat sheet!
Hey Suzy, does this leave any extra fabric so you can trim/square up the blocks to 3×6? Or should I add a bit extra to be able to do this?
Thanks!
These makes pretty exact blocks, so add a little extra if you want wiggle room.
This is genius! I made it and it’s so easy and beautiful!! Thanks!
Question: Why the 3 7/8” measurement? Wouldn’t it be easier to just cut 4” blocks and then trim the finished flying geese’s blocks down? Please what is the reason for the 7/8?
Thank you
You can definitely do that. This is just the exact math assuming a 1/4″ seam allowance.
Thank you for helping out, wonderful information.
Excellent blog you have got here.. It’s hard to find quality writing like yours these days.
I seriously appreciate people like you! Take care!!
Where can I purchase the pattern for the Fresh Lemons quilt?
It looks like the link was broken, but I just fixed it 🙂
Love this blog. I prefer this method over video. Thank you soooooo much😃
I want a finished unit that is 4 x 7 1/2 “. I cut a large square 8 3/4″ (width +1 1/4″) and 4 smaller squares 4 7/8″ (height + 7/8″). I end up with a unit that is 4 1/2 x 7 3/4”. Maybe this only works with rectagles that have a length exactly twice their height…..?? I’m not good enough with math to make this work!
The No Waste 4-at-a-time method is designed for exactly what you said – blocks that are twice as wide as they are tall. For what you’re trying to do, the Basic one-at-a-time method should work, though.
The no-waste-4-at-a-time method is a very neat method. But it hardly leaves any seam on the sides. So if we join two columns of flying geese how will one get neat points at the two sides of the base?
The seams are a 1/4″ with this method. If you find that you’re having trouble sewing and trimming because the seams are too small, add a 1/4″ to your cut size and then trim the blocks when you’re finished.
Thank you for all of your great illustrations and help! I just started on a flying geese crib quilt, but my blocks don’t have enough seam allowance for a 1/4” seam. The corners will be cut off on all three sides of the triangle when I sew the blocks together. I cut 7.5” square and 4” smaller squares so that I’ll have a 6.5 block. Can you help? 🙂 Thank you!
It’s possible your 1/4″ seam is a bit wider than you realize. Many quilters sew a “scant” 1/4″ to make up for the added seam the folded fabric makes. I first suggest double checking that your seams are in fact a 1/4″ and then try using a tailor’s clapper to get extra flat seams – https://suzyquilts.com/tailors-clapper/
I love the time you take to research and enlighten us about quilting! Thank you! Who knew the craft we all enjoy served a necessary purpose at such a critical time in history.
Now….on to the flying geese.
Thank you again Suzy!
Another very helpful post! I’ve recently discovered your blog, and am delighted with the amount of useful information it contains.
I’m so happy to hear that! 🙂
I have just discovered your site and so pleased to find you. You have so much to offer in the quilting world and I appreciate your talent. . I was wondering how one can download the free quilt that you are offering–Bows and Arrows pattern. I just do not see where to go to download it.??????? I live in southern New Mexico and your pattern is so perfect.
Your work is very inspirational. Thank you so much..
Hey Judith, if you sign up for the Suzy Quilts newsletter you get the Bow and Arrows pattern for free! Click here to sign up – http://bit.ly/SuzyQuiltsNewsletter
Hello! I grew up watching my mom quilt, and I have long been wanting to learn. I just finished my first ever quilt, using this tutorial and a bunch of your other posts (and, of course, advice from my mom). Thank you for taking the time to post and teach us newcomers…it really helped it seem doable.
Currently making the Stars Hollow quilt and just want to confirm — should the end result end up with dog ears that need to be trimmed at the corners where the triangle points are? I see the dog ears in part of the illustration but not at the end so I just want to make sure I didn’t make a mistake!
Yes, that’s exactly correct!
Suzy I am a new quilter and I feel like I just learned an insider trick! Thank you for the easy to follow cheat sheet! 😍 can’t wait to try this.
Have always enjoyed your blog. I was particularly moved by the historical “references”. Surely more interesting (and to such a more noble end) than talking about @%#Q$!#^ election results. Quilting really is the “fabric of our lives”. in so many ways. Thank you for being such a great contributor!
Thank you for this tutorial. I’m a new quilter, and I’d like to use both ‘large’ and ‘small’ flying gees, as in ‘Wonderlust’ by Maureen Cracknell. How does one do this? Are the small ones half the size of the large ones so that two of the small ones ‘fit into’ a row of the large ones? Does one have to make separate small and large rows? I’m quite muddled.
Hello! new quilter here. Thank you so much for this article –really enjoy your site! This may be a basic question, but any advice on how to press the seams to avoid excessive bulk at the tip of the triangle? thanks!
Yes! This post, vith a video tutorial will help – https://suzyquilts.com/how-to-press-seams-in-a-quilt-with-video-tutorial/
I am a new quilter, but wanted some flying geese on the border of a crib quilt. I used scraps to practice the no waste option because I didn’t understand the directions. However, I followed them exactly, and it worked beautifully! I’m using 5” squares from a charm pack so I adjusted my small squares to be 2 3/4”. I don’t know if that is technically correct, but it seemed to work. Thank you!
There is a wonderful book Hidden in Plain View by Jacquline Tobin actual account of the story passed down from generation to generation in the family of Ozella McDaniel.
“Ozella’s Underground Railroad Quilt Code,” offer proof that some slaves were involved in a sophisticated network that melded African textile traditions with American quilt practices and created a potent result: African American quilts with patterns that conveyed messages that were, in fact, essential tools for escape along the Underground Railroad.
Thanks for reading, Trine! “Hidden in Plain View” is a pretty controversial book among professional quilt historians. Here are some links that help explain! First, this is from the International Quilt Museum: https://worldquilts.quiltstudy.org/americanstory/quiltsare/undergroundrailroad
And here is an article that features enlightening quotes from noted quilt historian Marsha MacDowell: https://folklife.si.edu/magazine/underground-railroad-quilt-codes
The research continues!
I want to make a quilt with 5 different fabrics that contain various bee patterns in bee hive layers, I am not sure what type of pattern to do in the void area around each hive. The quilt is 29 x 42 and each bee hive is approximately 6″x7″.
Should I have another pattern or a solid color piece (like yellow) or another simple pattern surrounding the bee hives?
I made the bow and arrow baby size quilt. My middle row was way short. I am a beginner but have quilted before. I double checked my seams and they were 1/4 inch. Any thoughts?
Hi Rosey! If your seam allowances were accurate, it mostly likely was a mistake whenever you first cut your fabric. Can you trim the outer rows and make the quilt a little shorter?