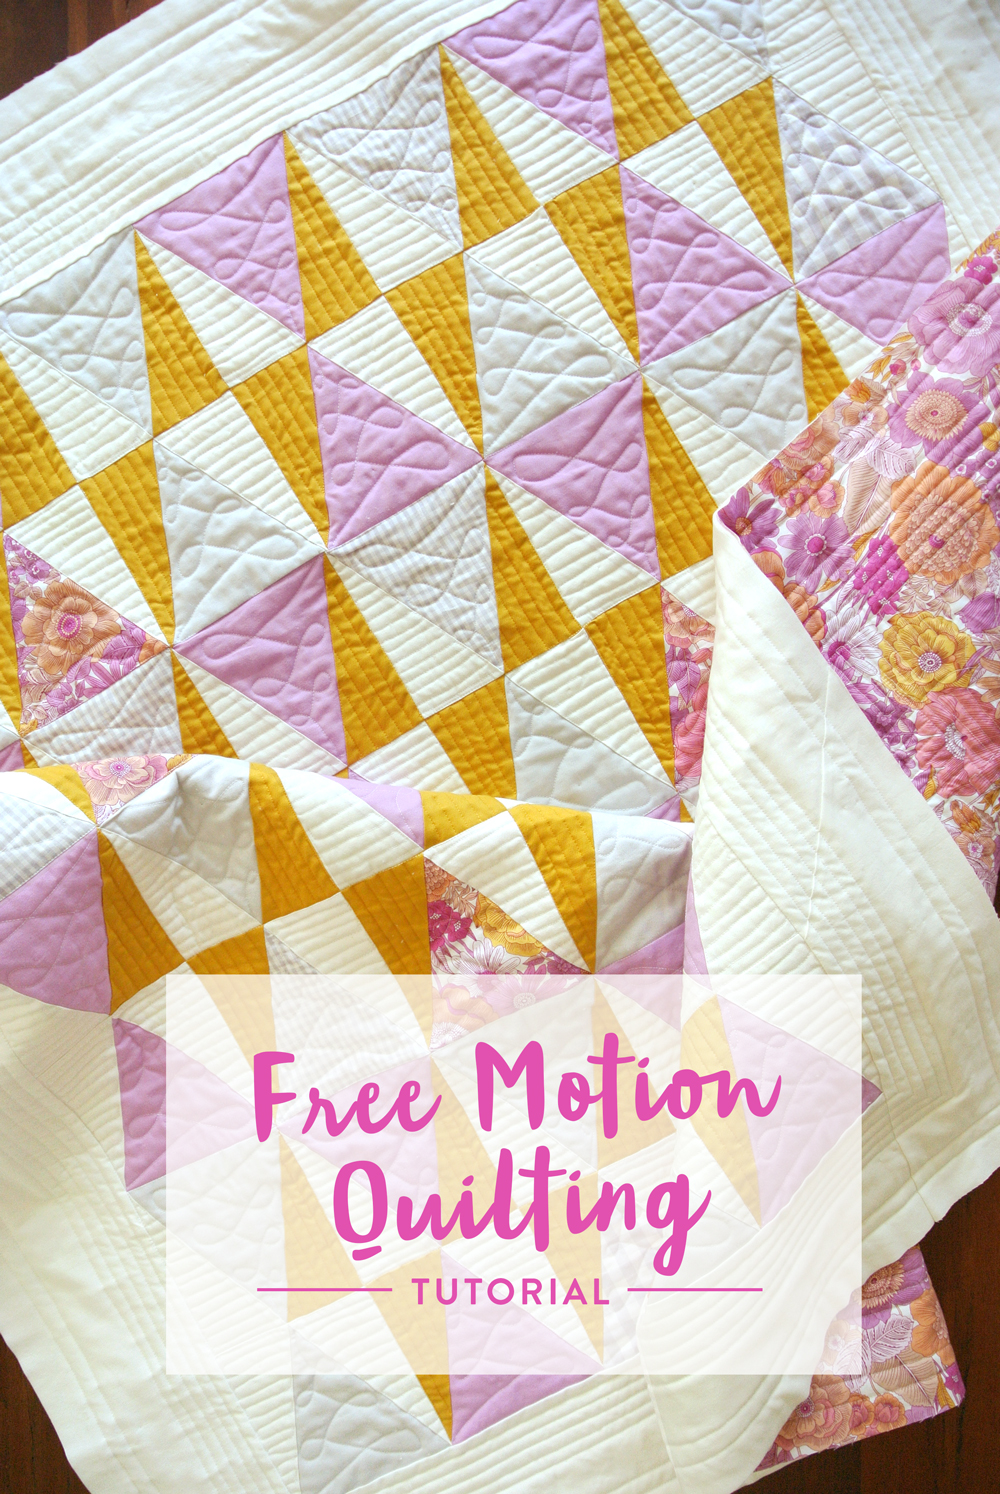
Free Motion Quilting Tutorial for Beginners

If you’ve ever been intimidated by free motion quilting, raise your totally capable hand. I know. I'm right there with you. At first, basically everyone feels like free motion quilting is out of their league, but everyone can do it – with the right tools. Also, with a step-by-step free motion quilting tutorial geared toward beginners.
There's a saying that a poor craftsman blames his tools. Well, that doesn't apply here. The right tools can make all the difference – especially in the beginning when you are learning.
You’ve got the hands, I’ve got the plans. Let's dive in.
What is Free Motion Quilting?
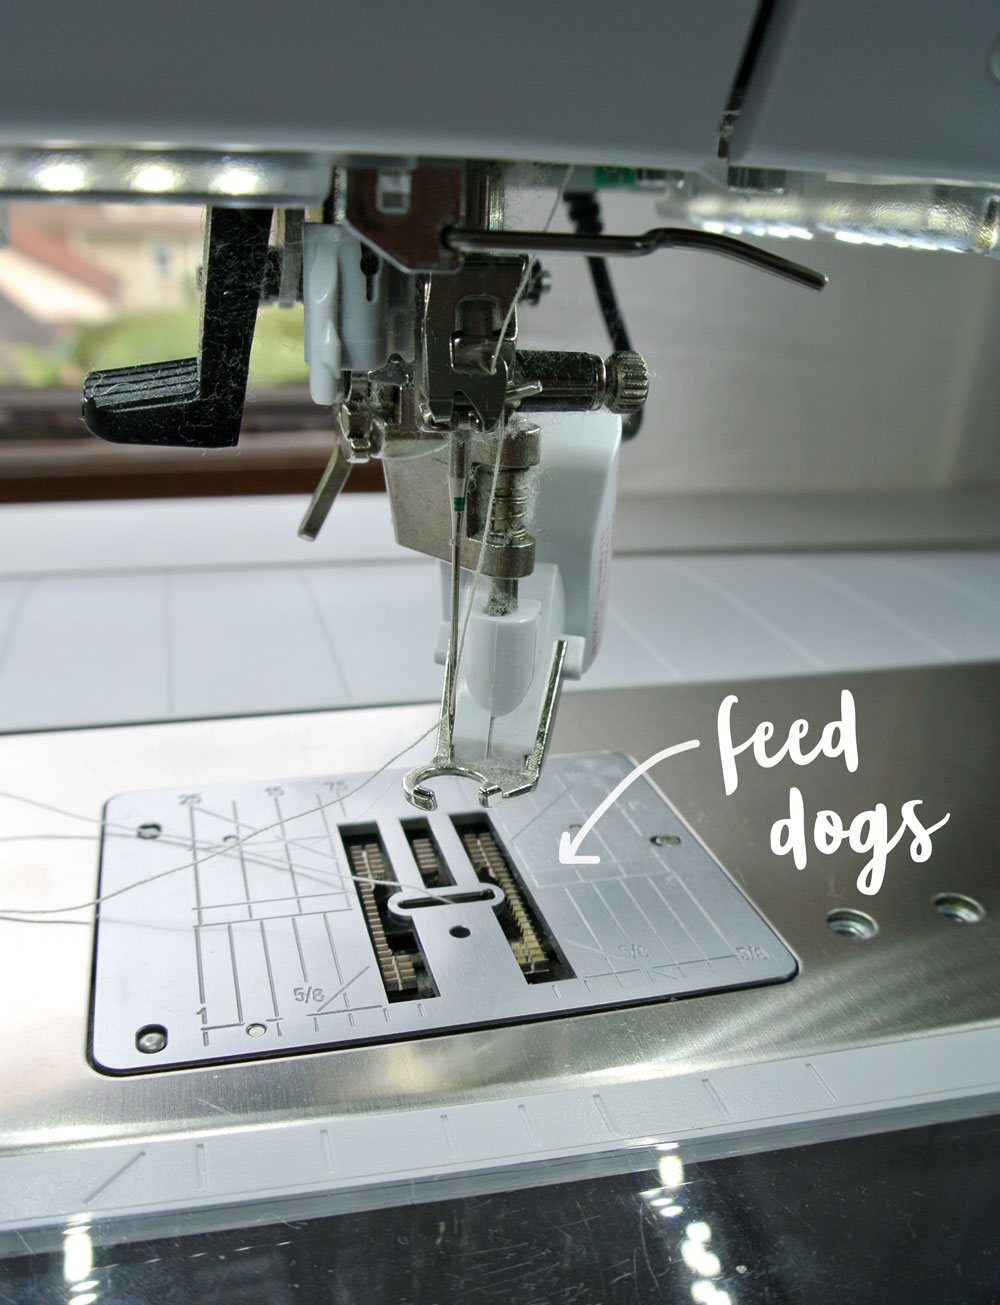
Without going into lots of detail, to free motion quilt, your sewing machine must be able to lower its feed dogs* so that there is no resistance or pushing of the fabric. You will also need a free motion foot that is compatible with your sewing machine. In most cases, it is brand-specific.
Once the feed dogs are lowered and your free motion foot is securely attached, you are in complete control of the fabric and the stitching. Your machine will provide no resistance so you can freely maneuver the fabric or "quilt sandwich" around in any pattern you like.
Trending patterns!


Quilt Patterns


Quilt Patterns


Quilt Patterns


Quilt Patterns


Quilt Patterns


Quilt Patterns


Quilt Patterns


Quilt Patterns


Quilt Patterns
*Feed dogs are the metal teeth-like plates that rest level with your sewing machine surface. They are used to help pull fabric or "feed" fabric through your sewing machine. (I get the "feed" part, but the "dogs?" Maybe it's supposed to reference dog's teeth? Feed for thought.)
This much freedom can be scary, and at times, frustrating. I can say with certainty that you won't sew perfectly the first time you try. But that's OK! We're a laid back lot here at Suzy Quilts and perfection is overrated. The key is to practice on small projects. I like to practice by trying to outline a design on some fabric.
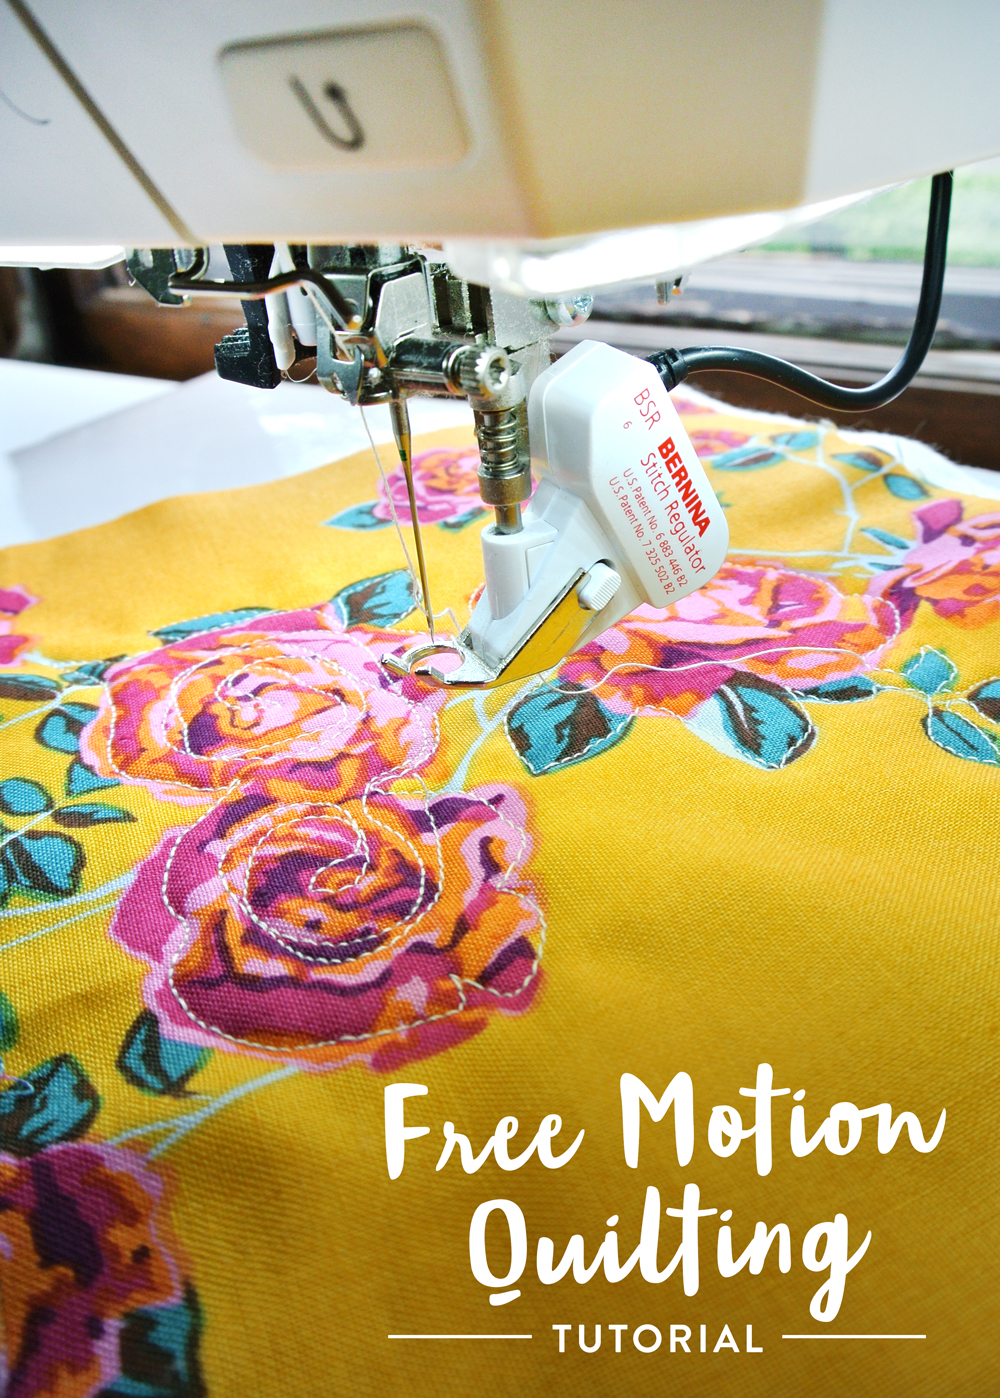
In the video below I am using a few of the tools I list below and simply outlining the pretty floral design in some Anna Maria Horner fabric. Check it out!
Free Motion Quilting Tutorial
My Favorite Free Motion Quilting Tools
I'll preface this first tool by saying I know not everyone has a BERNINA sewing machine. I actually switched to a BERNINA earlier this year and this BSR tool was a big reason why. As I mentioned in a previous sewing machine post, the BERNINA Stitch Regulator adjusts the stitch length to your speed so that your stitches remain even...even if your speed doesn't. 😉
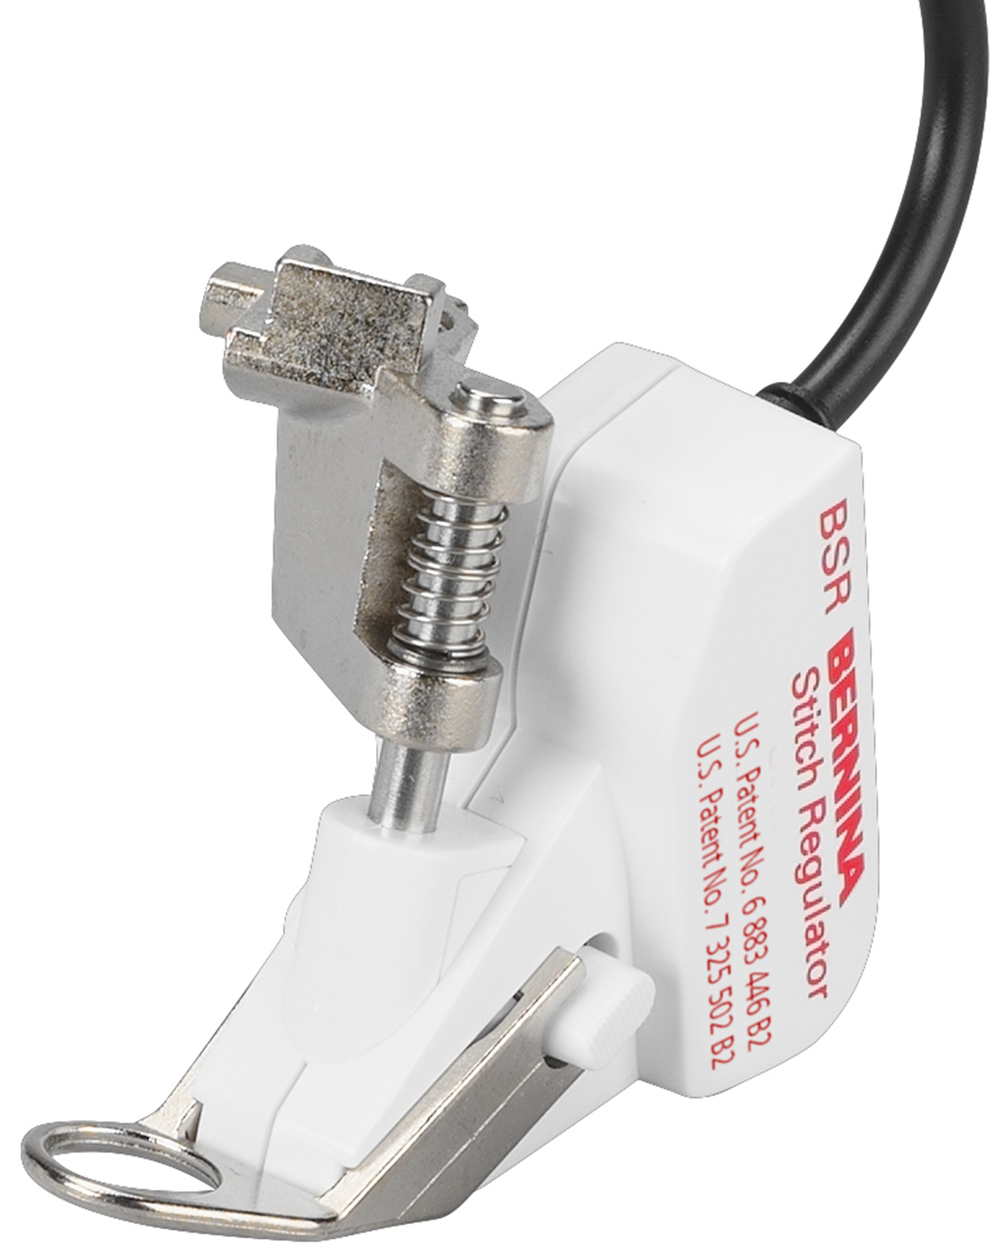
BERNINA Stitch Regulator (BSR)
This amazing little foot produces neat, consistent stitches that are precisely the same length while free motion sewing.
The way it does this is through sensors that react to the movement of the fabric. This nifty accessory is able to adjust the speed of the machine automatically.
Get this FREE Liberty & Flowers quilt pattern here!
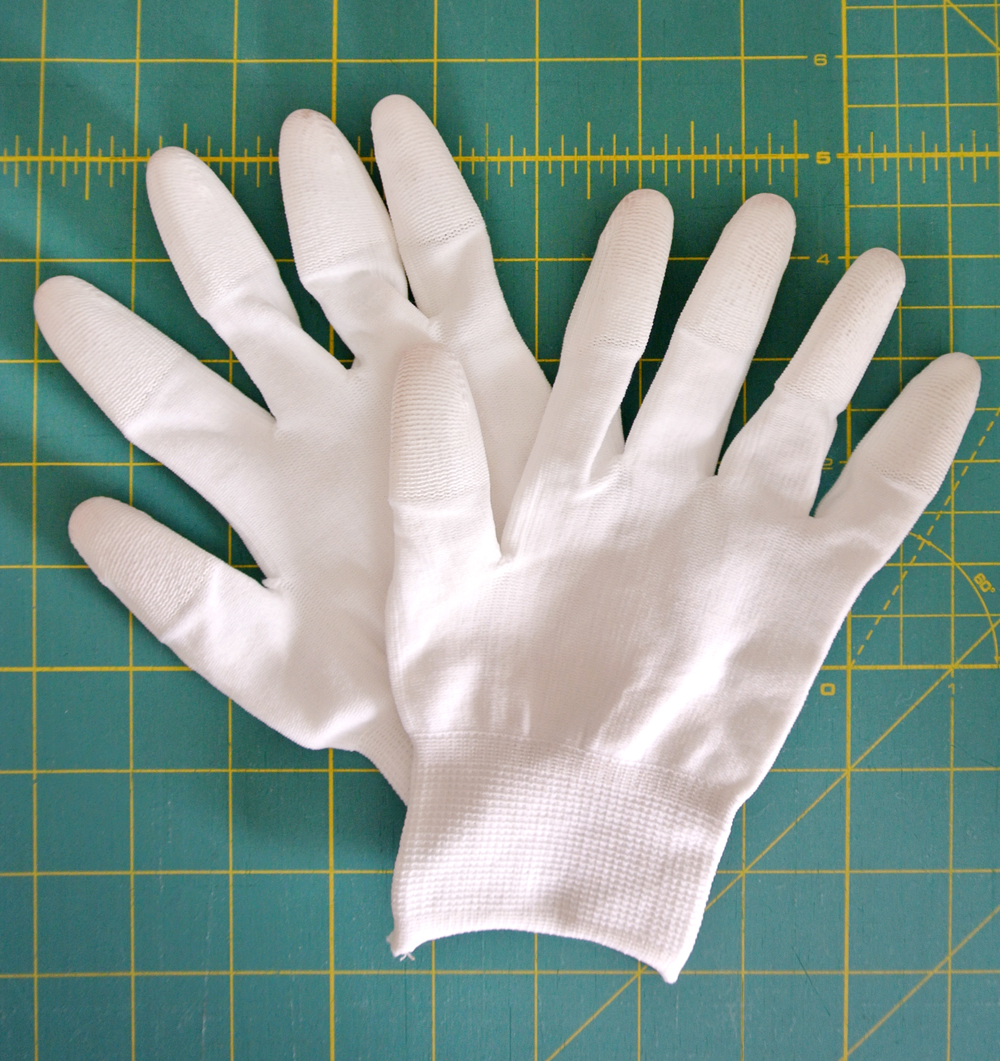
Sewing Gloves
Whether you’re a free-motion newbie or you’ve been doing it for years, quilting gloves are going to make your life waaaaay easier.
I found my favorites on Amazon – they’re really affordable, and definitely get the job done. Just ignore the fact that they’re called Machingers. Actually, no. That’s an awesome name. Wear your Machingers with pride.
You might try having two pairs on hand – one for working with dark fabrics. When you’re really working it, dark fabrics can make the tips of your gloves a little bit smudgy (the color probably won’t transfer to light fabrics, but I like to play it safe.)
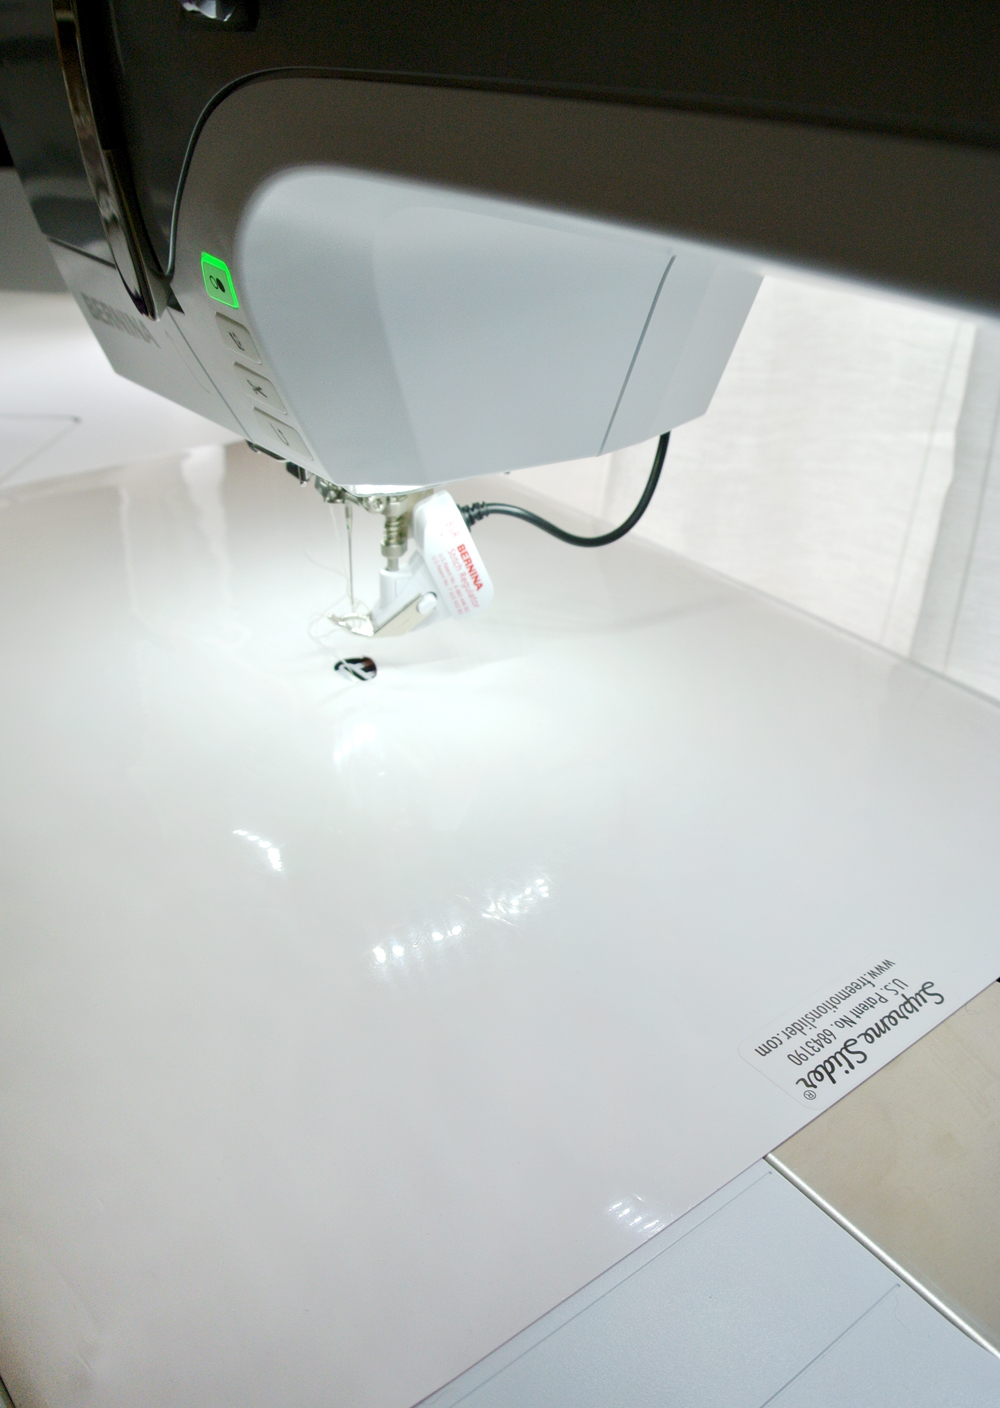
Supreme Slider
I'm one of those people who enjoys a good workout...at the gym. When I'm in my sewing studio I want my quilting to be as smooth and easy as possible. Using a Supreme Slider while free motion quilting gives my bulging biceps (they totally are...take my word for it) a break. Oh, and we’ll give some credit to the gloves, too.
The Supreme Slider may seem like just a little slab of plastic, but it really does make a huge difference, especially cutting down on drag.
Before ordering, measure your sewing machine – these come in different sizes and you want to make sure it's going to fit.
What are your tools, tips, tricks or thoughts on free-motion quilting? Have you tried it with success? I'd love to hear about it in the comments!


Ok, I really need to give this a go! I have always had a longarmer finish my quilts, but it’s time to be independent!! Thanks for the push!
You totally got this! You may want to start with simple straight lines using a walking foot. But in no time you will be a free-motion champion!
It was so nice to meet you in person at BU…. your class keep everyone interested and the time flew by so fast… enjoy your Bernina, they are awesome.
Likewise! Before BERNINA I didn’t know what I was missing, but now I’m 100% on board and can never go back! haha 😉
Thanks Suzy. Now I feel like I definitely neeeed a BERNINA!!! 😍
haha well…you won’t regret it 😉
My fear with free motion quilting is, how do you keep your design consistent?? And how do you choose a design?? I just bought a machine with a quilting foot so I can give it a try, but I’m terrified!
I’m a new quilter and I send my tops out to be quilted. But at $100+ per quilt it’s getting too expensive. I have 3 tops waiting to be quilted now. My husband asks me why I’m not quilting and I tell him. We are both retired now and money is tight. So, after watching this tutorial, I’m going to go for it! Wish me luck!
Yah! You can totally do it! Also, straight line stitching is another great option, and a little easier for large quilts. https://suzyquilts.com/how-to-machine-quilt/
If you still want to quilt, we started a non profit group called quilting for a cause NJ. We sew quilts for homeless and people in need. We received tons of fabric donations and supplies. Batting is bought from donations we receive. We have a facebook page and we periodically ask for $$ donations.
I just started free motion quilting (loke a week ago) and my biggest recommendation is to make yourself a nice size scrap quilt sanwich and practice before you give it a go on your project! Maybe you will do less seam ripping than me 😉
Do I need to adjust the tension? My bottom thread is very lose. What should I do? I am new at this and don’t know how to adjust the tension
If your bottom thread is really loose, it could be a speed issue. Try sewing faster and see if that solves the problem. If that does nothing, then start slowing adjusting the top thread tension to make it tighter. If you look up “free motion quilting troubleshooting” there are also other blog posts and videos that could help.
And I can not find the tutioral
The tutorial is the entire blog post and also the embedded video 🙂
Hi, I went to my Bernina store and said I wanted a foot for free motion quilting. They didn’t show me the stitch regulator— just the darning/ embroidery foot #9, so I bought that. I hope to learn from tutorials like yours instead of going to a class. Hope I can do this!! Yikes
Really? I’m guessing the BSR isn’t compatible with your model. That’s the only thing I can think of. Before getting the BSR, I used a simple darning foot and it worked just great. Good luck learning! It’s a lot of fun. 🙂
Any best recommendations for sewing machine for kids?
I wrote this guide last year and I think it still holds up – https://suzyquilts.com/ultimate-guide-buying-best-sewing-machine-kids/
Are there such things as stencils to practice quilting patterns?
Definitely! Stencils, rulers and marking a quilt with guidelines is something even the pros do!
Hi Suzy. I just completed my first quilt project —a baby quilt — and I couldn’t be more pleased. I’m a quilter now!! But I didn’t (still don’t) have the proper equipment yet. My basic Brother machine won’t let me adjust the feed dogs and no plates will fit over them. So I did FMQ with the feed dogs up. At some point, hopefully very soon, I’ll upgrade to a better machine. Looking forward to what’s ahead!
Absolutely brand new to FMQ so please don’t laugh, how fast does the needle have to go? Videos look like the going pretty fast.
The needle just needs to go as fast as you are moving the fabric. There’s a sweet spot, so a bit of practice is involved. The quilters who are free motion quilting really fast have practiced enough to make their sweet spot speedy – that’s the only difference between them and you 😉
I just found your video on free motion quilting and it was great! Very helpful. I just started practicing free motion and it is a little intimidating but I’m not going to give up!! I noticed your Bernina machine. I have a Singer One but I’m looking to upgrade in the nearest future. Could you share what model of Bernina you have and does it come with that large surface seen in your video or is that an add-on?
Thanks so much for your wonderful videos and blog!!
I’m sewing on a Bernina 770 QE. It comes standard with a wonderfully large throat space. If you get the chance, you should go to a Bernina dealer and ask to test out the BSR on a machine. It’s A LOT of fun!
So for the free motion piece you created in your video, is the back piece of the sandwich going to reflect your front free motion sewing lines / design? In other words, there will be no specific consistent pattern to the back piece, it will just be the image of what you’ve sewn on the front? Is this correct? If this is the case, is this inconsistent (free-motion) pattern an acceptable “backing” look for a free-motioned quilt that outlines a printed pattern such as your flower(s) in the video? Thank you and hope this makes sense 🙂 Marie
That does make sense, and some of that is up to you. For example, if I follow a flower pattern, then the stitching will look a bit like the flower pattern on the back. I think that’s pretty cool!
Will the stitch regulator fit on my Bernina 1230?
That’s a great question. I think it might only be compatible with the 4 series and up, but you may have to call a BERNINA dealer to double check that.
Can you tell me who makes the pink floral fabric you used on backing. The fabric I was using in mid completion is out of stock and need something similar to what you used to finish quilt.
That fabric was made by Benartex about 4 or 5 years ago. It’s called Liberty Garden in Pink.