How to Make a Quilt Design Wall
This post goes out to all of the parents of human children, pet children and/or spouse children. Basically if you have anything in your home that moves and can potentially make a mess, creating a space for a quilt design wall is not just a helpful idea, it's a necessary tool!
We’ve been talking recently about how to take your sewing studio to the next level – like getting an AWESOME sewing table, and setting yourself up right with all the best gear. (Visit the Sewing Tools section on the Blog.) Now, it’s time to talk about a quilting studio must-have: a quilt design wall.
What is a Quilt Design Wall?
A quilt design wall is basically a blank space on the wall where you can project your quilty brain. You can use it for aaaanything, like arranging fabrics, comparing colors, organizing finished quilt blocks… so many steps of the quilting process can benefit from a design wall.
(Bonus: your knees and your back can benefit, too. Without a design wall, I’d be crawling all over the floor all the time, probably in knee pads.) Design walls are made with material that ‘sticks’ to fabric, so you don’t even have to use pins to arrange your work--you just slap it to the wall, like a crafty magician. It’s the best.
Should I Have One?
You totally should. This is one of those things I really push quilters to create for themselves because
Trending patterns!


Quilt Patterns


Quilt Patterns


Quilt Patterns


Quilt Patterns


Quilt Patterns


Quilt Patterns


Quilt Patterns


Quilt Patterns


Quilt Patterns
- It’s really easy.
- I’m guessing you probably have walls.
- Previewing quilts makes a big difference. Like huuuuuge difference.
Literally Just Stick It to Your Wall.

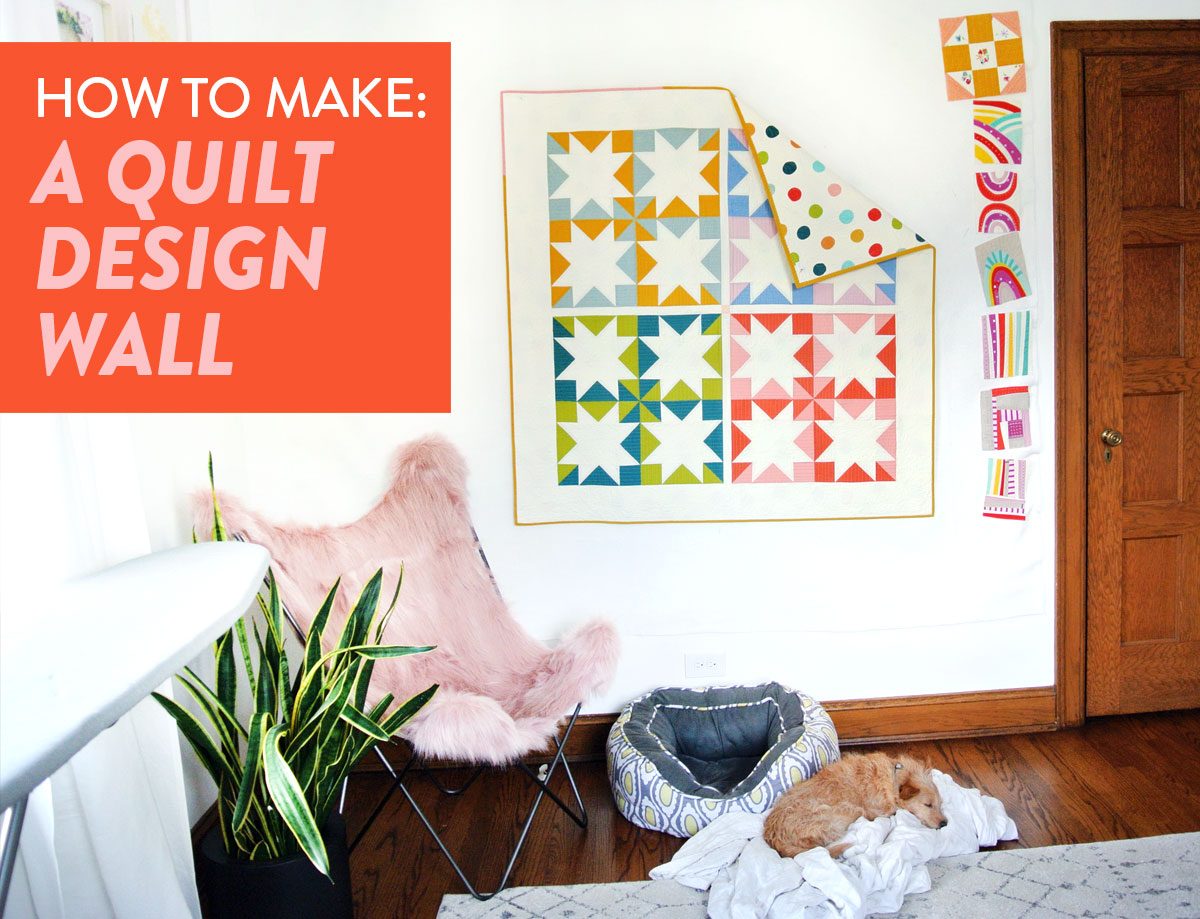
(The quilt above is the Stars Hollow pattern – get the PDF download now!)
There’s the easy way, and then there’s… like five more easy ways. Let’s start with the Suzy Quilts Original Method (AKA the lazy way):
What do I mean when I talk about quilt previewing? I’m talking about setting up your quilt blocks, and stepping back to take a look at your work from a distance before you actually sew it together. I can’t even tell you how many times I’ve found layout errors and rearranged colors after a quilt preview.
You don’t want to notice this stuff after that quilt’s all quilted and sitting on your bed. Preview it. Move stuff around. Have a quilt design wall.
To make one just like me, all you gotta do it stick 100% cotton batting to a wall with Command strips. Ta-da!!! I use this cotton batting and these Command strips to be exact.
Yes, that’s really all you have to do to have an official, totally useful design wall. I used cotton batting because it has that handy cloth-sticking factor, but it’s not the only fabric with that magic touch. Here are some other options.
- Cover a thin composite board with neutral-colored flannel: Flannel is another one of those ‘sticky’ fabrics, and it’s relatively inexpensive. I recommend neutral colors because trying to evaluate your quilt blocks against a background of pink stripes can be kind of confusing.
- Use foam-board, with or without cloth covering: If you are someone who actually likes the idea of pinning fabric up, go for foam board! It’s really easy to get pins in and out, and it’s a great lightweight option.
- Secure a flannel-backed vinyl tablecloth to your wall, flannel side-out: If you do it right, this can be a great option if you want to be able to remove and roll up your wall in case, you know, you’re having company over and pretending you have more interests than just quilting.
- Buy an actual, commercial design wall: These exist! This one is inexpensive, removable and very transportable (for retreats and stuff.) If you can make a larger investment, this one has great structure (so it's not flapping about when the ceiling fan turns on) and is also collapsible. I just bought myself one and you can see it pictured below.
- Use a door: This can be a great use of space if you have a smaller craft room or quilting space in your home. Cover a closet door, or the door to the room, with flannel or batting, and you’re good to go!

Get this same portable design wall here. It takes about 10 minutes to put it together the first time, and then it gets much quicker. Since first writing this article, I decided to take down my on-the-wall design wall and get this one. I take mine up and down all the time. My reason for the change is because I wanted to utilize that wall for hanging a display quilt permanently.
Basically, I get the itch every 6 months and need to change everything in my studio completely. 🙂

A Few Other Ideas Found on the Blogosphere...

Supplies:
- Gridded flannel
- ¾" Velcro tape
- Gorilla glue
- 1 ½” and ½” PVC pipe
- Sand paper
- Screws and wall anchors
For step-by-step instructions, check out the original post.
Supplies:
- 1" thick insulation board
- Flannel sheet
- 3" screws
- Washers and anchors
- Gorilla tape
- Staple gun
To get the full instructions, read more here!


This is a very similar technique to the Insulation Board Quilt Design wall, but with a few different supplies:
- Polystyrene boards
- Duct tape
- Clear packing tape
- Cotton batting
- Basting spray
- 3M adhesive hanging strips
Check out the original post!
Have you made a design wall or possibly have a new spin on one? I'd love to hear about it in the comments below!


You kept mentioning something good for the cat? So where is the cat related part? I’m sorry, but I am very confused about what you were suggesting about something to make the cat happy. I did see a picture of a dog.
hahahaha Well, in my newsletter I was getting a little crazy. If you read to the end I explained that by making a design wall, you will get your quilt blocks off the floor so you will no longer have to yell at your cat for laying on them and messing them up – thus helping your relationship with your cat. It didn’t make a ton of sense then and I’m realizing now as I’m typing it for a second time that it’s not making a ton of sense now. Just ignore half of what I say. 😉
Oh I totally get the cat comment!
It makes perfect sense to anyone who lives with a cat. I have one lying on my head as I attempt to type this
hahaha! I’m very impressed.
I judge how well a project will turn out entirely by how much my beloved feline sewing assistant sits/sleeps/lays on my fabric or project. Oh, I totally get this!
I know this post is old but I totally got the cat reference immediately (3 cats and a dog). I was just picking hair balls off my quilt that’s on the floor being previewed, and decided it was time to research a bit about preview boards and so here I am! Thanks for the great tips BTW!
My blocks are not sticking to the flannel, should I replace the flannel?
Depending on how large your blocks are, this is pretty normal. I would just use a straight pin to keep them on. Changing the flannel probably won’t help.
My comment is “awaiting moderation”? I’m really not trying to be rude but what does that mean?
It just means that I have to sit down at my computer and hit “Approve” before it goes public. 😉
I turned my 3-door sliding closet into a design board. My husband put 2 eye hooks into each door and I hung an indoor/outdoor carpet up. I’m pinning quilt blocks onto it now but I think I’m going to hang a flannel sheet on it. Pinning each block and trying to move them is a hassle, and I worry about pins falling off and getting stepped on. Why didn’t I think of using flannel? Genius! Thanks!
Yes! I think once you swap out the carpet for flannel you will love the result!
I did the KISS (keep it simple stupid) method. My walls are wooden pine car siding. I nailed finish nails into my walls at a slight upward angle. Then I pressed one inch styrofoam covered in batting onto the nails. Perfection!!! I love it. My only other suggestion is make it as big as you possibly can!!! It cannot be too big!!!
Wow! Thanks for sharing! I noticed your design wall a couple of weeks ago and assumed it was something like a very large post-it note made just for quilters. I actually put it on my birthday wish list. I started your Kriss Kross quilt for my sister’s baby shower, and just ended up using scotch tape to place my blocks up in my living room. My husband definitely thinks I’ve gone off the deep end, but I am having so much fun! I can’t tell you how grateful I am to have discovered your blog this summer!
hahaha I bet your living room never looked better 😉
Great ideas thank you
I’ve been thinking about adding a design wall to my newly converted sewing room. You have perfect timing. I’m for sure making mine using the Suzy technique! Thank you 🙂
Go for it, girl!!
BASTING SPRAY!!! How did I not think of this?? I’ve had a corflute board in my room waiting to stick the batting to, but all I could come up with was a hot glue gun bhahahaha! And I obviously didn’t think that was a great idea because I’ve been putting off doing it. But BASTING SPRAY!!! Now that is genius! Haha!
Yes! Basting spray or even spray glue (found in craft stores…probably next to the basting spray). Both would work great!
I have a giant piece of 1/2 in plywood leaning against the wall in my sunroom (walls aren’t drywall, but original outdoor siding). I used my left over scraps of batting and staple gunned them in-perfect!
Sounds perfect!
I have the less expensive portable system, the flannel back tablecloth put up with finish nails! It works great! My question relates to the Insulation board system that you show on the blog= it has the most beautiful dark grey quilt with improv color blocks on the board? Is that quilt one of your patterns that will soon be for sale?
That’s a question you would have to ask the designer – Katie Pedersen. If you click the link next to the photo you can see her original post.
I am them vinyl table cloth person. Last time wasn’t thinking and got one on clearance for 2.58. But it has dinosaurs on the vinyl side and show through. I just think of it as extra color on my design wall.
I use a flannel sheet held onto the wall with thumb tacks about every foot or so along the top. I am thinking of stretching it on the foam insulation board so that it doesn’t “droop” when I hang whole rows or small quilts on it.
I use gray fleece from Walmart attached to the wall with large pushpins. It has worked well for a couple of years, but I have to lint roller it occasionally to improve stickiness.
I hope this doesn’t sound stupid, but I’ve got the batting and the command strips … but I’m not sure how to attach it to the wall. Do I literally just stick the strip to the wall, then put the batting directly on the adhesive? Does the fabric stick to the strip just like that??
Yes and yes! It’s as simple as sticking the Command strips to the wall and then slapping the batting right on top. Not much to it! You will end up using a lot of Command strips to keep the batting from gapping and sagging.
I just stapled a piece of flannel to my wall. Works fine. Very low cost.
Have used a number of your patterns to make quilts for donation to cancer kids in rehab. For my planning wall I purchased 2 sheets of insulation board from the lumber yard. Since I’m a crossword puzzle lover I cut them into 12″ squares, mixing both white and light grey fleece, I wrapped and hot glued the fleece then arranged them to appear as a blank crossword puzzle. Could you give size details on your newest “toy”, the collapsible planning board as I often times start working on a new design at the same time using the smaller pieces from the initial quilt I’m cutting out so I don’t forget the idea I had in mind for the “left overs”. I look forward to more quilt designs.
That gridded flannel is the BEST stuff. Even large sections of pieced quilts cling to it without falling.
I have very very little free wall space as I just downsized into a retirement condo—lots of fabric still in tubs in the garage sort of downsizing! And I have a cat making the floor a non-option. Could you use a large window blind hung above the doorway then flannel or batting glued on to that? Would it be sturdy enough? Thanks for your help!
That is what a friend uses for her design wall, and I believe there is a photo of one made that way in the article. Hung in front of fabric storage cabinet.
I have like a gazillion 1.5″ yo-yos to make a quilt & really need a design wall for the layout. Thank you so much for the great ideas. I’ll try the flannel method first because it’s on hand.
Hi is there anyplace on the net that sells fabric made by ‘Peter Pan Fabrics, Inc.’? I have a carmine/grey floral print someone gave me that I cannot find anywhere. online.
I’m not familiar with that company. Maybe try eBay?
I love the design board ideas. I have an old pull down school map. I am going to replace the map with a lightweight vinyl and spray adhere flannel (I’d get the grid, but it’s sooooo back ordered, ya can’t even order it) to it. I’m going to see if this brainstorm will work.
That sounds like a perfect way to setup a design wall. How did it turn out?
I appreciate how you said that you should look at a quilt really well before deciding to have it on your bed. Knowing exactly what you are getting into when you make or buy something is really important. That way you can be sure that it will go with the color scheme of a room or something like that.
Would felt work just as good as flannel,for a design wall. Would the fabric stick to the felt like it stick to flannel how would you make a moveablev board.
Yes, felt would work just as well. You could staple it to a large piece of foam core, as an option.
Hi Suzy, May I ask if you still like your portable design wall i.e. would you buy it again? I currently have the command-strip-stick-it-to-the-wall version but it’s in a different room than my sewing machine so am thinking of getting the portable one like yours (72″x72″). As with everything there are great reviews and then some that say it’s not that sturdy and blocks don’t stick, etc. so was hoping to get your opinion. Thanks much!!
Great question and I have a lot of opinions. What’s new? 😉 Overall, yes, I still really like it and it still serves it’s purpose well. Once I get it all set up, mine is surprisingly sturdy, however I do understand the review that blocks don’t stick super well to it. My blocks always stick, however if my ceiling fan is cranked higher than a gently breeze – blocks be flying. The first time you pull it out of the bag you are going to think, “You’ve got to be kidding me.” It’s a bunch of tiny black poles and a piece of white flannel. It probably took me 15 minutes to assemble the first time, and now, about 4 minutes later I have it up. Basically, I think for the price point, it could have been designed better. I realize the designer wanted it to break down completely into a small bag, but I expected it to “pop into place” rather than make me feel like I’m assembling a tent.
Bottom line: I still like mine. I’ve gotten really fast at putting it up and taking it down. I like that I can move it around my sewing studio as needed, and I really like that once I’m finished I can hide it so that I don’t have to stare at a wall covered in batting. I recommend it, knowing that it’s not a totally perfect product.
Thank you, Suzy. I love hearing your opinions. 🙂 It sounds like a good solution and Massdrop currently has a drop for $89.99. It’s still a nice chunk of change but, like you mentioned, not having to look at a wall covered in batting is appealing especially since I don’t always have quilts in progress.
I have the large portable design wall that collapses into a bag. I hate it. In a small space it is difficult to put together, it falls over easily, things do not stick well. I’d gladly sell it!
Hi Suzy Quilts,
I am absolutely loving your blog. I have been a fan of yours for quite a while, but have only been reading/catching up on your blog for a couple of weeks. I have a design wall that is a huge piece of batting tacked to a bright red wall. Instead of taking the design wall down when it is not in use, I pin one, out of approx. seven, of the pieced quilt tops that my Grandmother & Mother pieced when working on quilts together close to 55 years ago. My mother surprised me with the quilt tops a couple of months ago. They sure beat looking at a white piece of batting hanging on a red wall! Since it was my Grandmother’s intent to hand quilt the piece tops, I am most definitely going to hand quilt a couple of them. My Grandmother gave me my very own quilt when I was five years old which I still have. She is the reason that I quilt today.
My cats would like you to know that they really don’t appreciate your giving me this idea, as it will ruin their fun.
Hahaha!
I have been on hiatus for a while sewing wise since I moved my sewing room and proceeded to fill it with junk… I have finally found the time after 2 years to declutter and get back to my machine! I am an avid quilter and in the past had to arrange my blocks on the floor in the lounge room as that was the only space I had (not easy with a 1 year old at the time who would be great buddies with your cat!) I have just finished making my self your quick and easy display board and I am so in love with it!
Thanks for all your great posts am thoroughly enjoying browsing your back catalogue!
After reading the instructions for the design board, I was wondering if I can use felt for the design board instead of flannel or batting?
Hmmmm I would think so. If you have a small piece of felt tape it up on your wall first to see if fabric sticks to it. If yes, go for it!
I used felt and it works fine. And it is sold in wider widths so I didn’t need to piece it!
JMHO, nothing works as well as cotton batting for stick-to-it-ness! I’ve used flannel and felt and ended up going back to batting.
Wow! This was a great, helpful post!
Thanks Suzy
is there a temp wash away glue to glue baste a binding on a project
If you’re using water soluble glue, any temp should work. Warm water will prob be the fastest.
How do you put a queen size quilt on that size design wall
You’ll probably have to do it in sections.
Do the command strips hold up
They do!
do larger sections of pieced material stick to flannel? I have already pieced some sections (say, 2′ x 4′) and want to shuffle them around, but it seems like all the seam allowances on the back would push it away from the wall
Thanks
Pieced pieces will still stick to batting and flannel, however the heavier your sections become, the more likely they will fall. Use a couple pins to tack them to the flannel and you’re good to go.
Just found your site, great information! I recently retired and moved into a very small one bedroom apt. I had my son put a long strip of Velcro close to the ceiling and “hung” a piece of felt on it. I can pull it down if company comes and remount it easily and the Velcro is not too noticeable. Hoping the felt works (had it in my stash) if not, will try flannel.
What a brilliant idea!
Where did you get the quilt ladder in the picture above?
I got this one from The Citizenry.
Hi. I just bought a projection screen from a surplus auction and plan to iron fusible fleece on the screen as a possible design wall. Will let you know how it goes
I thought you’d put the command strips up so Velcro is touching the batting rather than the sticky side. No?
You could do that! The Command strips I used did not have velcro, just sticky.
I have one of the commercial flannel/plastic back design walls…I have put it up with command strips before, but sometimes the fabric just loves to fall off… especially when I have strips sewn together…any tips?
At times I make flannel quilts – and they apparently got a bit heavy 🤷🏻♀️
Sometimes with long strips are larg blocks, I have to use a pin to keep them tacked onto the design wall.
hi suzy, i love this idea and i am excited to try your method! do you have a rough estimate of how many of those sticky strips it took to hold up the batting? (was it more like one in the corners or more like one every foot of the border?) before i run out and buy 50 packs, which is something i would likely do 🙂 thanks!
I placed a sticky strip about every 8″ on the top and then about every 12″ on the other sides. That may be overkill, so you could try less and if your batting falls down just add a few more.
I am going to try buying a curtain with grommets and spray basting flannel on it. I will hang it with a curtain rod over my closet door. when i need to get into my closet or am not using the wall, I will just push it off to one side. i was going to just make one out of flannel, but I think the curtain that already has grommets with add a little stability to the flannel. I will let you know how it works out.
Sounds like a great idea! The spray baste might lose its stickiness over time, so after basting, you might want to sew the two layers together – at least around the edges.
Thanks for this! I would love a design wall. I don’t get how the quiltblocks stick to cotton or flannel. Wouldn’t they fall down?
The texture of the batting or flannel keeps them up. It’s pretty cool!
I live in a small apt where I cant put nail holes in the walls, how do I make this design wall without damaging the drywall underneath? Is there a way I can make it a freestanding wall or possibly lean it against the wall? I need step-by-step instructions please can you send a link?
Thank you so much for your post and directions! I put this together in a day. I used the same sheet as suggested which is of excellent quality and perfect for the application. My design wall looks fabulous!!
Love your ideas, I’m going to make one of these! My question for you has to do with the size, and your recommendation is for when I have a whole bedroom wall to put it on?
I am planning a queen sized Tail Feather quilt and then will be making two king sized quilts, patterns tbd. For the Tail Feathers quilt I bought a fat quarter set that has 14 pieces in it, so it’s going to be kind of scrappy. I want to be able to layout the whole thing before I start sewing so that I can play w the color combos.
I was looking at 96×96, but will that be overkill once I have these 3 sewn and I’m doing smaller projects? And is a 72×72 large enough to layout and plan a king sized quilt?
72″ x 72″ is a great size for a throw quilt, but I’ve found that the only place where I have space to lay out a king-sized quilt in progress is on a king bed. Those things are HUGE!
Genius! Thank you so much! I’ve been wanting a design wall but don’t have the wall space and was pondering how I could make it happen. I’m so going to do this…maybe even tonight if I can find the hardware locally!!
I have a cape cod style home and my sewing room has slanted ceilings taking up most of my wall space. I have insulation boards and flannel from my previous home for a design board. Do you think if I attach it to those slanted ceilings that my quilt squares will still easily stick to it?
Honestly, I don’t think so, but you could pin them to it and that’s not so bad.
I’m new to quilting and the lack of floorspace to lay out the design has been driving me nuts. I’d never heard of a design wall but now have 2 metres of cotton wadding winging it’s way to me, command strips on standby.
Thank you!
Thank you so much for your tips and ideas! I tried the 100% cotton batting and velcro command strips. I zigzag stitched one side to the batting (horizontally) and adhered the other side the the white stripe ( a total fluke but an idea I noticed in a tour of a high end home a few years back) along our ceiling so the strips are not noticeable when the wall is down. I am in LOVE! Thank you again. I’ve been quilting for 35 years – this a game changer!
I use a curtain rod and clip rings to hold up my flannel. I can take down the “design wall” and clip up finished quilts to photograph, AND I can clip up actual backgrounds to do formal photography. Best $30 I ever spent, it contributes more to my businesses than any other investment 😂😅
At our local quilt shop, the design wall is made from a flattened refrigerator box, covered in flannel and nailed to the wall. I usually lay a flannel sheet on a bed, but I am an empty nester who can hold a room hostage for a few days.
The link you provided for the cotton backing is not currently available. Do you have a second choice, or are there any preferences when buying cotton batting as to which one will work best or will they all work fine?
oops! Yes, we have lots more batting info. Here’s a post specifically about cotton batting – https://suzyquilts.com/why-cotton-batting-is-the-most-popular-choice-for-quilters/