Make the Starling Pattern with a Layer Cake
Hello, my darling Starling friends! If you're reading this tutorial on how to make the Starling quilt pattern with a layer cake, chances are you've been watching dust gather on your pretty bundle of squares for some time. You may even have the thought, "Thank goodness! Finally a use for this pre-cut bundle!"
Layer cake patterns are hard to come by, and I think a big reason for that is because they are tricky for pattern writers. Even though we all hope that every single piece of fabric in a layer cake is a perfectly cut 10" square, unfortunately that's not always the case.
Manufacturers aren't always precise in their cutting and these bundles can be slightly smaller or even be cut off grain — giving you a little bit less than 10". For that reason, the Starling pattern does not include a layer cake option; however, if you are bold, and if you just desperately want to use up that layer cake you've had on your shelf, together we can make it work.
You May Also Like...
What is a Layer Cake?
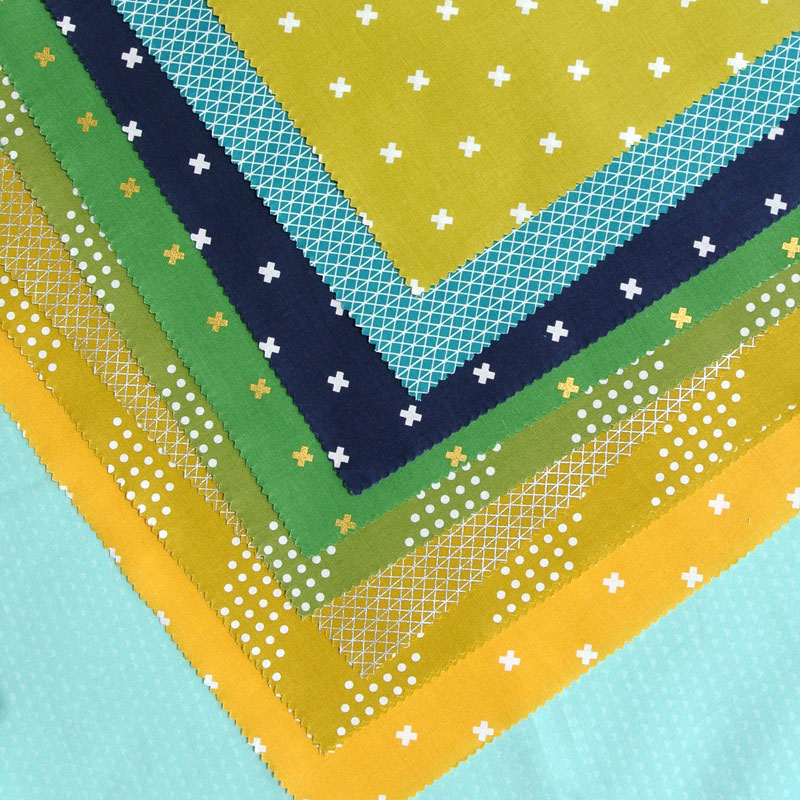
In quilting, a layer cake is a pre-cut consisting of 10" squares of all the fabrics in a collection. Standard LCs contain 42 squares per bundle. Before using a layer cake for this Starling pattern variation, double check your bundle to ensure it includes enough squares for the size you're making. This tutorial assumes your LC has 42 squares.
One thing to point out is that the edges of layer cakes are pinked. Pinking is when you cut scalloped or zig-zag edges to prevent fraying. Take a close look at the picture above. You can see the tiny zig-zags cut in the layer cake fabric.
Trending patterns!
Why Use a Layer Cake?
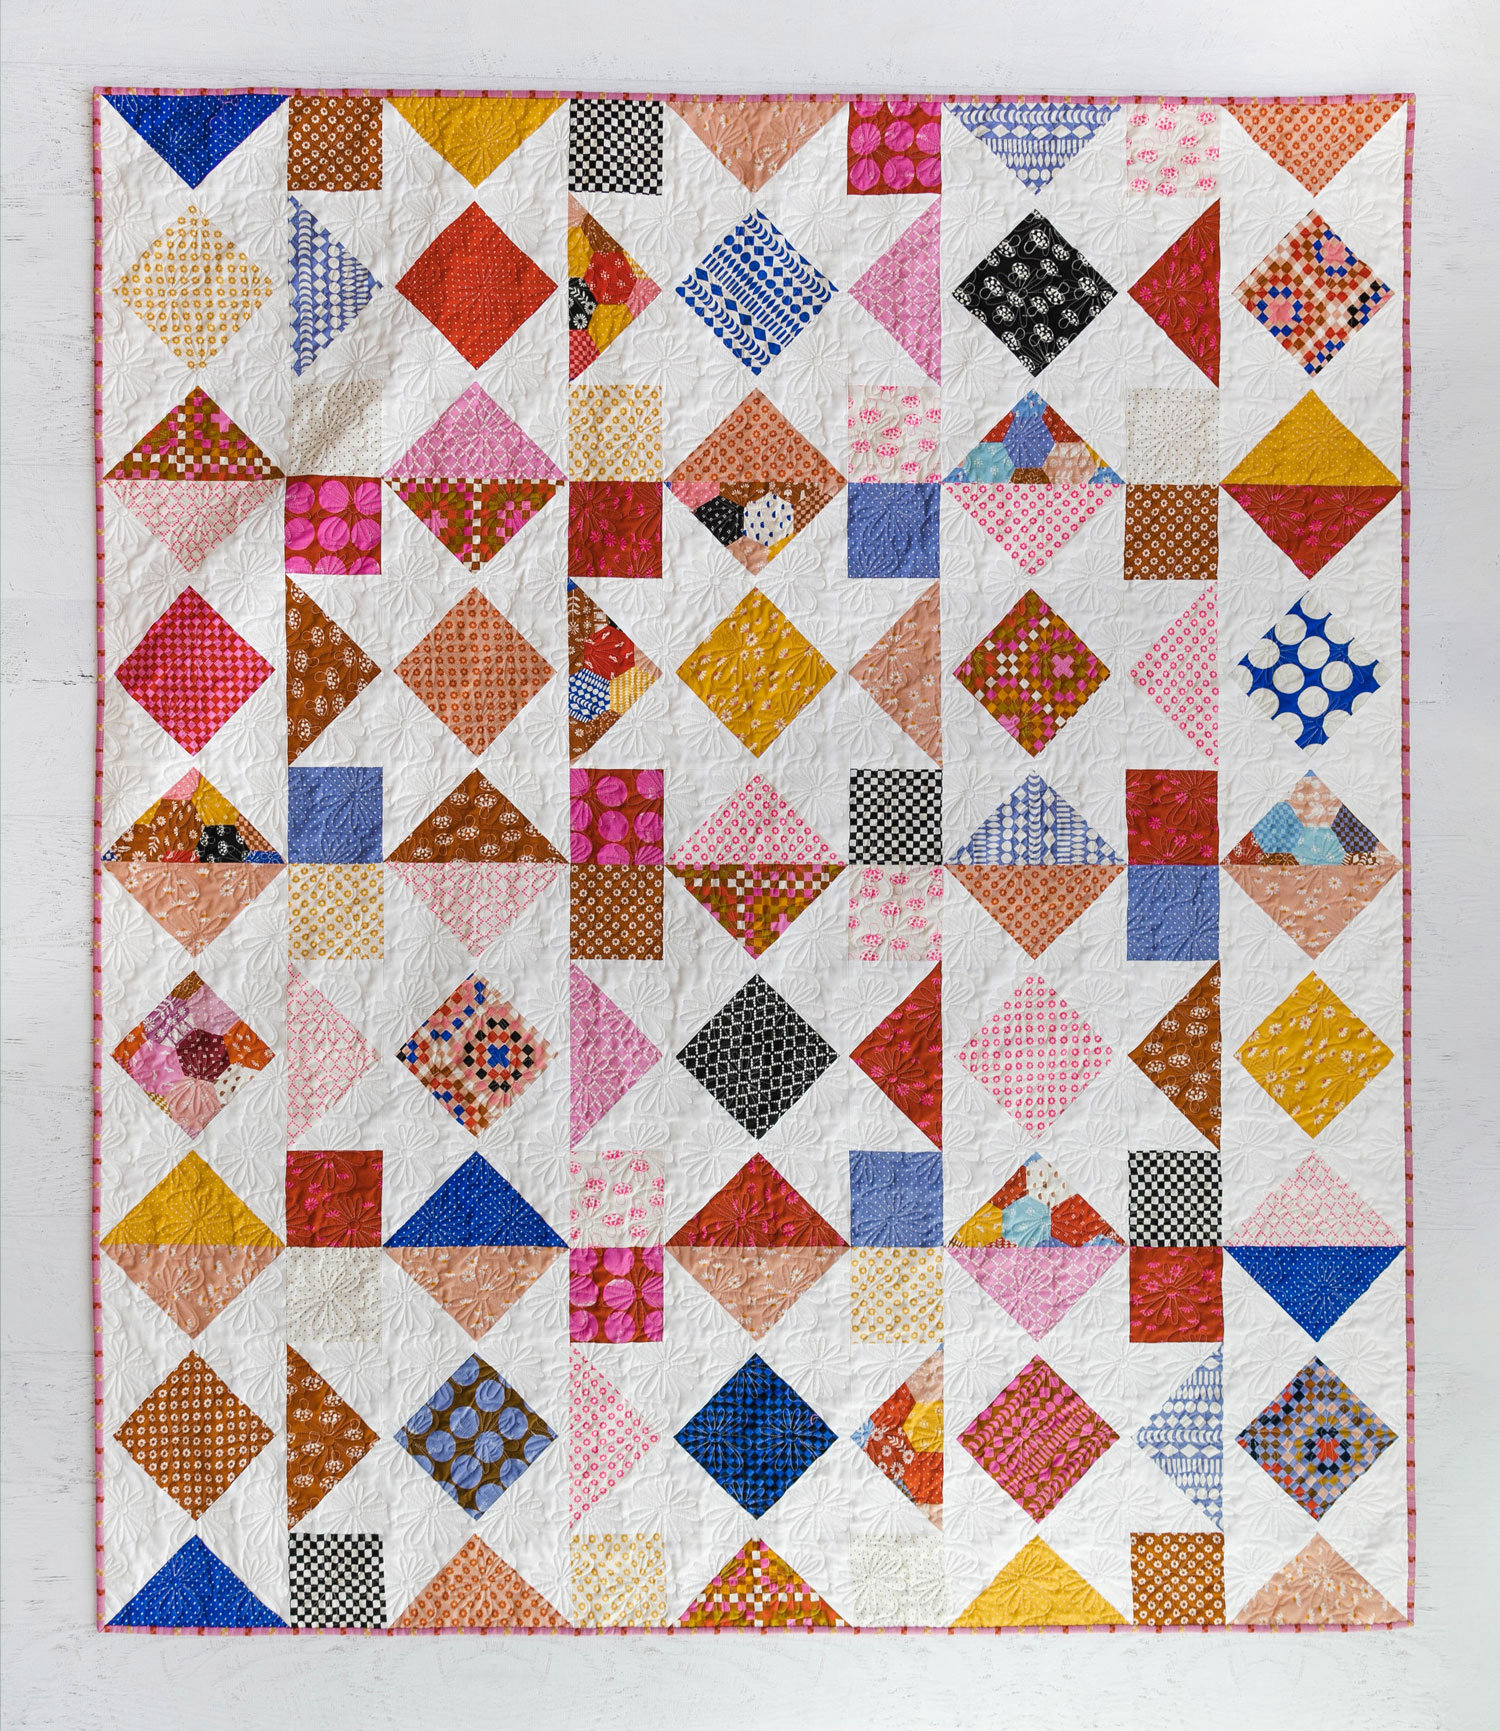
Sandy of Thai Charm made this layer cake Starling quilt. Isn't it lovely? One reason it's such an attractive quilt is because using a layer cake allows you to use more fabrics, giving the quilt an overall scrappier look. If you like this scrappy look, you can make your own layer cake by cutting up lots of scraps into 10" squares, then following along with this tutorial.
Starling Layer Cake Variation Tutorial
Let me first point out that this tutorial only works in tandem with the Starling quilt pattern. I will give you instructions on how to alter the fabric requirements in the pattern to use a layer cake; however, you will still need the pattern to know how to sew the blocks and assemble the quilt top.
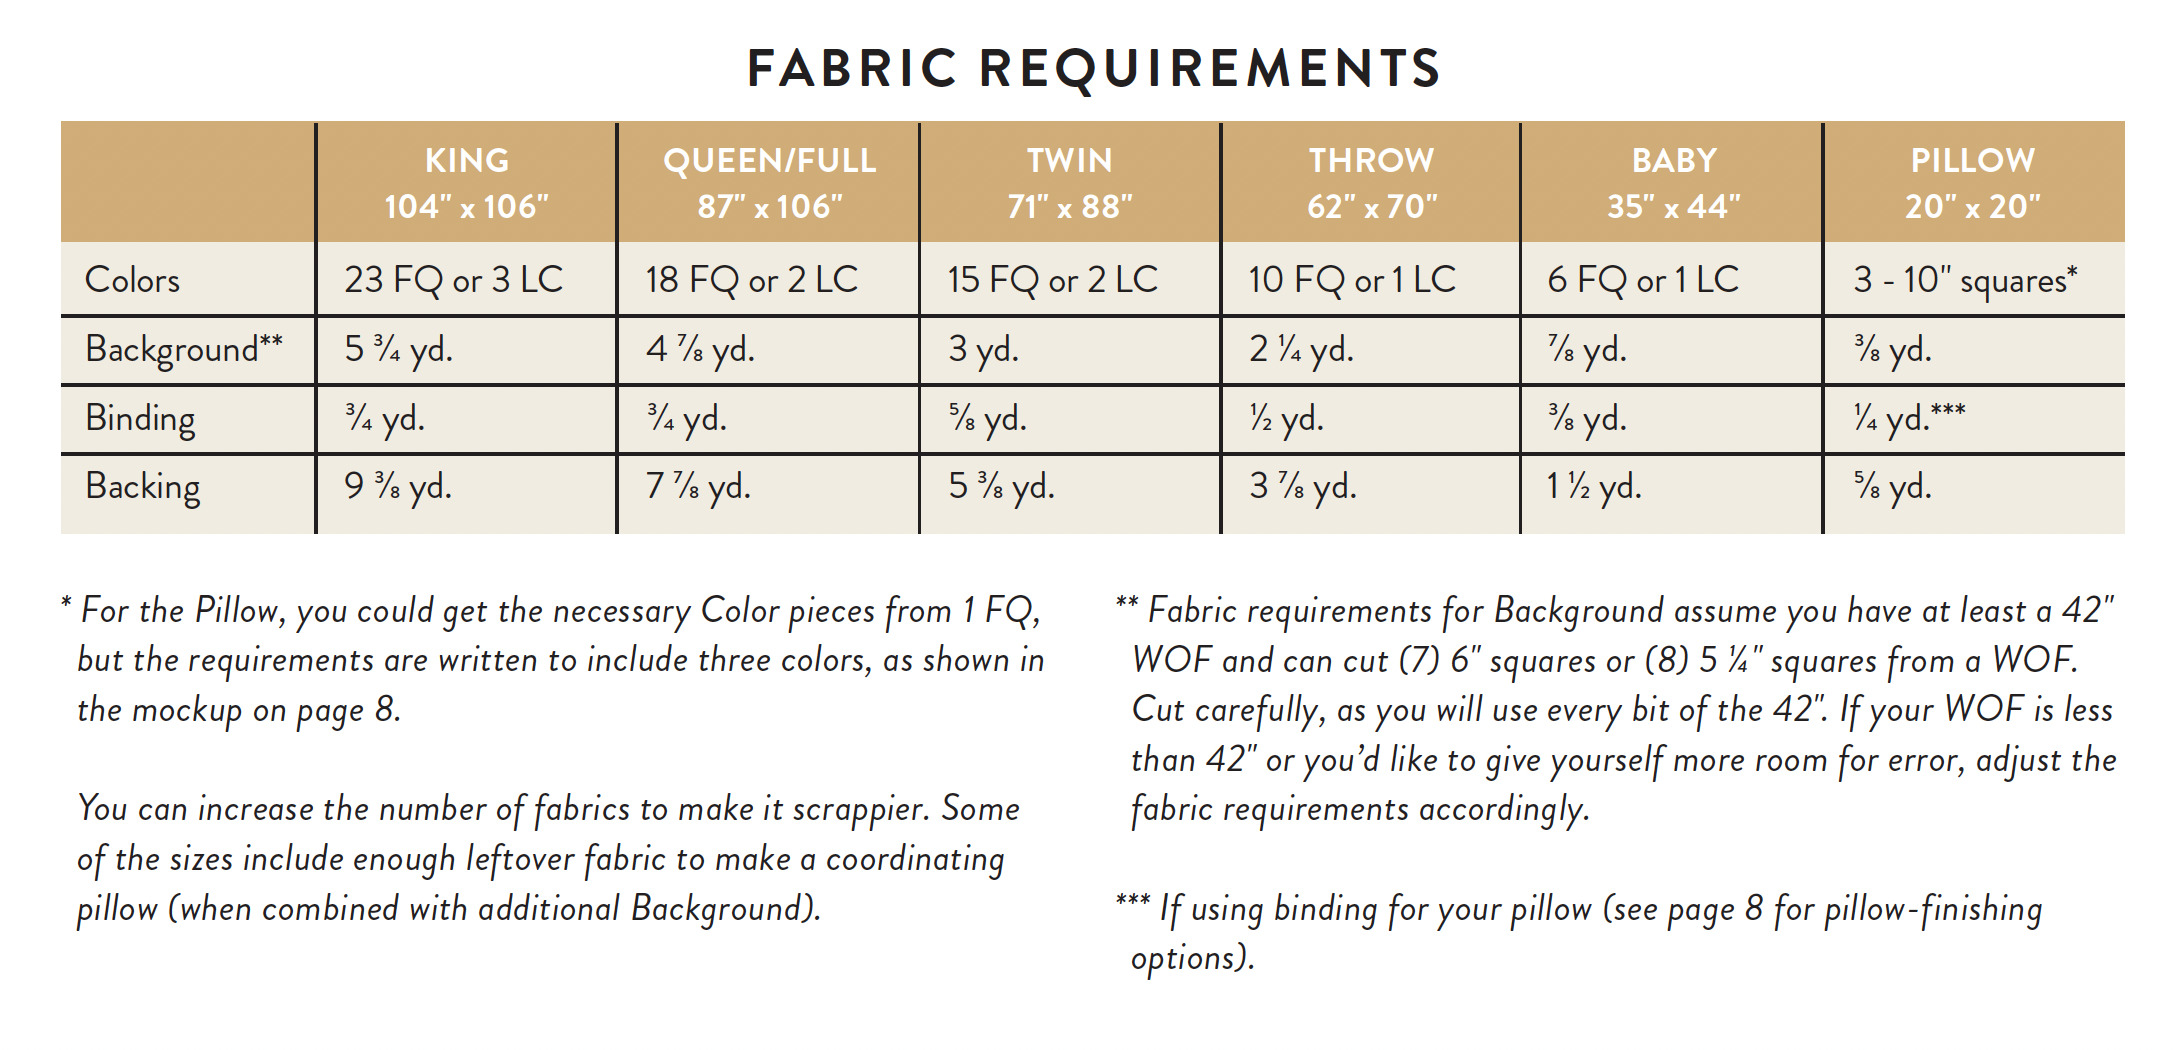
Layer Cake Variation Fabric Requirements
One of the first things you may notice is that the Background fabric in this variation is a little bit less than the requirements in the pattern. That is because to make a Starling quilt with a layer cake you will use the no-waste flying geese method, which uses smaller cuts of fabric.
In the current pattern, the flying geese are made slightly larger than needed so you can trim them down. This allows for some margin of error and also gives you the opportunity to trim them to the exact size needed.
I'll talk more about no-waste flying geese below. For now, here's how many layer cakes you need for the size you're making.
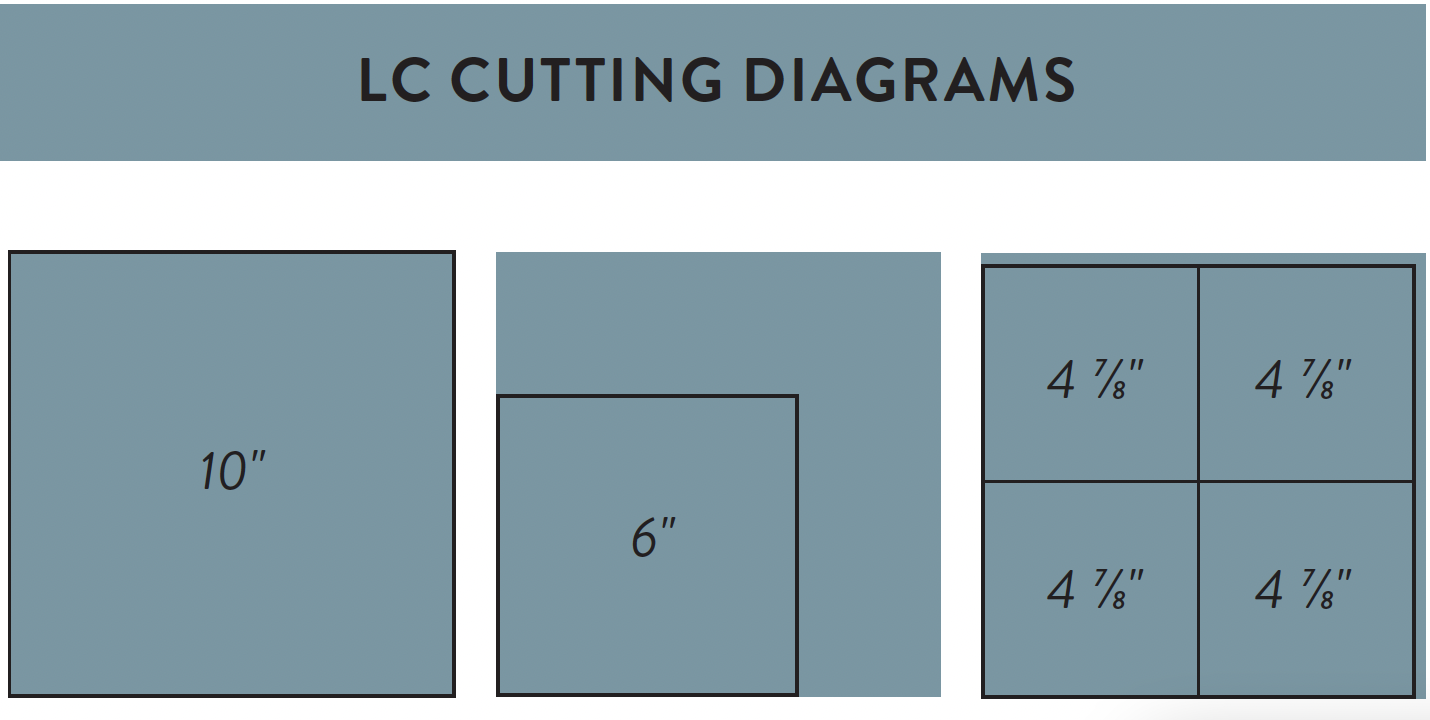
Step 1: Cut your layer cake fabric.
To get the Color fabric for your Starling quilt, cut the needed amount of pieces based on the cutting instructions in the pattern. Instead of piece b being 10 1/4" squares, you will cut 10", just like the diagram above.
Step 2: Cut your Background fabric.
For your Background fabric, piece e will decrease from 5 1/2" squares to 5 1/4" squares.
Step 3: Sew your no-waste-flying geese.
The no-waste flying geese method creates units the exact size needed in the pattern. No waste also means no trimming — yay! on the flip side, it also means there's no wiggle room. Because of this, be sure to precisely sew with a scant 1/4" seam. I also encourage you to press your seams with a tailor's clapper. This will make your flying geese extra flat.
Helpful Pressing Articles...
Using the 4-at-a-time method and instructions on page 5 of the pattern, sew your flying geese. If you are worried about getting the scant 1/4" right, cut some scrap fabric to make a practice block before you dive into your Starling fabric.
Once your flying geese are pressed, simply trim the extra dog ears (those triangle tips hanging off the sides) and you're all set for the next step in the pattern! Once you master the no-waste flying geese you'll zip right through them and love not trimming.
Troubleshooting Tip!
The biggest potential issue with this no-waste flying geese method is that your flying geese could end up a wee bit smaller than the 9 1/4" x 4 7/8" size needed for the pattern. If this happens to you, you've got two options:
- C'est la vie! Just stretch and pin to make it work. Any puckering that occurs won't be noticeable once your quilt is completely finished and washed. You can also "fudge the seams" a bit by making some of the seams narrower or not completely lining up the units. As long as your seams are catching at least 1/8" of the fabric, you're good.
- Trim your other fabric a little bit so everything fits together better. I only recommend this if your flying geese are a lot smaller than they should be.
Comment below if you think you'll try this layer cake variation! Use #StarlingQuilt on Instagram so we can see your beautiful creation. Happy quilting!





I think I just might need to use one or 2 of my abundant collection of layer cakes! Thanks for this option!
Oh, Suzy….. you are drawing me in agaain when I had decided to pass on the next sew along in favor of finishing UFOs. I have a lot of beautiful layer cakes in my fabric closet that would love to be turned into a beautiful quilt. Might just have to jump in and try this. – Suzigrammy
I’m so glad to hear that! I’ve been missing you!
Aw, thank you, that’s sweet to hear. I’m with Jenni-Hope and Vernetta on this….have a stash of layer cakes that will make fabric choices easy, so count me in!
I’m going to try the LC version, a little nervous after looking over the pattern
My one thought is to let yourself fudge the seams. The “guts” of the quilt don’t have to be exactly perfect for a quilt to look stunning. Ya know? 😉
I think I will be using layer cakes from my stash and give this a try. Sounds like it will be fun.
I am definitely going to do the layer cake version. Thanks for that version of directions. Have my pattern already, so I am ready to go!
Linda – Do you have any tips for the layer cake version? I am having difficulty with it.
Great teaching techniques. You speak simply and, more importantly, slowly so that the beginners understand and follow. I aways give my fabric a quick press with some starch or Best Press before I cut it. It helps with the stretch that always happens on the bias.
I’m so tempted now. I recently bought two layers cakes and 10 fat quarters. I’m curious if I could get a king size quilt out of it…
I think you could!