Quilt Tying Tutorial: How to Tie a Quilt with Yarn or Embroidery Thread
This quilt tying tutorial is the most beginner-friendly way to finish a quilt. If you are a new quilter, using yarn or embroidery thread and these simple steps will secure your quilt layers quickly, effectively and last but not least, beautifully.
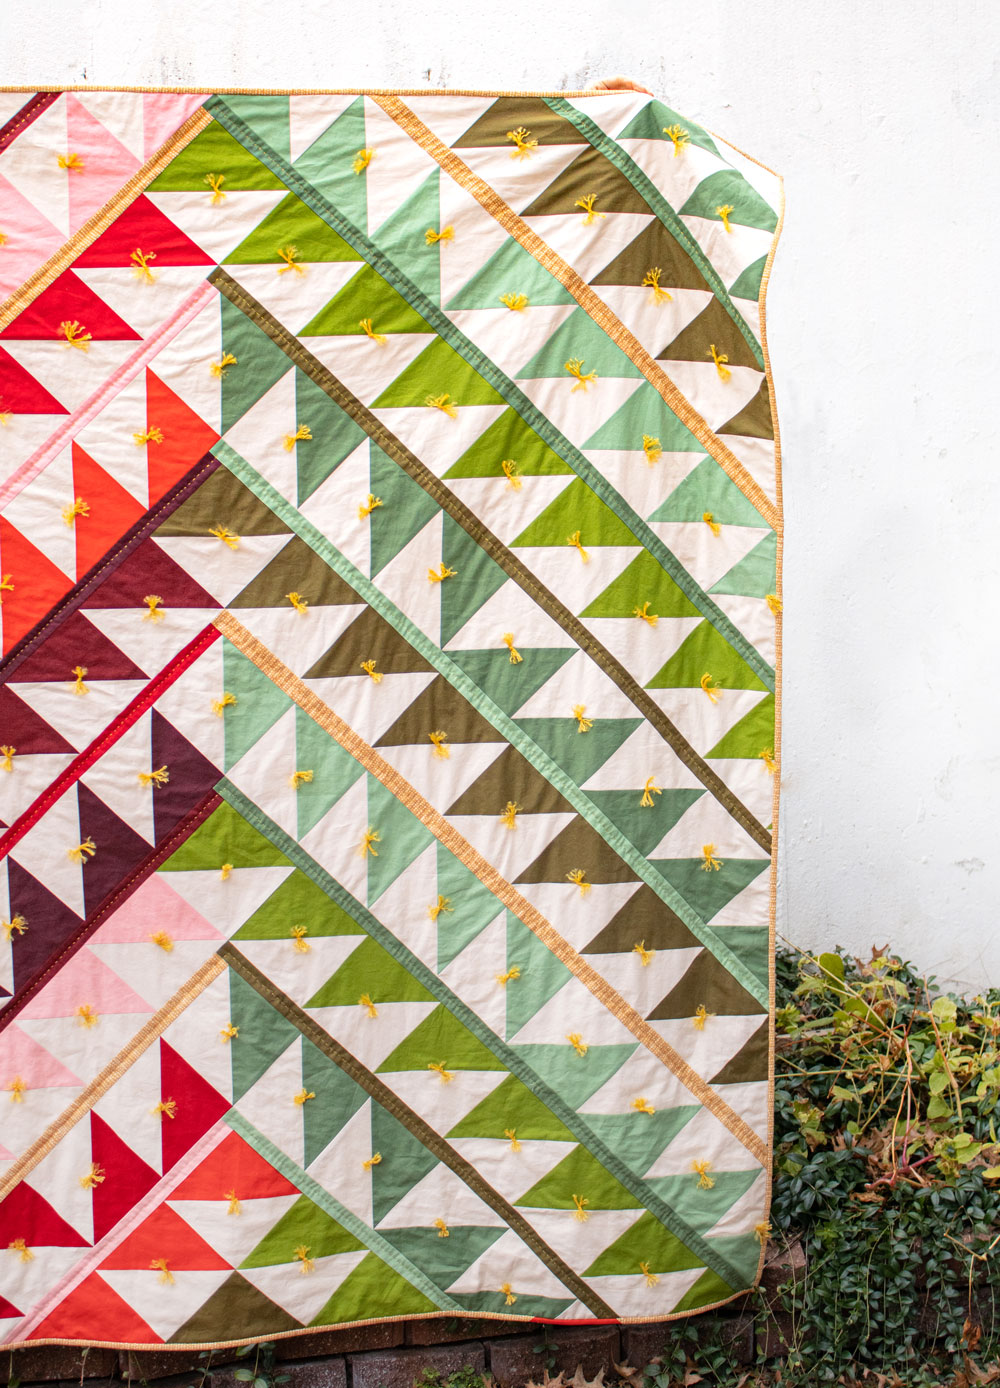
Even if you are not a new quilter, quilt ties can be a fun addition to some machine quilting or just a fast way to finish a WIP that has been sitting on your work table for too long. The quilt pattern used in this quilt tying tutorial is the Gather pattern and can be purchased in the shop!
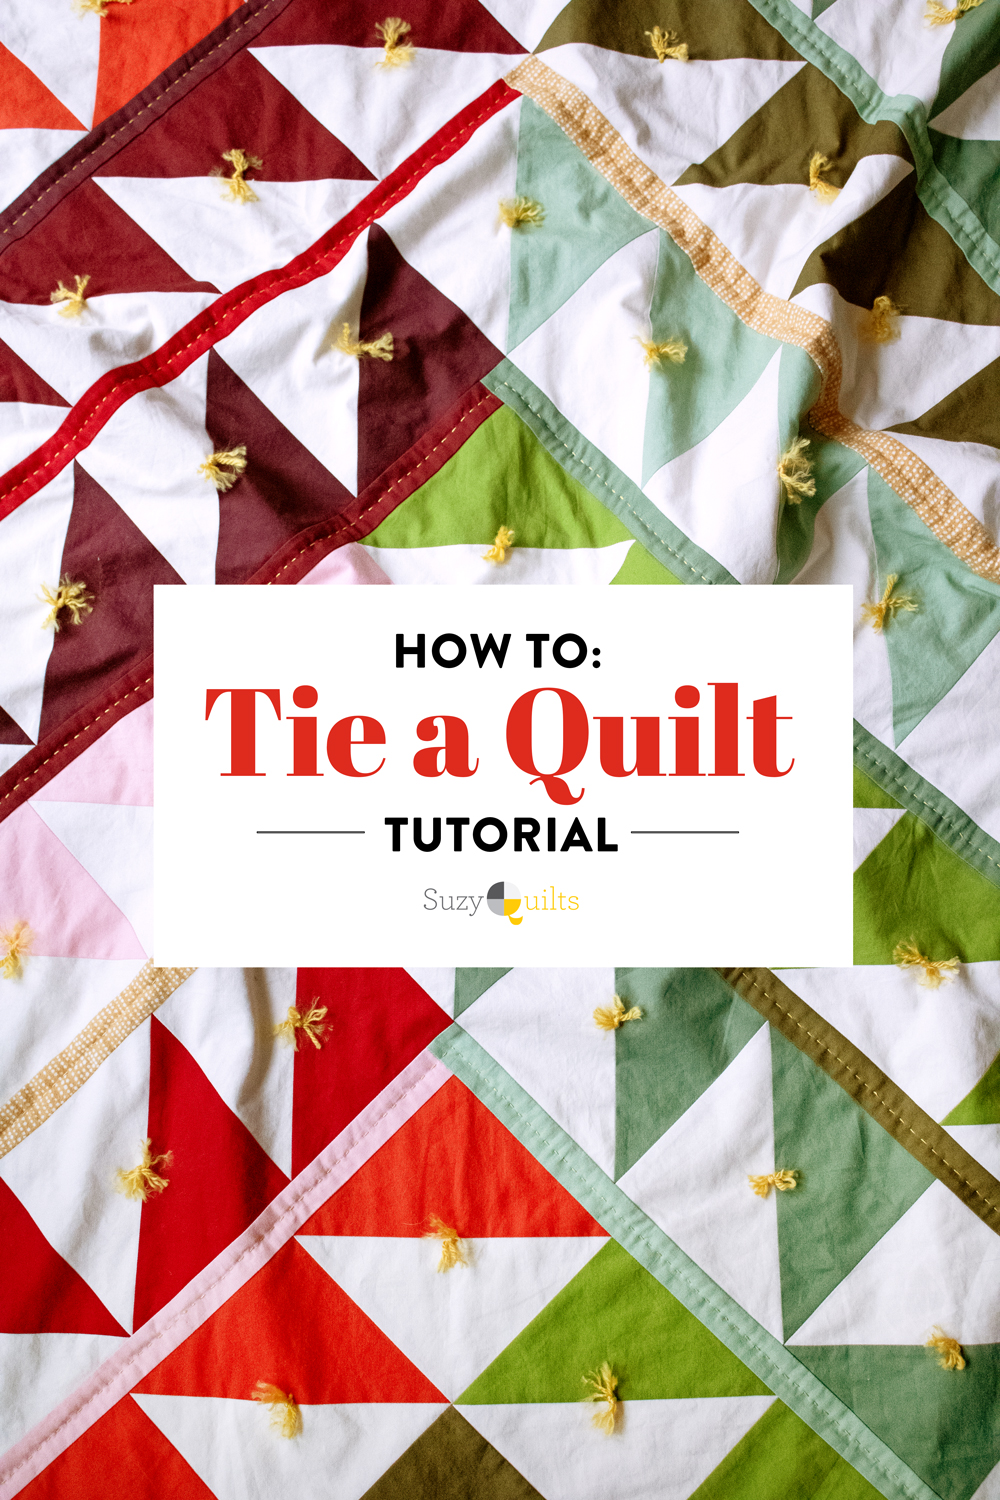
One of my first quilt memories is snuggling underneath an old blue and yellow quilt held together with fuzzy yarn ties. As I absentmindedly played with one of the ties I didn't think about the hands that spend hours sewing each piece of fabric together or the process of quilting tying. I just liked the warmth it gave and the cozy feel.
I couldn't have imagined at the time that my enjoyment of that quilt would plant a seed for a lifelong love of textiles and sewing. Quilt tying is a simple way to finish a quilt and is especially effective on larger quilts that you may not have the stamina to hand or machine quilt. Affordability is another factor in choosing to tie a quilt - for about the cost of a cup of coffee, you can tie a quilt!
Added texture may be the most compelling reason to tie a quilt. The options for ties are almost endless, you can use embroidery thread, yarn or even tassels. Get creative in your color choices, use more than one yarn type, make clusters of multi-colored ties or use them alongside some hand quilting. The only constraint is that the quilt tie must be able to fit through the eye of a needle and the needle must be able to be pulled through the quilt.
Trending patterns!
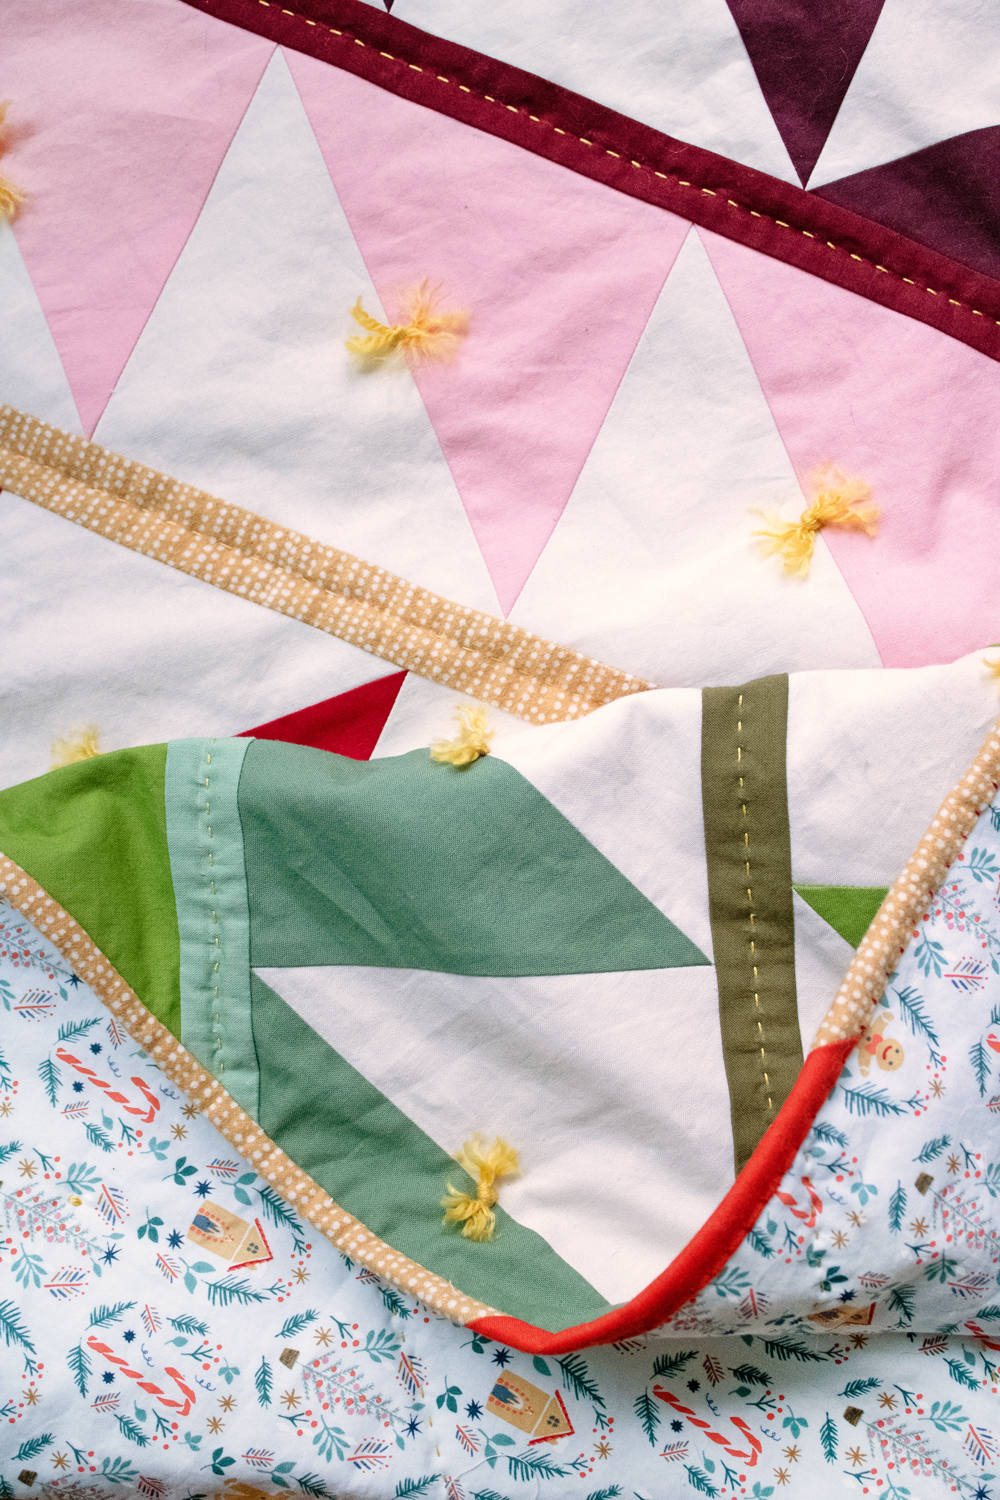
You May Also Like...
Quilt Tying Tutorial Supplies
- Yarn: Pick a color that compliments the colors already used in your quilt. There are A LOT to choose from! Poly or natural-fiber yarn both work well; however, yarn made with natural fibers may fray more than synthetic. Read Step 6 below for tips on how to prevent yarn from fraying too much. If you have any suspicion that the yarn dye might bleed once the quilt is washed, run a quick bleed test by throwing some of the yarn into a bowl of hot water along with a scrap of white fabric.)
8 or 12 wt. pearl cotton thread or embroidery thread: Use or single or double thread - it’s all about your end design goals. - Needle with a big enough eye for your yarn to pass through - for more info on needles, check out The 5 Types & Sizes of Hand Quilting Needles
- Scissors
- Basted quilt
- Needle-nose pliers (optional)
- Fray Check (Recommended for thicker yarns)
Step 1: Decide Quilt Tie Placement
The first step in this quilt tying tutorial may sound like a no-brainer, but it's really important. Before threading your needle, decide where you want to place your ties. Most batting requires quilting at least every 8" or 10", when you are tying a quilt I recommend that you keep that number closer to 4" or 5" since these ties are just single places of stability holding the quilt layers together.
Use a marking pen to make a small dot where each tie will go. If you like to live on the wild side, you can also throw caution to the wind and randomly place ties approximately 5" apart. Just make sure you aren't getting too wild and free and placing them too far away from each other.
Step 2: Thread Your Needle
The bigger the eye of a needle, the bigger a hole it is going to leave behind in your fabric. The good news is, a hand sewing needle very rarely breaks the woven threads of fabric. Instead, the needle just pushes them to the sides.
The downside to this is that the bigger the needle is, the harder it is to pull through the fabric. So to find that perfect sweet spot, select the smallest needle possible that will still allow your chosen embroidery thread or yarn to pass through its eye.
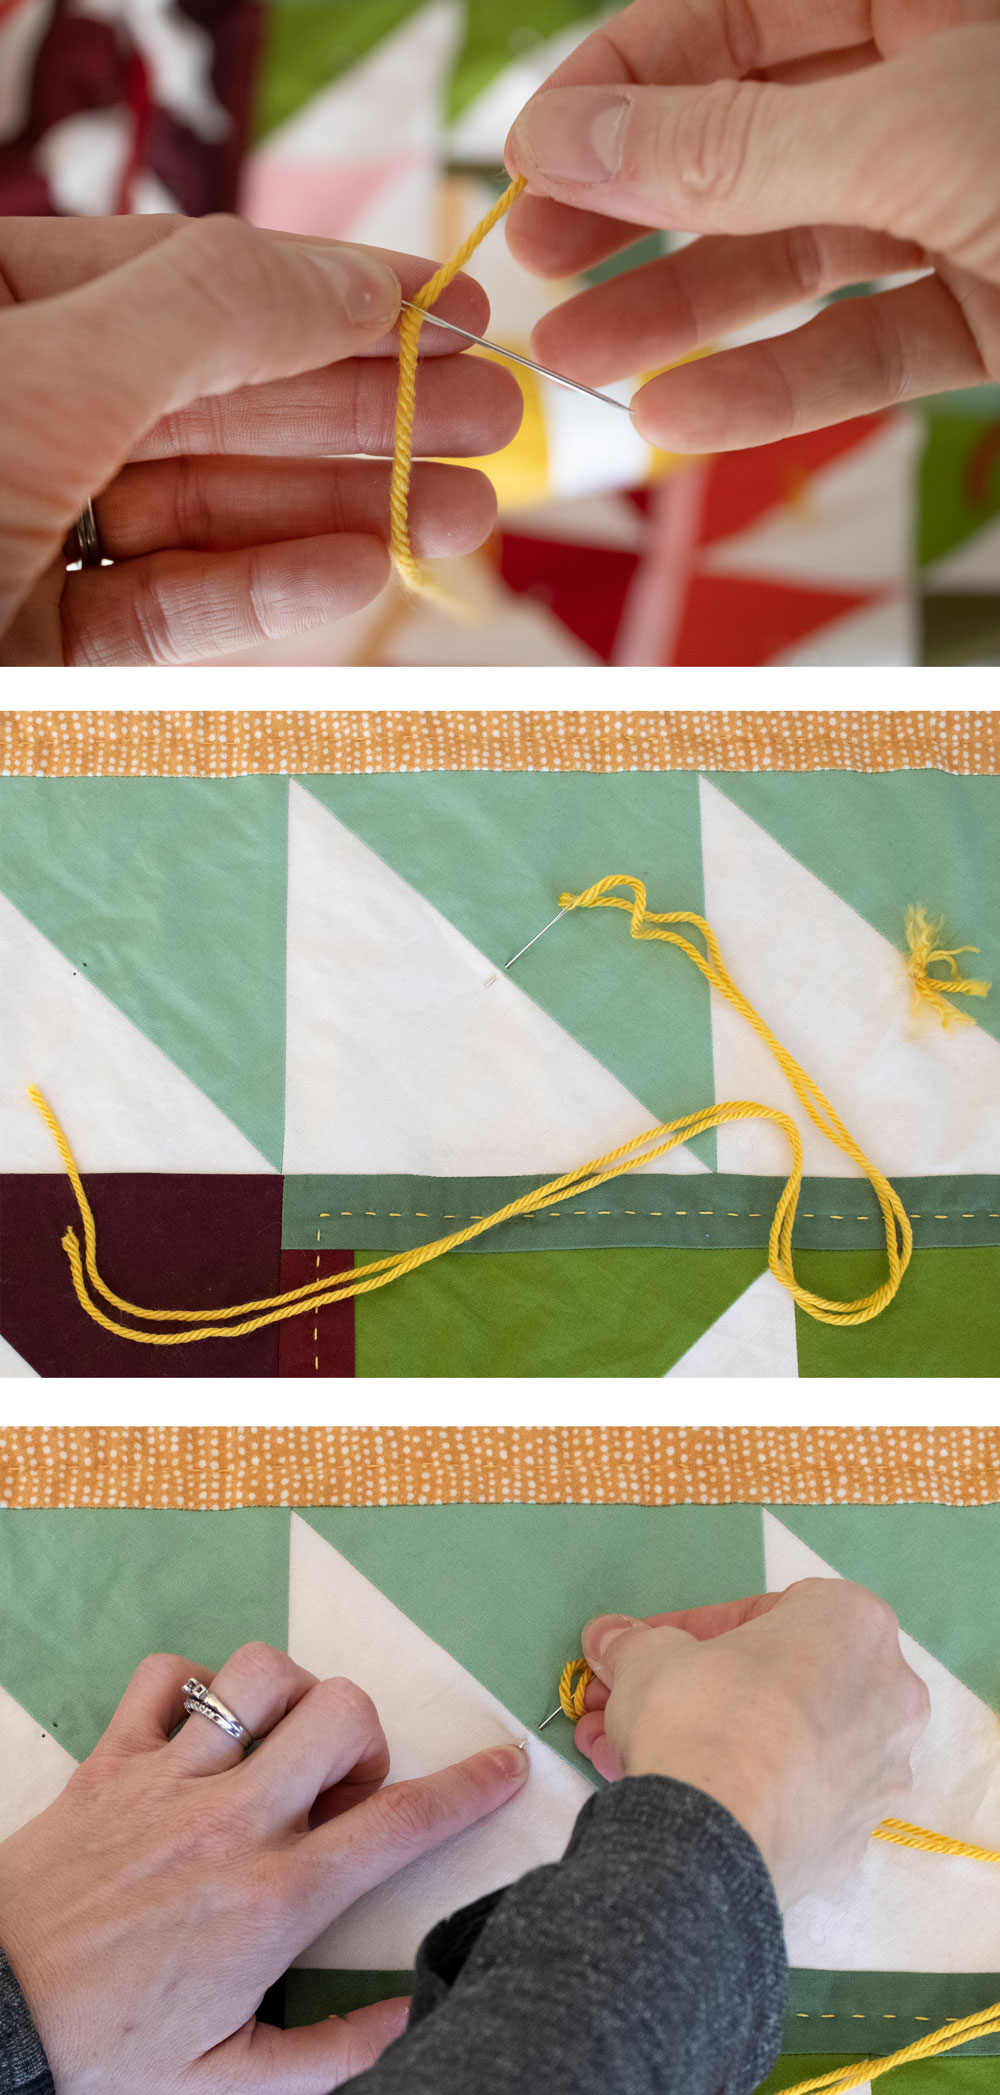
With yarn, I recommend twisting the yarn until its fibers are very compressed, then flatten it between two fingers so it can pass through the eye of the needle. You can also use a needle threader, however in my experience, if you get a mega cheap flimsy one, it will break pretty easily.
At this point, do not knot your thread or yarn. (That comes later.)
TIP! To avoiding having to rethread your needle after every single quilt tie, cut a really long piece of yarn (like really long – up to 10' is great!) This will come in handing during Step 3, Option 2 below.
Step 3: Pull the Yarn Through
Insert your needle into the quilt. Make sure it goes all the way through to the back. You can either pull the needle all the way through the quilt top and then reinsert it through the back of the quilt about ⅛" away, or you can use a rocking motion similar to hand quilting to take a ⅛" stitch in the quilt.
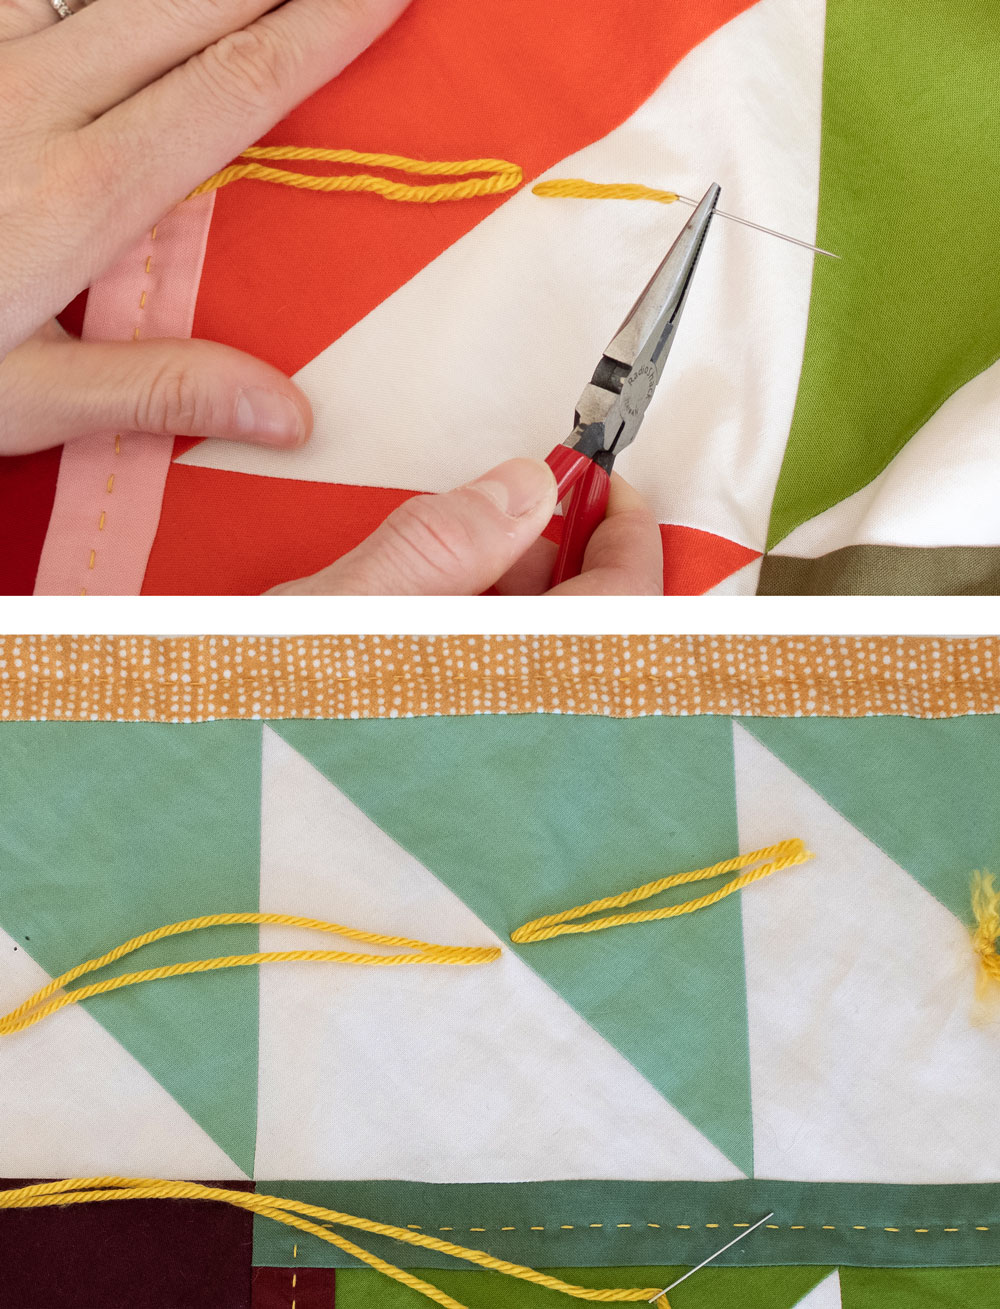
Option 1: Trim your thread, leaving two 2" tails sticking up through the quilt top on either side.
Option 2: If you cut a really long 10' piece of yarn, you are set up for the chain method. Instead of clipping your thread after each stitch, leave them all connected. After all stitches have been made, cut the yarns between each two connected points.
Tip: If using a thick yarn, this is where a pair of needle-nose pliers can come in very handy. Use the pliers to pull the needle though the fabric.
Step 4: Double Knot
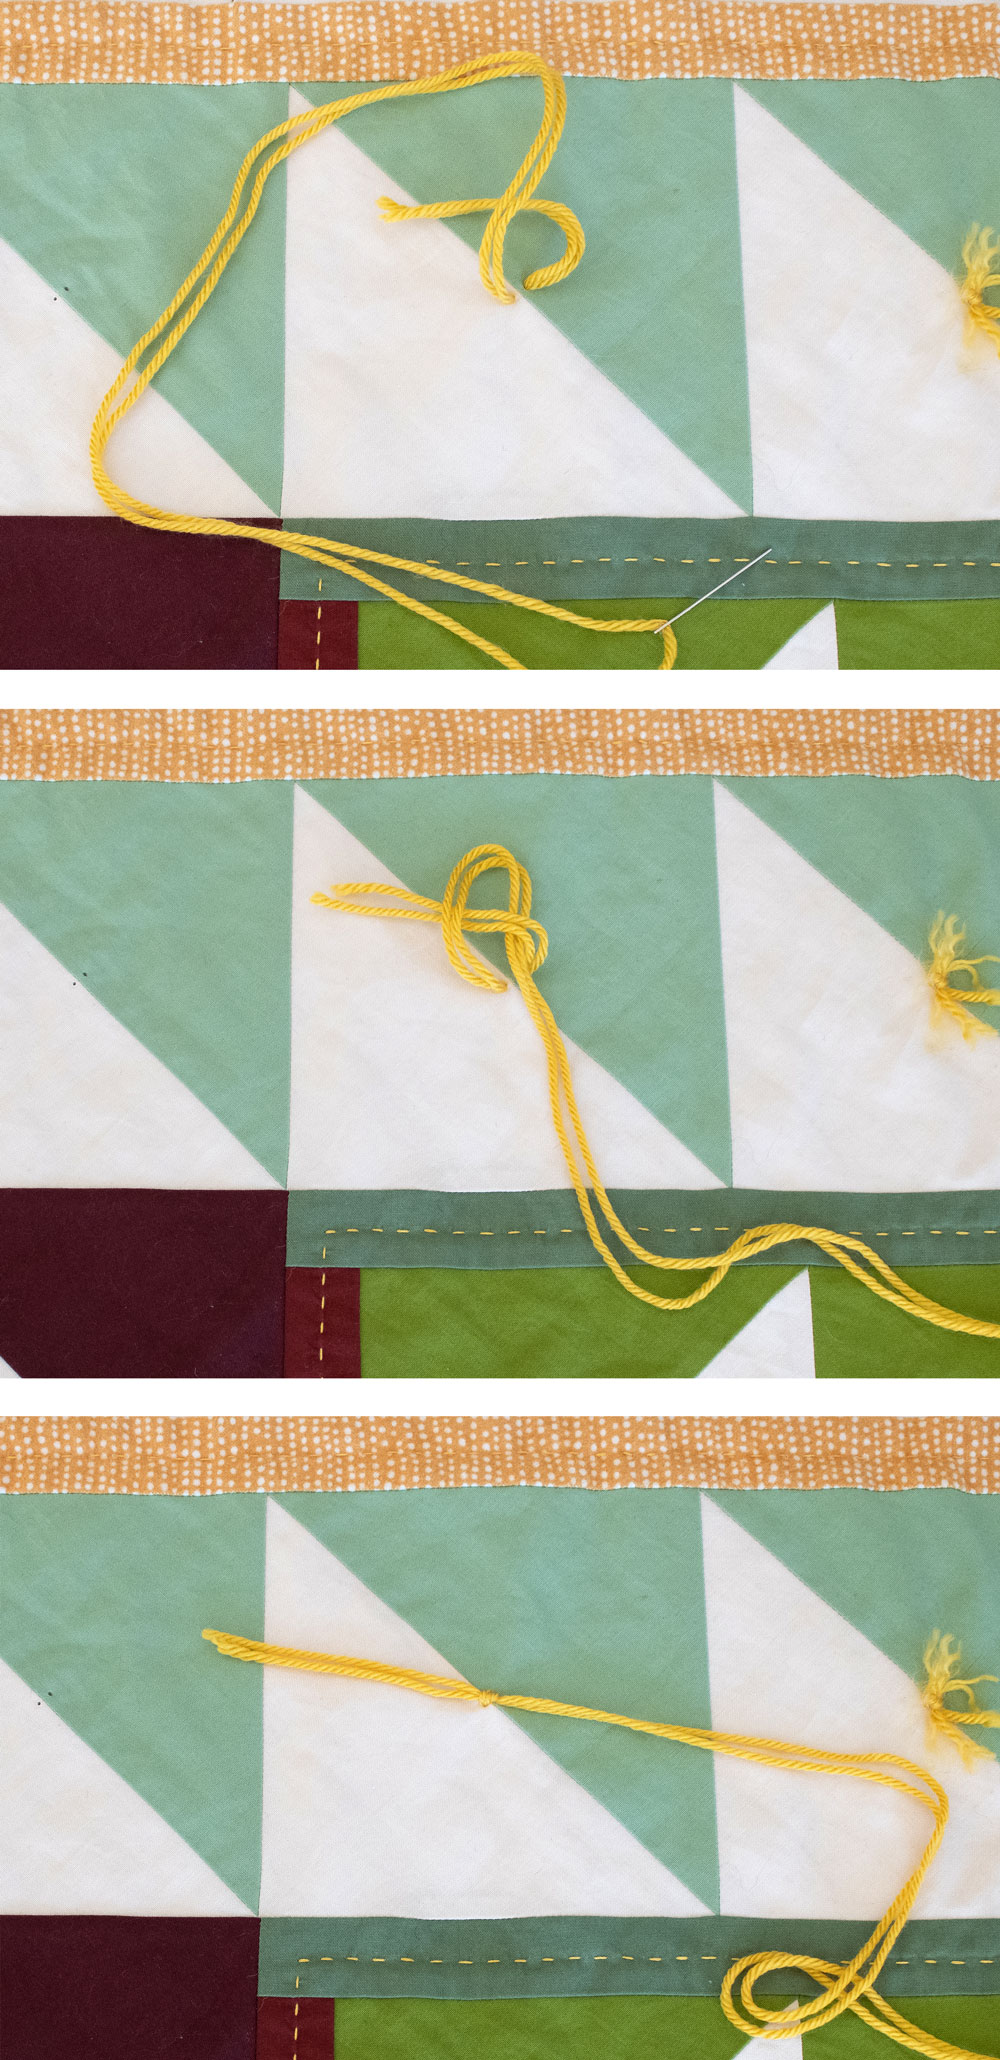
Use a double knot on each of the thread ties.
First pass the right thread over and under the left. Pull it tight.
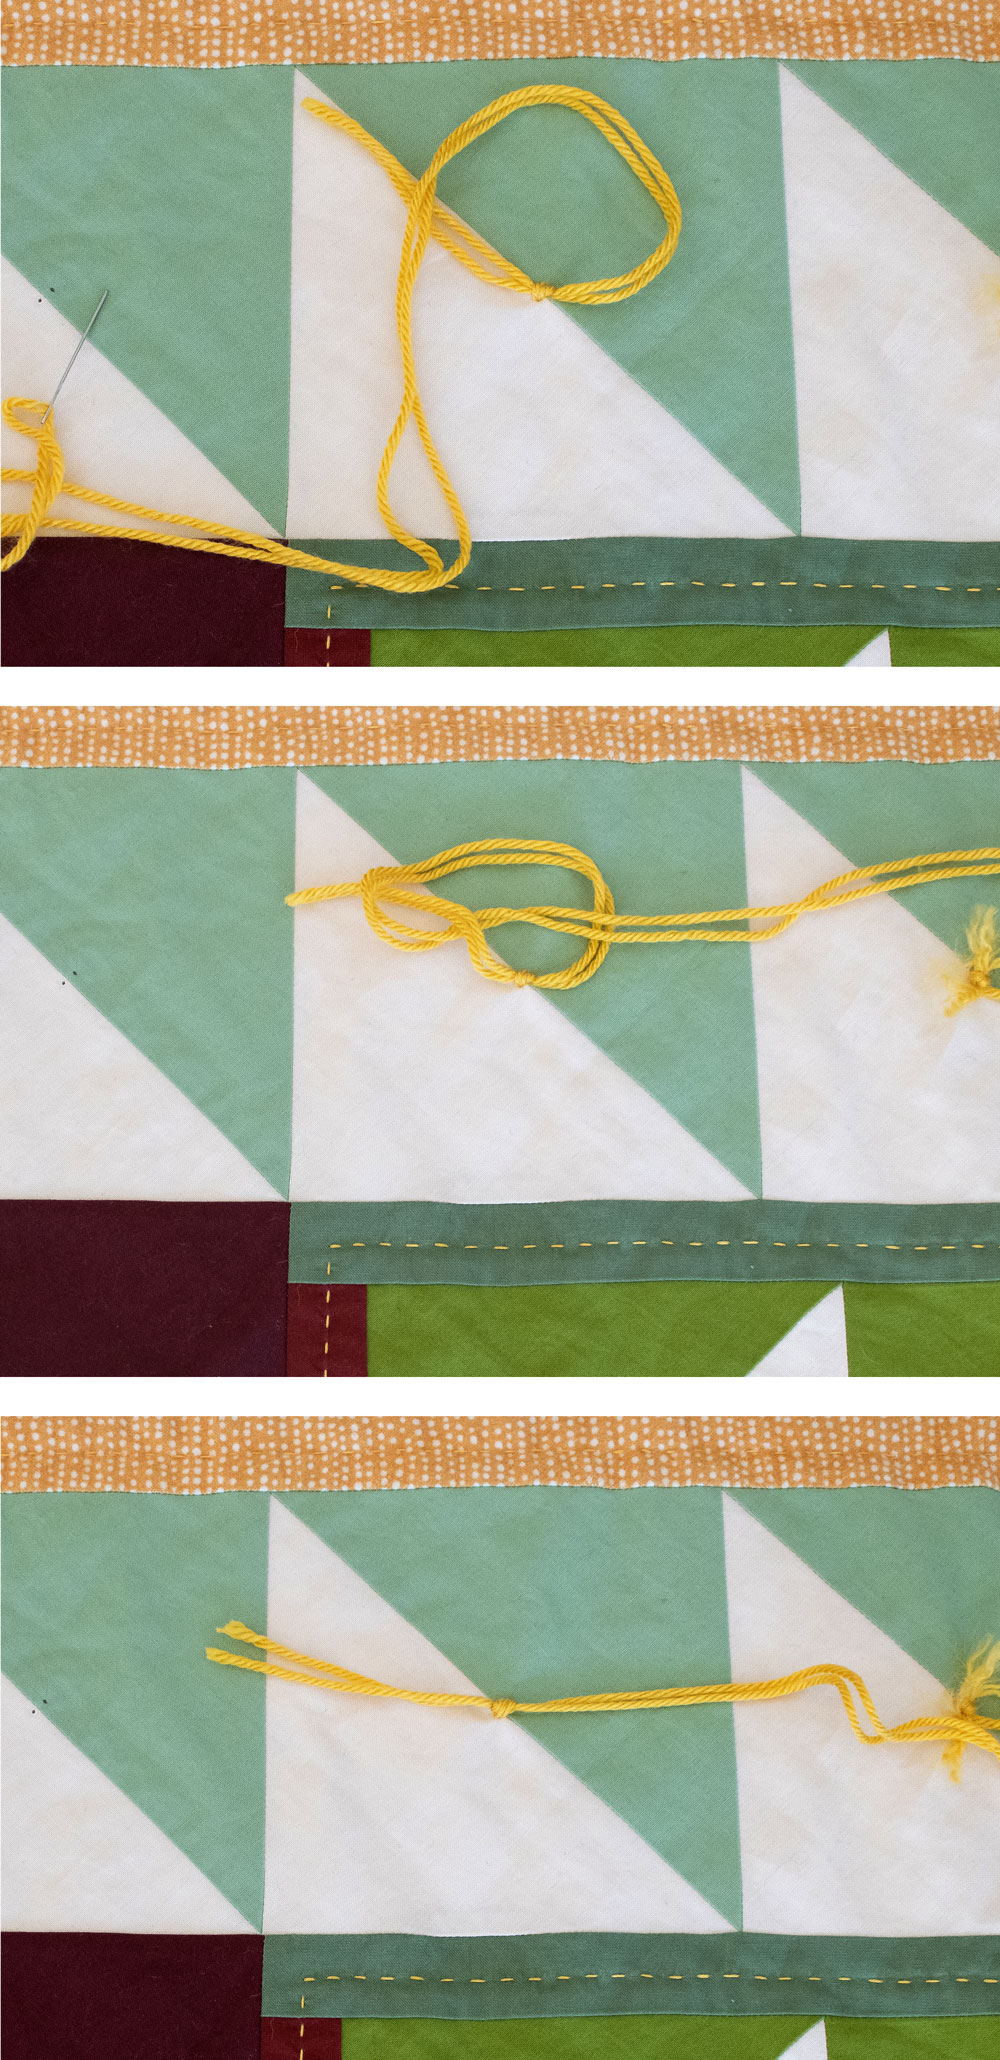
Then pass the left thread over and under the right. Pull it tight.
Step 5: Trim the Threads
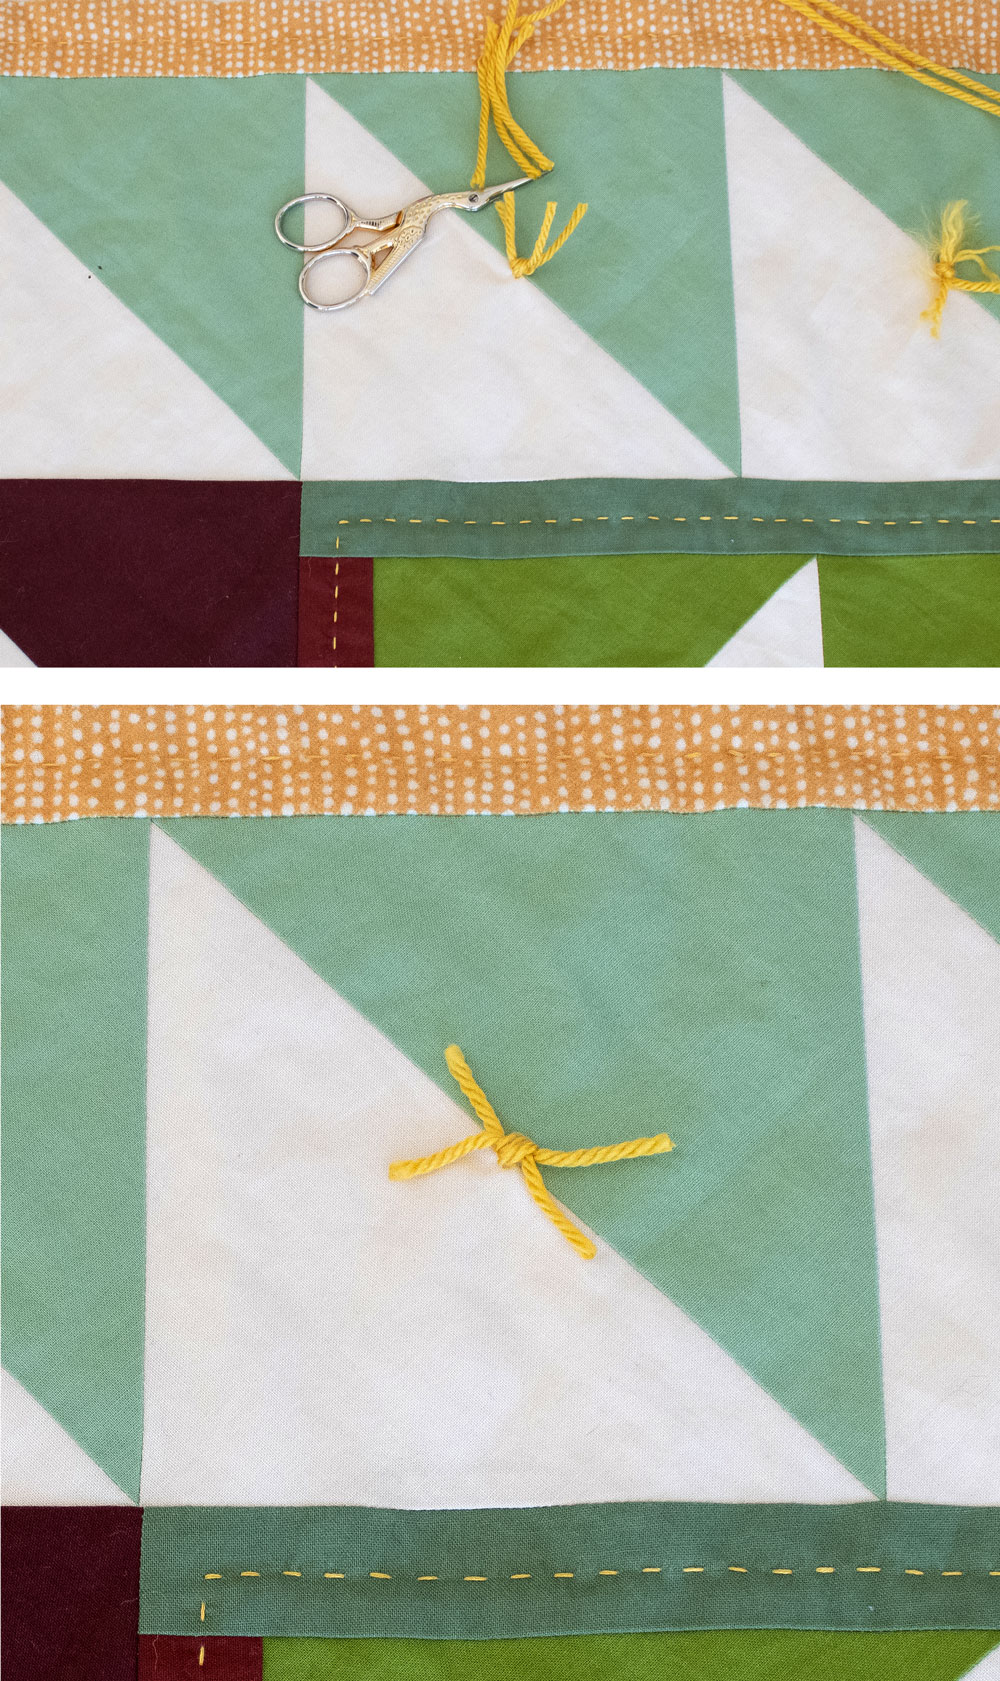
Holding both thread tails together, trim the threads to your desired length, making sure to leave at least 1/2" tails.
Step 6: (Optional) Use Fray Check
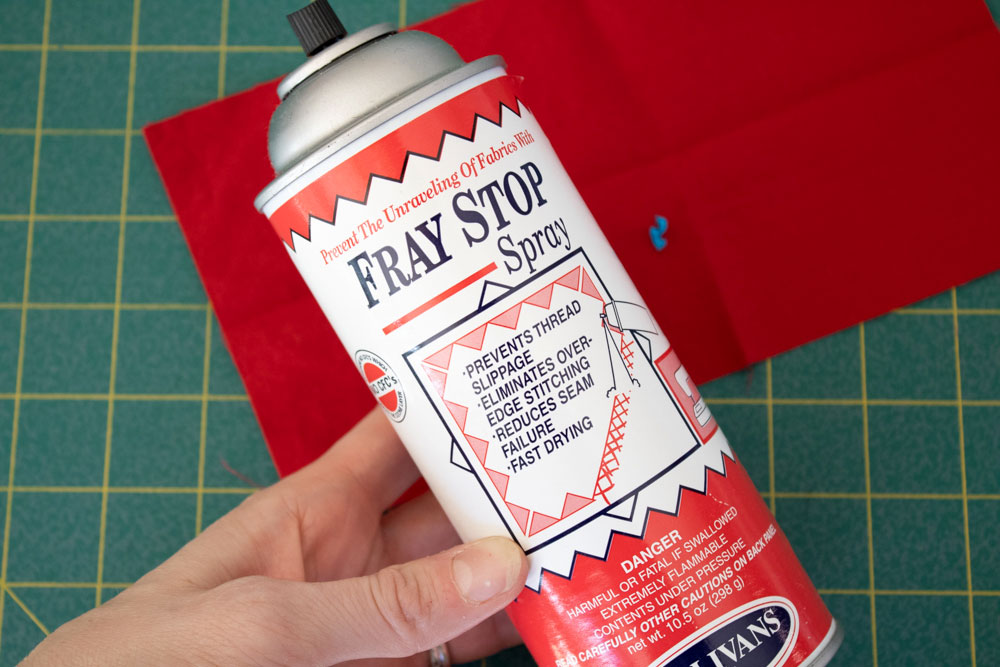
You can purchase products for fray prevention as either a spray or, more commonly, as a liquid in a bottle. If you are worried about your threads unraveling or coming untied over time, add a small drop of Fray Check or a little spray of Fray Stop to the center of each knot.
And that's all there is to it! So whether or not you are pressed for time or simply would rather have a hand sewing project rather than working at a sewing machine, this quilt tying tutorial is a beautiful way to finish a quilt.
Comment below with any quilt tying tips of your own!


Can one do embroidery at these quilt tie spots? Thank you.
Yes, definitely! Just make sure the knots are secure and the tails are left kinda long.
What type of yarn did you use here? I love the frayed look!
Hi Sarah! I love that too — It reminds me of Christmas lights! The yard in called Basic Stitch by Lion Brand. I found this particular skein at JoAnn, but, you can get it on Amazon and other online retailors.
I have a lot of DMC cotton pearl thread. Can this be used to tie a quilt
It sure can!
Hi, what kind of batting did you use on this one?
Hi Denise! I used 1 layer of Warm & Natural cotton batting.
I am a first time quilter, I have been on numerous sites, looked at a lot of books so I want to give you a GREAT big hug & thank you!!!! You are step-by-step your illustrations your wording it is the best easy for me to understand again thank you
Thank you so much! What an amazing compliment 🙂
I tie all my quilts and knot them using 2 8-10” pieces of yarn creating an X, then I tie them all together like you would knot a balloon. And I leave about 2” tails to get the frayed look!
Does the Fray Stop Spray make the yarn sticky or look different? Also does it stain the fabric?
Great question! A small dot of fray check will not change the look of the yarn. If you overdo it I do remember that it can look a little crunchy. The texture of the yarn will change slightly, but, it is almost imperceptible. The fray check dries so that it blends in with most fabrics, that being said, I recommend doing a little test blob before you begin to see how it dries on your particular fabric.
Thank you so much!!! You explained it perfectly. Easy to understand. Thank you so much again. Keep making beautiful quilts.
Thank you for the great instructions! I am planning to tie my next quilt. Now I feel confident with these instructions.
I am so glad you found the instructions helpful! Excited for you to try this on your next quilt!
Great tutorial! This may be a silly question Did you bind your quilt first? OR do the usual routine- baste, tie quilt, and then bind?
Thanks!
Binding is still last. This technique just takes the place of machine or hand quilting.
I was just thinking that a WIP I’ve had since last Christmas (a Christmas tree quilt top with flannel backing) would be perfect for some golden thread/yarn ties… now I know how to do it! 😆 Thanks for the tutorial!
This is a great tutorial. I am making a quilt for my bed that is a civil war quilt. I am so excited to tie this quilt to make it look authentic.
I am looking to make a twin size quilt for great granddaughte s from a quilt top that my grandmother madein the 40s or 50s.. She cut it in half when she broke up housekeeping and gave each of her two oldest granddaughter half. Don’t know how I ended up with one half, but think it is time to be used, so appreciate the instructions for tieing. I’m 85 at this point and have vision problems.
Hi Suzy! How far apart should ties be? Also, does your machine easily handle 2 quilt sides, the batting you mention, and the binding layers? Thank you kindly!!!
I would say to keep ties no further apart than 4″. With a walking foot, my machine can handle quite a lot 😉
When using fray check place a dot on the first “right over left” tie. Then finish the knot with the “left over right” tie and the fray check will be “embedded” in the center of the knot, holding it securely.
This is a great tip!
Your instructions are fabulous! So easy to understand. I had a tied quilt when I was young, it was so beautiful. Will definitely try this out. Thanks
Love this added layer of texture! Could I long arm quilt AND hand tie (with DMC Pearl), but not so many hand ties as pictured above? Just finished a throw size Gather!
You could! You can add as many or as few ties as you like if they are mostly for decoration.
Should you start tying from the center out or doesn’t it matter? Great explanations! Thx!
As long as your quilt is basted will it shouldn’t matter.
My quilt has a 4in. border. Should I also tie the border?
I would.
How many strands of embroidery thread should you use to tuft a quilt?
That mostly depends on your preference, but I think at least three strands for the tufts to look substantial.
Thankyou so much for this visual. I just got all the layers finished and I wanted to tie instead of machine quilt. My Grammy always tied and I have a very, very old quilt of hers and I didn’t want to root it around because it is so thread bare. It must be over 70 yrs old. When I found your tutorial I blessed you many times…Thankyou, Thankyou….you are a God send. My first great-granddaughter will be here in May…can’t wait. I’m Blessed.💝
I often tie quilts with ribbon, but I use PURE SILK RIBBON (3mm wide). It ties extremely tightly (especially with a surgeon’s knot) and doesn’t work lose. The secret seems to be to moisten the ribbon at the point where you will tie it. I have a quilt my grandmother made over a 100 years ago, it’s tied with silk ribbon (simple double knots) and not one of them has loosened.
I love this! Thank you for sharing. Now to find some silk ribbon…
This is such a wonderful idea, I always cut off the narrow ribbons manufacturers add to the shoulders of garments. I now have lots of different coloured ribbons. Do you think I could use these up as a sustainable option to silk ribbon?
I am planning on making a fleece blanket for my grandsons. Straight fleece on each side and would like to use yarn ties to keep it together rather than basting. Do i need to baste it first given that it is just 2 big pieces of fleece sewn together. I also thought I would put a layer of batting in between. the fleece as long as it isnt too bulky or heavy
I am ready to tie my first quilt and am a little nervous. Your instructions are nice and clear. When using yarn, should fray check also be used on the cut ends of the ties? How close should ties be placed to the edges? Do you start tying on the edge or in the middle? Thank you!
Hi Melinda!
I would do little test with your yarn before deciding to treat the ends with gray check or not. Tie a few and then rough them up a bit, if you like how the yarn holds up then you could just fray check the middle. I only fray checked the middle on mine.
I always start in the middle and work my way out when I am doing hand work on a quilt.
Mistakes are part of the artwork? I underestimated the necessity of fray check and wound up with pompoms!
I used wool yarn- like one of your commenters suggested- and doubled up the strands so I had four tails. After the first wash, I had a frayed mess. Rather than pull it all out and start over, I trimmed them down to cute little pompoms!
I have a lot of DMC embroidery thread. If I use that to tie my quilt, how many strands should I use?
It’s up to you how much you want the thread to stand out. No less than two strands for support, though.
I have just discovered this site. I have been quilting for over 40 years and never tied a quilt! So I thought I ought to see how it’s done properly. Thank you for this!
I am hand quilting an enormous rather pink hexagon quilt that was dumped on me (the 6th person apparently!). My group has managed to finish it off with the hexagons left behind – I am presuming the lady who started it has died. It’s been a labor of love as it was made in what looks like furnishing fabrics, tacked over card not paper, and double tacked in places so you couldn’t just pull the tack stitches out. I have discovered from the card inserts that it was probably started in the mid 1970s, and her name might have been a Mrs AJ Goddard. It is so big that I am going to do minimal quilting, and tie in the middle of the patterns (diamond shapes rather than grandma’s garden). Thank for this great tutorial!
Can I have some of the tails on the front of my quilt (around the border) and the rest of the tails on the back of the quilt?
You sure can!
Can I use thread to tie my quilt? Does it matter what kind?
I would just make sure your thread is on the thicker side. At least 12 wt. You can also double or triple the thread to make it more substantial.
Why is it necessary to leave 3” when using embroidery thread to tie? I just had a T-shirt quilt made by someone and I don’t like the looks of the large threads hanging.
This is just to take into account threads loosening and fraying. If you don’t like the look of the threads hanging, you can clip them closer and just try to be gentle with the quilt. Machine washing is what really frays threads.
I made quilts for each of my two daughters, identical unicorns done in two different colors, pink and yellow alternating with same color gingham. I had never actually made a quilt before, so I had no idea of how to hold the front, batting, and back together. This was in the mid-70s, long before everybody had home computers! But I must have seen a quilt that was tied, so I used matching yarn and tied knots at every intersection of blocks. As of about five years ago, both girls still had their quilts! And that’s very amazing considering how many times they had moved as Army brats, and then the younger one married a sailor who has moved many times, as well has having two boys of their own! It’s just incredible what someone can accomplish with just their imagination!
I also tie some quilts using 4 strands of embroidery floss, but I do a long running stitch, 3 or 4 inches apart, THEN cut and square knot tie. Saves time to not pick up the needle, then scissors, etc. I’ve also made bows! Knot, then bow, then knot the loops of the bows for stability. Love hearing your directions and the tips from others! Thanks so much!
I am curious if you would recommend this for a baby quilt? Are the ties secure enough to be safe?
As a mom with two kids, I can say that if you tie the knots well, no baby will be able to untie them, however, toddlers are another thing altogether. 😉 The good thing is, by the time the kid has the finger dexterity to untie a yarn knot, they usually are beyond the “eat everything” phase. With that said, I highly recommend for safety that you don’t leave a baby unattended on a quilt or in a crib with a quilt since they could get tangled up.
I wanted to tie a quilt with yarn but never found a needle that worked. When I found one with a large enough eye the tips were too blunt to go through the quilt. Do you (or anyone else) have a link to specific needle that will work with yarn?
Here’s an article about different needles for hand quilting that may be helpful! You might want to try a #3 embroidery needle, and you can see how large that eye is in this post too: https://suzyquilts.com/best-hand-quilting-needles-part-i/
Is there a way to estimate how much pearl cotton thread is needed? I’m in a quilt guild that does charity quilts and normally machine quilt them, but want to try tying. I have no idea how much to use for throw or twin sizes. Thanks!
You will be able to tie a whole throw quilt with one ball of perle cotton thread. You could probably tie two or three, actually.