How to Hand Quilt (with Video Tutorial!)
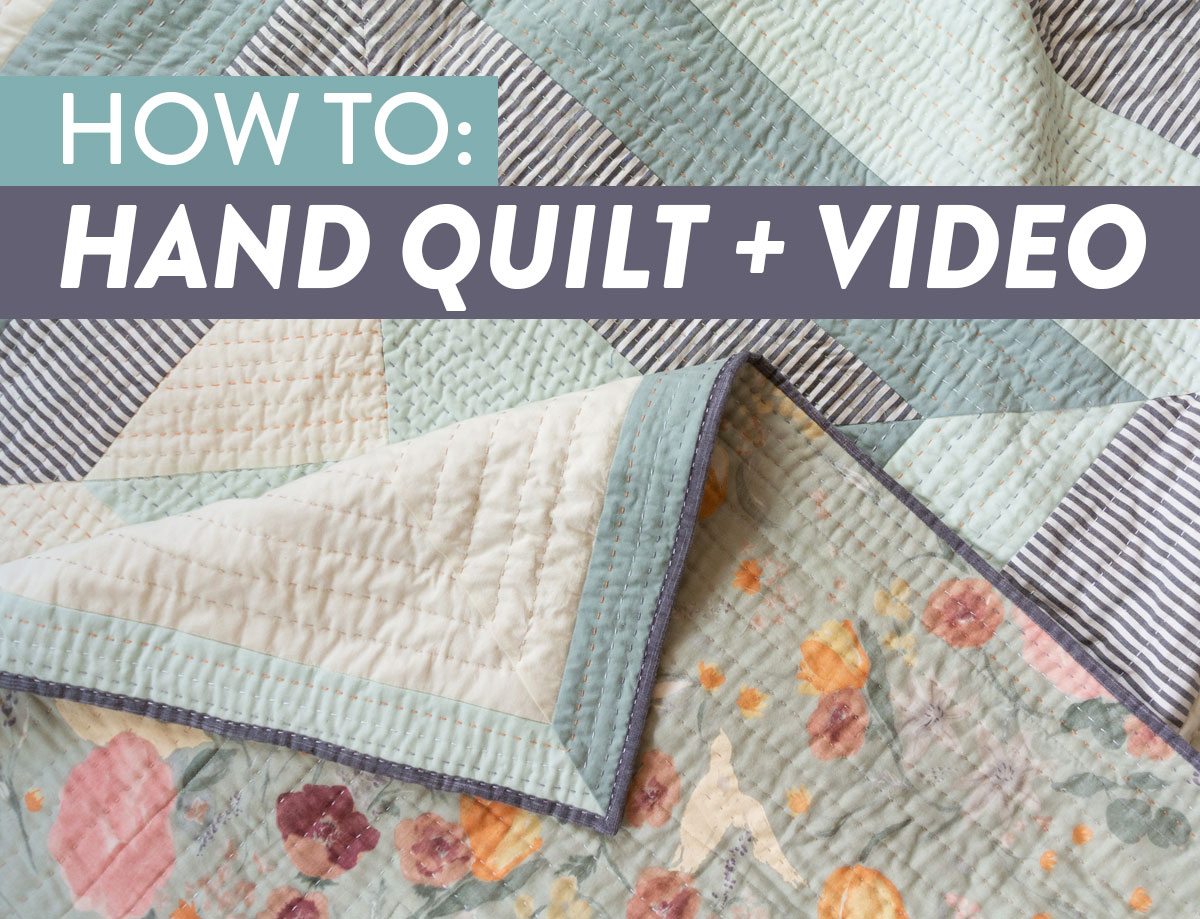
I learned to hand quilt a few years ago, and since then I've spent hundreds of hours stitching away. Those of you who enjoy these SQ tutorials have been asking me to "finally write that tutorial!" Even though I've filmed many spontaneous Facebook live videos and IG stories about hand quilting, only now have I planted myself in a chair and filmed everything I know on how to hand quilt.
Writing this tutorial loomed large in my head, because there's so much to say! I have so many feeelings about hand quilting. As much as I love picking fabric, piecing on my machine and even (can it be?) basting, hand quilting will always feel special to me in a way other techniques don't.
Many of you already know how much I love diving into our shared quilt history and learning about our wonderful Quilt Mothers who laid the foundation for us. When I'm hand quilting, I feel a spirit connection with them. I feel tied to a strong sisterhood of makers, creators, builders, matriarchs and dreamers.
Oh my fellow quilters, I could wax poetic on this for pages and pages, but that's not why you're here. You're here to learn a sewing skill that has been passed down from generation to generation for...generations! On to the hand quilting video tutorial!
Trending patterns!


Quilt Patterns


Quilt Patterns


Quilt Patterns


Quilt Patterns


Quilt Patterns


Quilt Patterns


Quilt Patterns


Quilt Patterns


Quilt Patterns
Read More About Quilt History
- Courthouse Steps Quilt Pattern
- Rail Fence Quilt Pattern
- Irish Chain Quilt Pattern
- Sawtooth Star Quilt Pattern
- Churn Dash Quilt Pattern
- Bear Paw Quilt Pattern
- Flying Geese Quilt Pattern
- Double Wedding Ring Quilt Pattern
- A Brief and Entertaining History of Polka Dots
- A Brief and Amusing History of Paisley
- Sunbonnet Sue: A Brief History
How to Hand Quilt Video Tutorial
Everything I cover here in this blog I also cover in the video. However, if you continue reading, you'll find all of the links I reference in the video.


Hand Quilting Supplies
After testing out many different kinds of needles, threads, thimbles, etc... These are the notions that I've landed on as being my go-to faves.
And don't forget, after you stitch one million stitches to gather the family together for everyone to stand on it. 😉

Hand quilting is all about touch and what feels right. Because of this, I recommend trying a few different kinds of each notion and then deciding for yourself what is the most comfortable. I've stitched with many quilters who hate my leather thimble and love the thimble pads (which don't work for me at all.)
In-Depth Lists of Hand Quilting Notions
- Thimbles: Your Guide to Finding the Best Thimble
- Thread: I have a handful of articles on thread. Here's a list of 4 of them.
- Needles: The 5 Types & Sizes of Hand Quilting Needles
- Scissors: The World's Best Sewing Scissors
- Marking Tools: Quilt Marking Tools: Different Ways to Draw Guidelines
- Rulers: 4 Best Quilting Rulers

How to Hand Quilt: 3 Easy Steps
Now that you have all of your supplies (and there aren't many), it's time to learn the 3 basic steps to hand quilting: Knot, pop and rock it. Say that 5 times fast. Knot pop and rock it. Knot pop and rocket. Knotpopandrockit!
You got those 3 steps in your head?
1. Knot.
You can make a simple double knot with your thread, or you can watch the video above for a demonstration on how I make a fancy quilter's knot. The key here is to make a secure knot that's not too big to pop through the weave of your fabric. Oh! But I'm getting ahead of myself...
2. Pop.
You've tied your knot and trimmed your little thread tail. The next steps is to decide where you would like your stitches to start. Pierce the fabric with your needle, catching only the quilt top and not the batting or backing, about 1" away from where the stitches will start.
Poke the tip of your needle out where you will begin stitching and pull your thread through. Oh dear! You're left with a knot sticking out on the front of your quilt! Can you guess what to do next? We pop! (For some reason this always make me think of the bend and snap from Legally Blonde. ha!)
Give that knot a little yank and pop it through to the inside of the quilt. Be careful not to pop it through one hole and out the other. However, if that does happen, try again and be a bit more gentle.
Don't worry about ripping your fabric. The knot will find it's way between the yarns of thread that make up the weft and warp of the fabric. Once the knot is through, I give the hole a little scratch with my fingernail to close it up.
3. Rock it.
The best way to hand quilt a running stitch is to rock your needle in and out, up and down, using your thimble-covered finger. This will keep tension off of your other fingers and, with enough practice, will give you the most even stitches.
To know what I'm talking about, check out the video above.
Finishing Your Stitches and Hiding Your Knot
To finish your stitches we are going to implement the same popping technique to make our knot nicely hidden. Once the knot is underneath the quilt top, I like to rub it into the batting layer a bit so that the knot gets nicely tangled in the fibers of the batting. This will help ensure that your stitches remain secure.

More Helpful Tutorials on the Quilting Process
There are a few steps to take before and after you jump into hand quilting. Below are links to tutorials on the different stages of the quilting process. You can also find a lot of these, plus more, in the Quilting 101 tab located in the top toolbar.
- Some simple beginner-friendly quilt patterns: Triangle Jitters, Rocksteady and Squared
- Must-Have Quilting Tools
- How to Baste a Quilt
- How to Choose the Right Quilt Batting
- How to Sew Binding on a Quilt
How to Pick a Hand Quilting Design
Choosing the right hand quilting design for your quilt can feel overwhelming. Just remember that there is no "right" choice and as you hand quilt more the process of deciding on a quilting motif will get easier and easier.
Below is an Instagram LIVE video I filmed about how to pick a quilting design. The quilt I'm using as an example is the Perennial quilt.
I hope you found this video and tutorial on how to hand quilt helpful and informative! Please let me know if you have any questions on the quilting process or supplies. Also I'd love to hear your hand quilting tips!
Below is a finished picture of my Reflections quilt and also what I looked like at 14 weeks pregnant. I felt huge, but now at 23 weeks, I realize I wasn't. 😉

Below are examples of some of my hand-quilted quilts. Some of them are fully hand quilted, and some of them use both machine quilting and hand quilting. Let's start with my very first attempt at hand quilting. The photo is a bit blurry, but that's how I was taking most of my photos in 2014.
Mod Mountains Quilt


That was such an awesome video girl! I’ve been hand quilting for years and I learned a lot from it still. Thanks for taking the time to share your talents!
Thank you so much for the great tutorial. I learned a lot and have been quilting for a long time. Appreciate your expertise 💗
Thanks for sharing all your knowledge on hand quilting. Since I made my first quilt, which was 10 years ago, hand stitching is the only I make my quilts. My fellow quilters don’t understand why I hand stitch my quilts. I don’t understand why they piece their quilts together, then send it off to someone to machine quilt it, charge an arm and a leg for their services it’s a stand off. What I can’t make them grasp is how much satisfaction I get from drawing on the design, then the relaxing act of hand stitching it all. Its wonderful to see your site supporting hand stitched quilts! Let me know if you would like to see some pics of some of my work. I’d love to share them with you.
Love the hand quilting look . Do you use a quilt frame? Or hoop?
I personally like laying the quilt on a table and quilting it that way.
Very informative. I love quilting and am presently watching videos on the above. Hoping to start soon. Thanks for sharing.
I have never made a quilt but with your help I think I’m going to give it a try. Need some free patterns.
My question is, how far apart can you space your quilting (say you are quilting straight lines—I’m asking about the space between lines rather than between stitches) without causing a problem? Is a hand’s breadth too far?
Great question and that is something I meant to cover, so I’m glad you bring it up. Your batting packaging will tell you specifically how far apart you need to quilt your quilt for the sandwich to stay together. Usually that ranges from 6″ – 8″. I, however, always feel like that’s still too far apart. My quilting is almost never more than 2″ apart and definitely not more than 4″ apart. I just think that if you want your quilt to stand up under wear and tear, it’s good to have those layers nice and secure.
Generally no more then 6 inches apart. But its really your preference, which most quilting rules are.
I loved this video and picked up several techniques from you while watching it. I too like to add big thread quilting to the quilts that I’ve already quilted. The table quilting idea is one I’m really anxious to try. Thanks so much for taking the time to make this special video! Love your patterns too.
Thanks so much for the great tutorial. You are so generous with your time!
One thing I do differently is when I knot off at the end, I go through the entire thickness of the quilt and pull the thread out through the back. That way the knot goes through the batting and lays between the batting and the back. Maybe that is more secure. Not sure if that’s better– it’s just how I was taught. Just bought the Campfire pattern and am going to make a baby size and try the combo of machine and hand quilting like your tutorial. I like that idea a lot! :=)
It probably is more secure. Great tip! I’m going to try that next time 🙂
What do you do if the thread breaks before the the knot goes through the fabric when you are tying it off? This happens to me a lot.
If this happens I just unstitch enough stitches so that I have room to rethread my needles and finish by popping my knot into the quilt top. Usually that’s about 3″. What kind of thread are you using? It shouldn’t be breaking on you like that.
Hi, I stumbled upon your tutorial on hand quilting. I’ve never done quilting before but the way you explain everything makes it look simple enough. Not that I think that this will be a walk in the park. I do have a question though, I have an old quilt dated back in the family but with years it has started to come apart & obviously the batting is almost none existent. How should I go about, should I open her up completely & put a brand new batting in & try to put her back together? Your feedback will be much appreciated. 😉
Thanks in advance x
If you want to replace the batting, you will need to unpick all of the quilting, rebaste with new batting and then quilt it. Another option is just to mend the tears.
Hello, when you machine stitch in the ditch or adjacent to the ditch, are you using a sewing machine or a long arm quilting machine? I quilted a baby blanket once on my machine and can’t imagine anything larger than that would be feasible on a sewing machine. I was told once that with long arm quilters it’s really difficult to make straight lines equal distance from the ditch. I’m wanting to make a large quilt with a combo of machine and hand quilting using straight lines. Thanks!
Throw quilts are actually the largest size I will machine quilt on my machine. I have a pretty wide throat on my sewing machine (BERNINA 770 QE) so it’s doable. Anything larger I send to a longarm quilter. Most longarm quilters will sew an all-over pattern on the quilt, however if you pay extra, some will sew a custom design. I still doubt they will want to stitch in the ditch, but certain longarm quilters could do something similar.
Try doing it in sections then joining the sections together. Much easier that way. I just quilted a full size quilt on my sewing machine and will never do it again! I will do it in sections of by hand. I just don’t feel that I’ve made the quilt if I send it out to be quilted. Also, let’s face it with the economy the way it is who can afford to do so? By doing it in sections it makes it so m much easier and doesn’t kill your shoulders! After I quilt the sections I stitch them together!
Great tutorial! Can’t wait to try on bayside quilt. One question: when you machine quilt above the ditch what weight thread do you use there and how long of a stitch?
Great question! When machine quilting I bump my stitch length up from a 2.5 to a 3. I usually keep the same 50 or 40wt. thread in my machine unless I want a fancy look like I did here with 12 wt. thread.
Suzy, where is the quilt pattern for the one in your tutorial?
That’s my Reflections quilt and I actually haven’t written the pattern yet. I’m saving it for next year when I plan on doing something really special for its release. 😉
Have you release it yet? I need it so baaad!
Hoping to launch it soon!! June 2019 – stay tuned! 🙂
I think I remember that lovely flowered backing fabric from some other post but can’t find. Can you tell me what it is? I am recently moving from years as a hand-quilter (tiny needle, 10-12 stitches per inch) to machine quilting…can’t fit thimbles on my arthritic finger anymore. I must own 30 different thimbles and none work! But big needle/big stitch/big thread quilting is a little easier on the digits and I find a way to add some to my projects. I love the way the colors show up…tiny quilt stitches are more about texture. Thanks for all you do!
It’s double gauze called Birds and Blooms in sage by Nani Iro. It’s from last year’s collection and after searching around online, I’m having the hardest time locating some in stock. I got it originally from fabricworm. And yes, those tiny hand stitches are stunning, but can be hard on the digits.
What brand leather needle do you use. I have always used a Roxanne and not easy on arthritic fingers.
Do you possibly mean leather thimble? I use one made by Clover. I wrote a thimble post with a link if you’re interested – https://suzyquilts.com/best-thimble/
This is so great! I had two questions. Is the table technique the best for posture? This is going to sound crazy, but I hand quilted a quilt once and strained a muscle in my neck from looking down too much. Second question is on waxing your thread, seems like you don’t, but do people wax? Thanks again for all your advice, just from watching the video I can tell hand quilting will be quicker than I assumed!
I think resting the quilt on a table probably would be easier on the neck than resting it in your lap. One thing I like to do too is lean back in a chair, bed or couch, bend my legs at an angle and stretch the quilt over my legs. Make sense? In that posture I’m totally relaxed and have easy access to the back of the quilt.
If you use thinner thread than 12 wt., you will probably want to coat it in a wax so that it doesn’t tangle. The thicker threads don’t seem to have the same tangle problem. Well, at least I haven’t encountered that.
Great info ! I would have to say that Sashiko needles are my best friend! Truth! Their sharpness makes up for the hulking size ( my opinion) and they are my new go to … I love that you kick open the door for everyone to find their own way … art should be like that and often we try to stuff it and ourselves into a box that doesn’t fit! Goodness knows ‘comparison is the thief of joy! ‘ Good for you… keep up the good work…
I knew someone would say they like the Sashiko needles! haha! Truthfully, I didn’t give them a fair shot. I took one look at their massive size, let out a little squeak and went back to my embroidery needles. 😉 Sashiko is a beautiful stitching technique, so I’m sure I’ll dust them off for another try soon. xo
Thank you for the very thorough tutorial on hand quilting. Your teaching style is very straightforward and really answered any questions I have had on this technique. Your lovely personality shines through and is like a breath of sunshine. All the best to you and baby.
What a sweet comment! Thanks, Vicki!! 🙂
Love this video! Thanks for taking the time to make it. I’ve already planned to talk to my quilt guild about hand quilting this month, so I’ll pass along your blog post to them too!
That’s awesome! Thanks, Nicole!
Thank you so much! I’ve collected all my supplies and have been practicing. I’m using cotton batting and it seems like A LOT of fiber to stitch through by hand! What is your preferred batting if you plan on hand quilting? Thanks!
Great question! I’ve used cotton, but I think my two favorites are wool and bamboo. Wool batting really shows off your stitches because of its puffiness and the bamboo batting is light with an amaaazing drape. I used bamboo in the sage and cream Reflections seen in this blog and wool in the Maypole and Modern Fans baby quilt. Here’s a blog post with a bit more info on batting if you’re interested.
Your video was awesome. I just finished hand quilting a Christmas quilt for our bed. I never in a million years thought I would ever “hand quilt” something but I decided this was one I would cherish forever and decided to go for it. I LOVED hand quilting – it’s so relaxing. I learned a lot from you even though I’ve already done this. I used embroidery floss and hope this doesn’t become a problem in the future with the 3 strands I used. I am going to invest in a multi color pack of pearl cotton for my next project. I LOVED your tip on machine basting it down. The pins in my quilt were quite a pain to work around. I spray basted first but as you can imagine with all the handling it came undone and so I stopped and pinned the whole thing before I went any further. I’m already looking for my next project to start. I’ve got several quilt tops done and ready to be quilted so I think I’ll start on one of those.
PS: thank you for the free quilt pattern for signing up for your newsletter.
I have never done hand quilting and your tutorial is so great to start. thanks a lot for your advices and your time
Thanks so much for the video tutorial AND thank you for adding the written instructions and links. This is a great post.
I loved the tutorial, thank you! I learned so much. It doesn’t have to be dense quilting, just enough to add impact. I would like to know the plaid fabrics and the gold dot used in the quilt in the video. Thanks!
HI, loved the hand quilting video. So nice to know I can quilt that way more selectively and it looks so nice? What is the blue plaid with orange fabric used in the tutorial video? Thanks!
It’s a woven fabric made by Free Spirit Fabrics. I believe Anna Maria Horner is the designer.
Hi,
I’m debating whether to hand quilt a throw sized quilt (60×68) but I’ve never done it and it’s for a baby shower in 7 days. I have a fair amount of time to work on it – think I’m crazy to try it?
Thanks!
Not crazy, just very ambitious. haha! I think it’s very doable, but you may want to sew a combination of machine and hand quilting. If you start with machine quilting, then you can add as much hand quilting embellishments as you have time for.
Suzy, loved your video. and am now a follower! Thanks for posting! I have only hand quilted 2 quilts so far and even though my stitches can be a little uneven, I love the look and the feel. I never thought about the mixing of machine and hand quilting but I am definitely going to try it as it will certainly save some time. I have only really used straight lines or outlining the pattern in the fabric within a block. I just bought your fly away pattern to make a baby quilt for my favorite niece. I really like the way you use the semi-circles. It looks like there is no machine quilting on that quilt. Can you confirm? Also, did you start in the middle and work your way out and what did you use to mark those perfect semi-circles? Thank you so much.
I’m so happy your found my tutorial helpful! Yes, I can confirm that I used no machine quilting on that Fly Away quilt. It’s all wabi-sabi hand quilting. I started in the bottom left corner and grew those crazy rolling hills outward. I used a Hera marker as a went. I would mark a little then sew a little. You can see my post on marking tools here – https://suzyquilts.com/quilt-marking-tools/
I tried hand quilting a few years back but ended up getting frustrated with the look of my stitches, but I think I’m ready to attempt it again (thanks to your tutorial!) You covered straight line hand quilting, but if you do a circle or any curve, do you stitch fewer stitches before pulling the thread through? I’d imagine stitching a curve would mean you make fewer stitches before pulling the thread through?
To tell you the truth, I stitch the exact same way no matter what shape I’m sewing. I just make sure my knots are secure in the beginning and end.
Great tutorial I only hand quilt with the Clover or John James #10 and small stitches I’m going to try this method on a batik top I have waiting to be quilted thx great name that’s my daughter’s name and only her dad is allowed to call her Suzy lol.
Suzy this is just plain awesome. I just did my first little trial of hand stitching and it’s so addicting! Question about popping the knot, both at the beginning and end: is there a special trick to get it through without breaking? I broke the thread a couple times and am wondering if using pre-washed vs washed fabric makes a difference? With the density of the weave? I am just using quilting cotton but it really didn’t like letting my knot through, apparently!
Are you double knotting or triple knotting? Try only double knotting. And are you using DMC Pearl cotton thread #8? I haven’t found washing or not washing fabric to make a difference. The only time I thought, “sheesh this is a tight weave!” was when hand quilting with poplin. But even then, there are tricks to making it work. If you find that the weave of your fabric is really tight, one thing I do is stick my needle into the hole where I”m going to pop the knot, but before pulling it through, I stretch out that hole a bit with the needle. Stretch is the wrong word, I guess all you’re doing is pushing the threads of the fabric further apart from each other so the knot can more easily go through. Once the knot is through, the threads can be pushed back into place. Make sense?
Your thread consistently breaking is really annoying and definitely something we can prevent.
I thought I knew what I was doing with hand quilting, but I definitely needed this video. Goes to show, there is always more to learn. Thank you for a great tutorial!
I have always wanted to hand quilt a quilt but I haven’t dared to yet. I have done smaller pieces and I’m far from perfect but I know I could manage. However I didn’t like the idea of having to do a whole quilt nor the idea of having to use a frame or a hoop. I actually even visisted a workshop once but I didn’t like the tiny needles nor the frame and there seemed to be so many rules to follow that it turned me off and I decided that handquilting won’t bee for me. Now that I have seen your excellent video my heart is full of hope again. Wonderful! You explain everything so well and give so many practical tips that it seems your way of working is more like mine. On my next quilt I will think about doing half and half and progress with your phantastic tips. I feel quite lighthearted again – thank you so much Suzy! I wish you all the best for the coming months!
I really enjoyed your hand quilting tutorial….since I’m new to your postings, I’m wondering if you have instructions on marking for Baptist fan quilting….I would love to use this design for a hand quilted project.
I’ve done a wabi-sabi Baptist fan design a couple times. You can see examples in my Maypole pillow and pink Fly away quilt. Both times I just free hand marked as I went using my Hera marker. If you want a more precise look, you’ll need a template or stencil. You can make your own or get one. I’d still suggest using a Hera marker since it doesn’t actually mark on the fabric (and that’s always the safest). You can read more about quilt marking tools here.
I just finished basting my rocksteady quilt and want to do a mixture of machine and hand quilting — any advice about which one to do first? Thanks!
Very interesting tutorial. Do you have any advice on how often you should change your needle? Thanks
I change my needle whenever the stitches begin to feel sluggish. If at any point your fingers are tired or if you’re having trouble pulling the needle through the fabric, try a new needle to see if that’s the issue. If it is, viola! Throw that old dull needle out.
Oh my word, I’ve been doing it wrong for years! And that’s okay…. because handmade is beautiful and unique. But I’m so excited to get some better techniques so I can improve my handiwork! Also – your videos make me laugh – thanks for not being boring. 🙂
Thanks for your tutorial. I have never quilted, but I am encouraged to give it a try.
I am more of a Machine embroidered.
I have a possible suggestion for threads that keep breaking. When we have that problem, we’re advised to put the embroidery thread in the freezer for 24hrs to prevent breakages.
I thought it may work for other threads as well.
Bless you and your baby. Ina.
Ps. I will be subscribing. Thanks
I’ve started hand quilting Mod Mountains, my first hand quilting experience. You’ve totally converted me!! Thanks so much for the great tutorial!
When you hand quilt and do not machine quilt at all, is there an amount of stitches per inch. I’ve seen 10-12 and 8-10. Any ideas?
Great question! This could be answered two different ways. 1. Based on your quilt batting instructions, make sure you have quilting close enough together so your three layers remains stable. Your batting packaging will say and it’s usually around 8″ – 10″ apart. As for stitch length, that’s a matter of preference. You don’t want your stitches so large that they become like basting stitches and can easily be pulled out, however, they do not need to hit a certain stitch/inch quota to be secure. If you were to compare it to stitch length on a sewing machine, try to make them no larger than 6 in length.
The question was on number of stitches per inch. (Your answer was on spacing.)
Note that the second half of Suzy’s response is about stitch length (which is the number of stitches per inch) 🙂
Hi Suzy – Not sure if you are still responding to questions given how long ago you posted this tutorial .. which is awesome btw. My question is simple .. when you quilt with the rocking motion what are you doing with the hand that is under the quilt?!
Thanks in anticipation, Samantha
Great question! Since I’m right handed, my left hand’s job is to gently stabilize the quilt sandwich. I also raise the fabric up and towards the needle for a more comfortable rocking rhythm. I think this is one of those things that will feel awkward until you figure out what works for you.
Suzy, thank you for taking the time to get back to me, busy person that you are. I think I understand .. I have tried with a hoop, and having the bottom index/second finger used to pivot the needle, but it hurts! I shall run away and try your version. I’m also interested to see the size of the stitch, and the associated gap, I think I have been trying to make the stitch, and gap, too small which is making life really tricky! Happy 4 July to you from Australia 🙂
Hi Suzy, Could you tell us what the fabrics are for the quilt top? Thanks!
The gray and white stripe is actually a duvet cover from IKEA. The rest are:
https://www.fabricworm.com/jadeforbifao6.html
https://www.fabricworm.com/mbs-mineral.html
https://www.fabric.com/buy/ef-289/kona-cotton-ice-frappe
Hi Suzy. I’m new to quilting. Love your blog and video tutorials. So informative and inspirational. Can you tell me the backing fabric used in the Reflections quilt? It is lovely.
Thank you! It’s a lovely double gauze designed by Nani Iro for Kokka. Sadly, I think it’s out of print since it’s a few years old. The collection was Jardin, I believe.
Thanks for this tutorial – super helpful! Quick question – how long does a ball of thread last you? I’m looking to do some hand quilting (already have some machine quilting) on a baby quilt on a road trip later this month. This will be my first hand quilting attempt so I’m trying to predict if I’ll need more than one ball or not. Certainly my husband doesn’t plan for Joanns to be one of the vacation destinations!
One ball should get you through an entire baby quilt. If you plan really dense quilting, grab a second ball just to be safe.
Hello,
Truly enjoyed the tutorial, but my problem is that I am left handed…. and I can’t seem to get the rocking motion from the front to the back.. My stitches on the back don’t show up…Any suggestions. I know practice practice…
The rocking motion does take more practice than you think it should. The first quilt I hand quilted the back looks very different from the front. I probably only sewed through all three layers with every other stitch! In the beginning, try sewing two stitches at a time. Once you feel confident with that, add a third and then a fourth. I think you’ll get there.
Thank you for this terrific tutorial! Do you (and other hand-quilters here) “gift” hand quilted items? Will they hold up in a washer? TIA for all input…..
I sure do! When I wash them I use a bit more care, but they should hold up over time.
great tutorial! I have a multicolored quilt made up of 2″ squares on an angle backed with off white muslin…..if I hand quilt it with thread to match the squares won’t the back look kinda janky? what would you do?
thanks, Missy
I think multi-colored thread on a light background can look really cool! One rule of thumb is to match thread to the lightest fabric in the quilt. Have you thought about white to match the muslin?
I’m so glad I came across this post, your vid was enjoyable to watch and listen to… I’m a first time handsewer and I’ve been getting conflicting suggestions on type of stitch. Is a running stitch what you would always recommend? As opposed to a back stitch?
Thanks for your advice and I look forward to reading more from you:)
A back stitch is when you stitch back and forth to lock a stitch into place. I think a running stitch will be best for your hand quilting project. Good luck!
I just found your site this weekend and enjoyed the video. I have a friend of my mother´s pattern for the ¨Cathedral Window¨ and/or Saratoga quilt. It is done by hand, in squares, folded and the fabrics inserted into these ´folds´’brings such sparkle to the white background. Please consider this for a future project and demonstration. Let your fans know if you ever do it! PS our friend used white drapery lining fabric to make it along with scraps from her home sewing for inserts! What do you think of that?
So resourceful! One of these days I’ll try it and write all about it! 😉
Did you hand sew the binding down onto the Reflections quilt with the same technique as you would with a machine? Thanks!!
I used the same technique I show in this post (How to Sew Binding on a Quilt) except instead of hand stitching a whip stitch, I used my same thick #8 thread and sewed a running stitch.
Do you use a frame, or quilt size embroidery hoop while you are hand quilting?
I actually prefer to lay my quilts flat on a table.
Hello! I was actually wondering this same thing. I’m new to quilting and told my Mom I wanted to try your table method as shown in this video instead of using a frame and she was skeptical. Can you explain how the table method works, when (it seems like) many people stretch it taught on a frame for quilting? Is it just personal preference? Will there be a difference in the end product? I’m just wondering why anyone would use a frame, which requires constant repositioning, if you can just use a table… seems so much easier! Thank you! Your tutorials and responses are so helpful! 🙂
I think a frame is the traditional method because it allows the quilt to be more mobile. It also may be more ergonomic if you are quilting detailed motifs.
Very informative video. Thank you.
Thank you for a wonderful tutorial!! I’ve been intimidated by hand quilting but your hybrid method seems a perfect fit for a newbie handquilter. I cant wait to try my first project. P.s. Your a great teacher. Thanks so much for sharing!!!!!!
What a sweet comment! So happy to help 🙂
Hi Suzy! I loved your video and it was very helpful-this may be a silly question but when you’re hand stitching, do you attach all of the pieces together at once or do you sew the fabric together first then add the batting/backing? Thanks!
No question is silly, but I’m not sure I totally understand what you’re asking, so let me know if this response doesn’t make sense. When making a quilt, you first sew the quilt top together completely. Once the top is finished you baste the three layers of the “quilt sandwich” together. After that it’s time to quilt the layers! The word “quilt” is super confusing because it’s a noun, a verb, a specific process of sewing, and also describes the general act of quiltmaking.
I really appreciate this video. I have a seasonal panel which I am hand quilting into a hanging picture. I started off totally wrong (about half an hour’s work) but am going to pull out the thread and start over. I have it on a quilting frame so will loosen the tension on it to get the rocking motion. Instead of straight lines I’m going around the picture outlines. Like all my projects, I’m learning as I go and am too stupid to be intimidated.
Hi! I try to avoid animal products. Do you have any suggestions for your second favorite thimble to use? I’m going to be hand quilting your Reflections quilt 🙂
This article should help you out – https://suzyquilts.com/best-thimble/
Love this video. I hope I’m not repeating a question but how long would you estimate your stitches are?
Probably an 1/8″
Your video is so helpful! I’m going to start hand quilting for the first time and am wondering when to add the crease lines. I don’t plan to machine quilt at all and in your video you added the crease lines after you machine quilted in the ditch. My quilt top is your reflections pattern and I hope to hand quilt similar straight lines to the ones you did. Thanks 🙂
Hi Suzy, I did two knots successfully! Your blogs are so helpful and I can see my quilting finally starting to improve. Thank you.
How long should a hand stitch stitch be?
About and 1/8 of an inch.
I loved this tutorial, thank you so much for it! I’m working on hand quilting a project now and wondered if there are other stitches you can quilt with? I am wanting to use a curvy stencil on the border of a quilt and am afraid the space between the stitches with this stitch will make it hard to see the stencil pattern.
If you are interested in other stitches, check out sashiko. There are some beautiful designs out there! Also, aside from a basic running stitch seen here, you could chain stitch for a “solid” line look rather than a “dashed” line.
Your work is sooo beautiful! Congratulations!
I learn a lot with your video, thank you so much! You are an inspiration!
Oh this is incredible! I couldn’t find the leather thimble so I made myself one and guess what? I tried your method on the table, to bad for the money spent on the embroidery hoop!, and it goes much faster now and my fingertips don’t hurt! Thank you so MUCH for this revelation! Greetings from Germany!
Hi Suzy, thank you so much for this tutorial! I’m just starting to think about quilting and would love to try hand-stitching first before committing to purchasing a machine, so I was wondering if you have any blog posts or tips about hand-stitching the quilt top? Is there any specific stitch or method you recommend? Thank you so much!
Hand piecing is not something I have personally done. You can do it with regular 40 wt. cotton thread and a simple sharp or quilting needle. Use a running stitch and try to make them as small as possible. I bet there are YouTube videos on this if you are a visual learner.
Thank you so much!
Your use of a bone folder and ruler are genius! I used that technique on a quilt I just finished and it worked great! Thank you so much.
Hi Suzy,
I’ve always enjoyed doing hand sewing and was thrilled when I found your website and video on the topic! Beginner here–I have yet to quilt anything and had a question. I’m trying out something small first by putting together a Row by Row kit (from 2015). I want to make it as a wall decoration (which I plan to hand quilt), rather than in a full-size type quilt. I have some unbleached muslin and wondered if I could use that instead of batting? Or is batting preferred no matter what? Thank you so much!
You could use that as batting, however, if you want your stitches to have dimension and be well seen, I recommend some thin batting – maybe a bamboo blend.
Hi Suzy. I love the way just a small amount hand quilting can give the quilt a vintage look. How would you hand quilt a quilt made with 16” Ohio stars blocks with sashing in between? The quilt is made with Tula Pink fabrics. I am also wondering what you think about a variegated thread, either shades of the same color or different colors. Would that be too busy? Thank you!
Oh I love variegated thread! It will add some business to the overall look, but Tula’s fabric is already pretty bright and busy so I think it will work really well. I’m assuming the sashing is a solid color so you will be able to see the stitching? You could stitch the whole quilt in the ditch and then add some hand quilting just in the sashing.
Thank you so much for responding! The sashing is done in stripes with a tiny bit of white. Maybe a bit in the white would be good. https://www.freespiritfabrics.com/product_images/FS2180TP%20Center%20Stage-VERSION%202.pdf
So many colors!
I’m thinking of doing Triangle Jitters next as a baby quilt. I’m excited.
Thank you again.
Leeia
Hi Suzy! Thanks for this wonderful tutorial. Quick question: Is using a single strand of thread (vs. doubling it up) a personal preference for hand quilting or is single vs. double better? Thanks!
In the tutorial what size of yarn thread did you use? I have a size 5 and that seems too big. What size should I use? Thanks.
I use 8 wt. – it’s pretty thick. 12 wt. would work great too.
I used your tutorial to hand-quilt some of my Triangle Jitters quilt — it came out so cool-looking. Took for-EVAR but I would do it again. 🙂
Hi! I’m new to quilting and falling in love with the various patterns, techniques and fabrics. Your site, blog and FB page are all informative and more importantly they are very inspirational. One question I have regarding hand quilting is about some of your thread colours. Do you use the same colour thread for the entire quilt? It looks like some of yours have two colours. I’ve only used quilters thread and teeny tiny needles, which are difficult for arthritic hands. I am SOOOOOO looking forward to using a different gauge. Thanks for sharing your talent.
Great question! I treat every quilt differently, so if a subtle look is what I’m going for, I’ll probably stick with a single light neutral thread color. However, if you check out one of my recent projects, my Shine quilt, I used a different coordinating thread color in each block! That makes the quilting feel extra unique and special. It’s also a great reason to grow your thread stash. 😉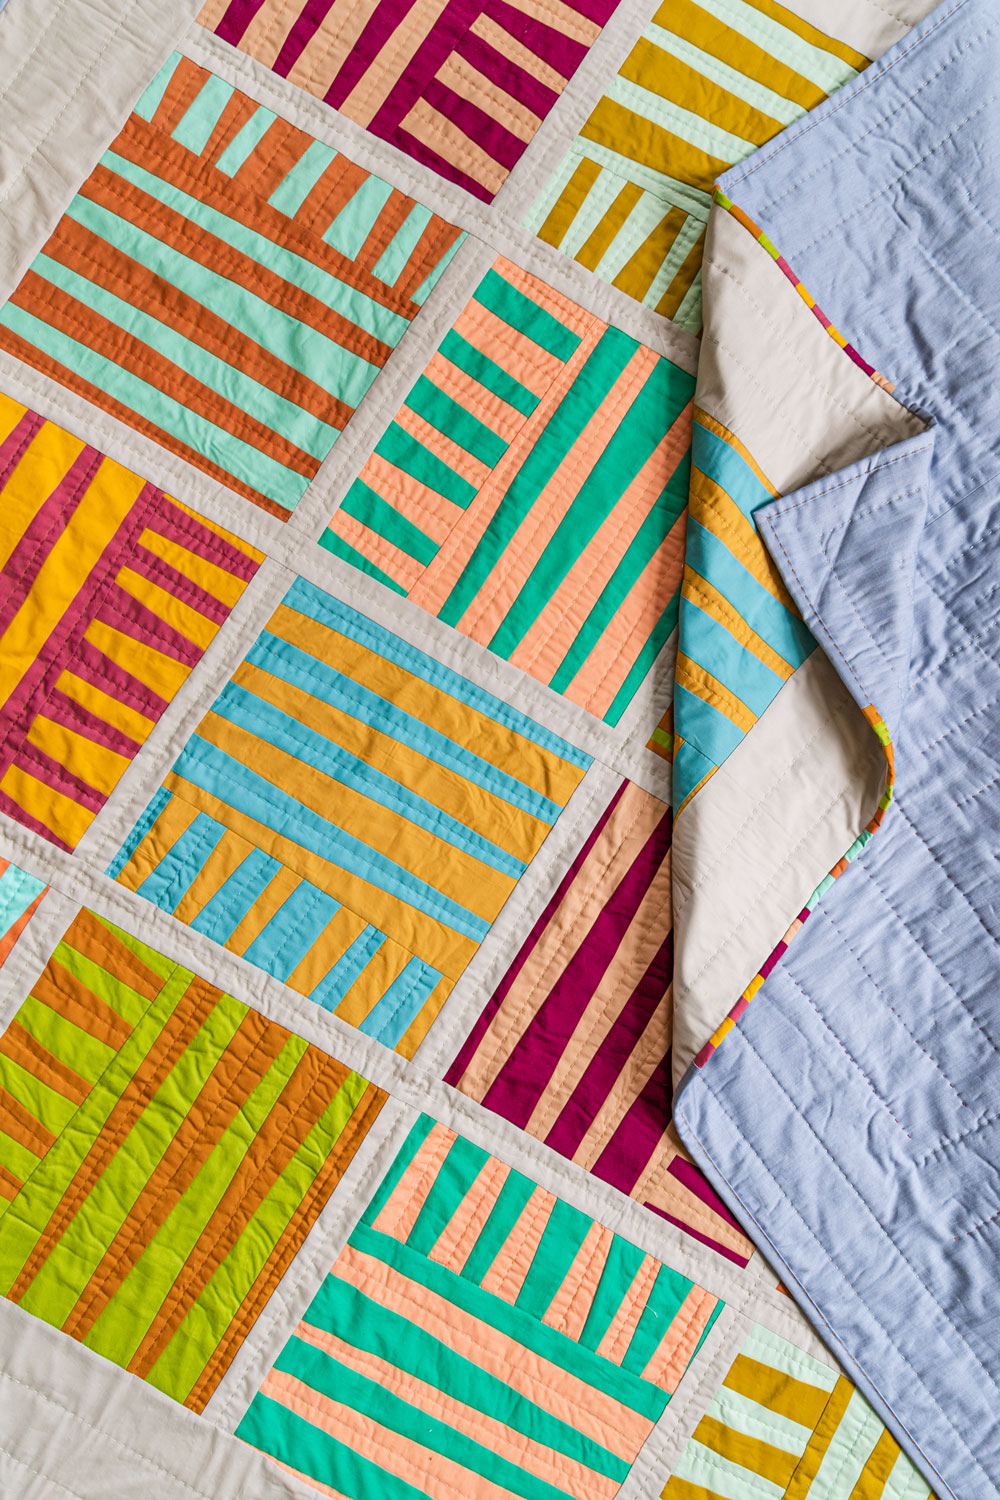
Hi Suzy!
Love your tutorials and all the gorgeous quilts! I am currently hand quilting my first quilt! I was wondering if you have tips for taking care of your hands and wrists while you’re stitching all these lines!
Great question! Like all things quilty related, it’s good to take breaks often. At least every hour put your needle down, stand up, walk around, drink some water, and figuratively hit the refresh button. In addition to wearing a thimble (or two) that fits well, I suggest doing different wrist stretches as needed.
Hi Suzy! WOW! You have really inspired me. I have started a quilt for my granddaughter and I have been doing it wrong. 😮 It’s a first for me and it will truly be a unique quilt with all the blunders and mismatched stitches. It’s a pleasure to watch you do your thing. I laughed and learned. Thank you so much for just being yourself and letting it be fun.
First off–you are adorable and have beautiful skin!!! I’m not a creeper–honest! I’m new to quilting and am addicted! I really love the handstitching aspect of quilting because it is so portable. My next project is a landscape quilt for my sister that I know will have to be handquilted–your tutorial was so comprehensive and took my anxiety right down to zero! I’m signing up for your newsletter because I can see that your quilts are my style–kind of modern in color and pattern. Thank you so much!!!
Thank you for making and sharing this very helpful video! I’m going to start quilting my first quilt shortly and this is just what I needed.
If hand-quilting only, do you recommend starting in the middle of at a corner?
If you are only hand quilting, you can pick and choose where it is easiest for you to start.
Hi Suzy! Glad to see many 2020/21 comments on an old post of yours. I’m sure all the indoor time is driving this quilting frenzy.
I was just wondering if I can bind my quilt first before hand-stitching the whole quilt? I’ll have the quilts pinned throughout though, before binding.
Because fabric inevitably shifts during the quilting process (even hand quilting process) you will be happier with the result if you wait until the end for binding. I also find it a lot easier to start and stop quilting whenever possible at an open edge, which you would lose if you bound the entire quilt.
I’ve had some consternation around binding after hand quilting. I hand quilted only, then squared off my little quilt and cut off my knots! Then I had stitches coming out. It was nightmarish. Does this ever happen to you, and if not, where did I go wrong? For the future, I considered squaring and binding, then quilting, but that seems risky (for shifty reasons). The result: I’ve been scared to hand quilt. And I want to hand quilt! Thanks in advance for your advice!
Oh that is frustrating! One way to stop this from happening is before you trim your quilt sandwich, sew a scant 1/4” around the perimeter. That will lock in all of your hand quilting and will eventually get covered by binding.
Hi Suzy! I chose a solid color for my backing without thinking twice. I have basted all three layers together and want to start hand quilting as you have shown in your video (thank you!) My question is what color thread should I use? The quilt has pastel shades of pink, green and violet on the top and the backing is pink. Should I choose the same color as the backing or can I use a combination of colors?
There’s no right or wrong answer! You can use multiple thread colors, or pick one that blends well and stick with that. Lay out the thread on your different fabrics to see what it looks like as a single piece. Sometimes thread on the spool can look different to the eye than a single piece of thread laying on fabric.
WOW that video was so incredibly helpful for me. I was doing my stitches way too large and I just didn’t like the look of them, but wasn’t sure why. Your tutorial really helped and I hope someday my stitches are just as beautiful and even as your’s!!!
Hi Suzy! Thanks for this video. It’s super helpful. Do you have a yardage estimate for the pearl cotton thread you like to quilt with? I realize it would vary a lot with quilt size and quilting pattern, but just a ballpark would help me know how much to order. I’m not sure if I would need 1 ball, 5, 10? Thanks for your help!
For a throw quilt you probably need 2-4 balls.
Great video – thank you for sharing. Now, to do some hand top stitching soon 🙂
I have a bag that was the start of a hand sewing quilt but it doesn’t have the pattern it was my grandma. All I have is a part of it. I want to finish it but don’t know the pattern. How do I email you the photo so maybe you know the pattern or can help me with it
While we can’t guarantee that anyone on our team will be able to help, you can email us at [email protected]. You can always find that email address under the “Contact” tab at the top of our website! Sounds like a cool project!
Thanks for the great video Suzy! I am trying to hand stitch a quilt, using the rocking technique, but having a hard time getting the stitches on the back side to look like the top. What am I doing wrong? Is it the batting, or because I am using a hoop? I like your table top idea and will try that.
That’s a common problem when you’re first starting out. Practice, and possibly trying different techniques, will make all the difference.
If I machine quilt with stitch in the ditch on the seams, do I need to leave the basting pins in, or can I pull them out as I move to a section so they’re not in my way? And thanks for the tutorial!
You can pull them out as long as your stitching is close enough for your quilt sandwich not to shift.
That makes sense. Thoughts on how close that is? I’m doing the queen size of the Maypole quilt. This is the first time I’ve made any quilt larger than baby size, so I’m kind of a noob here. 🙂
Double check the instructions on your batting packaging. I’m guessing it says something like “quilt every 6 to 8 inches.” I usually suggest quilting at least every 4 inches, which is basically a hand’s distance apart.
Hi Suzy. I’m working on my third hand quilted project and I’m not loving the stitches. I think it’s the Color of the the thread. I’m using white pearl cotton and I know now I should be using the creamier version of white. I’ve done only about 6 inches of the quilt and am wondering if it’s ok to remove what I’ve already done. Will the holes disappear in the wash or will it look like I removed stitches? Have you ever had to remove stitches?
It’s never too late to change your mind! Since it’s only 6″ pull out what you’ve done and start over with a thread color you like better. When you hand sew like this the needle is finding its way through the weave of the fabric, which means some gentle scratching with your nail or a cycle through the wash will move those threads back into place – hiding any appearance of holes. This is true when you rip out stitches made with your sewing machine too.
In the future, if you sew a lot more than 6″ and decide you don’t like the thread color, it’s ok to save what you’ve sewn and then switch colors. You could even sprinkle tiny bits of that first thread color in throughout the quilt to make it look intentional.
Thank you for this great video. I am doing my very first hand quilt and was sent your direction for a great tutorial. You have been so helpful. Thank you!
Do you use a quilting rack or anything? I’ve tried them all but find they hurt my shoulders and back. I just hand quilt by holding the quilt on my lap. Do you have any other suggestions?
Quilting design really changes the overall quilt. I’m curious about scale, lines vs. curves, etc. For the Fly Away quilt, how did you choose the size of your fans for the quilting? Did you use a pattern for it? How did you make a pattern? I would love a post on how you choose your quilting motif in hand quilting. There’s a lot of talk about choosing a quilting design for free motion or machine quilting, but I’m having a hard time finding advice on choosing a hand quilting design.
Great questions! My favorite way to mark the top of a quilt for quilting is with a hera marker. This blog post will give added info on that – https://suzyquilts.com/5-reasons-why-a-hera-marker-is-the-best-quilt-marking-tool/
A while back I filmed an Instagram LIVE about how to pick a quilting motif. It’s a little long, so you may want to watch it while doing something else. Here is a direct link and I will also embed the video in this post so you know where to find it – https://www.instagram.com/tv/B_qUcTYAu26/?utm_source=ig_web_button_share_sheet
Hi Suzy!
I have not seen any mention of an Aunt Becky in your hand quilting posts. Have you seen or tried this implement and what did you think? Anyone else out there familiar with Aunt Becky? It is made by Jannilou. Inquiring minds want to know …
This is the first I’m hearing of an Aunt Becky tool, but at such a low price point, might as well give it a whirl! I wonder if you could replicate it with something you already have at home. I can’t get a sense for how big it is online, but I wonder if a small book of matches is a similar size?
Thanks, I went ahead and ordered one for grins. I’ve heard of using a spoon in a similar fashion. Story to be continued…
I saw the pictures of your little brown haired dog and it looks JUST like mine.
Amazing.
Love this…I’m ready to quilt my finished top so may do some hand quilting . Your little dog looks exactly like mine !
awwww 🙂
I am planning to make a baby quilt which will need to be completed in approx 3 months. It will be double gauze, front and back, with bamboo batting. I would like to hand quilt it in rows approx 3/4″ apart. I will have most evenings to work on it but am wondering a few things:
1) how long does it take to hand quilt a crib size quilt like this?
2) how much quilting thread does it require?
3) what type of quilting thread works best on this type of project?
4) will the bamboo batting have enough loft for a soft crinkly finish?
this is my go-to refresher video on hand quilting. i hand quilt more and more lately, as i love the process, and always need a reminder about quilting off the edge of the table. it’s very helpful for big old fingers! thanks so much – love your patterns, colors, vibe.
Thanks for the easy-to-follow video! I’m getting ready to hand-quilt a small blanket for my granddaughter. You’ve inspired me to consider using a #8 thread!
When you stopped quilting before actually reaching the end of the desired line (because you wanted to demonstrate how to pop the thread at the end), I was hoping you’d show how to start again with a new thread and continue the line, as if you had run out of thread and needed another piece. Where do you pop and start the first stitch with the new thread so your line of stitches looks continuous with even-spacing on both the top and back side of the quilt?
Hi MaryKae! You’ll just use the same technique Suzy demonstrates when she starts her quilting line to continue following your marks. Hope that helps! Enjoy your hand quilting!
If doing a combination of machine quilting and hand quilting, which would you do first? I’m using mini waffle knit as backing, so I’m worried if I machine quilt it first it will stretch funny. I’ve used a polyester sheet as backing before and it was a nightmare to machine quilt because it was so slippery. Would you suggest just hand quilting it?
You can do either! Do whatever excites you — either just hand quilting or a combination. If doing a combination, we like to machine quilt first because it helps keep hand quilting tension even. Either way, the most important part is to make sure you’re having a great time!
Thank you for sharing your wealth of knowledge. I’ve read this article a couple of times now. I’ve been sewing for over 45 years, machine quilting for about 3, and now I’m ready to tackle hand quilting. I’ve got a baby quilt in mind, and was wondering if you think Essex handspun linen on the front (just a solid piece, not pieced) with either a jersey knit or a flannel on the back would work for this technique? Should I pre-wash either or both fabrics? I’m worried the flannel or knit will shrink quite a bit more since it has a higher percentage of cotton. But that might be a good thing too (more crinkly?) Any words of wisdom would be ever so much appreciated!
You can use any fabrics for hand quilting, so go for it! When mixing fabric types, we always recommend pre-washing since they are likely to shrink at different rates. Enjoy that baby quilt!
What parts are actually done by hand…hand quilted?
That depends on the quilt. When I first started hand quilting I would machine quilt my sandwich together (that’s the backing fabric, batting, and top) by “stitching in the ditch.” That means stitching along the quilt top piecing. Once all of my layers were secured, I would add additional hand quilting. Now, I mostly hand quilt my layers together without machine quilting. I do, however, always machine piece my quilts.
Hi! I’m trying to view this tutorial but can’t get it to load. I’m ready to start stitching my first hand quilted throw and looking for tips. Help!
Hi Kathy,
It could be an ad blocker that is preventing the YouTube video from appearing. Since YouTube videos have ads, this could be causing the problem. I would recommend checking your plug-ins and extensions (ad blocker or a site blocker). I would also test opening the blog posts on another browser to see if this solves the problem. You can also try clicking on the video, on the bottom left there is usually a little link that says “watch on YouTube” and this will open a new tab and that will usually do the trick.
I hope this helps! 🙂