How to Sew Binding on a Quilt (VIDEO!)
We're happy to continue our Quilting 101 series here on the SQ blog where we give you tutorials on all of the steps to make a quilt from start to finish. Now we are finally at the end of this sewing journey and wrapping up (quite literally) your quilt. It's time to learn how to sew binding on a quilt! Hooray! Pat yourself on the back. You deserve it!!
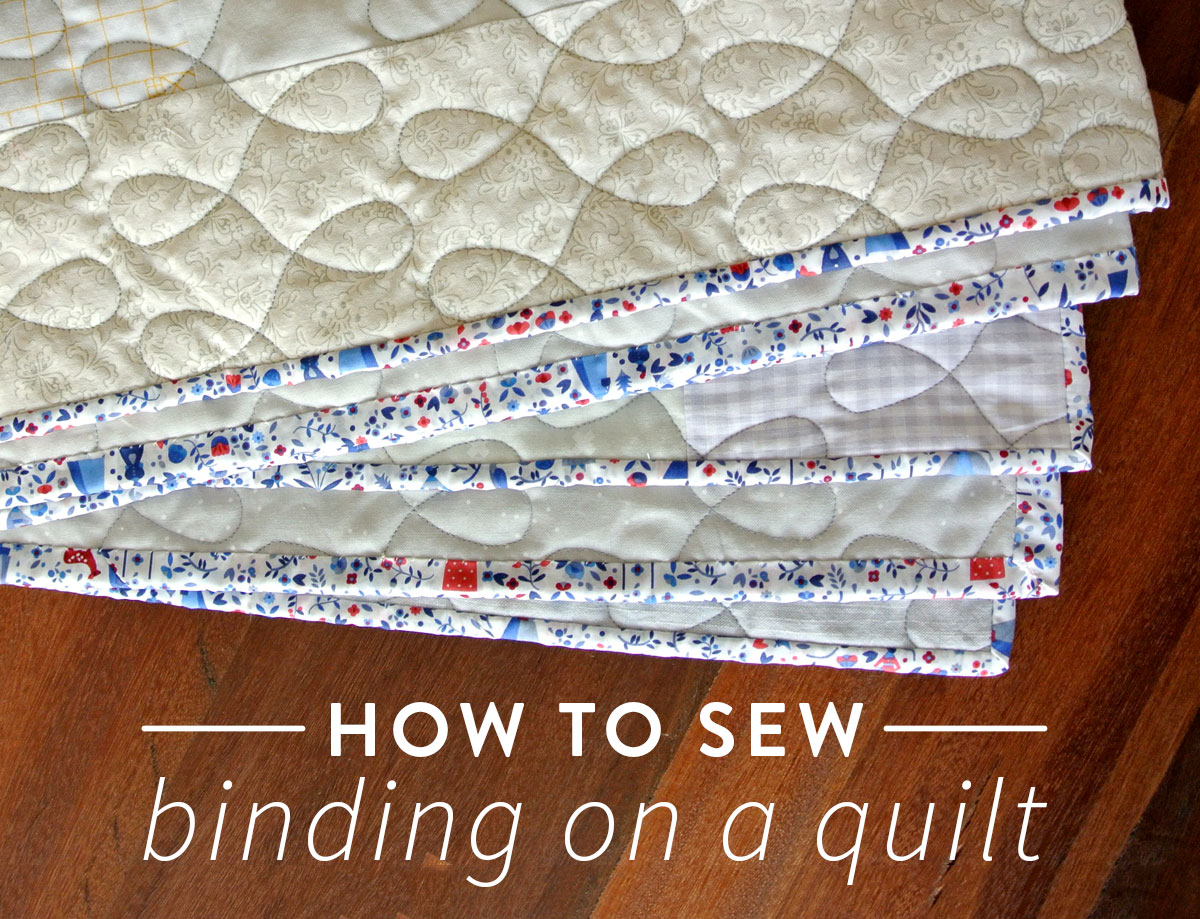
Sewing quilt binding may not be the most exciting part of making a quilt, but it is the icing on your beautiful cake – so it’s best to take the extra time and do it right. The video below will demonstrate how to sew binding on a quilt step by step.
Quilt Binding Supplies
- Sewing machine (in the tutorial video I use a Janome Memory Craft 7700)
- Walking Foot
- Ruler
- Rotary Cutter
- Cutting Mat
- Pins
- Thread
- Needle
- Iron
- Ironing Board

Some optional supplies include:

What is Quilt Binding and How Do I Make It?
I’m glad you asked! Binding is a strip of fabric used to cover the raw edges of a quilt. To make binding you need to:
- Measure the perimeter of your quilt to determine how much binding you will need.
- Do the math. Here’s an example:
- Your quilt is 56" x 66"
- To find the perimeter calculate (56 x 2) + (66 x 2) = 244.
- Because you will need some extra wiggle room for seam allowances, add 12" to that number: 256
- Divide the perimeter by the width of your fabric (most quilting cotton off the bolt is 42" wide minus the selvage, so let’s say 40") 256 ÷ 40 = 6.4
- Based on our amazing quilty math skills, we know that we need 7 strips of fabric.
- If you HATE math, here is a link to a binding calculator that will figure all of that out for you (you’re welcome).
- Using a rotary cutter, cutting mat and a ruler, cut 2 ¼" strips of fabric. This will make a nice, uniform appearance on both the front and the back. (Using the example above, you would need to cut 7 strips of fabric.)
- Connect the strips by placing two strips, right sides together and sewing at a 90° angle. Sew the them together on a 45° angle across the diagonal. Sewing mitered seams like this helps them blend into the fabric better and lessens bulky seams. See photo.
- Once all of the strips are connected, trim the excess fabric so each seam is a ¼".
- Press seams open with an iron. Press the strips in half so that the right side of the fabric stays on the outside.

How to Sew Binding to a Quilt
Line up the raw edges of the binding with the raw edges of the quilt. The folded edge should be facing toward the quilt. Leaving 6" - 8" of extra fabric, start sewing the binding around the edges of the quilt.
Trending patterns!


Quilt Patterns


Quilt Patterns


Quilt Patterns


Quilt Patterns


Quilt Patterns


Quilt Patterns


Quilt Patterns


Quilt Patterns


Quilt Patterns
Refer to the tutorial video for details on how to rotate the binding so that the corners of the quilt have perfect 45° angles. The video tutorial will also demonstrate how to connect the two edges of binding seamlessly.


Check Out My Favorite Sewing Tools!
- How to Choose the Right Quilt Batting
- The Best Sewing Table
- The Best Quality Thread: Part 1 and Part 2
- 5 Best Cutting Mats for Quilters
- Best Rotary Cutter
- The 4 Best Quilting Rulers
- The Best Iron for Sewing
- The World's Best Sewing Scissors
- Your Guide to Finding the Best Thimble
- Best Pins for Quilting
- The Best Quilt Marking Tools
- Fusible Batting Tape: Why You Need It and How to Use It.
- 8 Things You Never Knew About a Tailor's Clapper
- 5 Types & Sizes of Hand Quilting Needles
- Must-Have Quilting Tools
Two Different Ways to Finish Binding
Sewing binding to your quilt is twofold – the first step is sewing the binding to the edges of the quilt, the second step is to fold the binding over and tack it down. It is the second step that allows for a couple options.
- The first technique (demonstrated in the video) uses a whip stitch to hand-sew the folded part of the binding to the quilt. This process looks cleaner because the finishing stitches are invisible.
To whip stitch, thread a needle and tie a knot on the end of about 18” of thread. Tuck the knot underneath the binding. Grab a bit of the backing of the quilt and push the needle through the binding.
Continue forming each stitch be bringing the needle in behind each previous stitch and pushing it out ahead of the last stitch. Make sure not to sew all the way through to the front side of the quilt. If you accidentally do that, your binding stitches will be visible on the front. - The second technique uses a sewing machine to tack down the binding. These stitches are much more obvious and are visible on both the front and the back of the quilt. This may not look as nice as the first option, but it is much faster. If you are pressed for time or are mass-producing quilts, this will be the better option.
Congrats! You finished your quilt. Now go make another one and happy sewing! xo


This is magical! I usually make a pocket at the start of my binding and tuck the end of the binding into it. It works but it gets pretty bulky. Can’t wait to try your method on my next quilt!
yeah! I’m so glad you found it helpful 🙂
Million Thanks for this great Binding Tutorialvideo. Will try your binding method next time. Can`t wait to start my new project 🙂
Hi Suzy. Found your blog on Pinterest and I must say I’m a new fan. You rock this tutorial. Can’t wait to do some quilting on the weekends with my girls. 🙂 TFS!
Thanks so much for your sweet comment and happy sewing! xo
Your video to finish the binding just BLEW MY MIND! Love love love – now going to finish my navy dino quilt+
Awesome!! So happy to hear it 🙂
Just wanted to thank you for the binding tutorial. I have been quilting for over 20 years and couldn’t (or wouldn’t) figure out how to finish off and join binding ends to form a diagonal. I saw your video, tried it, and I was like, “Whaaat? that was so easy!!”
yah!!! It’s intimidating, for sure, but so easy once it clicks! I didn’t master it until I made myself sew 10 placements for my mother-in-law and bind all of them.
I too wouldnt try the diagonal ending. I triped aross the binding tutorial after printing off Twisted Ribbons.You showed evey step clearly and didnt assume the learner already knew a step. . So helpful!!! Thank you!!!!
This is the best tutorial I’ve viewed regarding binding an edge. It’s wonderful that you’re so willing to teach us how! Thank you for the technique, the great camera work, and your pleasant speaking voice. And thank goodness no chaotic background music!!
What a sweet comment! Thank you, Helen!
Can I just tell you how much I LOVE this tutorial on ending the binding?! My mom and I would sweat over the process trying to follow pictures in a Joanns book on how to end it-love ripping seams out over and over and now – TA DA! You have ended our fear of ending the binding! Thank you thank you!
Yay! I’m so happy to hear that!
This is the tutorial I’ve been searching for all my life! No, seriously though…I knew there had to be an easier way to do the binding and was doing something very similiar minus the pins…GENIUS I tell ya! Why did it take me so long to creep your blog in its entirety? You’re brilliant at what you do and I am beyond grateful you share your talent!
Oh, T, I’m so happy to help! Maybe you have blissful bindings from now on. 🙂
This is amazing – I have forever dreaded the process of joining the edges of binding because it always, always, always is just a mess of bulk but I always thought to myself that that was just how it was meant to be (or convinced myself that’s how it is meant to be… probably the latter). I’ve just tried your method of joining seams on my latest quilt this morning and THANK YOU SUZY for changing my relationship with binding. I’ll love you forever for it. Thank you.
Wahoooo!! Sounds like binding is your new BFF and I couldn’t be happier!
Love your tutorial. So helpful for joining the binding ends. But I can’t seem to figure out why the binding is wavy. Any ideas?
The binding could be wavy for a couple reasons: 1. When creating your binding, try your best to cut it on grain. If you cut it on the bias, it could stretch and get wavy. 2. When sewing binding to the quilt, are you using a walking foot that is feeding the layers well through your machine? When sewing the two together, if the feed dogs are pulling the quilt sandwich through the machine more than the foot is pulling the top fabric, there can be tension issues which can cause the fabric to stretch – thus being wavy.
If you are doing both of those things correctly, my next suggestion would be to pin your binding to the quilt sandwich before sewing it, that way you know to sure there is no tension issue. You can pin each side as you sew. Good luck!
Suzy, I tried one of your suggestions on my next quilt. I used the walking to attach the binding. It still is not laying flat. This suggests to me that I need to try your binding suggestion next. I am just surprised because I always learned to but binding on the bias. But I am happy to change if it looks better! Will I still be able to make the neat corners using binding that is cut on the grain?
My binding is always cut on grain and I like to think my corners look neat 🙂
Yes, your corners look fabulous 🙂 As does the rest of your quilt!
These tutorials/videos are so so helpful. I am trying to find a good tutorial for the part when you are done quilting it and before you bind it- do you baste all around the outside of the quilt before you square it off? I saw your recent Q&A that discussed how to square off- thank you for being a reliable source of info!
At this point I take my ruler and rotary cutter and trim off the excess backing and batting. There’s really not a special trick to it, I just try to make sure the corners are squared up with my ruler.
Wow! Great step by step, easy to follow instructions. I am very happy with the results😃. Thank you
I just followed your steps to connecting the beginning and the end of the binding seamlessly. You made it so easy to understand. Thank you, thank you! I finally am on my way to mastering this step!
Love the tutorial. Thanks. My question is probably dumb but I need to ask. After you hand stitch up the 45degree angle, do you tie off and come to the edge and start hand stitching again or do you stitch back down and go on?
Once I get the the top of the 45-degree corner, I poke my needle through and come back out on the other edge of the binding. So yes to you question, except I skip the stitching back down part. Does that make sense?
Hand stitched binding just looks so much cleaner and neater.. It’s hit and miss on the machine. You’re sewing blind on the underside. Thank you for a lovely tutorial!!
Thank you for this!
I only got it wrong once… second time was the charm.
Problem I have now is that I’m working with flannel (with warm & natural batting). I upped my binding width to 3 inches, but I don’t think it is wide enough…
I’ve never cut binding wider than 3″. I bet it’s wide enough once you start wrapping it around the edges.
If you cut your binding fabric 3″ wide and use a 1/4″ seam, you’d end up with a 1/2″ wide binding over a 1/4″ seam allowance. (Unless you wrap it over the back to be much wider on the back side.)
I see big stitch hand quilting on some of your bindings. Have you discussed how to do that? I’ve never seen that before and I like the look. Thanks
I’m going to post a video tutorial on this technique soon, but in the mean time, this video on hand quilting will help. I just hand quilt a running stitch through the backing and binding layers. It’s as easy as a whip stitch, but with more pizzazz!
I am also very interested in the big stitch hand quilting on the binding that I have seen on some of your quilts……do you have a tutorial on that or maybe I should just go for it!!
Thank you! This is a great tutorial for binding, and it worked well for me. I did it for the first time and the mitered corners came out very nice. The only part I don’t understand is why, since your aren’t stretching any other part of the binding fabric, you leave a 1/4″ gap for the connection, because that causes the binding fabric to have to stretch for that section of binding.
If you connect the binding at a 45-degree angle it should fit perfectly with no stretch. If you would prefer a straight vertical seam connection, there is no need to leave a 1/4″ gap.
I am a pretty new quilter (finishing up quilt #4!!) and I want to thank you for your helpful tutorials. I found your blog through this video last year when I was making my first quilt and have followed you ever since (I have read a LOT of your older posts too!). Every time I bind a quilt I watch it, and every time I doubt myself…but it comes out perfectly every time! Thank you! The next quilt I’m going to make is Mod Mountains using my grandfather’s shirts.
This was really really helpful, I’m finishing off my first quilt (a two year process…), Thank you for making such simple tutorials so even such a newbie can understand xx
Do you or have you used the binding foot with your 770?
I haven’t, but I should!
Thank you for a clear and reasonable tutorial on binding. Joining the ends drives me crazy! It works so much better when I remember to leave extra room for maneuvering on the diagonal seam, as well as room to iron the new seam and fold of the binding. Question: why do you recommend leaving a 1/4″ gap between the folded ends before sewing? I used your method twice recently and had a bit of excess binding (tiny pucker) when I sewed the finished binding down. Again, of all the tutorials I watched, I like yours best!
Hi Suzy, I am Kerry Webb, 70 YO, and just made my first quilt from scratch. I’m discounting the quilts I made with my mother where she taught me to hand quilt on one stretched over a quilting frame, because she is the person who pieced the top and did all the other work I now have an appreciation for. Anyway, your tutorial on Quilting 101 was essential to my success. You made the mitered corners and the completion of sewing on the binding so easy! This leads to my question. Is it possible for me to save the video on my computer? People’s lives change. You could find new opportunities that would lead to the loss of these videos. I am more than willing to buy the ability to download them. I already downloaded the Maypole pattern for my next quilt. What do you think? Thanks for your wonderful site!
Kerry Webb
Hi Kerry, interesting question! I’m more than happy to give you this video for free. Have you heard of this website – https://screencast-o-matic.com/. It allows you to record your computer screen. So you could actually play this video and record it through that site, which then lets you download the mp4. It’s pretty cool!
Thank you so much for being so generous with your knowledge! This video is so helpful! Im following it to complete my SugarPOP quilt.
I always turn the ends the wrong way and sew the wrong direction when I sew the ends together. Your explanation and clear video model helped so much. I ripped it out 4x last night, and did it first try today with your video <3 Thanks!
Great tips! Thanks for sharing!
I had never used a walking foot to attach binding before… it didn’t want to work for me when I just tried it :-/. I’m not sure what I’m doing wrong but it started, then the stitches just stood in place for a good long while and wouldn’t advance along my fabric. Is that a problem with my machine? My walking foot? My technique?
It sounds like your foot was getting caught on your fabric. Try glue basting an area of your binding and see if that solves the problem. Here are a couple posts that use that technique – https://suzyquilts.com/a-complete-guide-to-glue-basting-seams/ and https://suzyquilts.com/how-to-sew-cloth-napkins-tutorial/
This is great! Thank you so much for making this available!
This tutorial was just what I was looking for! Your explanation of joining the binding was by far the best that I have found, and I have tried many, mostly unsuccessfully. Thanks for this post.
Thank you for sharing.
A very beautiful quilt.
Wonderful and very clear demonstration.
I teach family consumer sciences and my class is working on quilts. My first student was able to piece the ends of her binding perfectly using your method! Amazing!!! Thank you!
I used this method on a quilt and it came out perfectly! However, I tried it on a second quilt and was quite unsuccessful. I twisted the binding, I sewed on the wrong diagonal, it was too long. I actually tried 5 times! I eventually went back to my own method and got it done. Luckily all the ripping out I did didn’t ruin the fabric. I’ll probably try again. Probably.
Here’s another video showing the same thing that might help – https://www.instagram.com/stories/highlights/18079875070239714/
This is brilliant! I’m just starting out and have been doing potholders and mug rugs, and have struggled with ending the binding. Can’t wait to try this! Thank you!
Thank you for saving my bacon and sanity. I practiced several times on batting with scrap fabric and am ready to bind my first quilt!
Thank you for this tutorial! I have to rewatch it every time I sew a binding so please never take it down. 🙂
This video is so perfect except for one thing. You say to use a walking foot, but you also back stitch. I can’t backstitch with a walking foot. And my walking foot does not look like yours. It attaches to the needle adjustment screw. Help!
I’m suspicious of a foot that doesn’t let you backstitch. Are you positive it’s a walking foot? What kind of sewing machine are you using?
I have come back to this tutorial multiple times now (including last night) and it always works like a charm! Thanks for the tutorial, Suzy.
So happy to hear that!
Quick question – do you use a single or double strand to hand sew your binding?
I like to use a single strand. If you’re worried about the strength of your stitches, you can use a thicker weight thread like 12wt.
Is the watermelon quilt pattern available? It’s adorable!
It sure is! Here’s a direct link – https://suzyquilts.com/mod-melons-free-quilt-pattern/ You can find all of our free patterns in the Free Patterns sub-category on the blog 🙂
Every time I click on the video tutorial on how to apply the binding, it just disappears, rather than playing. Though honestly I don’t really want to have to watch a video whenever I want a quick refresher on how to do the corners. I really wish I could just find written directions for applying bindings.
Hi Barbara,
Have you tried clicking on the bottom left corner of the video where it says “watch on YouTube”? No worries, if not! We have a couple of blog posts on binding. Including these:
https://suzyquilts.com/connect-quilt-binding/
https://suzyquilts.com/how-to-machine-bind-a-quilt/
In it, you’ll find lots of lovely photos and great descriptions on how to manage the corners when you are binding your quilt. We hope this is the refresher you’re looking for! 🙂
Hi – I am having the same problem with the video — “How to sew binding on a quilt.” It just disappears when I try to play it – both on my laptop & phone. There was no direct option to watch on YouTube. (I always watch this when connecting the ends of the binding!) Can the link be corrected? Thank you.
Oh no! I wonder if you have a pop-up blocker or video blocker set up that’s stopping it from loading. Here’s a direct link to the video on YouTube. Let me know if it’s still not working for you – https://youtu.be/NzUQW_IQW8U