How to Sew Cloth Napkins Tutorial
Learn how to sew a napkin in this beginner-friendly DIY cloth napkins tutorial! This fat quarter friendly sewing tutorial is incredibly fast and easy. With the holidays coming up all you need to do is reach into your stash, pull out some of your favorite fat quarters, and follow along with these easy peasy instructions!
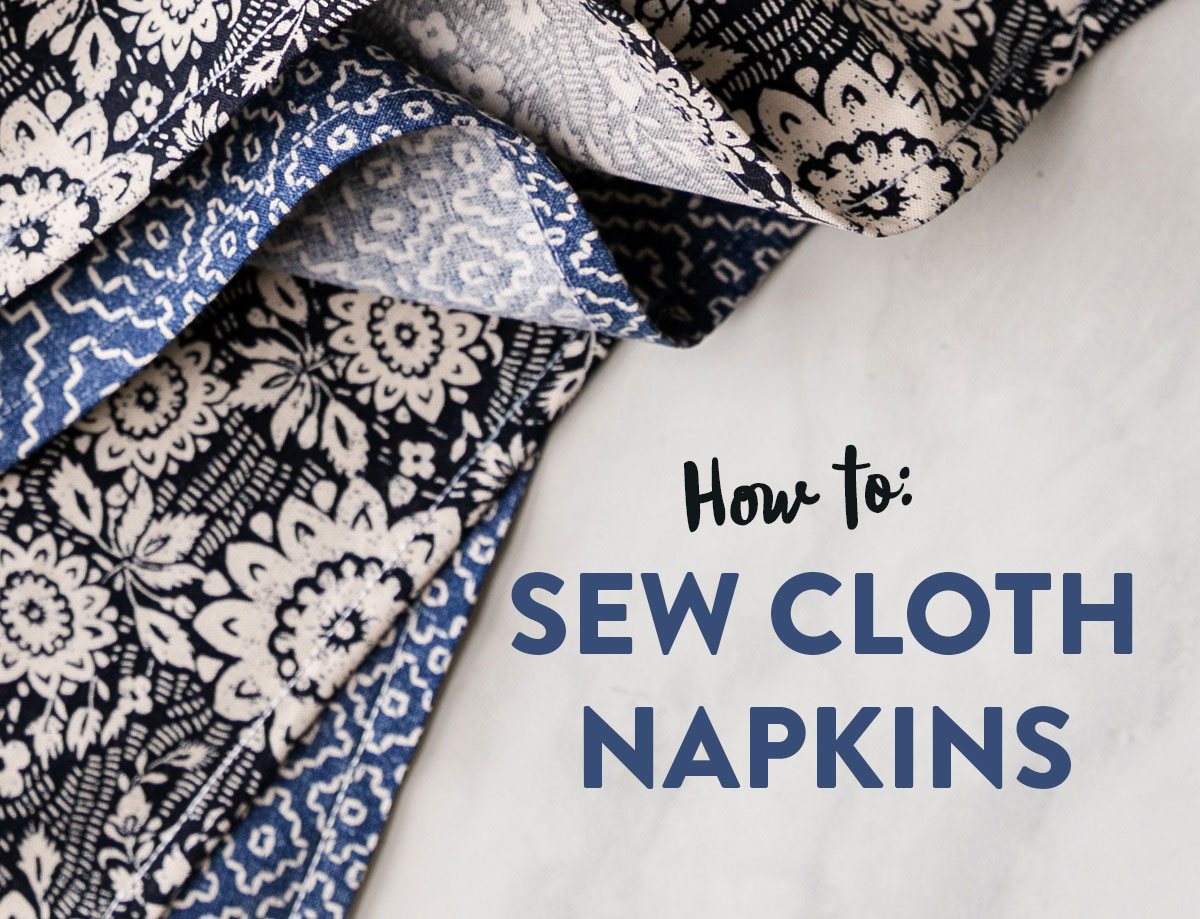
I have been meaning to make myself some cloth napkins for a while, mostly so we could be a little more green at home and use fewer paper products. Finding these beautiful fabrics was the final kick in the pants I needed to make them happen! And don't worry, I'll share the info on the fabric. 😉

You May Also Like...
Cloth Napkins Supplies
For this cloth napkins tutorial you only need the most basic sewing supplies. One thing I will add, because it really will make your life easier and these napkins more polished, is glue. There's nothing fancy about this glue, any kind of water-based glue will work. You don't even need it to be liquid. If a glue stick is all you can find in your 3rd grader's backpack, that will be perfect.
- Basic sewing machine
- Thread - I suggest matching your thread to your fabric so it blends well (this will also hide any stitching flubs or mistakes – not that you make those.)
- Fabric - Fat quarters (18" x 21" pre-cut), 1/2 yd cuts or yardage is perfect. You will be trimming each napkin down to 17" x 17", so a fat quarter is a great size.
- Glue
- Cutting mat, ruler and rotary cutter OR a ruler and scissors
- Iron and ironing surface - I'm using this wool pressing mat.
Cloth Napkins Tutorial
Are you ready for a fun gift you can make in an hour or two? Let's jump in!
Step 1: Trim fabric to 17" squares.
If you are starting with fat quarters I suggest stacking 4 on top of each other and trimming that way to save time. Don't pre-wash them because you might lose too much fabric to fraying.
Trending patterns!


Quilt Patterns


Quilt Patterns


Quilt Patterns


Quilt Patterns


Quilt Patterns


Quilt Patterns


Quilt Patterns


Quilt Patterns


Quilt Patterns
If you are using 1/2 yd. cuts, consider pre-washing the fabric. This way they are pre-shrunk and you know how they are going to look after many washes. Once washed and ironed, fold them in half and stack 2 on top of each other for cutting.

The fabric used in this tutorial is from the Sashiko collection by Windham Fabrics. Isn't it pretty?
If you're pulling out the yardage for this project, go ahead and cut it into 4 fat quarters to make future cutting a little easier. To do that, measure the halfway point of your yardage (18"), make a snip through the selvage, and rip it. Since fabric rips on grain this will give you 2 - 1/2 yd. of fabric. With each half yard, line up the selvages and cut along the bottom fold. You now have 4 fat quarters!
Lay your fabric on a cutting mat and trim the bottoms and the sides. Rotate the stack of fabric 180-degrees, line it up on the cutting mat, and trim the other two sides so that you have 17" squares of fabric.

Step 2: Press the edges.
It's time to fire up the iron! If you're unfamiliar with what a 1/4" looks like, take a minute to measure and mark a 1/4" and a 1/2" from the edges of a napkin.
Fold in all four edges, first a 1/4" and then a 1/4" again (this will hit that 1/2" guidemark you made if you did that.) I folded the corners too, but they don't stay folded very well. Don't worry, we'll fix those pesky corners...

Step 3: Trim the corners.
Unfold each corner and trim the tip to the first 1/4" crease. Use a ruler and rotary cutter here if you aren't sure about estimating and using scissors; however, I bet once you finish one or two of these cloth napkins, you'll be so good at eyeing the right measurements you won't need a ruler anymore.


Step 4: Glue baste the corner.
Place a small amount of glue on the wrong side of the fabric, right by the corner edge. Fold over the edge about a 1/4" and heat set the glue with your iron. NOTE: Glue basting does not work unless you heat set the glue.

Step 5: Miter the corners.
The mitered corners on these napkins is what will give them a finished "professional" look. Fold in both sides a 1/4" twice so that the tips meet in the middle like the picture below. I find it's easiest to fiddle with both edges at the same time and get them just right before glue basting them in place.

Step 6: Glue baste the napkin hem.
Now that our corners are beautifully mitered and in place we can use little dabs of glue around the edges to keep our cloth napkin hem in place. Don't forget to heat set!

Step 7: Sew around the hem.
What I love most about glue basting is that once it's finished, and you're ready to sew, the hard part is over. There are no pins to remove, or fabric puckers to mess with. No, ma'am! If our glue basting was done properly, this last sewing step is a cakewalk.
To sew the hem, I like to flip the cloth napkin so the wrong side of the fabric is facing up and sew as closely to the edge of the hem as possible. Since the bobbin thread is what will be visible on the front of the napkin, I put this really pretty 12 wt. 712 variegated Sulky thread in my bobbin and used a simple 50 wt. white thread on top. I love how well variegated thread blends and the higher weight gave these cloth napkins some fun added texture.

Backstitch at the beginning and end of each seam. Pivot at the corners by keeping your needle down, lifting up on the presser foot, and rotating the napkin.

Ta-da! Wasn't that the easiest cloth napkins tutorial? You are now ready for a festive dinner party, or at the very least, doing your part to be more green and use fewer paper products. Mother Earth and Martha Stewart commend you!


If you end up making some of these cloth napkins, please let me know in the comments. I'd love to know what fat quarters you'll be mixing into your next soirée! Cheers!


Thanks for the detailed tutorial. I must get to making more napkins!
Love these napkins – making a set to go with placemats for Christmas! Having trouble getting the mitered corners to line up tho – any tips?
Sounds like when you’re folding, your hem isn’t even on all sides. Try measuring, drawing some guidemarks and then folding to the guides. You can also smoosh the fabric into place if it isn’t cooperating.
I have always wanted to make some napkins. Great tutorial as always. With gratitude
Terry
Wow – never thought about using glue to help hold the hem down. That does make it easier-peasier. Just made a stack of cloth napkins a few weeks ago and wish I would have known about the glue trick.
I don’t like making mitered corners (don’t know why but I just don’t, lol) so when I make a napkin I make a little ‘pillow case’, trim corners, flip inside out, and edge stitch all the way around. Yes, they’re double thick, but I’ve found that helps to prevent the need to iron them in case they get wrinkly.
Can you share your method of “making a pillowcase?”
I’m also excited to try the glue basting!
I have been making cloth napkins for a while now, but the glue sounds like a fantastic idea. Thank you for sharing! Also thank you for the fabulous blog you are writing. I always enjoy reading it.
Thanks for this tutorial, Suzy. I never knew about the glue but I LOVE the idea. 🙂
I love the idea of cloth napkins but what’s stopping me from making them is getting the napkins dirty with greasy food smears. Is there a secret to keeping them clean or getting stains out? I’d hate to spend time making them only to have them ruined by food stains.
Hi! I use a commercial spray stain remover, give the spot and spritz and then I use Pink Solution Stain Removal bars from Costco. They are the best!!
Treat grease stains with Dawn dish soap!
Just got some beautiful Japanese fabrics and now I know what I will make! Thanks much.
Thanks for a great tutorial, and for making me smile! Always love your posts. So very glad you are not so sick this time around! Looking forward to the next smile! Take care of yourself.
Be sure to find soft cotton. Some of the napkins I’ve made in the past have been a bit harsh on the face.
I have made cloth napkins for years. My son, (who is now 31) was “a very busy boy” when little. To get him to sit and eat, I made a big deal out of dinner. He chose napkins and placements and candles. Fancy for chicken nuggets or grilled cheese! btw I’m older than dirt! 70 😊
I love thinking about a candlelit dinner with a toddler and chicken nuggets! So adorable!
When I tried this with my littles, they kept singing happy birthday and blowing out the candles, lol!
Hahaha!
What? Why has no other pattern ever suggested using glue first? Brilliant idea. My sister is a huge cloth napkin person. Will be making a stack to send to her for Christmas.
Thank you, Candy! You’re sister will be ever so grateful. Sounds like you need some more fabric! 😉
I’m going to try your mitered corners method because I really don’t like doing mitered corners on my quilts lol. Love your humor hehe. Can I ask what kind of fabric do you use for your napkins?
You read my mind! I’ll be making Christmas napkins from AGF’s Cozy & Joyful Collection! Also, a table runner from Kaufman Manchester – gold metallic
That will be perfect! And you are very lucky to have some of that fabric – it’s sold out in most stores!
I’ve been using cloth napkins daily for years now… mostly since it’s been just me and hubby. I love the idea of making some in Christmas fabrics! Such a fun idea!!
Years ago, a co-worker got me started using Elmer’s school glue sticks (non-acid), for basting, and I discovered that is the best thing since sliced bread! A bit messier than what you’re using, but it works, non-the-less. I got ‘wonder clips’ on Amazon (so very cheap) to hold glued seams in place and now have 99.1% perfect seams lining up my quilt blocks. I will definitely be trying your recommended glue for those tighter spots. Thank you for your fun, educational blogs & tutorials…and congratulations on your pregnancy 🙂
Suzy, I’ve been a JoAnn’s fabric shopper for more years than I care to admit. Since I’m a novice, I don’t know what to look for when shopping for fabrics online. Any advice?
That can be tricky if you’re new to buying fabric outside of big box craft stores. First I would say to find some fabric shops you trust. They will steer you in the right direction. Here’s a great list to get you started – https://suzyquilts.com/the-ultimate-guide-to-best-fabric-online/ Once you discover some of the brands and designers you like, you can get more adventurous and seek those out in other shops and maybe even in some second-hand fabric stores!
I’ve been using cloth napkins every day for a couple of years now but I have always found the corners pesky when I make them. Thank you for the tip about trimming and doing mitered corners. This, along with a dab of washable glue sounds like the ideal method. I will definitely be trying this.
Hi! I use a commercial spray stain remover, give the spot and spritz and then I use Pink Solution Stain Removal bars from Costco. They are the best!!
This is a great tutorial! I use cloth napkins, but I haven’t made any yet. I’ve unsuccessfully tried glue-basting on other projects in the past, but I didn’t know I needed to HEAT SET THE GLUE!!! Thank you SO MUCH for that tip – no wonder it didn’t work!! 🙂
Heat is the magic! Good luck 🙂
I make double napkins. 2 18 inch squares sewn together turning right side out and then top stitched. Not as elegant but fast and fun with lots of different fabrics.
Any suggestions on fabrics to use for these fancier cloth napkins? Most of the quilting cotton I have is pretty but doesn’t seem like it would the most functional as a napkin.
A darker fabric would be best in hiding possible stains and if you want to expand outside quilting cotton, a linen/cotton blend would a nice thickness and get softer the more you wash it.
This is great- I’m planning on gifting napkin sets for family this Christmas! Any chance you’ll do a cloth placemat tutorial next? Or would I just follow the same steps in a larger format?
I love to make, use, and gift cloth napkins. I make them oversized (cut 21” square) and double-sided. Invert and top stitch with a zigzag. Easy, and oh so luxe!
I haven’t made these lovely napkins yet, but I plan to very soon. Great pics and tutorial! I’ll keep you posted!
where’d you get the Japanese fabric
Thank you Suzy for your napkin tutorial. I had never thought of glue basting the corners for perfection. New sewing secrets are always fun to receive!
Great tutorial and pics! I made a simple fabric “throw” for my grandson. The fabric has streets and buildings on it and I purchased little cars to go along with it. Doing this simple fabric throw like your napkins was perfect! Thank you!
I just came across this tutorial, love it ! This is something great I can do during the winter when we get stuck in the house due to snow and cold. Thank you so much, I’m looking forward to trying this. I don’t have fabric glue, but I do have mini – clips that should work. Thanks again.