A Complete Guide to Glue Basting Seams
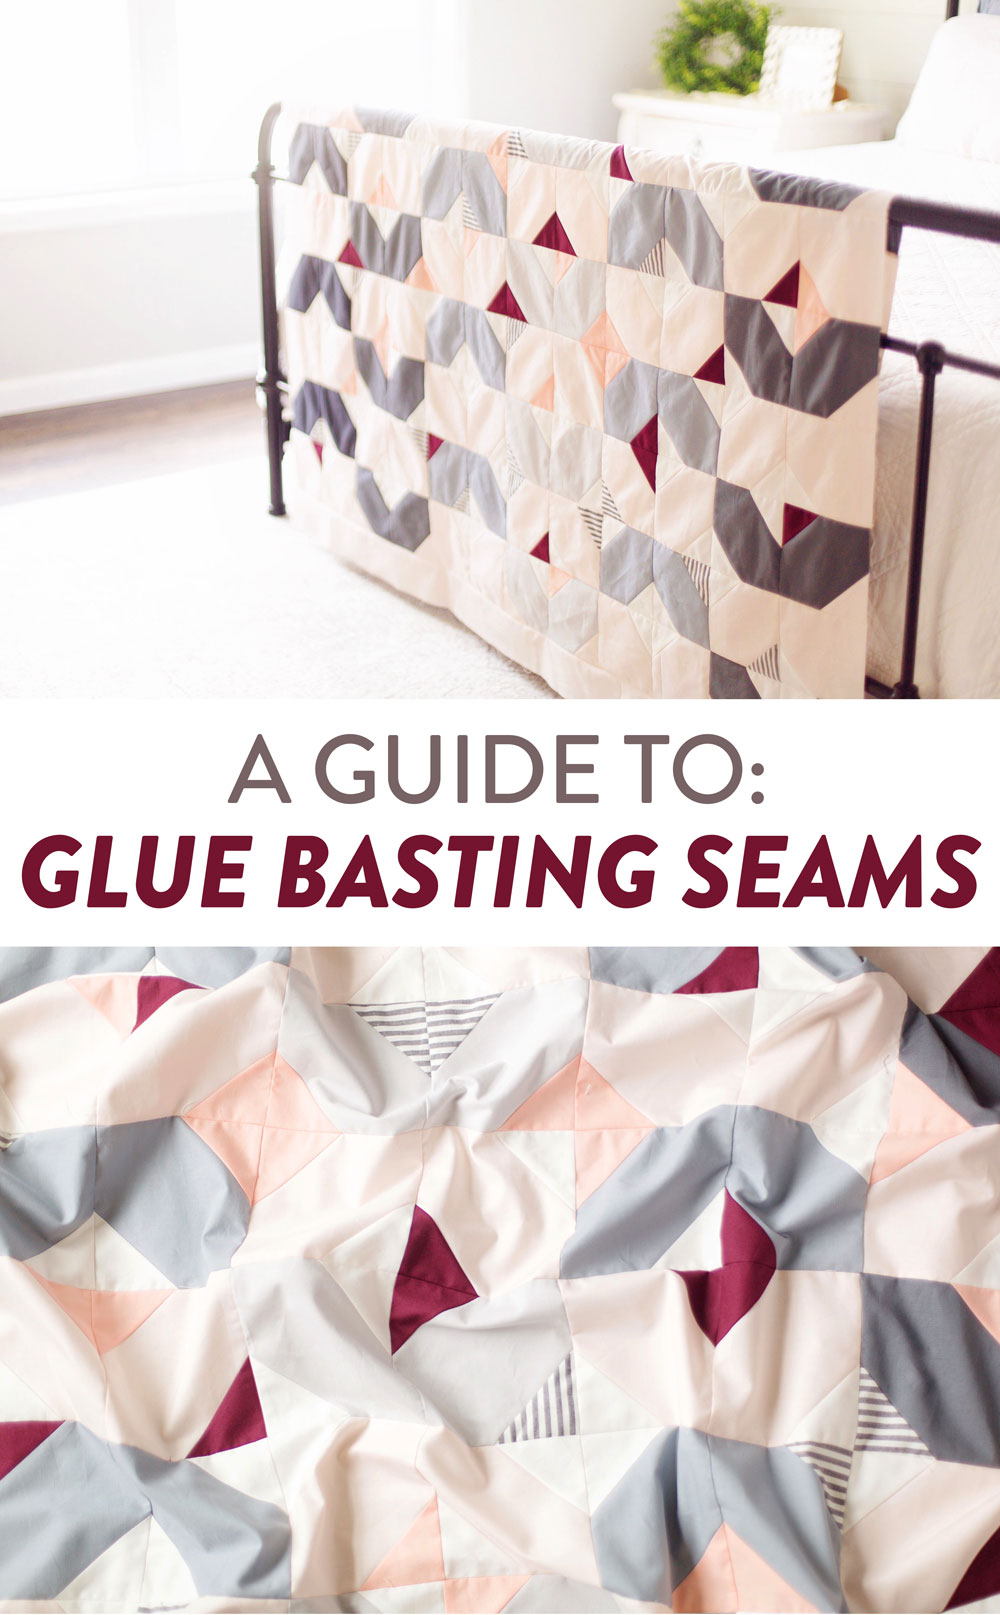
Glue basting seams is simple, inexpensive and the best way to ensure accuracy when piecing a quilt.
Have you ever been in the “quilting zone” piecing your little heart out only to realize that your points aren’t matching up very well, despite using pins? If you’re raising your hand right now, I’ve BEEN THERE. Many times. And it’s frustrating!
But after a lot of trial and error, I’ve discovered that glue basting seams is my holy grail when I want things to line up just so. In this photo tutorial, I will walk you through step-by-step how glue basting seams will allow you the most accurate results when quilting.
When to Glue Baste
Glue basting seams is useful on many quilty occasions. Most notably, I find myself reaching for the glue when I’m piecing triangle quilts and quilts that have clean lines (such as the Reflections pattern I will be using in this demonstration. The Reflections pattern will be available on June 27, 2019.)
Additionally, I have a nasty habit of sewing over my pins (I know I’m not the only person with this problem. Insert exaggerated wink) and glue basting seams allows me to ditch the pins and sew with reckless abandon like the speed demon I am!
Trending patterns!
Tools of the Glue Basting Trade
When it comes to glue basting, things are pretty straightforward, and not a lot of tools are needed. The main thing you need is (ready for it?)...glue. Not all glues are created equal, though, so you want to make sure you have the correct one for glue basting seams.
A glue that is washable is the most important thing. Not a lot of glue is used when glue basting seams, but you want to make sure the small amount you do use will be able to be washed out once your quilted project is complete.
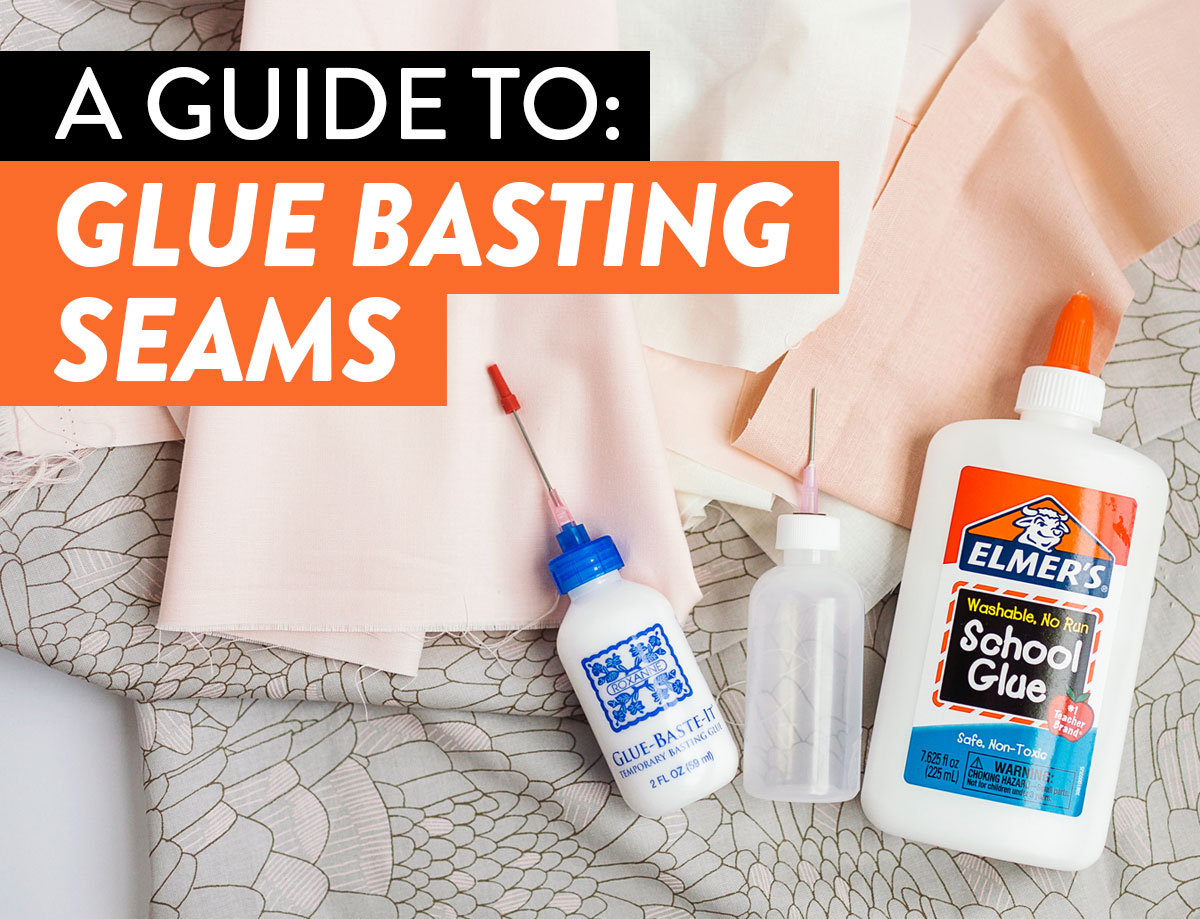
I’ve used two types of glue that have worked well. On the left in the photo below is Roxanne Glue Baste It which does work very well. It comes in a bottle with an awesome precision tip and really does a great job of holding fabric in place. However, what I use most often is plain ole’ Elmer’s Washable School Glue (make sure it’s the washable variety.)
It’s inexpensive, it’s readily available at a variety of stores (or in your child’s crafting kit), and it works. Honestly, I don’t notice much difference between Roxanne Glue Baste It and Elmer’s Washable School Glue.
If using Elmer’s glue, a precision tip is key. Only a teeny, tiny, minuscule amount of glue is needed when glue basting seams and the tip included on Elmer’s glue bottles yields way too much glue. These bottles with precision tips work amazingly well. For this photo tutorial, I’m going to use Elmer’s Washable School Glue inside a bottle with a precision tip.
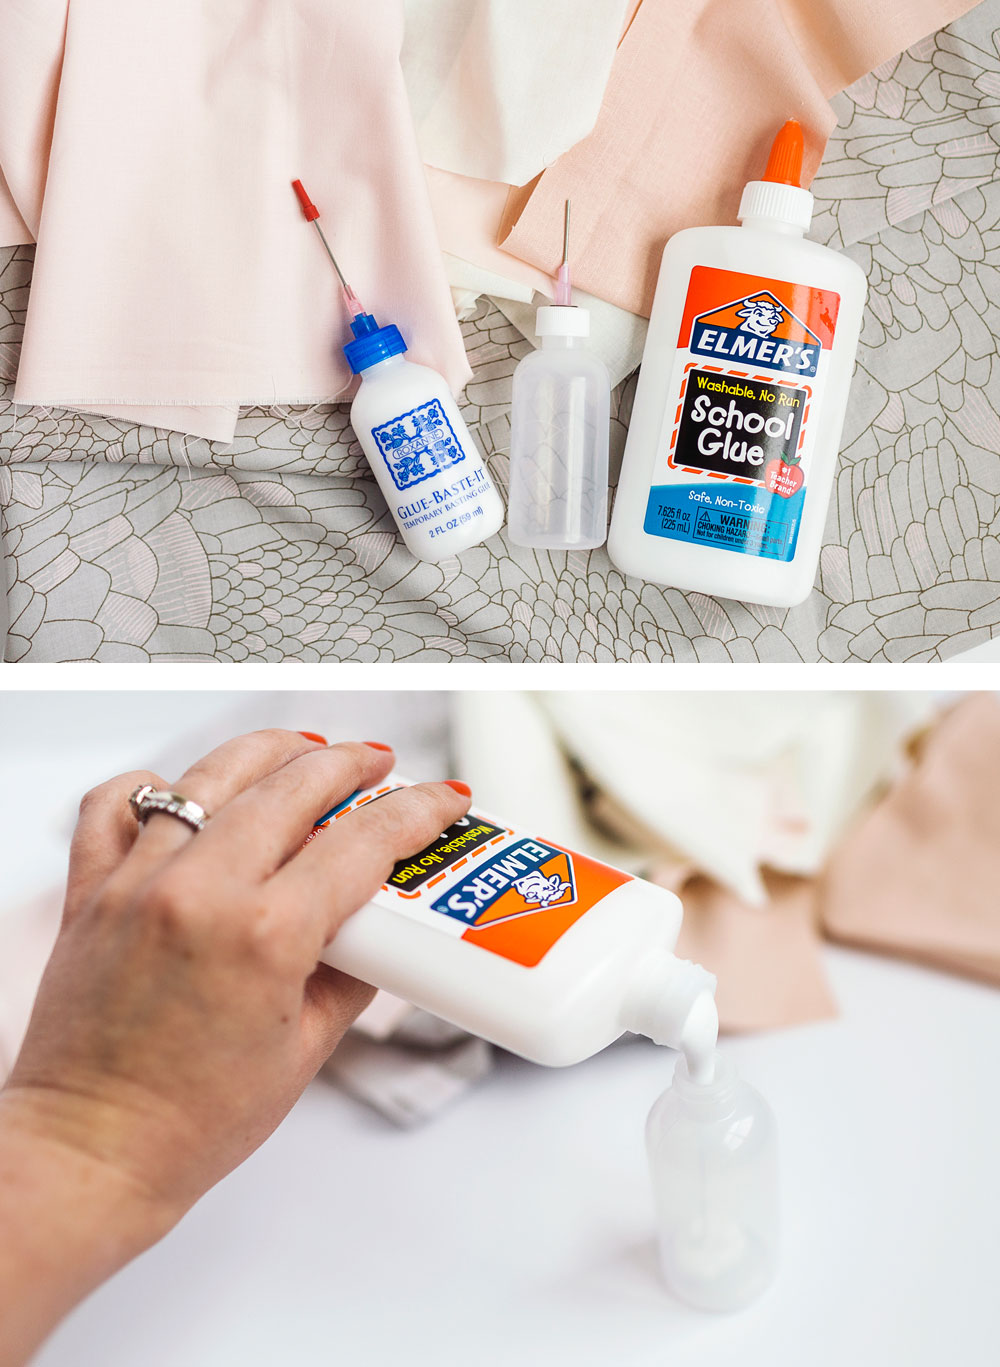
#1: Transfer Your Glue
(If using Roxanne Glue Baste It, you can obviously skip this step.) If using Elmer’s Washable School Glue, carefully transfer the Elmer’s glue into the precision tip bottle. After tightening the precision tip cap, you’re ready to go!
#2: Gather Your Pieces to be Basted
I am testing out Suzy’s upcoming Reflections pattern for this demonstration. (As a side note, you guys are going to LOVE this pattern. Seriously. Trust me on this.) As you can see from the photo below, I want to make sure the points match up as perfectly as possible.
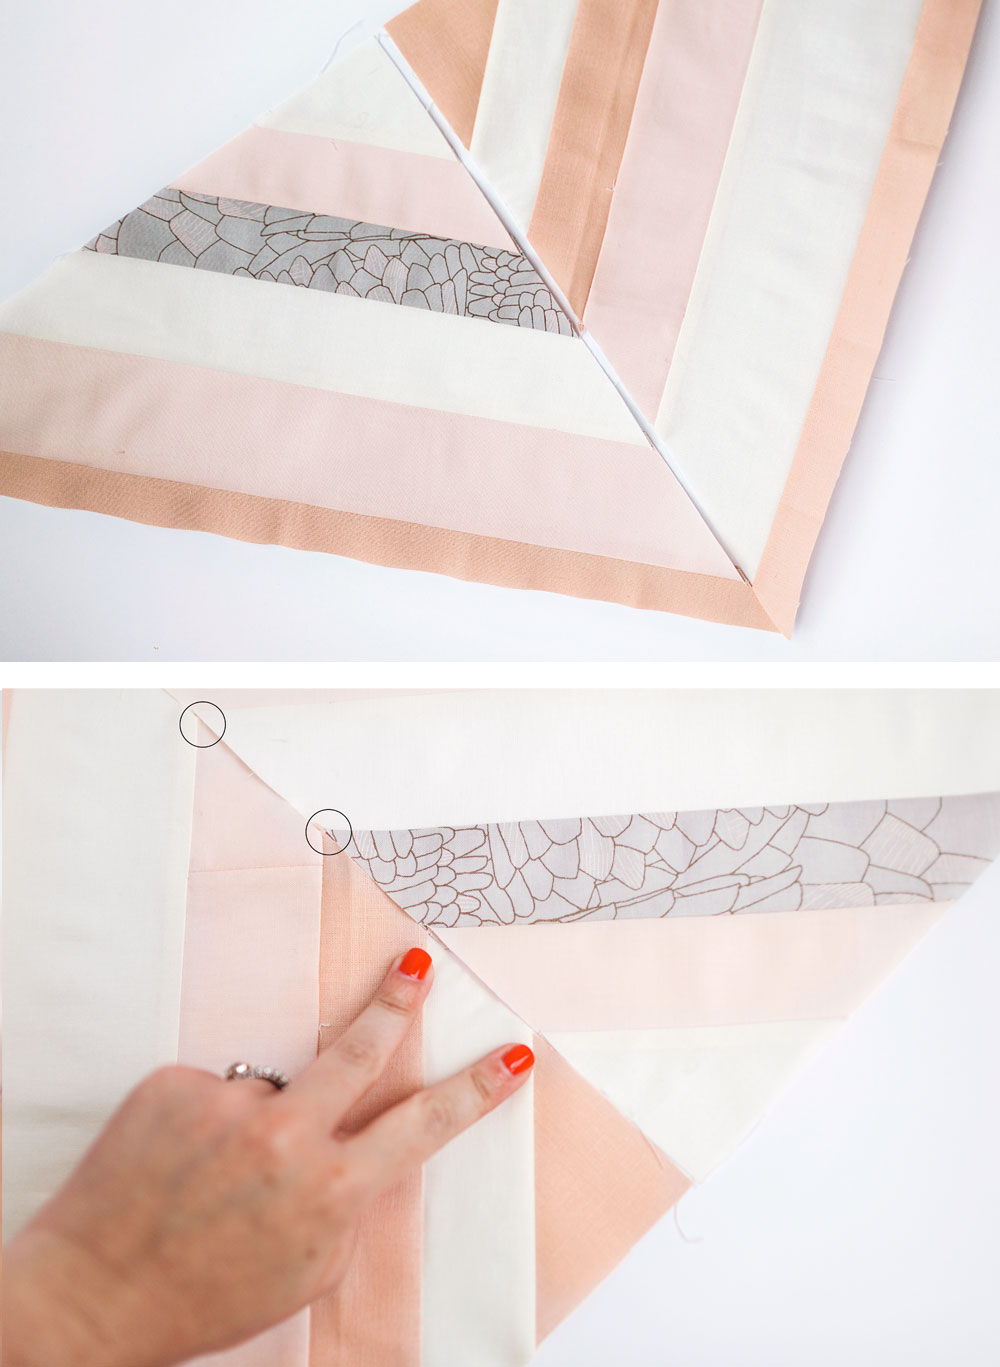
#3: Start Glue Basting Seams
I know I’m starting to sound like a bit of a broken record at this point, but….here goes. When glue basting seams, only a very tiny amount of glue should be used.
First off, you want to make sure the amount of glue stays inside your ¼" seam allowance so that your needle doesn’t sew over the glue (ain’t nobody got time for gummed up sewing machine needles!)
Secondly, if you have too much glue, you risk any excess getting onto your iron when you heat set the glue (I’ll get to that part in a bit.) Ok--now let’s get our glue on.
In the photo above, I’ve identified two of the spots I’m going to put a bit of glue. Because my other fingers couldn’t reach the additional spots, I added a circle to show every spot I will glue. I’m placing glue where I want the strips to meet at crisp 90 degree angles.
Place the precision tip right at the spot you want to glue baste and place a tiny drop of glue.
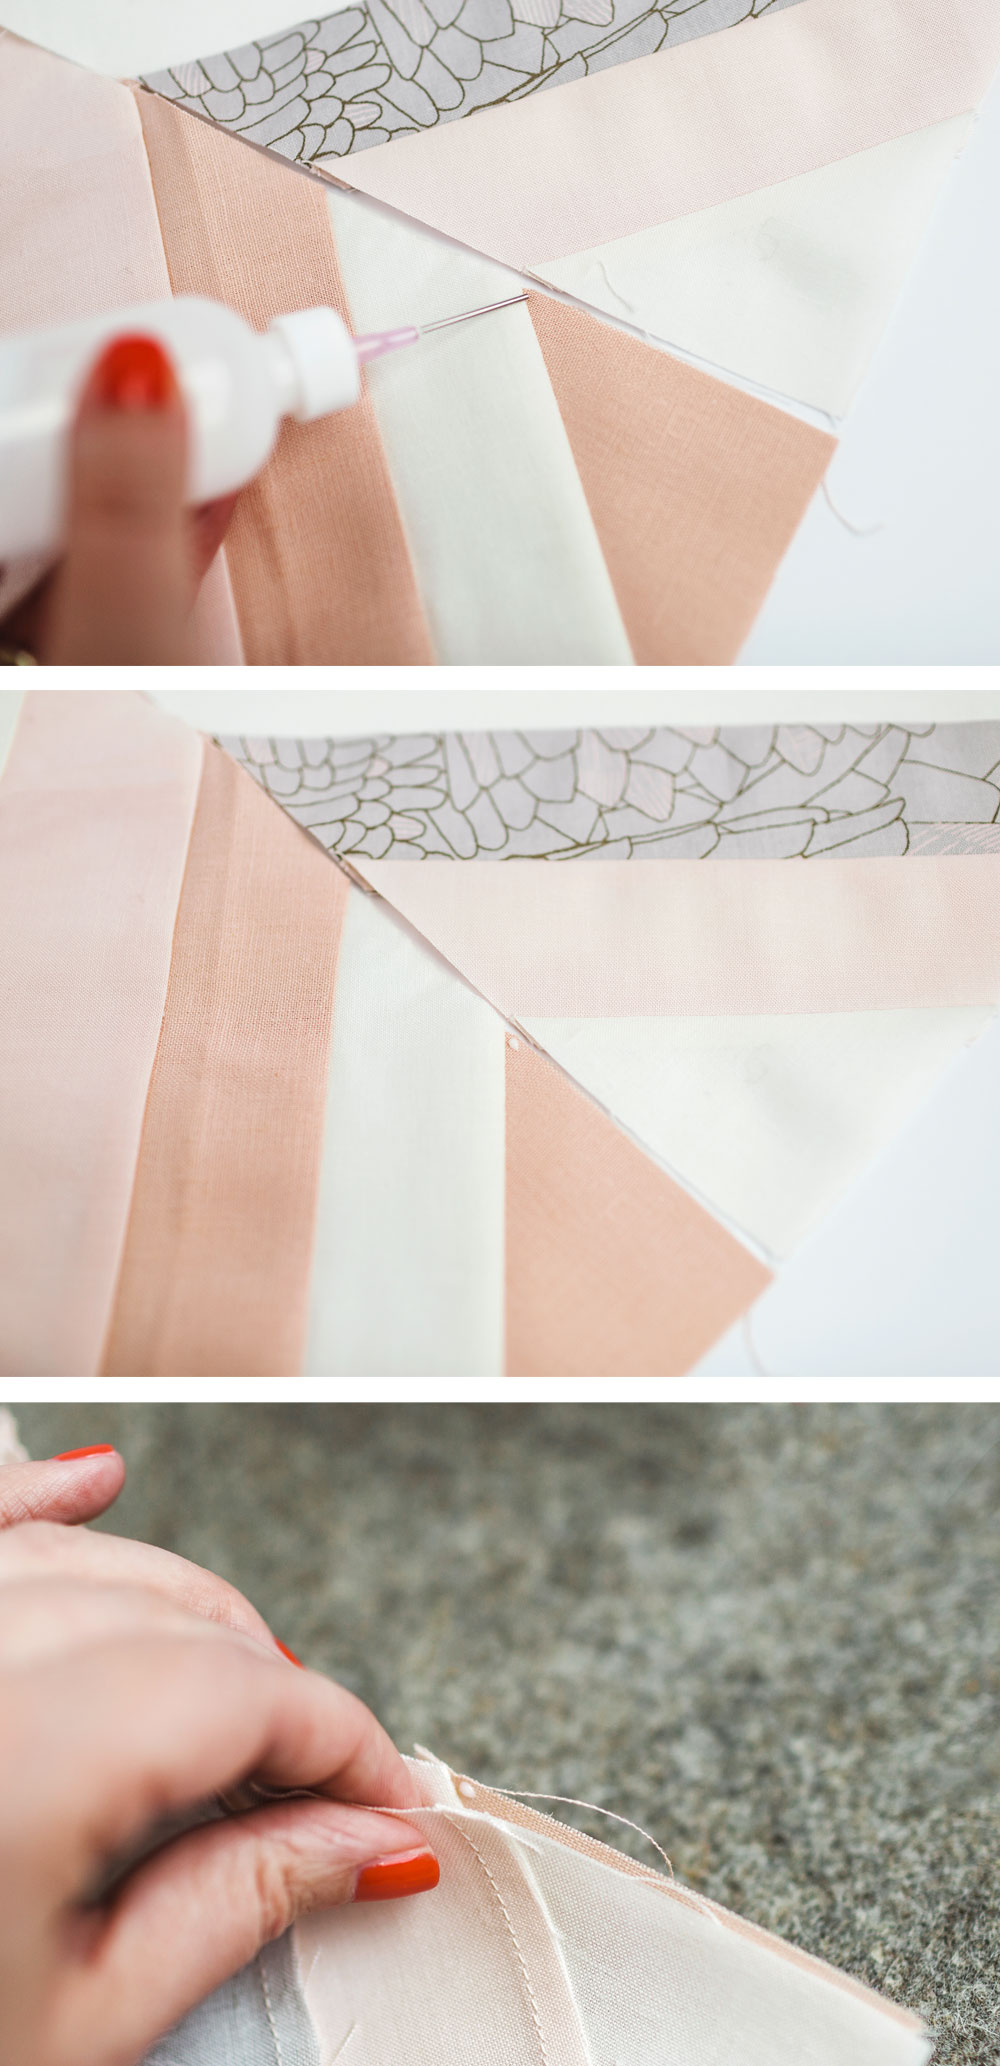
#4: Add a Little Heat
Line up the points you want to match (where the drops of glue are) and gently press them together with your fingers. (This is the only step where I’ve noticed a bit of a difference between Roxanne Glue Baste It and Elmer’s Washable School Glue. I’ve found that Roxanne “sticks” better after finger pressing. However, you’re going to heat set the glue anyway, so it really doesn’t make that much difference in the end.)
Take your fabric to be glue basted to your ironing board or wool pressing mat. Press your glued spots with a hot iron (no steam). The heat will dry the glue and bond the two pieces of fabric together. This prevents any shifting when sewing the two pieces together. It’s truly magical.
After pressing the glued spots, you can either glue baste the rest of the fabric to be sewn or use a few pins in between the glued spots. If gluing, use a very thin strip of glue right along the edge so that the glue stays inside your seam allowance. Heat set the glued strips and then sew your pieces together.
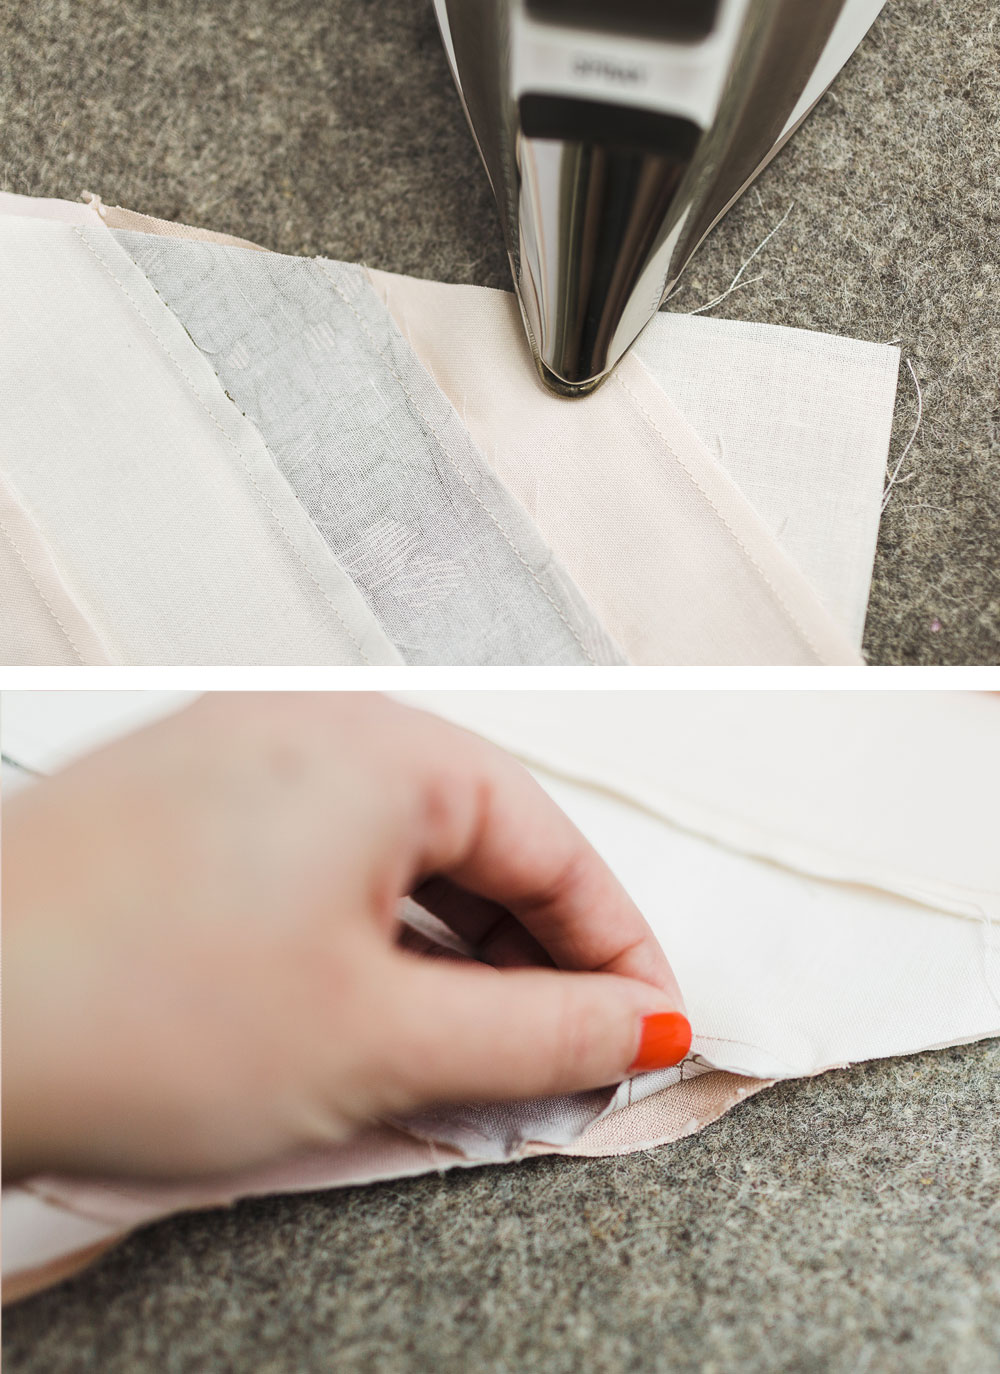
In the case of this Reflections pillow I’m making, I’m choosing to pin between the glued spots only because I will be pressing the sewn seam open and that is easier for me than prying the glued fabric apart after sewing.
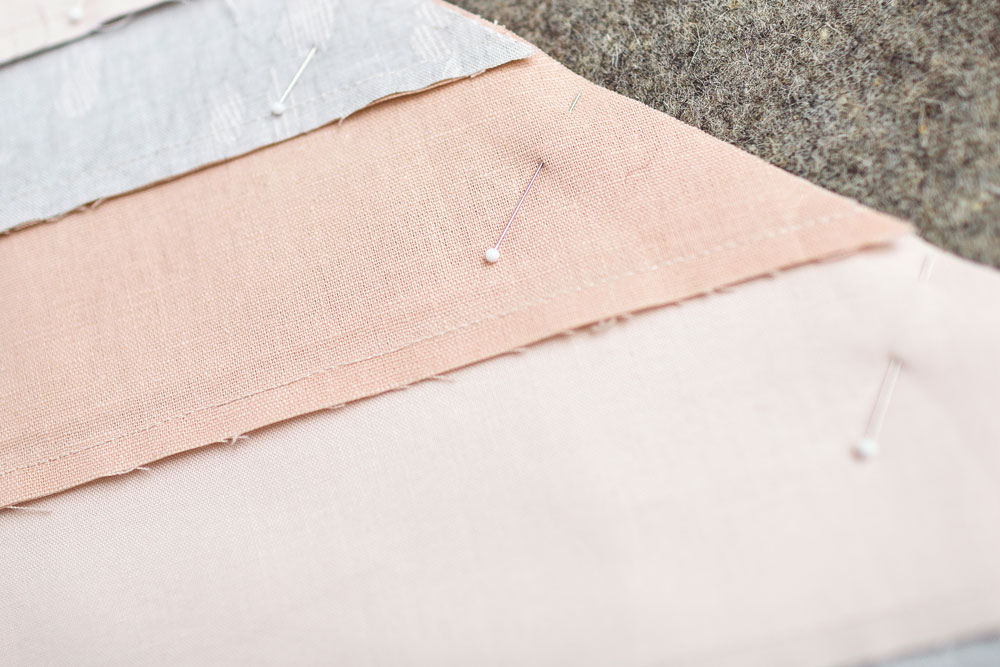
#5: Admire Your Well-Aligned Points
After sewing and pressing your seam, you’re all done! This glue basting seams method is seriously fool proof. I used to have to pin, sew, seam rip because my points were off, and repeat. And sometimes repeat some more. This is a huge time saver for me. I hope you give it a try and that it works as well for you as it does for me!
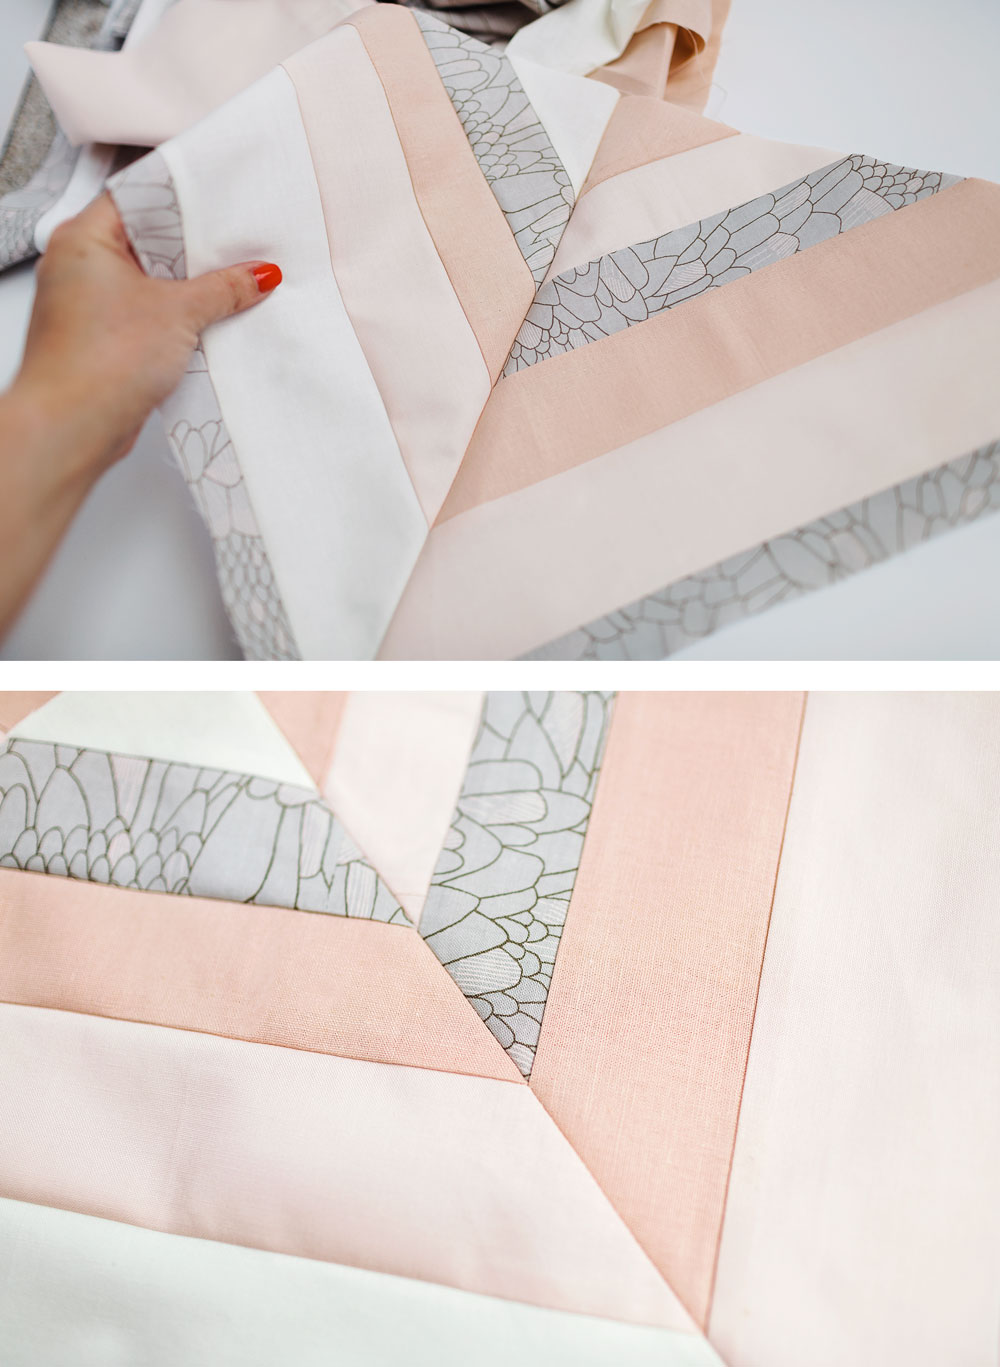
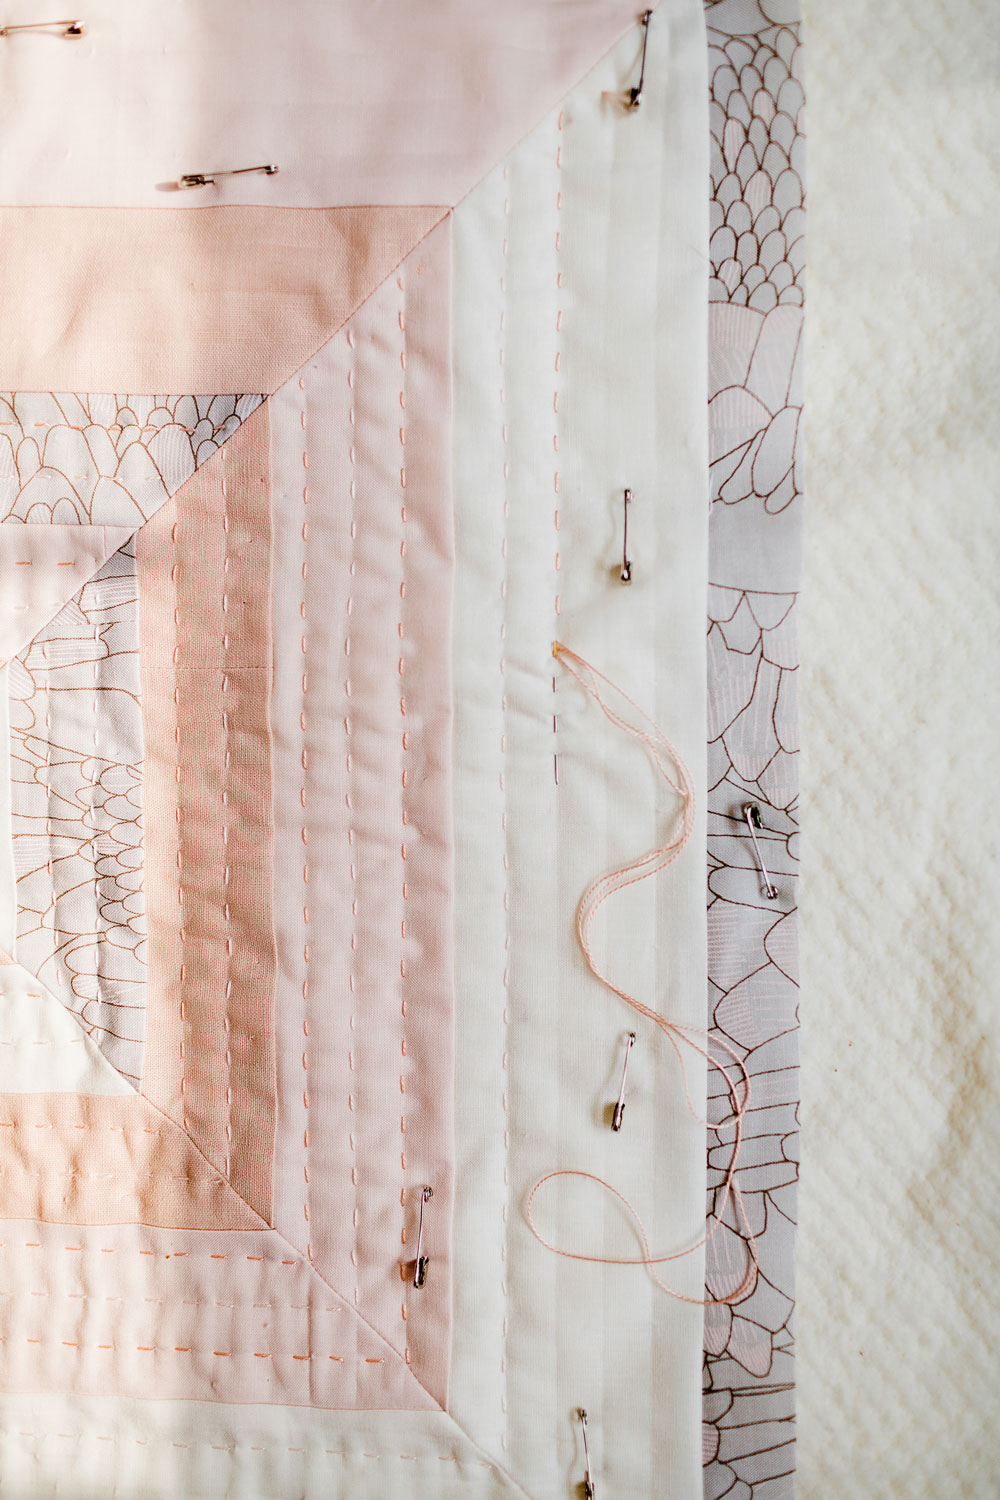
I’m choosing to add some hand quilting details to my Reflections pillow and I’m loving how it’s turning out! For a full hand quilting tutorial, check out How to Hand Quilt (with Video Tutorial!)
One Last (Precision) Tip on Glue Basting Seams
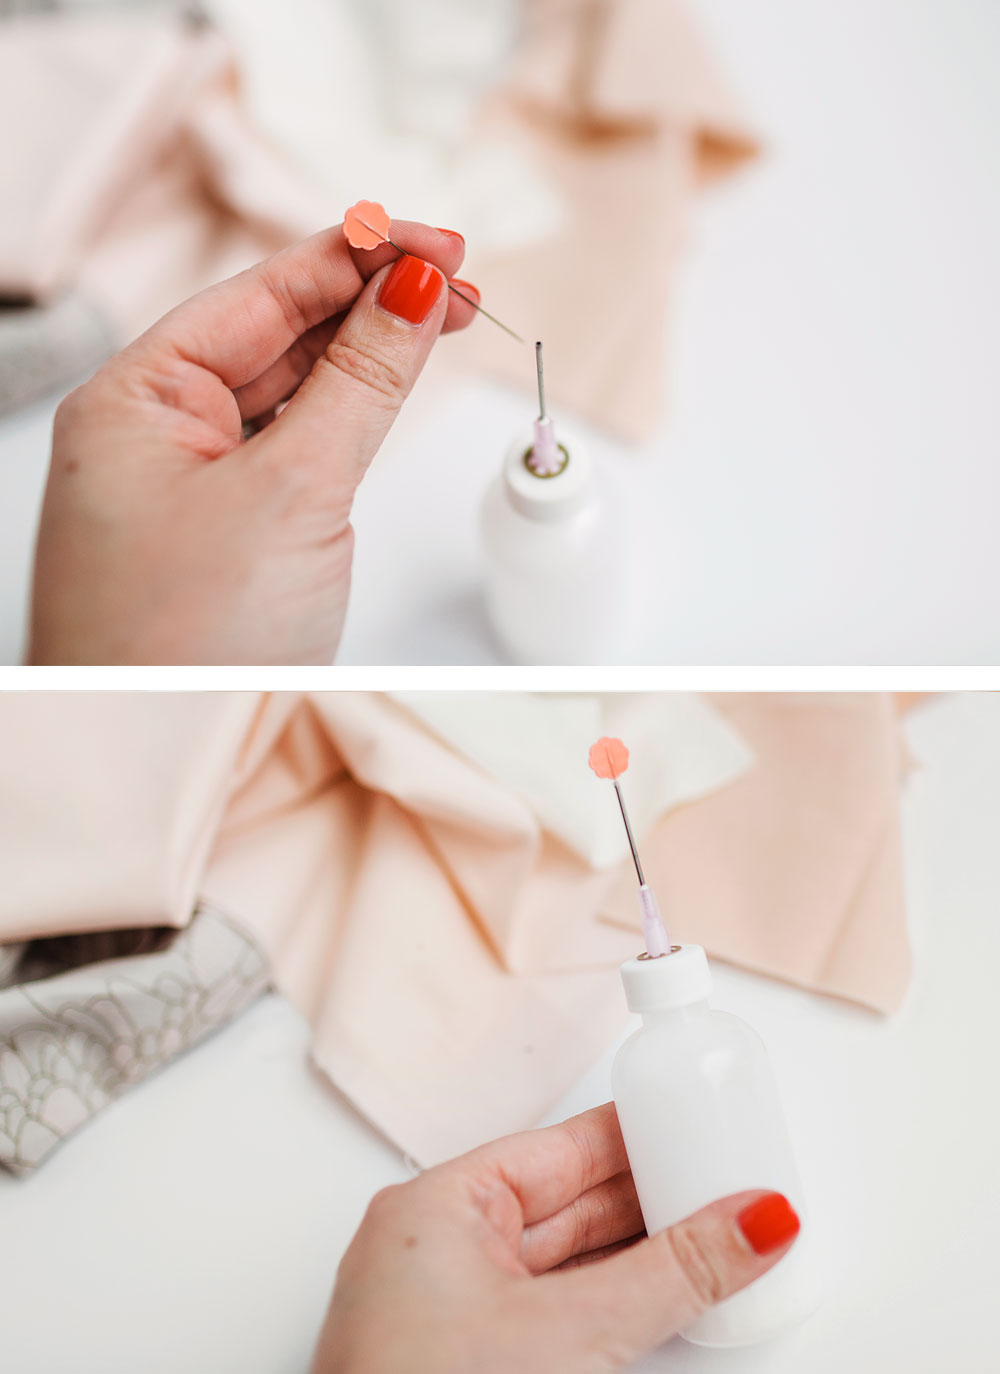
One last tip before I leave you: I take the precision tip lid off of the bottle and rinse it with warm water after each use. After re-attaching the lid, I place a sewing pin in the top to keep the tip clear from glue that might dry and clog it up.
Are you a glue baster? Let us know your tried and true tips in the comments!
Check Out SQ's Favorite Notions!
- How to Choose the Right Quilt Batting
- The Best Sewing Table
- The Best Quality Thread: Part 1 and Part 2
- 5 Best Cutting Mats for Quilters
- Best Rotary Cutter
- The 4 Best Quilting Rulers
- The Best Iron for Sewing
- The World's Best Sewing Scissors
- Your Guide to Finding the Best Thimble
- Best Pins for Quilting
- The Best Quilt Marking Tools
- Fusible Batting Tape: Why You Need It and How to Use It.
- 8 Things You Never Knew About a Tailor's Clapper
- 5 Types & Sizes of Hand Quilting Needles
- Must-Have Quilting Tools


Wow! I can’t wait to try this. THANK YOU!
This looks like such a great method! Thanks for sharing! One question though. Will this gunk up needles when quilting your piece later on a domestic or longarm?
It may dull your needle faster, but it won’t gunk it up.
As she says in her tutorial, you don’t apply the glue anywhere where the needle goes. So this question shouldn’t be an issue at all.
Glue is the best for binding too! Mine looks so much better when I glue instead if pinning.
Thanks for this post, I’m going to try it! Also, I always appreciate the shopping links so I don’t have to search. Thanks for that too! You’re the best!
You can purchase microfine glue tips for Elmer’s school glue from Cristy at purpledaisiesquilting.com. They work great and no need to transfer glue to another bottle.
Good to know!
I’ve recently starting doing this after seeing Mr. Domestic use this method on curved piecing. I definitely will try it for other tricky piecing projects. Do you ever mark the 1/4″ seam to help also?
I don’t, but you could!
Hi! I’m a new machine and hand sewer and quilter and this idea for glue basting is great. Thank you and I look forward to your newsletters!
With tricky seams that have to be matched, I press the seam allowance on one piece only, glue baste the bottom unpressed fabric and which has the right side upwards. Slide the top one over for a perfect match aligning the seam crease with the bottom fabric. Then heat set.
I’m not following what you’re doing, can you be more specific?
I discovered this after many unpicks. It is easy to press the top fabric’s seam a 1/4” under. Then you have that edge to match the piece on the bottom.
Glue further back from the edge though and heat set. Turn both over and stitch as normal. Imagine the turned under edge of your rug on the carpet.
Where can I get a precision tip glue bottle? I live in Ontario, Canada.
I got this one on Amazon. I think Amazon ships to Canada? You could also look at your local craft shop.
Do you have to wash the quilt after completing with this method. Also, how do you wash a new quilt.
Yes, I would recommend washing the quilt after using this glue basting method. I have a couple articles on that.
https://suzyquilts.com/wash-and-care-for-a-quilt/
https://suzyquilts.com/how-to-care-for-your-new-quilt/
They have lots of options on Amazon. They also have the Roxanne’s Glue Baste-It and the Elmer’s Washable School Glue.
I love to foundation paper piece but I struggle with stitching the sections together. I think this is the answer for me too. Thanks. I will try it on my faux, flange bindings too.
Can’t wait to try this method! Thanks for sharing! 🙂
Great tutorial! I gave it a try. It Doesn’t take anymore time than pinning! Is it strange that I am now flying instead of pinning? I find it easier and faster to be honest!
How do you press a seam open after glue basting? You would have to pry open the glued sites, right?
Yes, that’s correct. If glue basting, it’s probably not worth it to do that, so go ahead and press the seams to the side.
I’ve been glue basting my labels on before adding binding (2 sides) and the other 2 that I handsew down. Great points you add for those pesky seams that HAVE to match!! ♥
Do you mind sharing the name of the gray fabric with the loops/swirls? You always choose the most fantastic combinations!!!
The name is Gleaned by Carolyn Friedlander.
THANK YOU FOR POSTING YOUR PROCESS/TOOLS!!!
Genius! I needed this tip today,speny sooooo much time ripping seams out. I am also finding when I have to unpick seams that my blocks start to come apart – even when I have used a lock stitch…..
Hi there
Can you use this glue to baste your quilt before quilting it or is it only for seams?
Thank you
Basting spray is a spray glue, so you could, however it would be labor intensive.
I thought when using the Elmers glue that it needed to be diluted? I did not see that you do that? Full disclosure, i sometimes have a mess when gluing so perhaps this is why!! Ha ha
I have also tried glue basting. Swirling it on and ironing the layers together. My first attempt left the swirly pattern showing through the fabrics. It has eventually disappeared but it would not be fun for a gift!
Diluting the glue isn’t necessary and would definitely make for a soupier situation 😉 One thing to consider when using glue in your sewing is that it can feel hard and, if you use a lot of glue, can be seen a little bit once it’s dry until the project is washed with water. Since the glue is water-based, it will fully wash away.
Thanks so much, what a fabulous tutorial. Love having all the photos. I cant wait to try. Love seeing your newsletters pop up in my e-mail, always entertaining and informative. Stitch on…
That’s wonderful to hear! Thank you, Val 🙂
I have been using Elmer’s glue sticks for basting for a few years now and it works well. It is especially useful for curved seams like Drunkard’s Path and Apple Core.
Elmer’s also makes a washable glue stick. It goes on purple so you can easily see it but it dries clear.
Seriously wonderful tip! I’ve had trouble “controlling” the glue stick and not till you wrote this sis I even think about liquid glue! Hurray! Thanks!
What wonderful advice about getting seams to be perfectly aligned.
Thank you Suzy for sharing your expertise.
I have this glue in my kit but have never used it. Time to get it out and follow your instructions.
Would using a hot glue gun with a precision tip work for seam basting? I couldn’t find if the glue sticks were washable. Also, I’ve used Aleene’s Fabric Glue before and it worked fine.
Hi Karen! We don’t recommend using a hot glue gun because hot glue does not wash out. The best bet is to use washable glue so you don’t have a hard, inflexible line of glue running down the quilt back!
Will glue help with sewing bias cut seams like some of the big triangles used in Suzy’s patterns (like adventureland?). Or is heavily starching my best plan?
Oh that’s a neat idea! We are big fans of starching those bias cuts but please let us know if you try glue basting!