DIY Holiday Felt Garlands
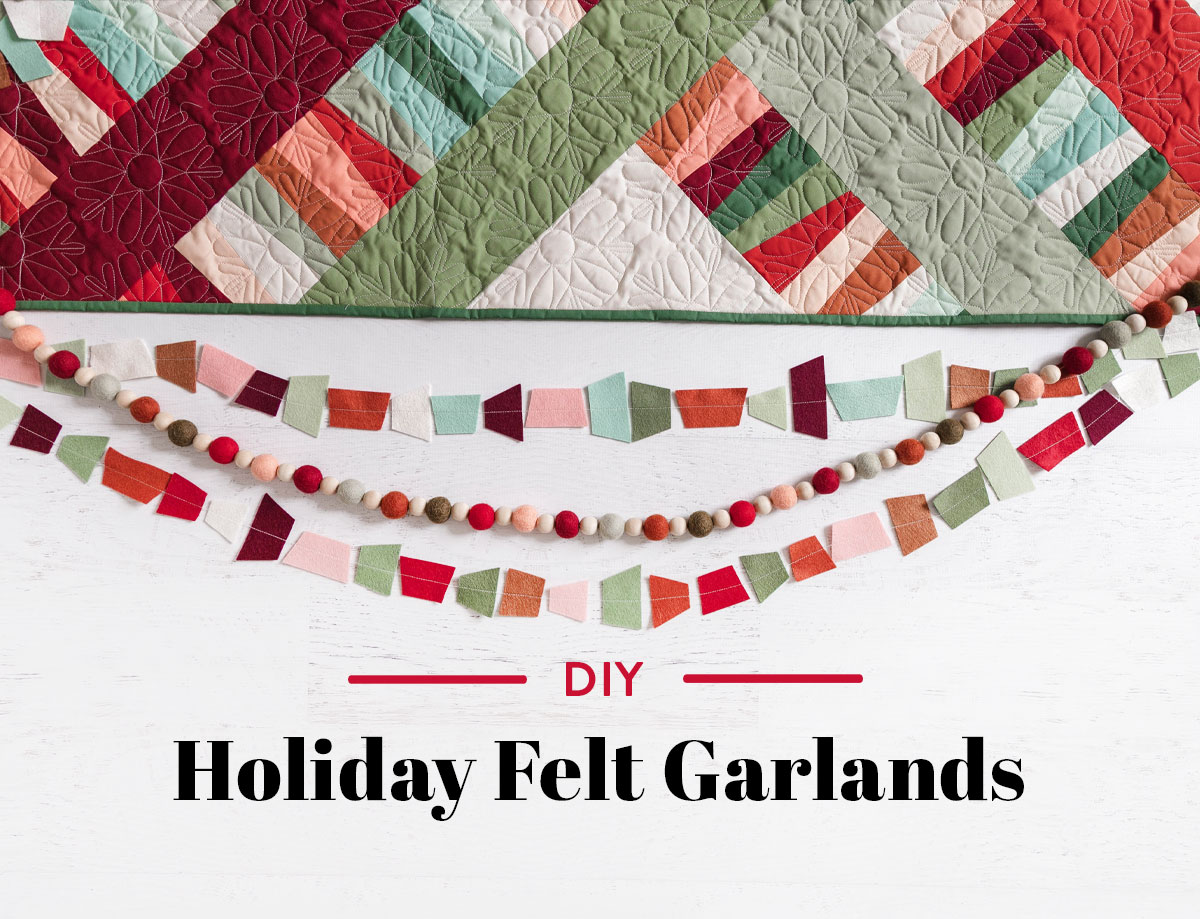
If the brand new Garland quilt pattern has you feeling festive, now is the perfect time to make your own DIY holiday felt garlands! In this tutorial, you'll learn how to make one garland using felt poms and one made with felt sheets cut using the same improv technique from the Garland quilt pattern.
These quick, easy, and fun projects will add some homemade cheer to your decorations — and both can be made in a just few hours. Make these cute projects quickly so you have more time to enjoy the holidays with your friends and family!

Our friends at Benzie Design — the best place to buy wool felt and hand stitching products — worked with us to create two custom felt garland kits. Both kits coordinate perfectly with the holiday Garland quilt featured on the cover of the pattern.

Fabrics from this quilt are all Art Gallery Fabrics PURE solids. They include:
Trending patterns!


Quilt Patterns


Quilt Patterns


Quilt Patterns


Quilt Patterns


Quilt Patterns


Quilt Patterns


Quilt Patterns


Quilt Patterns


Quilt Patterns
- 1 1/8 yard Moda Bella Solids in Porcelain
- 1/2 yard PURE Solids in Fresh Sage
- 3/8 yard PURE Solids in Patina Green
- 3/8 yard PURE Solids in Aurora Red
- 3/4 yard PURE Solids in Candied Cherry
- fat quarter PURE Solids in Burnt Sienna
- fat quarter PURE Solids in Candied Cherry
- fat quarter PURE Solids in Ruby
- fat quarter PURE Solids in Aurora Red
- fat quarter PURE Solids in Grapefruit
- fat quarter PURE Solids in Peach Sherbet
- fat quarter Moda Bella Solids in Porcelain
- fat quarter PURE Solids in Tender Green
- fat quarter PURE Solids in Warm Wave
- fat quarter PURE Solids in Fresh Sage
- fat quarter PURE Solids in Patina Green
- fat quarter PURE Solids in Eucalyptus
Keep reading for step-by-step instructions to make two kinds of holiday felt garlands! First up is the pom garland which can be made in under an hour, and second is the improv felt garland which takes about two hours.

You May Also Like...

Pom Holiday Felt Garland Materials
- 10 medium poms each in the following colors: Loden, Tortoise, Russet, Blush, Red, and Crimson
- 1 bag of 20mm wood beads
- Garland add-on kit which includes the best needle to use with poms, coordinating pearl cotton thread, and a thread winder to help keep your thread from tangling
The supplies above will make a garland that is about six feet long. If you'd like yours to be longer, add more pom palettes and wood beads! You should only have to buy one add-on kit if you extend the length of your garland.

Pom Garland Step 1: Plan Your Pattern
Once you've gathered your supplies and wound the pearl cotton around the thread winder, lay out the felt poms and wood beads in the repeating color pattern you'd like to use for your garland. If you'd rather choose your poms randomly as your string them on, that's ok too!

Pom Garland Step 2: Thread Poms and Wood Beads
To thread your garland, you can either cut off a length of thread that is about seven feet, or unroll a few feet from the thread winder and trim your thread at the end. I like to do the latter option because I think it decreases thread tangles!

Always begin with a felt pom since the wood beads have a large opening that will slip off a knot in the final step.
Pierce the felt pom with the needle included in the add-on garland kit, making sure that you are approximately in the middle on the top and bottom. Don't worry — the felt pom will move very easily over the needle!

Pull the pom down towards the thread winder. As you need more thread, just unwind more from the winder and push all the poms and beads down farther.

Repeat with the wood beads. Each wood bead has a wide opening, so these will go onto your garland even easier than the felt poms.

Pom Garland Step 3: Finish the Garland!
Once all your poms and beads are threaded, you're almost done! First, make sure you have a felt pom at the start and end of your garland. Next, trim the thread off the winder. Be sure you have about six inches of extra thread on both sides of the garland after the thread is trimmed.
Next, decide how you'll hang your garland. If you're planning to lay the garland flat on a shelf or table or drape it over something like a picture frame, tie a simple knot on both sides as close to the felt poms as possible. I like to tie a double knot so the garland is extra secure.
If you're planning to hand your garland from hooks, tie your thread in a loop at both ends so you can slip the loop over the hooks.
And you're done! Time to start the improv felt garland!

Improv Holiday Felt Garland Materials
- One 9" x 12 " sheet of felt in the following colors: Cinnamon, Laurel, Sage, Olive, Jadeite, Linen, Tellina, Red, Pinot, and Copper
- Ruler
- Rotary cutter or scissors
- Cutting mat
- Sewing machine thread
- Sewing machine
With one Garland wool felt palette linked above, you'll be able to make an improv garland that's about 50 total feet long. You can divide that up into smaller sections based on how you want to use your garland! I made two 20 foot garlands and one small one that is about 10 feet.

Improv Garland Step 1: Cut Felt Into Strips
Cut each of the felt sheets into 6 - 1 1/2″ x 12″ strips.

Improv Garland Step 2: Cut Strips Using Improv Technique
Using the improvisational wonky cutting instructions on page 4 of the Garland quilt pattern, cut each felt strip. Keep the shortest side of each cut to between 1″ and 2 1/2″, but there's no need to be as precise as when cutting fabric for the quilt. It's totally ok to vary the cuts as much as you want! I usually got five to six improv pieces per strip.

Improv Garland Step 3: Chain Piece the Felt
Choosing felt pieces at random, chain piece the felt together into as long of garland as you'd like! Be sure to backstitch at the beginning of the first felt piece and the end of the last felt piece to secure your stitches. No need to backstitch with each piece, just the first and last one! And once you backstitch the last piece, you're done!
Here's a video to help you learn to chain piece if you haven't done it before.

As you chain piece the felt, switch the orientation of the cuts for more variety. For example, in the picture above, the red and white pieces are both long but I've pieced one horizontally and one vertically. This adds to the wonky improv look of the garland!

And you're done! In just a few quick hours, you'll have a cute decoration to add to your holiday lineup. Hang both garlands together or spread them out across your home — either way, they'll look festive and perfect with your holiday-colored Garland quilt.

Decorate with your DIY Holiday Felt Garlands!
Where are you going to hang your garlands? Which one are you most excited to make? Let us know in the comments! And don't forget to follow Benzie Design on Instagram for more felt crafts!


