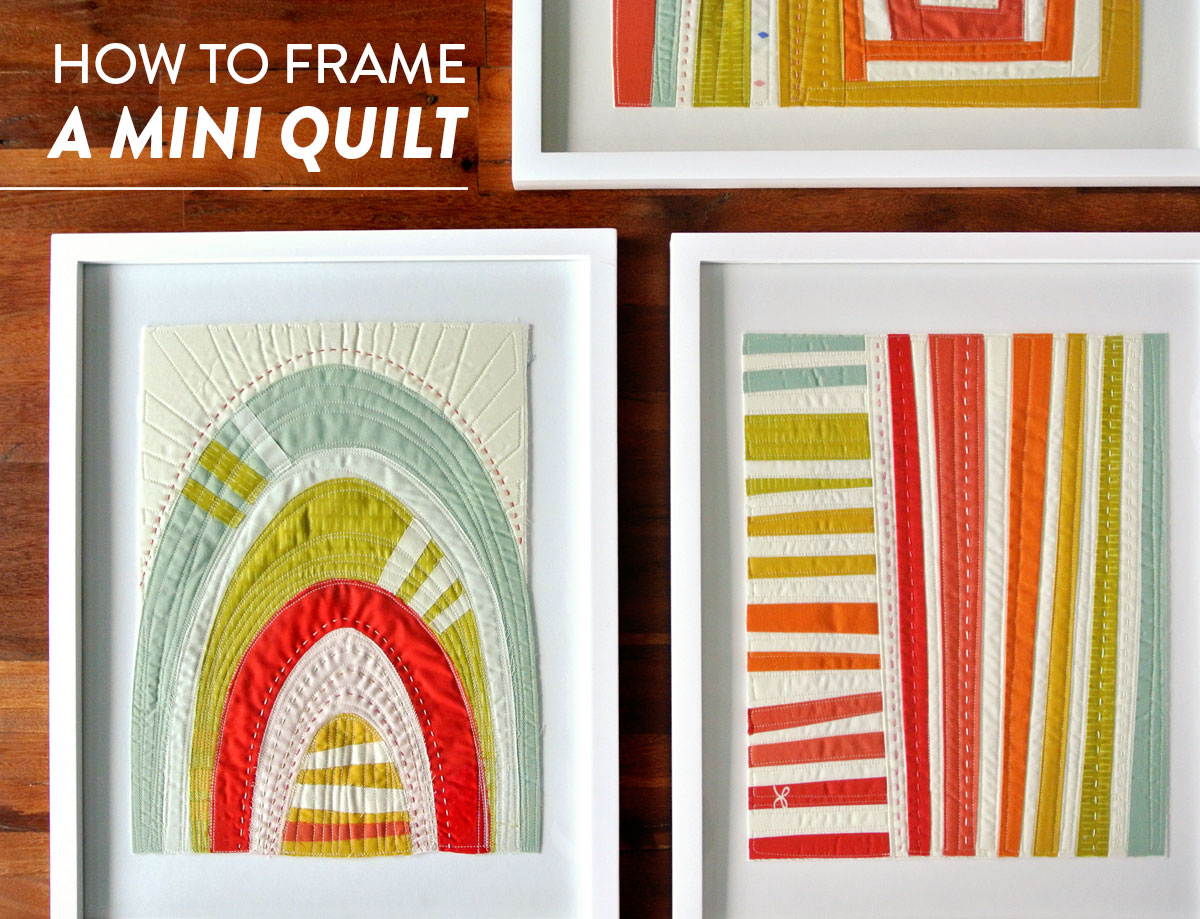
How to Frame a Mini Quilt
Hello, my fellow Mojo Quilters! This post is specifically for you – cause I love you and you're special and crazy talented and that color looks great on you and today is going to be a GREAT DAY! Woot! (I may have slipped into some self-affirmations because it's really cold and cloudy here in Chicago and sometimes I just gotta pat myself on the back, you know? But I wasn't lying. That color really does look great on you.
Now that Sew Mojo #1, #2, #3 and #4 patterns are available for download and lots of you are having fun playing around with unconventional lines, composition, rhythm and unity, the finishing step in making these minis is to frame them.
This is the easy part, so don't fret for a second. In this post I will walk you through each and every step. If you make it all the way to the end, I will reward you with a cheat sheet to my favorite frames and where to buy them.
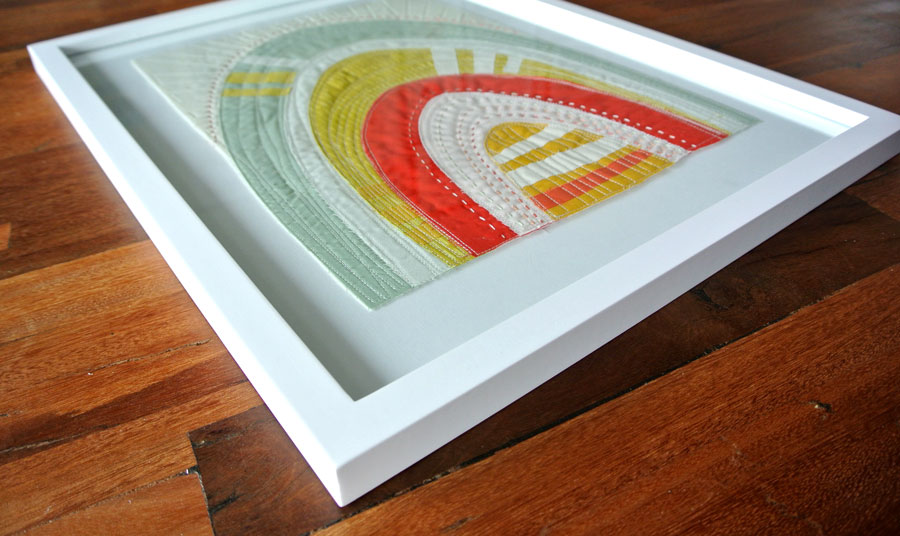
Pictured in this tutorial is the third Sew Mojo mini quilt in this series.

Supplies:
- Frame (includes glass and mat)
- Masking Tape or Double Sided Tape
- Clean cloth
- Your Sew Mojo Mini Quilt - Get the patterns!
How to Frame Your Mini Quilt
- Disassemble the frame by taking off the back and removing the mat. Fig. 1
- Place the mat right side up. Fig. 2
- Flip your mini quilt so that the back side is facing up and place a couple pieces of tape on either end. Fig. 3
- Flip the mini back over so that the right side is facing up. Place it in the center of the mat and press down where the masking tape is to secure the mini to the mat. Fig. 4
- With a clean cloth, wipe down the glass that is still in the frame so that no lint or debris is visible.
- Place the mat, with the mini secured to it, face down on the glass. Fig. 5
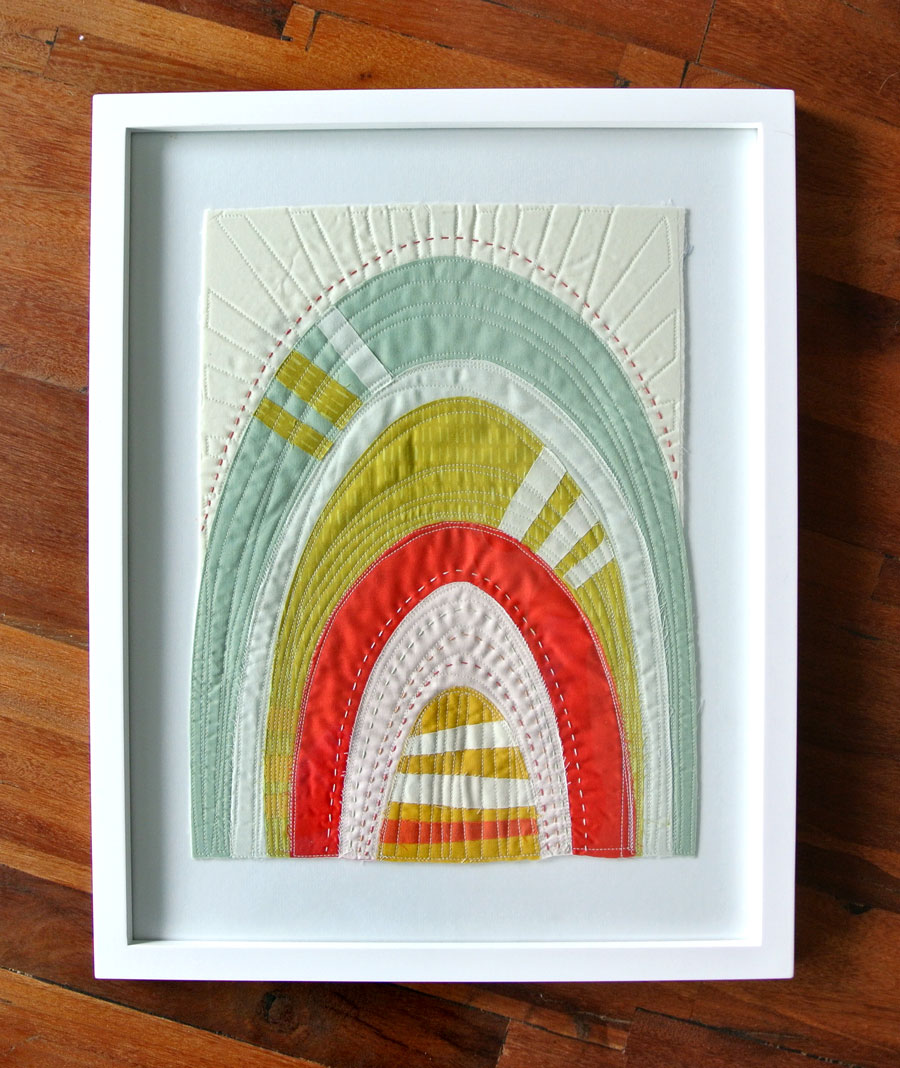
- Secure the back of the frame back in place.
- Flip over and admire your work! Fig. 6
Fig. 1
Trending patterns!


Quilt Patterns


Quilt Patterns


Quilt Patterns


Quilt Patterns


Quilt Patterns


Quilt Patterns


Quilt Patterns


Quilt Patterns


Quilt Patterns
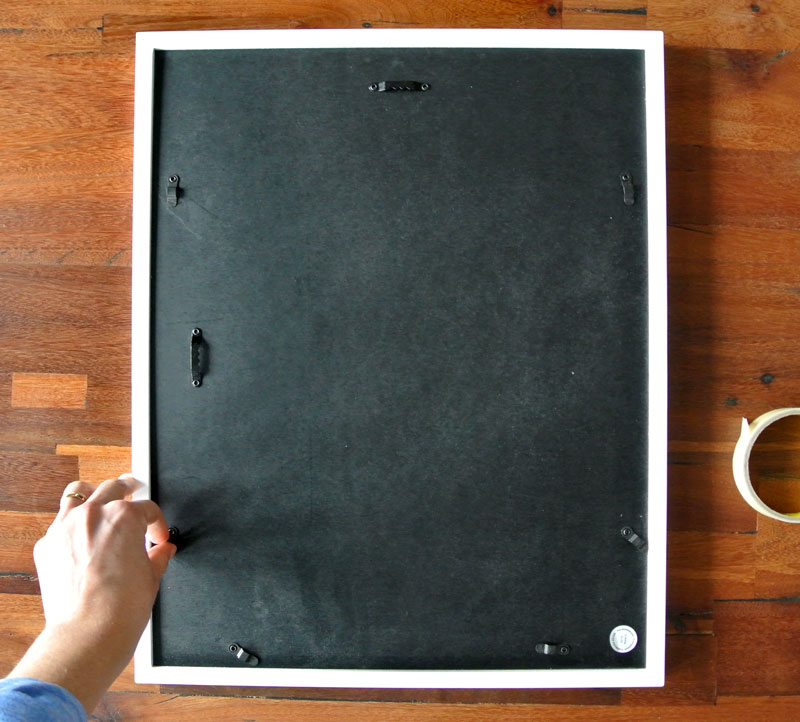
Fig. 2
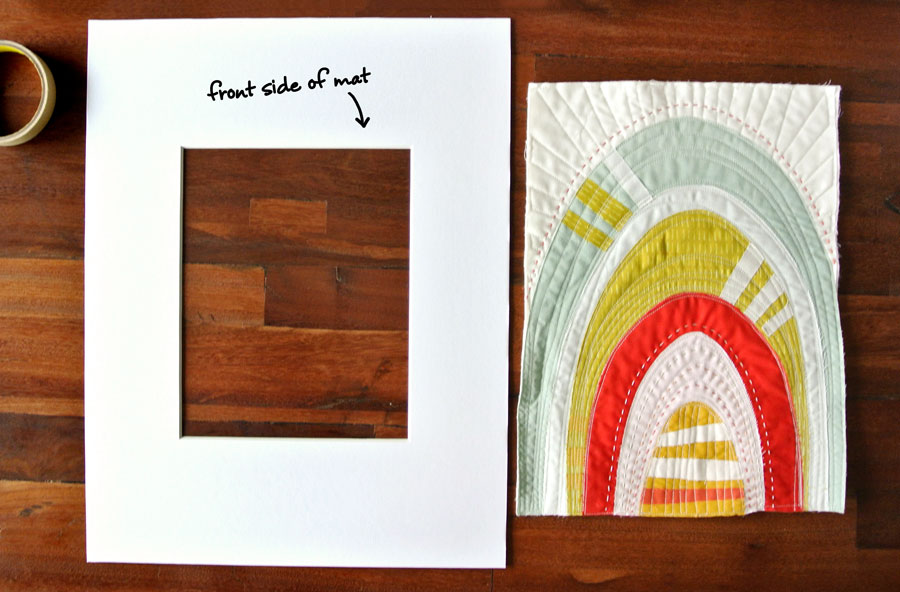
Fig. 3
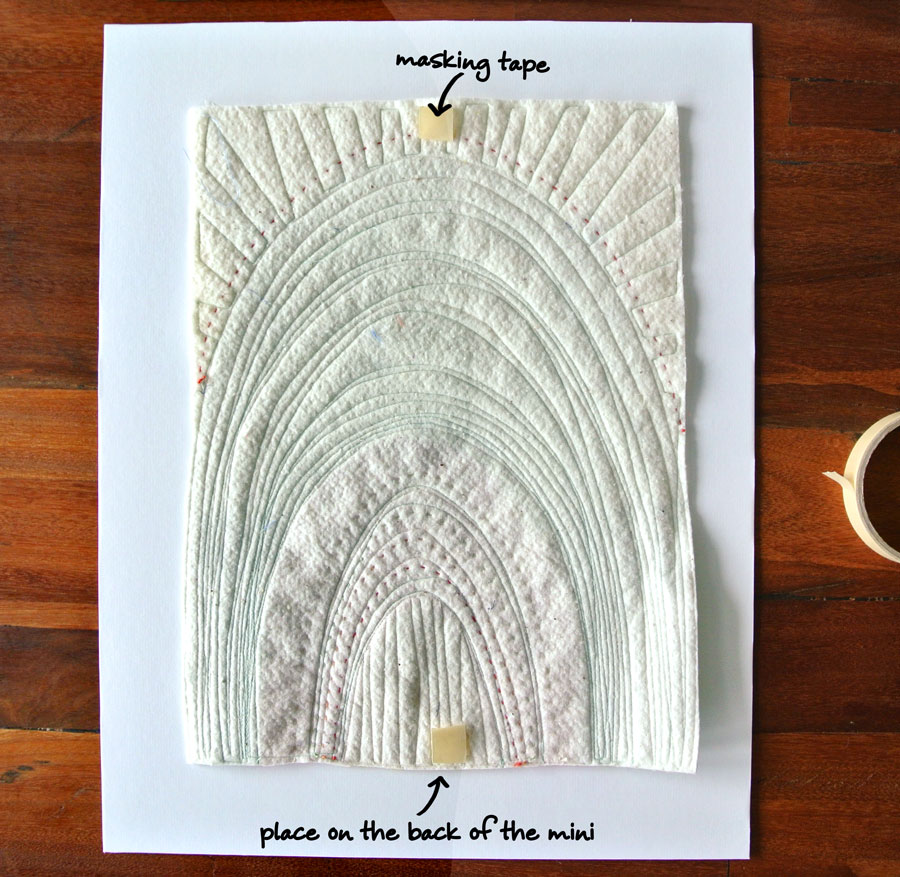
Fig. 4
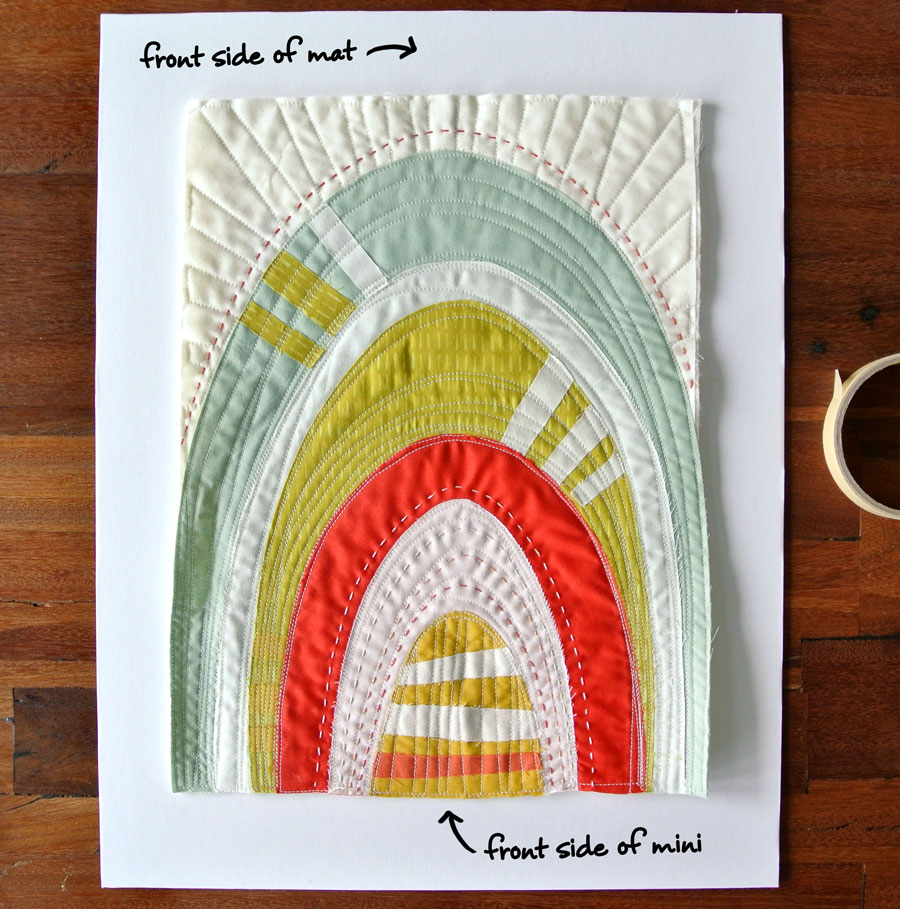
Fig. 5
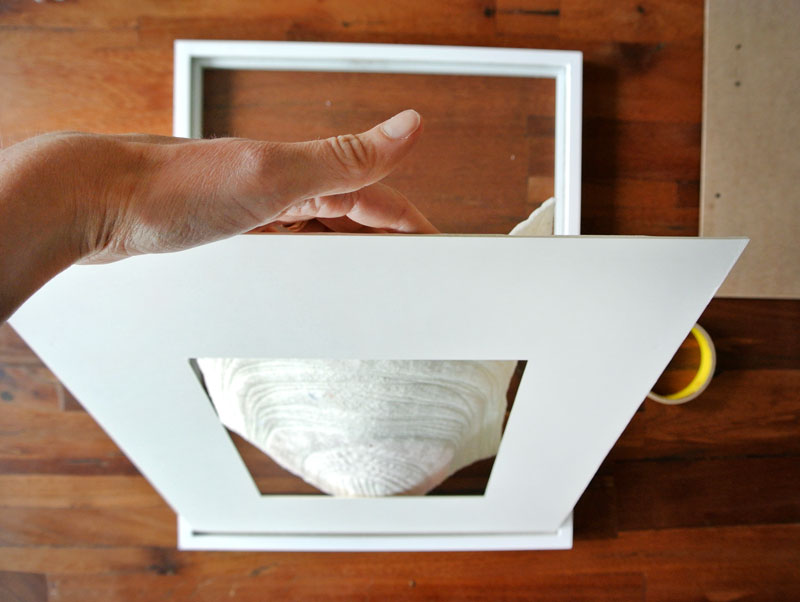
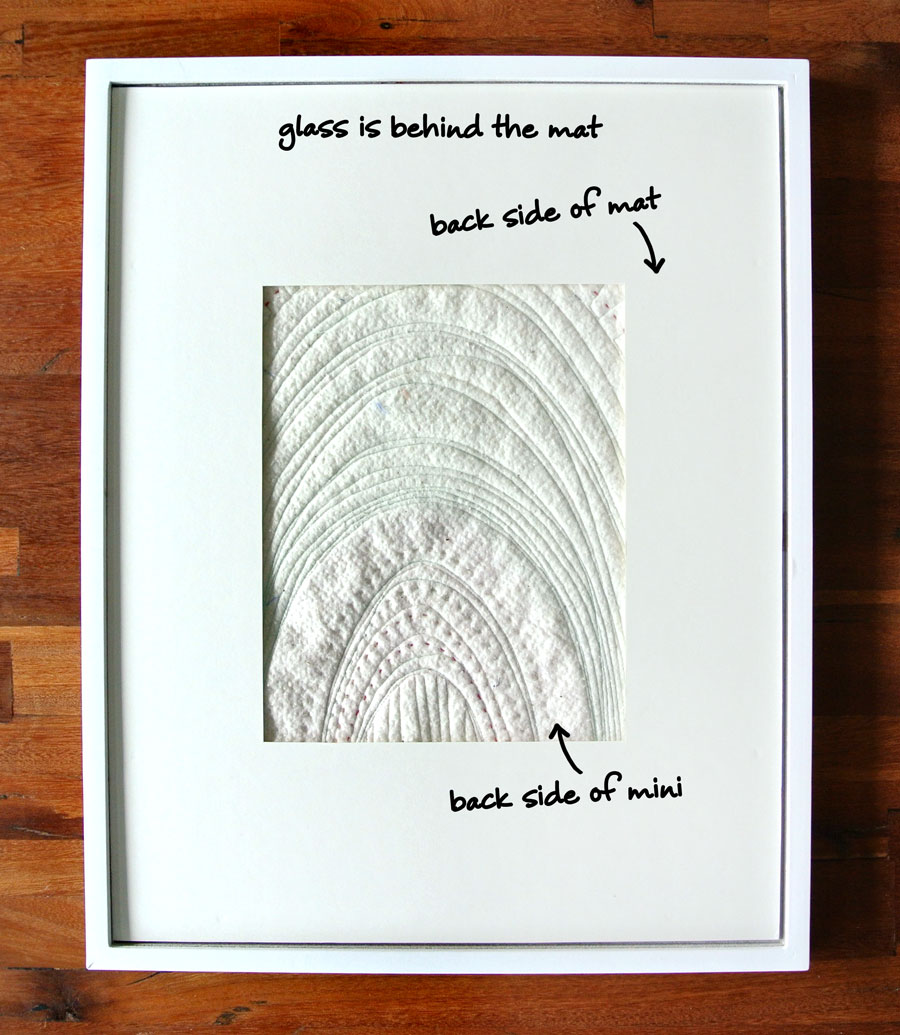
Fig. 6
Now, as promised, let me share with you some of my favorite frames and where to get them...but FIRST!
Did you know that these cute little mini quilts are now a class on Blueprint? I flew out to Denver and filmed Fabric Play: Sewing Mojo Minis so that you could see how fun, fast, and truly liberating these little sewn scraps of fabric can be!
You can read more about the class here OR watch the trailer below!
OK OK, back to my favorite frames:
- IKEA: The first on this list has got to be these little white frames from IKEA. They are cute, cheap and don't look dirty right out of the package (I'm looking at YOU, Target. Half of your frames are dinged up and scuffed IN THE STORE. For a while I was blaming it on my reckless driving while traveling home and then I was blaming it on Scrappy. But no, Target. I looked closer last time I was in the store and it is YOU!)
- Oh Target...I hate you but I need you. Second on my list, and also the frame used in this tutorial is the Room Essentials brand of gallery frames found...at Target. sigh...
- Amazon: BUT I just did a search for similar frames on Amazon and they are cheaper AND come with free shipping...so yeah! Suck it Target!
- West Elm: The last option on my list is the most expensive, but sometimes you just gotta spring for it. I can vouch for the quality of these frames. I've purchased...a lot, and every one of them is well made with welded corners and a nice heft (which is something you're looking for in a frame, right?).
If you're a #SewMojoQuilts quilter I'd love to hear about your process and see your framed minis – post a link to pics in the comments. xo


Hi Suzy, great tutorial. Once upon a time I worked at a frame shop, so I might suggest staying away from masking tape as it can yellow over time & transfer to card stock & fabric. Try a clear double sided tape close to the edges of the fabric.
Another good place for frames can be a dollar store, too.
For a frame ship finish on the back & once finished with adding the artwork, place the fame back side up on a table. Run a line of dbl sided tape along the top, bottom and both sides of the back edge (if it’s flat). Take brown paper and cover the back of the frame & smooth it out. Use a sharp knife and trim Any hang over excess. Add a hanger to the back and you have a nice professional back / dust cover. Cheers
Great to know!!! I use masking tape for everything and I never would have thought about it yellowing over time. Thanks, Michael, for the professional advice 🙂
I second all your comments. I too used to do framing.
SUCH A GOOD POST! Thank you!
Thanks, Betsy! xo
Love the bright, fresh look. And, it makes the wee quilt look less ‘quilty’, if you know what I mean. I think it makes a great gift for someone who is not overtly fond of quilts. Always good to get a new perspective.
I agree! Thanks, Becky 🙂
Thanks so much for the info. I’ve purchased all three downloads and am loving the freedom to explore and create.
So happy to hear that!
Is there as tutorial for making these mimi quilts?
You can currently buy 3 out of the 4 mini quilt patterns in the Sew Mojo series. The fourth pattern in the series will be released on January 12.
I owned a framing business and was a certified picture framer. Be aware that artwork or your quilts should never touch the glass as condensation can cause damage. You can purchase spacer although it can be hard to find. A picture framer might sell it to you. It is a thin piece of plastic that sticks to the glass inside the lip of the frame keeping the glass from touching your quilt. Never use masking tape to mount anything as it will stain anything it touches. I would stitch it to a piece of acid free matboard. Make sure the lip of the frame is deep enough to accommodate the glass, spacer and quilt.
Very helpful! I work for a Hospice & local quilters are making approx 40”x40” wall quilts for patient rooms. Looking for any addtl tips re: frame the quilts under glass & what type backing board you would recommend to hand stitch the Quilts to?
I don’t think you need to stitch the quilts to a board. Once they are securely behind glass they will stay in place.
Hi Suzy. 😊 It looks like your minis in this picture aren’t bound. Does that mean fraying is not an issue with wall hangings?
I frame these minis behind glass, so I like the look of the raw edges. I think it adds visual interest; however, if it was a stand alone mini outside of a frame, I would bind the raw edges.
Do you bind these at all? Or back them?
I don’t! I just use a piece of batting and no backing. I really like the look of the raw edges behind glass.
Wandered to your site via YouTube to ask you who makes the sweater you’re wearing in the tutorial. Thanks for posting this awesome video. I’m new to quilting and will definitely give you a follow!
I love this sweater too! Gosh, I got it years ago from a maker I followed on IG. I wish I could remember who it was because I’m sure they are still out there making adorable sweaters! Sorry I’m not more help!
In the Sew Mojo Mini series, what thread do you use for the hand quilting?
Perle Cotton No. 8 is a great option for any hand quilting project! Here’s our tutorial on hand quilting: https://suzyquilts.com/how-to-hand-quilt/