Halloween Candy Bag Tutorial
Spooky season is here! In about one month, cute little ghosts and ghouls will dress up in their favorite costumes and ring doorbells to fill their bags with treats. And if you want to make something special for the kid in your life, this Halloween candy bag tutorial is for you!
The great thing about these candy bags is that because the Halloween colors are subtle, they can be used year-round. The boxed corners at the bottom of the bag make it perfect for holding an entire king-sized candy bar haul, or books and toys once Halloween is over.
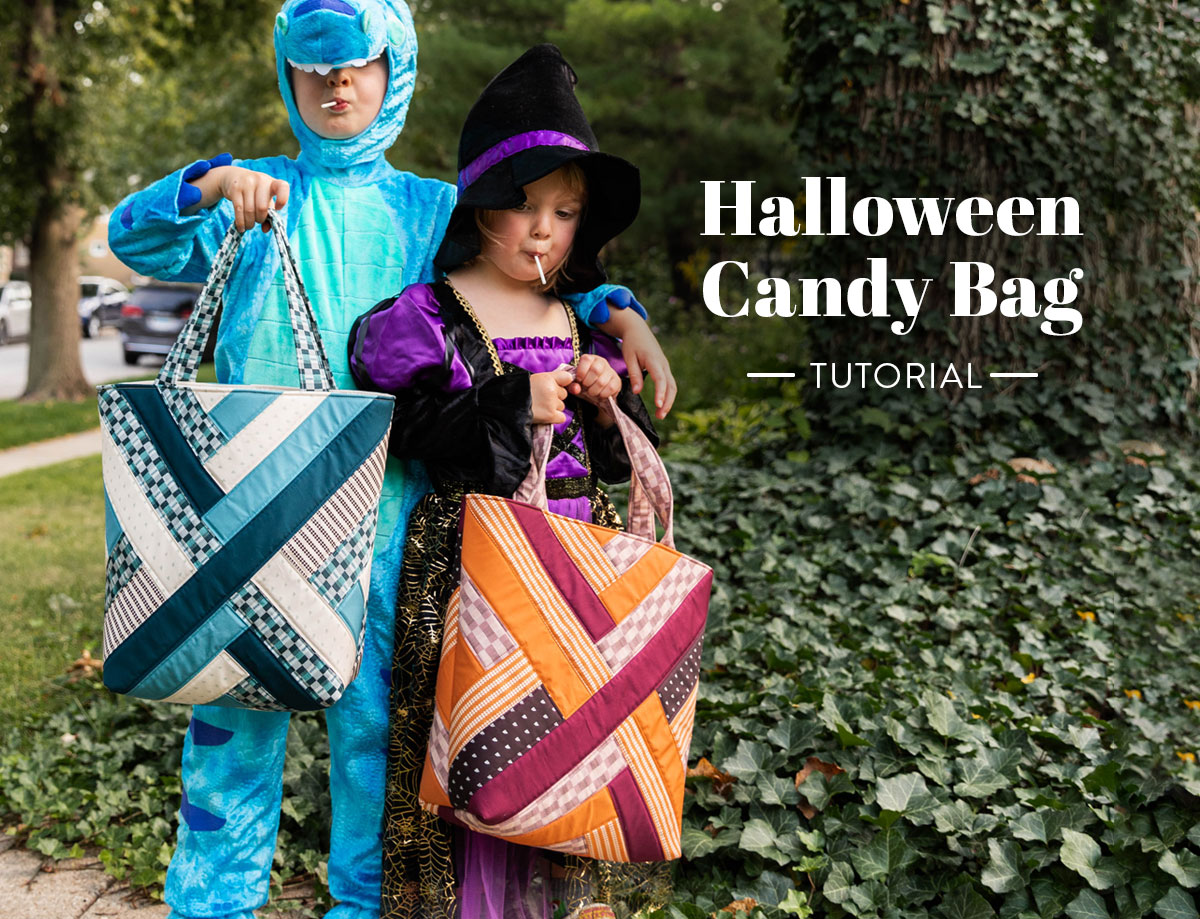
Want reviews of these bags from actual children? My Frozen obsessed daughter is calling the pair of bags Elsa and Anna bags and wants to bring both trick or treating. Suzy's son Desi liked the blue one so much he asked to sleep with it. And how cute are Suzy's kids showing off the bags in their costumes?
Grab some Halloween colored fabrics or your kid's favorite colors and let's make this beginner-friendly Halloween candy bag!
You Might Also Like...

Need a Halloween costume for your little? Suzy recommends both of these worn by her two and four year old kids. Toddler witch costume and blue T-Rex costume.
Trending patterns!


Quilt Patterns


Quilt Patterns


Quilt Patterns


Quilt Patterns


Quilt Patterns


Quilt Patterns


Quilt Patterns


Quilt Patterns


Quilt Patterns
Halloween For All: The Teal Pumpkin Project
Halloween is one of the most fun holidays for kids. What’s not to love about dressing up in a costume and getting an entire bag full of treats? But for some kids, Halloween isn’t always fun. For kids with food allergies or other medical dietary restrictions, going to a home that doesn’t have a treat they can eat can lead to feelings of stress or exclusion. No one wants that!
That’s where the Teal Pumpkin Project comes in. An initiative of F.A.R.E (Food Allergy Research and Education), the idea is simple. When shopping for Halloween treats, be sure to also get some allergen-friendly treats or non-food treats so that any child is able to add something to their bag. You can purchase a teal pumpkin to put on your doorstep at most major stores to indicate that you are a safe house. And some kids with dietary restrictions will carry a teal pumpkin or bag to collect treats, like the teal bag in this tutorial.

While the project was started as a way to protect children with allergies, it’s become incredibly important in my family. My daughter doesn't have food allergies, but she does have strict medical dietary restrictions. That makes Halloween pretty hard. We are always so excited when we see a house with a teal pumpkin because we know she can choose something she can keep!
For adults who are thinking, “But I don’t want a million more cheap plastic toys that I’ll just throw away,” you’ve got a great point! I don’t either. Here are some of my family’s favorite low-cost non-food treats to pass out and receive, all of which will eventually be used up just like candy.
- Stickers
- Temporary tattoos
- Art supplies like crayons, pencils, or mini notebooks
- Glow sticks
- Bubbles
- Mini Play-Doh tubs
Learn more on the Teal Pumpkin Project website!

Halloween Candy Bag Materials
- Maypole Pillow Extension Pattern (Download)
- Ruler
- Chalk marker or disappearing ink pen
- Pins or binding clips
- Coordinating thread
- Sewing machine
- Iron and ironing board
Fabric Requirements
Each candy bag requires two Maypole pillow tops. Because you'll be making two tops instead of one, the fabric requirements differ from the requirements listed in the pattern.
- Maypole Color 1: 3/8 yard
- Maypole Colors 2-5: 1/4 yard each
- Soft and Stable: One pack (36" x 58", you'll have plenty left over if you want to make multiple bags)
- Straps: 1 fat eighth
- Lining: 1/2 yard
Note that if you are using a color from Colors 1-5 for either the lining or straps, you can add the lining or straps measurement to the Maypole Color requirement.
Cutting Instructions
- Follow the Maypole pillow pattern to cut Colors 1-5, multiplying each cut by two to make two identical pillow tops
- Soft and Stable: (2) 16" x 16" squares
- Straps: (2) 3 3/4" x 18" rectangles
- Strap Soft and Stable: (2) 1 1/8" x 18" rectangles (you may want these to be wider if choosing to use thinner interfacing — starting with a 2" x 18" strip and trimming down should work)
- Lining: (2) 16" x 16" squares
A note about interfacing — I prefer using Soft and Stable by Annie’s for bags that will be used by children. It is a very thick material that gives the bag more structure so it can stand up on its own relatively easily, and it's more durable for children. If you want to use thinner interfacing, the bag will be floppier and may not last for multiple Halloweens.
Soft and Stable may be safely ironed on medium heat, but you may notice a slight chemical smell. Iron with your window open or lay fabric on top to diffuse the smell.
Step 1: Make Two Maypole Pillow Tops
Begin by making two identical Maypole pillow tops following the instructions in the Maypole Pillow Extension Pattern. Maypole is a very fast pattern — I made all four Maypole pillow tops shown in this tutorial in one day.
When the Maypole panels are finished, trim both down to 16" square.
All fabrics used in this tutorial are from Duval and Signature PURE Solids, the debut fabric collections from Suzy Quilts for Art Gallery Fabrics. To recreate one of the bags shown in this tutorial, use the fabrics listed below.
Orange and Purple Halloween Candy Bag
- Color 1: Spiced
- Color 2: Basket Weave in Haze
- Color 3: Diamond Stripe in Spiced
- Color 4: Tiny Moon in Truffle
- Color 5: Velvet
- Straps: Basket Weave in Haze
- Lining: Diamond Stripe in Truffle
Teal Halloween Candy Bag
- Color 1: Tiny Moon in Breezy
- Color 2: Honeymoon
- Color 3: Basket Weave in Nova
- Color 4: Diamond Stripe in Truffle
- Color 5: Nova
- Straps: Basket Weave in Nova
- Lining: Diamond Stripe in Glacier

Step 2: Attach Maypole Panels to Soft and Stable
Attach one 16" x 16" Soft and Stable square to the wrong side of each Maypole panel by sewing a 1/8" seam around all four sides.


Step 3: Quilt the Maypole Panels
One benefit of using Soft and Stable for these Halloween candy bags is that you don't need to quilt it if you don't want to. Unlike batting, Soft and Stable does not need to be quilted. So, if you're in a rush or making multiple bags, you can skip this step!
Use a walking foot to quilt the Maypole panels as desired.

I wanted the Maypole design to be the focus of these bags, so I did subtle quilting in coordinating thread 1/8" to the side of each seam.
Step 4: Assemble the Bag Exterior
Using a chalk marker or disappearing ink pen, draw a 2 1/2" square on the bottom corners of both Maypole panels.

Using scissors or a rotary cutter, cut out all four squares.

Place the two Maypole panels right sides together. Clip or pin along the remaining left, bottom, and right sides. For Soft and Stable, clips are recommended because it is difficult to get pins in and out without bending them.
Sew the left, bottom, and right sides together using a 1/2" seam allowance. Backstitch at the beginning and end of each seam. Do not sew the bottom corners yet.

Pinch the bottom corners together so they are perpendicular to the side and bottom seams, as shown below. Clip or pin together, ensuring that the side and bottom seams are held open.
Sew both corners together using a 1/2" seam allowance. If you're using a lighter interfacing, press all seams open. If you're using Soft and Stable, proceed to the next step because the Soft and Stable seams will be too thick to press open. Don't worry, you won't notice in the finished bag!
Turn the bag exterior right sides out, poking out the corners, and set aside.

Step 5: Assemble the Bag Lining
Assembling the lining is going to feel very familiar because the steps are exactly the same as assembling the bag exterior! Using a chalk marker or disappearing ink pen, mark a 2 1/2" square on the bottom corners of both 16" x 16" lining pieces.

Use scissors or a rotary cutter to cut out all four squares.

Place the two lining pieces right sides together. Pin or clip around the left, bottom, and right sides. Because there is no Soft and Stable or interfacing on the lining, you can easily use pins if you prefer them over clips.
Sew the left, bottom, and right sides together using a 1/2" seam allowance, leaving a 6" gap in the bottom seam for a later step. Backstitch at the beginning and end of each seam. Do not sew the bottom corners yet.

Pinch the bottom corners together so they are perpendicular to the side and bottom seams, as shown below. Clip or pin together, ensuring that the side and bottom seams are held open.
Sew both corners together using a 1/2" seam allowance. Press all seams open.
Leave the bag lining inside out and set aside.

Step 6: Assemble the Bag Straps
Begin by folding the fabric over 1/4" on the long edge of one 3 3/4" x 18" rectangles, and press. Fold the fabric over 1/4" on the other long side and press. A tailor's clapper will help keep the folds in place during this step.

Fold the fabric in half along the long edge and press. The fabric should now look like a tube with one long edge open.

Lay the 1 1/8" x 18" Soft and Stable piece inside the strap tube. Wrap one of the 1/4" folds up to the top of the Soft and Stable. Lay the other half of the strap tube down on the top.
Clip or pin along the length of the open side of the strap tube.

Stitch a 1/8" seam along both long edges, beginning with the open edge. Repeat with the remaining strap pieces to create the second strap.

Step 7: Attach the Bag Straps
Attach the straps to the bag exterior by finding the middle of the bag exterior top. This should be at about 7 1/2". Mark the center of the bag exterior top using a chalk marker of disappearing ink pen.
Mark one line 3" away from the center point on both sides. Line up the straps with the two new marks and clip or pin in place. Baste the straps in place using a 1/8" seam allowance.

Step 8: Assemble and Finish the Bag
You're almost there! Finishing a bag can be a little confusing, especially if you're used to only making flat quilts. But trust me when I say this part of the tutorial will go by in a flash and soon you'll have a gift for the special kid in your life!
Tuck the bag exterior inside of the lining, right sides together. Be sure both handles are tucked down into the lining. Clip or pin around the entire top.

Be sure that the side seams of the bag exterior and bag lining line up when clipping or pinning.

Sew the bag exterior and bag lining together around the entire top edge using a 1/2" seam allowance. If your sewing machine has a removable extension table, remove it before sewing this seam and the rest of the bag assembly.
Turn the bag right sides out through the 6″ gap left in the bottom seam of the bag lining. Push the bottom corners of the bag exterior out so the boxed corners allow the bag to stand up.

Sew the 6" gap in the bag lining closed using a 1/8" seam allowance on your sewing machine or using a ladder stitch if you prefer to hand stitch it closed. Tuck the lining inside the bag exterior.

If you're using Soft and Stable, place clips around the entire upper edge of the bag, folding the lining and interfacing inside the bag as you clip. If you're using a thin interfacing, press the upper edge of the bag so the lining stays completely inside the bag.
Finish the Halloween candy bag by sewing a 1/8" seam allowance around the entire top of the bag as shown below. And you're done!


And here's a picture of Suzy's daughter Joanna twinning with their family goose. 🙂

What Do You Do on Halloween?
Will you be taking a kid trick or treating? Handing out candy and non-food treats at your house? Let us know in the comments! And be sure to tell us about the special kid in your life who will get a new Halloween candy bag as a gift from you. If you make this or any other tutorial here at Suzy Quilts, use #SuzyQuiltsBlog on social media so we can see!


My goodness, those are some gignormous treat bags. I remember the days of taking a pillow case trick or treating. No handles. Beautiful tutorial!
They’re about 15″ square — great for a toddler who wants to carry around toys and books or an iPad to a restaurant, and also will last a long time as kids grow! My daughter has so many teeny tiny bags that will only last a short time, love making her something she can enjoy longterm! Glad you like the tutorial! 🙂
I can’t wait to make this bag for my 8 yr. old granddaughter! She’s going to love having so much room for her Halloween treats.
She absolutely will love it! My daughter takes her bag everywhere since I made it 🙂