Holiday Party Quilt Sew Along Week 6: Assemble the Quilt Top
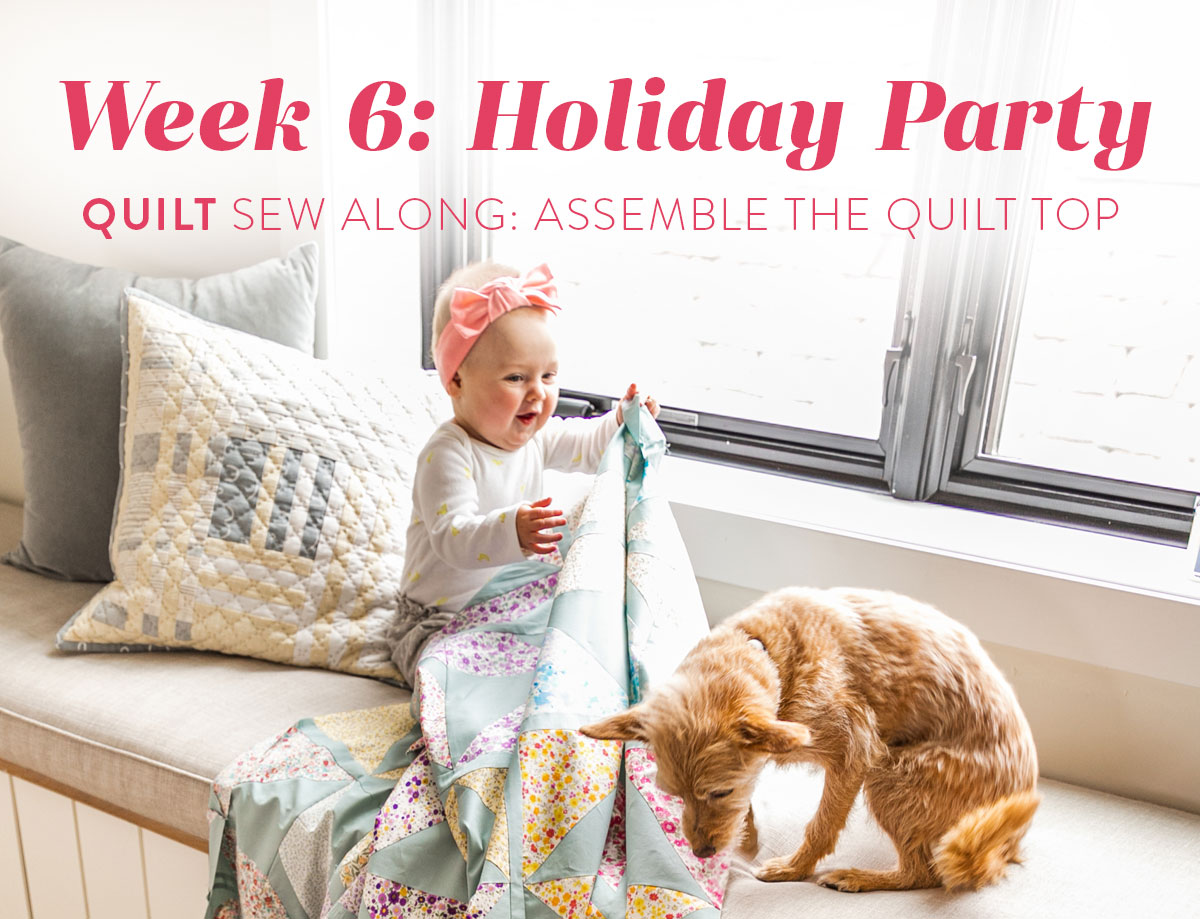
Party people, you did it! You finished all of your Holiday Party quilt blocks and it's time for the grand finale. Drum roll please.... this week we assemble the quilt top! That also means by next week you will have a finished quilt top just in time to kick back and enjoy your Thanksgiving celebrations (if you live in the USA).
And to my international friends, you may not technically celebrate "Thanksgiving," but I hope you feel proud and thankful for the hard work you put into making this quilt top. You sewed A LOT of seams!
For a full synopsis on what a Suzy Quilts sew along is, check out the Week 1 Holiday Party sew along post. In a nutshell, we are making this pattern together over a six week period of time and you can win prizes along the way by posting pics to IG using #HolidayPartyQuiltSA. YAY!
Holiday Party Sew Along Schedule
- Week 1, October 12: Pick and cut fabric
Sponsor: Global Fiber Textiles & Notions - 31 Day Fabric Advent Calendar Box which contains 62 fat quarters, a pattern, and fun extras AND The Gather Quilt Shop - 3 Holiday party throw quilt kits - Week 2, October 19: Make HSTs
Sponsor: Sewing Arts Center - $100 gift certificate - Week 3, October 26: Sew and trim all Template A units
Sponsor: Lavender Fields Co. - Free longarm quilting for one Holiday Party quilt plus 20% off for any other Holiday Party quilts made during the sew along - Week 4, November 2: Assemble 8 blocks
Sponsor: DuckaDilly Liberty Fabrics - $100 gift certificate - Week 5, November 9: Assemble 8 blocks
Sponsor: Lamb & Loom Fabrics - $100 gift certificate - Week 6, November 16: Assemble the quilt top
Sponsor: Trace Creek Quilting, Modern American Vintage and Aurifil


Week 6 Assignment: Assemble the Quilt Top
Most likely you have sewn quilt blocks together before, but I'm still going to try my best to give you some new exciting tips. To be totally honest, I just learned one of these tips a few days ago so you'll have to tell me if it's something you've been doing or if it's new to you too!
Tip #1: Lay out all of your blocks.
Yes, I know. This quilt is BIG. It's very possible you just don't have the floor space or a design wall large enough. Here's my suggestion, if you have a bed that is large enough lay out your blocks on the bed. Stand on a chair or something safe so you have an aerial view of the blocks. From there you can rearrange them until you find a layout you like.
Trending patterns!


Quilt Patterns


Quilt Patterns


Quilt Patterns


Quilt Patterns


Quilt Patterns


Quilt Patterns


Quilt Patterns


Quilt Patterns


Quilt Patterns
It sounds kind of weird, but you can take photos of the blocks on your phone and look at them that way too. I actually like to take photos with my phone because seeing the blocks on a smaller scale can help me focus and pinpoint more precisely what looks out of place and what should move.
Just like the pattern says, you can rotate these blocks any way you want. They don't have to be exactly like the example illustration in the pattern. These blocks are squares so no matter how you rotate them, they will still fit together.

Tip #2: Pin your sashing.
Sometimes your sashing will fit on the block perfectly and you will only need a few pins.

Other times the sashing will be slightly larger than your block and you will need a few more pins for it to line up at the edges.

And sometimes your sashing will feel quite a bit larger and you'll need 9 pins to tame the beast. That's really OK! Unless your sashing is over a 1/4" larger than your quilt block, I recommend just using a lot of pins to keep everything in place rather than trimming each piece of sashing to fit.


Here's a photo from last week to remind you how to stretch the block a little so the two pieces line up.
First line up the corners and pin. Then give everything a slight stretch so it all lines up and lays flat. I would normally do this with two hands, but I'm holding a camera in one hand for this photo. Lastly stick a pin in the middle. If the sashing is looking a bit bubbly, stick more pins in it.

Tip #3: Flip your sashing to the bottom.
We've talked about this in past sew alongs, specifically in the Mod Mountains sew along because there were so many "mountain" tips we wanted to look crisp and pointy.
To prevent your points from getting eaten up by the seam allowance, sew with the block seams on top so you can see them. Once you are sewing, fudge what you've gotta fudge (even if it's slightly more or less than a 1/4") to sew across the tip of the point's intersection. See the photo below for the intersection I'm talking about.


You can pin with the sashing up and then flip it down at your machine, or you can pin with the sashing down – whatever floats your boat.

Troubleshooting Tip!
I just learned this troubleshooting tip a few days ago after finding an Instagram post by Grainline Studio. Jen is a fellow Chicago designer and an incredibly good sewist. So here's what she posted, if you are noticing that the diagonal seams connecting your 1 1/2" sashing strips are unraveling at the edges, shorten your stitch length.
I piece my quilts using a 2.5 stitch length, but by simply shortening that to 1.5 the seam doesn't unravel at all! You can fiddle with stitch length a bit to find what works best with your seams and your machine.
NOTE: If you have already sewn your sashing strips together using a 2.5 stitch length you do not need to rip your strips apart and resew them. I have sewn MANY narrow strips of fabric using a 2.5 stitch length and a 45-degree diagonal seam and my quilts have not fallen apart. Once this sashing strip is sewn to the rest of your quilt top the connecting seam will be locked into place.

Tip #4: Trim off unwanted seams in your sashing.
If you are making the throw there are enough sashing strips that you don't need more than one seam in your sashing per row. I laid out my sashing strip on my second block row and trimmed off about 6" to avoid this extra seam.

Tip #5: Line up the block sashing when sewing the rows together.
The criss cross sashing is what your eyes will visually connect when you see the quilt top in its entirety, so make sure those line up when sewing the rows together.

Below you can see that I don't trim my sashing strips until the very end. As long as I'm lining up the edges of the blocks and the block sashing, I can trim it at the end. In fact, it's such narrow sashing, I can even trim it with my scissors rather than hauling the entire quilt top to my cutting mat.


Tip #6: Don't forget to use your tailor's clapper when pressing the sashing.
You're almost done so don't poop out on pressing before the finish line! These sashing strips are quite narrow and really need the power of the tailor's clapper to get the to stay flat. If you haven't been using a tailor's clapper, here's a brief tutorial on how to use one.
You May Also Like...
Look at all of those perfectly flat seams! It's the magic of the tailor's clapper.

Tip #7: Pat yourself on the back.
Celebrate your accomplishment! Things that are OK for you to say at this time:
- "WOW! I did that? I'm amazing!!"
- "I learned so much and can't wait to keep sewing!"
- "[Fill in the blank] is going to love this quilt! I cannot WAIT to give it to them!!"
Things that are NOT SQ approved to say at this time:
- "Welp, it's not perfect but I guess I'm proud of it."
- "I hope [fill in the blank] doesn't notice all of my seams that don't line up."
Deal? Should we shake on it? Now is the time for you to party! Now is also a great time to pose your kids, dogs, cats, birds, lizards, friends or spouse on the quilt top for some adorbs pics.


Tip #8: Don't overthink how to quilt this.
Your quilt top is finished, but there are still a few steps before you have a completed quilt. You put a lot of work into piecing seams to make this quilt, which is now going to work to your benefit during the quilting process. Because there is so much going on in this quilt pattern, you really don't need to overthink or over quilt your Holiday Party quilt.
Option 1: Quilt it yourself. If you want to quilt it yourself I suggest simple straight line quilting or, if you want to get a little fancy, machine quilt down the sashing and then add some hand quilting in the blocks. Here are some tutorials that will help:
- 6 Tips for Straight Line Machine Quilting (a.k.a. Matchstick Quilting)
- How to Hand Quilt (with Video Tutorial!)
Option 2: Send it to a longarm quilter. This is a great time to try out longarm quilting because we have discounts going on for two different longarm quilters exclusively to you, Holiday Party sew alongers.
Lavender Fields Co. is owned by Lisa Yates and based in Washington, Indiana and is a dream to work with. Lisa quilted this red Holiday Party quilt using an edge-to-edge design called Loophole. Get 20% off all Holiday Party quilts through the end of 2021. You must mention this sew along discount to get it.

Trace Creek Quilting is owned by Lilo Whitener-Frey and does most of my longarm quilting along with a lot of the quilting from my pattern testers. Get 25% off all Holiday Party quilts through the end of the year and guaranteed delivery by Christmas if you ship it by December 3, 2021. You must mention this sew along discount to get it.Here are some edge-to edge designs she stitched on Holiday Party quilts. This first quilt uses 100% wool batting and the design Filigree.

This design is called Rosemary. I sent her my finished Holiday Party quilt last week and requested either Baptist Fans or 60s Mod Butterfly. I told her to pick which one she thinks would go better. That's the great thing about Lilo and Lisa is that they've done this so many times, you can give them a couple designs and have them pick the one that will work best.

Some more quilting examples that may help. This next one is called Modern Tile quilted by Trace Creek Quilting.

Such a pretty snowflake design! I'm not sure what it's specifically called.

This next one is called Write Panes quilted by Trace Creek Quilting.

Basically folks, this quilt pattern looks great with any edge-to-edge design so just pick any one that you think is cool! Geometric, loopy, feathery, leafy, novelty, swirly, classic. You name it. I saw Melissa of Sew Shabby Quilting use the Mod Pod design from the original New Horizons quilt and it looked like vintage ornaments. Very cool!

Week 6 Sponsor & Prizes
Because there have been so many beautiful Holiday Party quilts and so many of you sewing along, there's no way I could pick just one winner. Oh no. This final week we will have THREE winners and each will get an amazing prize!
Winner #1 will get FREE longarm quilting on their throw Holiday Party quilt from Trace Creek Quilting. You can pick from any of the edge-to-edge patterns on her website or even find something online and she will stitch it for you!
Winner #2 will get a totally amazeballs (does anyone say that anymore??) and one-of-a-kind tailor's clapper handmade by Modern American Vintage featuring the Holiday Party block.
Chris Hanson, owner of Modern American Vintage, has a woodworker for a grandfather and a quilter for a mother. With those two superpowers combined he is transforming quilting notions into beautiful works of art. See and shop what I'm talking about here!

Winner #3 will get FOUR Aurifil color builder thread collections (winner's choice) from the 2020, 2021, or 2022 Color Builders Collections. Aurifil is an accomplished Italian company based in Milan, specializing in the production of 100% Cotton threads from the Mako region of Egypt.
One reason I love this company, other than it's high quality thread, is its effort to sustainability. Read more about their efforts here!

How to Win
- Post a pic to Instagram. The photo prompt for Instagram this week is to post a picture of your FINISHED quilt top. The top must be at least as large as a throw. Use #HolidayPartyQuiltSA in the caption.
- You must have a public Instagram profile to participate.
- Each photo posted is an entry and you can enter as many times as you want in a single week. Once the week is over, those posts do not count in the next week's giveaway. Every week we start fresh.
- Your photo must be posted between Tuesday, November 16 and Tuesday, November 23. The winner will be picked randomly from all qualifying posts and announced at approximately 4:00 p.m. on that day. Good luck!


Suzy, does it matter if the long sashing pieces are linked by a perpendicular seam rather than an angled seam? I like the 45 degree angled seam, but it does use more fabric and I am collecting a LOT of small triangles from the trimmings!
It doesn’t matter. I just think the 45-degree seam looks a little nicer.