How to Sew Curves in a Quilt
Learning how to sew curves is just like learning how to ride a bike. Do you remember that first time riding without the training wheels? As a little girl, I would have been quite content to cruise around the neighborhood with my training wheels still on until my bags were packed for college. My dad, on the other hand, would never have allowed it.
You see, I was blessed/cursed with a father who wouldn’t let me quit. I guess now I’m happy to not be a 33 year old scooting around with training wheels, (I’m actually not sure I could find some to fit my bike) but at the time I was learning, I didn’t see it that way. I only saw pavement, handle bars, and fear.
I can’t remember if I fell off while practicing, and I have no memories of skinned knees or bruised palms. I do, however, vividly remember feeling the wind in my hair for the first time as I charged ahead, balancing on two wheels. I remember feeling invincible. I remember flying.
Sewing curves on a sewing machine is a lot like learning to ride a bike. At first you may just see bizarrely shaped templates, bias edges, and fear. But let me tell you that as long as children can learn to rides bikes, you can learn and master sewing curves.
Ready to fly?
Trending patterns!


Quilt Patterns


Quilt Patterns


Quilt Patterns


Quilt Patterns


Quilt Patterns


Quilt Patterns


Quilt Patterns


Quilt Patterns


Quilt Patterns
The pattern featured in this post is the Modern Fans quilt pattern – get it here!

A Few Related Blog Posts:
SQ's Favorite Sewing Notions!
- How to Choose the Right Quilt Batting
- The Best Sewing Table
- The Best Quality Thread: Part 1 and Part 2
- 5 Best Cutting Mats for Quilters
- Best Rotary Cutter
- The 4 Best Quilting Rulers
- The Best Iron for Sewing
- The World's Best Sewing Scissors
- Your Guide to Finding the Best Thimble
- Best Pins for Quilting
- The Best Quilt Marking Tools
- Fusible Batting Tape: Why You Need It and How to Use It.
- 8 Things You Never Knew About a Tailor's Clapper
- 5 Types & Sizes of Hand Quilting Needles
- Must-Have Quilting Tools

There’s no wrong way to sew curves, just the finished way
Don’t get bogged down worrying about which way of sewing curves is the “right” way. There are different ways for different people for different patterns for different reasons for different fabrics...oh dear, now I’m dizzy. What was I talking about?
Oh yes. The right way to sew curves is to find a technique that you enjoy and gives you success. For some that is pinning every ½ inch. Other quilters will fold the templates in half and use a single pin in the middle. Some wild and free quilters use no pins at all and simply let the good times roll!
How to sew curves – the training wheels
When learning how to sew curves, there are two things I recommend for optimal success: keep your sewing machine needle down and sew slowly. You will probably need to lift up your foot as you sew around your curve – especially the first few times around. But by keeping your needle down, the fabric will stay exactly in place.
And why sew slowly? This is just to prevent stretching and puckering as you glide your way over the bias edges. Eventually you’ll pick up the pace, but not all the way to full speed.
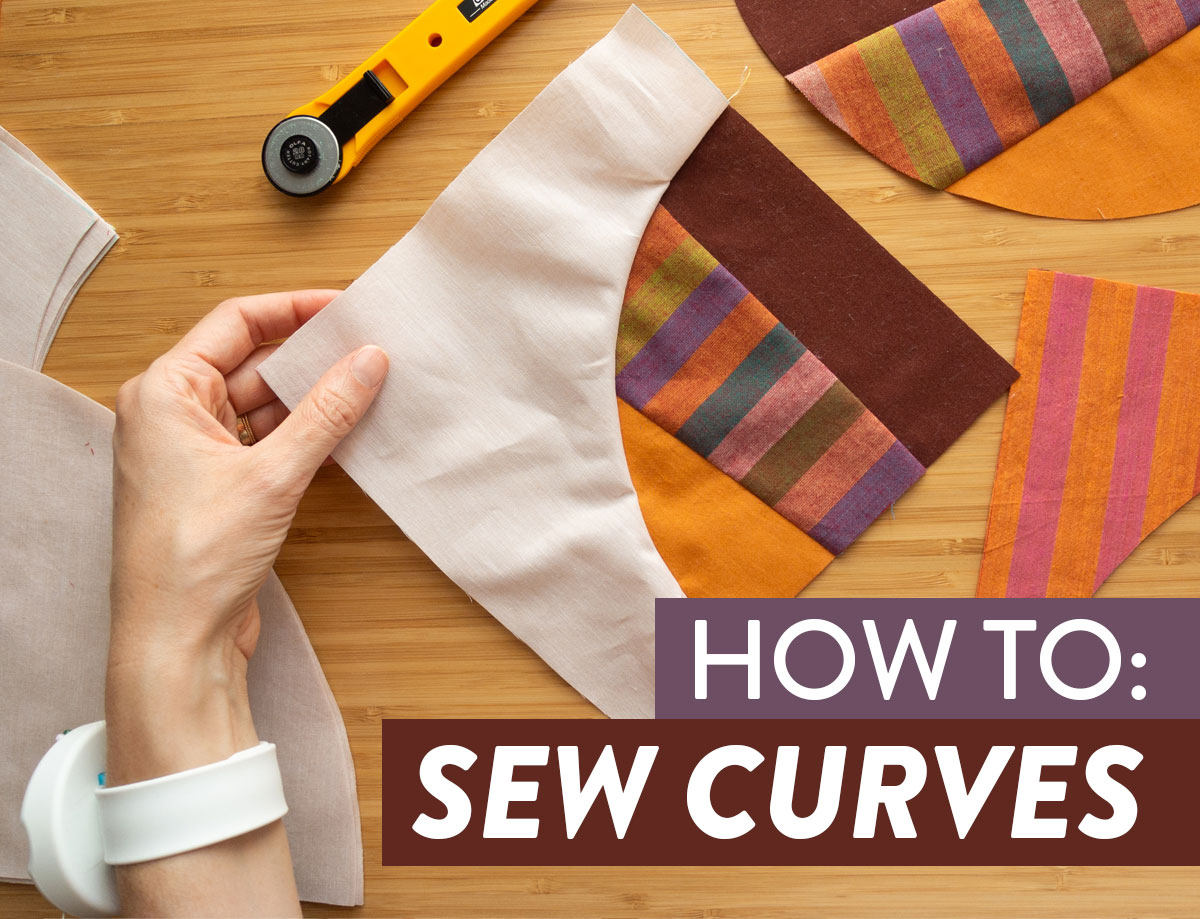
The How to Sew Curves video tutorial below uses templates from an old SQ pattern, Propeller. That pattern has been altered and expanded and is sold as the Modern Fans quilt pattern. SQ lead a 9-week Modern Fans sew along with tons of detailed instructions, videos, and tutorials for sewing curves. Check out all of those blog posts here!
Here’s a push and now you’re on your own
Place right sides together and line up the edges. Some people like to crease both pieces in half first and pin in the middle of the pieces where those creases meet. Doing this will ensure that by the time you hit the center, it will truly still be the center of both pieces. But do you have to do this to get a pretty curved block? Of course not! Just like I mentioned before, this is a preference and personality thing on how to sew curves. Do it if it feels right.
I demonstrate this technique in a video in the Suzy Quilts Patterns Facebook group and in the public IGTV forum. (Same vid. Different locations.) You do not need an Instagram profile to view a video in IGTV. In fact, all of the videos I post in the Facebook page I also post publicly in IGTV so anyone can see them.

At this point, with fabric pieces right sides together, everything is going to feel very wrong. You will have one curve swinging one direction and it’s partnering curve veering off in the opposite direction. Have the wheels fallen off? Fortunately for us, although our block appears to be cross-eyed, it is, in fact, right where we need it to be.

As you sew, gently adjust the top fabric edge to line up with the bottom fabric edge. Keeping your needle down and sewing slowly, make your way around the curve. Stop, lift up your foot, and readjust at any time. Think of it as taking your feet off the bike pedals for a second to catch your breath and give those breaks a test squeeze. Maybe even tighten your helmet strap. I’m assuming you’re wearing a helmet while sewing.

Once you get very close to the end, you may need to use a pin, tweezers, or even a toothpick will suffice to act as a tiny prosthetic finger. Your own finger will be too large (promise I’m not saying you have fat hands) and I wouldn’t want it getting this close to the sewing machine needle anyway. Use your tiny tool of choice to hold the last ¼ inch of fabric together.


And there you have it! Take your freshly sewn block to your ironing board and carefully open up the fabric and give it a nice press. Use starch if you like and a square ruler to trim off any wonkiness that occurred. Don’ be turned off if you see a pucker or two in your first couple of blocks. It happens! This is also a great time to use a tailor's clapper. Now who’s going to start a fast wheelin’ curve-sewin’ biker gang so I can join!?
See more pics of Desi's earthy Modern Fans baby quilt here!


And here's an adorable picture of two-week-old Desi. He's so cute I can't even HANDLE IT!


Suzy, beautiful curves, which foot are you using on your Bernina?
I’m using a regular 1/4″ presser foot. It’s 37D.
This is really helpful! And so encouraging to NOT pin! Thanks
I’m making your watermelon quilt. X2. One for a baby shower gift (new mom chose) and one for me. I’ve got about 25 squares made thus far. I have been pinning about every 1 1/2 inch. I crease in the middle of both pieces. Also, I would recommend using a short stitch length – about 1.5. Love your designs!!
Looking forward to making this😁
I have all my fabric pulled and this is next on my to do list! “I will conquer curves” is my new mantra. And may I add…Desi is getting so big!! Where does the time go? My littlest one is almost 4! 😢
Right?? Just yesterday they were newborns! Good luck with your curves, even though you won’t need it. They are so much easier than they look 😉
Congrats on the birth of your new baby. He is absolutely adorable xxx
HI Suzy .. thank you for such a wonderful tutorial .. I am in love with your fabric, can you give a callout to what you are using?
thanks
Hello! I’m in love with the quilt!!
I have a question… Which sewing machine do you recommend for quilting?
That really depends on what you’re looking for and how much you’re willing to spend. I have a few articles on sewing machines if you’re interested. Here’s one to get your started – https://suzyquilts.com/quilting-sewing-machines-one-best-budget/
I am interested in selling a few watermelon quilts and I used your free pattern of Mod Melons. Do I need your permission to sell let’s say up to 10 as the pattern is yours? Does it have a copy write on it? Just trying to be legal. Thank you.
Thanks so much for asking, Cyndi! You can most definitely sell the quilts, just not the patterns.
Thank you for this, sewing my first curves tonight and they have turned out better than I expected xx
aawwww what a cutie-pie…never mind the quilts he is adorable!! just hope hes a sleeper….
congratulations to you and all your family
Hello Suzy, I love the Orange and stripes combinations. Where can I find these fabrics? Also can you provide the color scheme (i.e. which is color 1, 2 etc). Thanks
Hi Suzy, thank you so much for this wonderful post. Question please – what stitch length do you recommend? I usually use 2.50 on my Bernina, should it be shorter? Thank you!
I sew curves with the same stitch length I use for most of my piecing — 2.5. If you find that the edges of your seams are coming undone, you can lower your stitch length to 2, and that will secure those raw seams a little better.
Yay! Finally someone makes the curve less or a magical shape that only pros can make!
Thank you, Terry
I’m coming to this post late, but warning about getting in too close to the stitching. I was working on a double wedding ring quilt earlier this year, and I actually sewed through my finger. A tiny tool as suggested would have been a much better choice.
Gah!! Good tip!