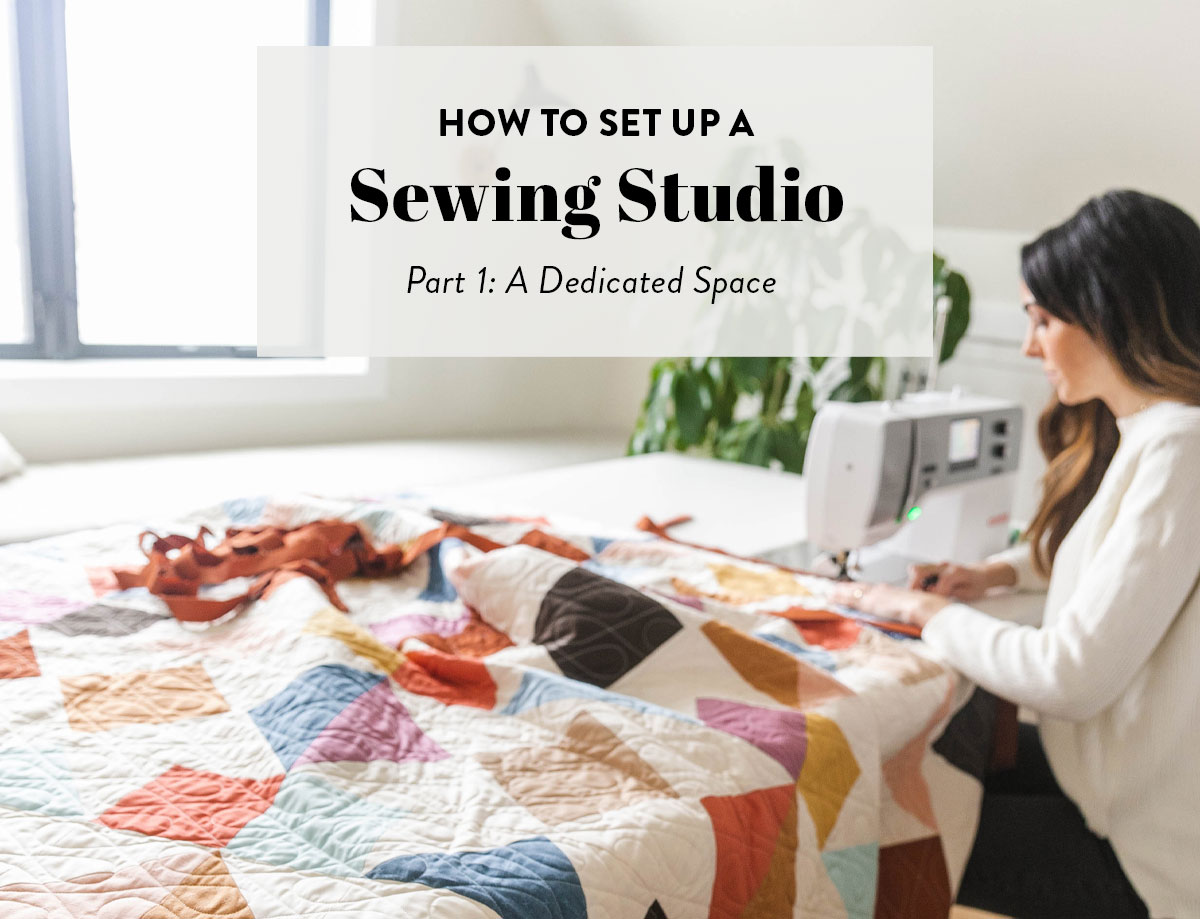
How To Set Up a Sewing Studio Part 1: A Dedicated Space
We are excited to bring you a series on how to set up a sewing studio! Some quilters have big dedicated sewing studios and others use tables around the house. Both are wonderful ways to make a quilt! I made a quilt that has hung at the National Quilt Museum by cutting fabric on my kitchen counter and taking over my kitchen table for my sewing machine.
Now I have my own small sewing room, so I know a lot about how any quilter's needs can change when they make that jump to a whole sewing space! We'll tackle the subject in a two part blog series. To start, we'll talk about our best set up tips and ideas for quilters who have a dedicated sewing room in their house. In part 2 (coming this spring), our focus will be on setting up a small space for quilters who don't have a sewing room.
If you are currently sitting on the floor of an empty room wondering what to get and where to put it, this post is for you! It's also for anyone who is trying to make improvements to their sewing room. As you read this post, first you'll get inspired by reading about three Suzy Quilts team members and their studios, and then keep reading for ideas about what furniture you might need for your room. Let's get to work!
You Might Also Like...
Sewing Studio Set Inspiration
Let's start with some inspiration! Setting up a sewing studio can be overwhelming. There aren't a lot of roadmaps available online for setting up a studio the way that interior design blogs and websites might cover bedrooms, kitchens, or living rooms.
We asked three members of the Suzy Quilts team, including Suzy, to write a little bit about setting up their dedicated quilt studios.
Trending patterns!


Quilt Patterns


Quilt Patterns


Quilt Patterns


Quilt Patterns


Quilt Patterns


Quilt Patterns


Quilt Patterns


Quilt Patterns


Quilt Patterns
Suzy's Sewing Studio
As some of you may know, I've been sewing since I was 15 — which means I've set up sewing spaces in my parent's spare bedroom, in dorm rooms, in rented studio apartments, in tiny condos, in my own spare bedrooms, and now finally, 20 years later, in a dedicated sewing studio. It's been a journey!
Like Laura mentioned, there's no wrong way to make a sew space. The worst thing you can do is count yourself out because you don't have access to all the bells and whistles of someone else. Because if I can set up a sewing studio and make an entire quilt in a cell-block of a shared dorm room, there's hope for everyone!
I wish I had photos of all my different sewing studios, but unfortunately most of that time wasn't documented. I do have a few though. Let me see... In this photo I have pushed over my dining room table and taken over most of my condo. This is when I lived on the corner of Damen and Division in Chicago (if you're familiar with the city.)

In 2017 my husband and I moved from a brand new condo in Chicago to a 100 year-old house in its neighboring suburb of Oak Park. With that came a lot more space and a lot more challenges. My main struggle was with lighting. My house was pretty dark and that made my increased interest in photographing my sewing a challenge.
I have a tour of that first sewing studio here, New And Improved! My Standing Desk Sewing Studio. If you started following the blog around that time, you will remember this sewing studio well. I had my first baby while using this studio, but with the birth of my second child in 2021, we started to think about other options.


In a stroke of sheer luck, we realized that right above our heads was an unused attic. It was in seriously rough shape, so we hadn't foreseen its potential when buying the house, but now I was a little desperate to not have a crib in my studio, so we began renovations.
Sewing Studio Before Renovations
See. I wan't lying when I said this attic was in bad shape. An adult couldn't walk upright without hitting the beams. It wasn't really safe to be up there at all.

But after months of meeting with an architect and having builders stomping up and down our house, eventually we got to this! In a couple weeks I'll post more details about the process (because SHEESH was it a process) but I couldn't be happier with the results. Can you believe the transformation?
Sewing Studio After Renovations

Some key things I wanted in this sewing studio were:
- Good lighting for photography and videos
- Wide open hard-wood floor space for laying out quilts in progress
- Flexible floor plan so I could move my furniture around as needed. I wanted most of my furniture to be minimal and on wheels.
- LOTS of built-in cabinets and drawers for storage
Because of the slanted ceilings, I don't have a good spot for a vertical design wall, which is something I miss. I have a pop-up design wall that I use every once in a while, but at this point it's easier to just work on the floor.
I originally had a desk (sold as a dining room table) on this side of the room, but decided I'd rather have the floor space, so I moved it out. I now do my computer work either standing at my cutting table or sitting at my sewing cabinet.

Joanna above and below — quite the difference two and a half years make!

She is currently just the right size for sneaking into my cabinets...

I am using a simple towel rack for quilt storage and magnetic boards for hanging my fabric swatches. These swatches are from Woven and Woolly, but we also have a tutorial on how to make your own — How To Make Magnetic Fabric Swatches For Easy Color Selection. The quilt featured on the rack is the Shining Star quilt pattern.
Also on this side of my sewing studio is my ironing board. I move it around based on how much pressing I'm doing, since my sewing table is on the other side of the room. This is a Reliable ironing board with a large wool pressing mat on top.

On the other side of the stairs is my cutting table and sewing cabinet. For more information on my sewing cabinet, check out The Best Sewing Cabinet For Quilting & Crafting.

My sew baby is a BERNINA 770QE, even though I have a soft spot for the 570QE - click the link to see why!

Now that I've started designing fabric for Art Gallery Fabrics, I am a bit overrun with bolts. I'm still working out a good way to store them all. I'm not making it easier on myself because I have a habit of continually pulling them out to play!

Seen above is a kitchen island with a custom Rhino clear cutting mat cut to fit the size. I have found kitchen islands to make the perfect height for cutting tables. Before this one I used two others — a much smaller one from IKEA and then a larger one from IKEA.
I love my Daylight Slimline lamp for quilting after the kids are in bed, and my Simple Human trash can has been following me around since my first apartment with my husband in 2011.

And that's a wrap on my sewing studio! It's in various states of tidiness based on how busy I am and how much time my two young kids are with me. As you can see, things can get a little wild, but that's part of the sewing fun!
Laura's Sewing Studio
I got my first dedicated sewing room in 2016. It was used exclusively for sewing until 2020 when I (and many other people) suddenly needed a home office. So, I gave my sewing room a complete makeover so it could double as a home office. The room is small — 8' x 10' — so I had to make some massive changes.
My sewing room was working well for me pre-pandemic. But I had nowhere else in my house to work and also had a baby that year, so my house was starting to feel smaller and smaller. So, I had to rethink how I would use the space completely. Before 2020, everything in the room was sewing related. I had huge storage shelves that took up an entire wall, and that's what I decided needed to go. I sold the shelves and sold a lot of my fabric to build a budget to buy a desk, chair, and new storage cabinets that would take up a fraction of the space.
This divided the room in half. One half would be where I actively sew (my sewing machine table, pressing station, and cutting table) and the other half would be my desk and reduced supply storage. The great thing about this is that because I work at Suzy Quilts, I sometimes have to move from my sewing area to my desk throughout the day. My current set up is really working for me!
My family is hoping to move soon, and one of my dreams is to have a bigger room. I hope to be able to add a design wall to my studio and move my large 1960s record cabinet into the room. That will definitely create more changes to the room! Here's what it looks like now.


Because my space is so small, I turned my closet into a cutting station! I took all of the shelves out of the closet and my husband built a cutting table custom to my height. It is attached to the wall and there is storage space underneath. Also, note that the pictures are slightly distorted because my sewing room is so small that it's not possible to take pictures of full walls!
Erin's Sewing Studio
Erin Jones is one of our contributors at Suzy Quilts. She recently moved into a dream house that she built and is setting up her studio as we speak! You can follow her sewing studio set up on Instagram @squirrelcoquilts. Take it away, Erin!
My current sewing space is much larger than my last space! My last sewing space was a small upstairs bedroom of a tiny Cape Cod house, with low, dormered ceilings and no direct heat or air conditioning. It was the definition of cozy, but I truly loved that space because it had character and functioned well for my needs.
I was building and planning an entire house, not just a sewing space, so I deprioritized my sewing space to focus on the high functioning rooms like the kitchen, bathrooms, and my kids’ spaces. I didn’t have the capacity to plan my sewing space until after I had moved in - I even ended up sewing at a dresser and cutting on the floor to finish a Suzy Quilts blog post after I moved in!
After recognizing that cutting on the floor wasn’t very comfortable, I started by setting up my sewing desk and cutting table, then began unpacking boxes as I needed supplies. That allowed me to get a good handle on the things I needed at the ready, where and how I might want to store them, and to identify things I may no longer need in the space. I also gave myself time to create in the space, which meant I could learn more about the space itself, like when and where the good natural light would pour in, how I wanted to position myself in the room, etc.
After a few weeks, I was feeling a bit overwhelmed with the space and questioning if it was too much, but then my husband suggested incorporating a larger design element since being practical about the size wasn’t critical. He suggested featuring an oversized sewing table as a focal point of the space, which I initially brushed off as absurd and impractical.
But the more I thought about it, the more I loved the idea! He was totally right, and I love the way my sewing table looks and functions in my space (it even feels small at times lol). Since then, I’ve incorporated pieces that help organize my space, while also building upon design and comfortable aesthetic.


Choosing Sewing Studio Furniture
First things first — don't feel like you need to get all of your studio furniture right away. Sewing rooms change over time as our needs also change over time. I've been in the same sewing room for seven years and I've used three different tables for my sewing machine (and all of them were hand me downs!).
Think of your sewing space, whether it's big or small, as a living and evolving space. The longer you sew in it, the more ideas you might have. Maybe those ideas are as simple as moving the furniture around, or maybe it's getting all new furniture! Keep reading for some of our suggestions.
Sewing Tables
In general, there are three types of tables to choose from for your sewing machine — a regular stationary table, a height adjustable desk, or a specially made sewing cabinet.

A regular rectangular work desk is great for sewing, particularly because a desk designed for computers tends to be spacious enough to hold a sewing machine and a quilt that's being fed through it. A square desk is a bit harder to work with because it may not support a quilt hanging off the left of a machine.
While it's not too common to sew standing up (though Suzy used to do it!), a height adjustable desk is a great any for any quilter. You can adjust the desk to exactly your height so that you don't put additional strain on your back, neck, arms, and hips. Even better — if your height adjustable desk is big enough to double as your cutting table, you can easily go from sitting to standing!


Sewing cabinets differ from desks because they are designed specifically for sewing. If you want to drop your machine down so the needle is at table level, this is the way to go! Sewing cabinets also usually have storage space built in for sewing supplies like drawers or even specialized thread storage. There are many different sewing cabinets that work with different sewing machine models, so our best recommendation is to visit your local sewing machine dealer to ask about which will work with your machine. They may even let you take a seat and try out some sewing cabinets! Arrow Sewing is also a wonderful company to research.
Chairs
While you should be sure to stand and take breaks often while sewing, there's no doubt that you'll be using your sewing room chair a lot. Most of us sit for very long stretches while quilting, so we need a comfortable chair!

A rolling chair can be your bestie in your sewing studio. You'll be bopping around like a pinball, rolling from station to station! And that's the best benefit of a rolling chair — if you have different stations in your sewing studio for sewing, cutting, and pressing, you can move between those stations with ease. This particular rolling chair is great for sewing because it is height adjustable, ergonomic, and the arms can fold up so they only need to be used when you want them. Great for working at a computer and sewing!
Rolling chairs aren't for everyone. If you have mobility issues, you may be concerned about rolling around a room. Or maybe your sewing room is so small that you don't need to roll around. Whatever your reason, if you'd rather use a stationary chair, there are a few things to consider. First, look for one like this one that is height adjustable. That will help get you in the right position when sitting at a sewing machine. And second, look for something padded or ergonomic. If you're sitting for a long time, you deserve to be comfy!


If you're going all in on custom supplies for your quilt studio, look into a sewing chair! These chairs tend to be higher quality than many office chairs, and Arrow Sewing even sells sewing chairs that have storage IN the seat! You'll never loose your notions now! In addition to making sewing cabinets, Arrow Sewing is also know for making comfortable sewing chairs.
Cutting Tables
Depending on the size of your sewing room, you may or may not have space for a dedicated cutting table. If you do, we have some great suggestions! We have found that kitchen islands, kitchen carts (rollers on the legs are a perk!), and bar tables are a great height for cutting.
A basic dining room table is large which is perfect for cutting fabric or even trimming a finished quilt, but it's also designed for sitting. This means that if you choose to use a dining room table for cutting, you'll also have to purchase table risers. We don't recommend bending down to cut because it causes a lot of strain on your back, shoulders, neck, and arms. Luckily, if a dining room table is your best option, risers are very affordable! Avoid dining room tables with decorative legs as they may not accommodate table risers. In the USA good places to look for affordable dining room table options are Home Depot, IKEA, Amazon, and of course your local garage sales or Facebook Marketplace listings.


A kitchen island is an excellent option for a cutting table because it's meant to be used while standing! Plus it's large enough to fit a standard 36" x 24" cutting mat. Think of all the cutting you do to prepare meals in your kitchen. That's most likely the most perfect height for you to cut fabric. This kitchen island from IKEA is a great option because one side has shelves which are perfect for storing fabric.
This kitchen cart also has storage and the added benefit of wheels! If your sewing space is small, this cart can be easily rolled out of the way when not in use. Plus because it's meant for use in the kitchen, it is also a great height for cutting. You could even get some S hooks and turn the paper towel rack on the side into a ruler and rotary cutter rack.
Because kitchen carts are for smaller spaces, your main obstacle will be finding one with a surface wide enough for a standard cutting mat. One solution I have used is getting a large piece of sturdy wood and placing that on top of the kitchen cart. Just make sure it's secured to the cart so it doesn't flip off when you put weight on it.

Ironing Boards
Like it or not, if you're making quilts, you're going to have to press. A lot. No seriously, more than you've ever used an iron in your life! So it's important to make sure your ironing board works for your studio space.
If you're looking for something top-of-the-line, the Larastar range of ironing systems may be for you. A Larastar iron and ironing board work together to press fabric, resulting in fewer wrinkles and shorter pressing times. You can read all the features here!


You know what's annoying for quilters? Ironing boards with tapered ends. We rarely use our ironing board for garments and that taper is valuable pressing space that's been stolen from us!
Thank goodness for large rectangular ironing boards like this one! Can you imagine how easy it is to press the seams of a quilt top on this baby? Plus it has a place to put your iron!
If you have your own dedicated quilting room, you may still not have space for an ironing board that stays out all the time. And who wants to deal with pulling an iron out and putting it away over and over?
My room is so small that if I open an ironing board it it, I can hardly even use the room anymore. So I started using a tabletop ironing mat! I have a very long table for sewing that has space for my sewing machine, a small cutting mat, and this ironing mat. And you can read my review of The Best Iron for Quilters here!

Anti-Fatigue Mats
While quilters do spend a lot of time sitting, one important thing to remember is to create standing breaks for yourself if possible. Make time to stand when cutting and pressing and you'll give your body a little boost while working and avoid strain for prolonged sitting. But if you stand for a long time, you have a new problem — your feet, knees, or hips might start to hurt. Kick that pain to the curb with an anti-fatigue mat!

The classic anti-fatigue mat style is a flat mat. When you step on the mat, it feels squishy. That squishy feeling is what protects your feet and legs! Have you ever stood for a long time on a hard floor? Or even a carpeted floor? Ouch! I've been to enough grungy concerts to tell you that the pain from standing on hard surfaces isn't just in your feet — it climbs up your whole body. And when your body hurts, the last thing you want to be doing is quilting. So do yourself a favor and pick a cute flat mat today!
A curved anti-fatigue mat has all the squishy benefits of a flat mat plus curves that allow you to stretch your muscles and adjust your standing position, which is very important when you're standing for long periods of time. Learn more about good quilting ergonomics here!


Have you ever been to physical therapy? I have, most recently for a knee problem. And that's when I first met a balance board. It's a great tool for improving your balance, which is a key indicator of longevity in your life. If you get a balance board for your sewing room, this is not meant for you to stand on for long stretches. You'll still want an anti-fatigue mat for that. But every so often, engage your core and hop onto your balance board to let your body move!
Storage Cabinets
Most dedicated quilters have a large collection of fabric. Building up that collection is essential for most quilters who like to pull a mix of fabrics into any quilt they make. And if you have a lot of fabric, you'll need something to put it in! Here are some options.
A solid door cabinet is an excellent choice because it will protect your fabric from irreversible light damage. You heard that right — light damage never goes away. And once it starts, it gets worse over time. Ack! Not my beautiful fabric! Storage cabinets with solid doors solve that problem. Read more about light damage and how to prevent wood from damaging your fabric here!
One cool thing about these cabinets is they can be stacked. Scroll back up and look at Erin's sewing studio — she used these and the glass door cabinets below!


Sure, protecting textiles from light damage is important. But isn't it equally important to look at how pretty they are? It's a fine line to balance between protecting textiles and seeing them. And in general, I recommend using your stash so it doesn't get light damage while stored.
If you want to be able to see your lovely fabrics all the time, a glass door cabinet is a great choice. You can see in, but also close the doors which means your collection is contained in this space and doesn't have the chance to overflow!
Open shelves like a book shelf are great for storing fabrics. I have this combination book shelf and closed cabinet from Target in my sewing room and I love it. I use the closed shelves for yardage and the open shelves for precuts. I also have a matching book shelf that is right next to it and that's where I keep all of my felt craft supplies, which are organized in acrylic tubs. It's a great system for me because I can easily grab things but keep my fabric yardage safe from light!

Lighting
Overhead lights are great, but they don't often give quilters all the light needed for detailed work. Avoiding eye strain over time is important to help make sure you can quilt for years and years. Adding more light to your sewing room is an absolute must. Here are some options! Each choice in this section is by Daylight Company, a favorite of the Suzy Quilts team.

This lamp isn't the kind of table lamp that sits on top of a table, taking up valuable crafting space. Instead. it screws onto the side of the tabletop! I have two in my sewing studio — one next to my sewing machine and one attached to my cutting table. I have very little overhead or natural light in my sewing room, so these lamps are invaluable! I love how easy it is to move around my room when I need to, and it is also very easy to transport to quilt retreats or workshops.
If you want something a little more permanent, this floor lamp is a great choice. For larger sewing rooms, a floor lamp could be adorable near a cozy chair — the perfect spot for hand sewing or hand quilting!


If you need a little extra help seeing fine or detailed work, a magnifying lamp will be your new best friend. Often used for embroidery or other types of needlework, a magnifying lamp can also help quilters with vision issues or aging eyes get up close and personal with your hand quilting, binding, appliqué, and more.
Top Ten Tips for How To Set Up a Sewing Studio
We've covered A LOT of ground in this post! Is your head spinning with ideas and inspiration? If so, let's break it down. Here are some of our team's best tips for setting up your own dedicated sewing space! Most of these tips come from Erin Jones who you read about earlier in the post.
- Keep fabric in the dark. Avoid storing fabric in direct sunlight so it doesn't get irreversible light damage.
- Think of your space creatively. How can you use part of your room in a new way that works better for you? For example, my closet wasn't working for me because I didn't need that much storage, so it's now my custom cutting station!
- Keep it as minimal as possible. Buying too much to fit into your sewing room means you have less space to craft and more stuff to get in the way. Only keep as much fabric or supplies as you can fit into your storage system.
- Get inspired by other people! You don't need to start from scratch. This blog post is a great start, as is the #HonestCraftRoom hashtag on Instagram.
- Give yourself time. By spending time sewing in the space as-is, you can figure out what you like, areas you could improve, where you need quick access to tools, and where you can store things. And remember that your needs may change and that's normal!
- Where are the outlets? Unless you want extension cords running all over the floor, think about where your electrical outlets are located when placing furniture in the room.
- Think outside of the box when it comes to furniture and organization. Don’t limit yourself to furniture that is specifically marketed as “craft room organization” or “sewing desk” - try repurposing furniture you already have or looking into options in other furniture categories.
- Functionality always wins. It doesn’t matter how many pretty bins you have on display or how fancy your sewing table is — if it doesn’t function well for your needs, it’s going to be a dud.
- Make it you. Even if you don’t have a dedicated sewing space, make sure your space is comfortable and gives you all the cozy vibes. Chaos can hinder creativity, so ensuring your space feels comfortable and “you” is essential to letting your creative juices flow. Do you like to sew alone? If so, move that sitting chair out and reclaim the extra space!
- The space never needs to be “done.” Always remember that if you want to make changes in your sewing room, it doesn't mean your previous space was a failure. It just means that your needs changed or your means to purchase furniture changed. It will always evolve with you!
Tell Us About Your Sewing Studio!
Ok, now it's your turn! What is your favorite thing in your sewing studio? Is there something you can't live without? Tell us in the comments to keep the conversation going!
This spring, we'll share part 2 of our studio set up series. If you are a quilter without a dedicated sewing room, give us your best tips and tell us what helps make your space work!


For me, my “quilting space” is a small corner of the guest bedroom. I have an adjustable-height table for cutting, and I also have a mini-ironing board that I’ll set up on it for pressing. For my sewing table, I use an old makeup table that has a flat top. It’s rather small, but it works. Also, since the room is rather small, it would take up too much space if it were any bigger. Instead of a design wall, I just lay out my quilts on the guest bed. I’ve also found that a peg board is a great way to store knickknacks and notions if you have limited space. I don’t have a large fabric stash, so drawers under the guest bed are sufficient for storing fabric and batting. Also a tip for anyone wanting to make a quilting/sewing space: start with practicality and make it prettier as it goes.
These are excellent tips! And we couldn’t agree more — start with functionality and find what works, even if it’s not the prettiest solution. Stay tuned this spring for Part 2, I think you’ll love it!
Love this! I really like my two 2×4’ folding, adjustable height tables (Lifetime brand). I made a pressing board to fit atop one (plywood, army wool blanket and white canvas), and purchased a cutting mat to fit the top of the other table. Everything can be put away when needed. I like multi purpose spaces!
Ooh, that’s wonderful! Very clever to set things up so they can all be put away!
Great subject and illustrations, love your ideas. Envious of your attic space…someday maybe.
Suzy’s attic is wonderful! A great example of thinking creatively about available space.
THIS WAS A MAVELOUS AND HELPFUL POST. THANK YOU I AM NOW READY TO RE-ORGANIZE MY SEWING ROOM. THANK YOU. THANK YOU.
Delighted to hear that this was helpful!
My cutting table (46×96) is an old farmhouse table I bought at an estate sale cheap. My husband took the legs off and put a six inch block of wood between the legs and top to bring the table top up to counter height. Fortunately, my next estate sale find was a 42x 72 inch cutting mat! Since my cutting table is Long I turned one end into my ironing station. My husband built a rectangular ironing board 18x 48 inches and I covered it with iron board cloth purchased from Joann’s and used a staple gun to secure in place. To complete my space I then purchased a sewing machine table which drops my Bernini down for a nice flat sewing space. Fortunately I have a huge closet in my sewing room to hold all my fabric and notions. Estate sales can be a useful resource. While a handy , willing husband is priceless.
Yes! Estate sales are an excellent suggestion to get affordable furniture and even quilting supplies!
I bought an old treadle machine to reuse as a cutting/pressing station. The cabinet and machine were toast but I salvaged the treadle and drawers.
I used plywood to make a basic padded ironing board and screwed it on top of the treadle. I have a small cutting mat, rotary cutter, iron etc stored on the actual treadle foot base. The top is the perfect size to have a wool mat on for pressing blocks, FPP and such and I hang my spray bottles off the treadle sides for easy access. When quilting a quilt, it supports the excess quilt to my left so nothing drags on the floor. It’s on the wheels it came with so moves away when not needed.
If only I had thought to spray paint it a bright, fun colour….. One day I will.
Amazing idea to put it on wheels! How creative 🙂
I love this article…it has some great ideas. I agree that sewing areas evolve. While my kids were home, and I was working, my sewing room was part of our spare bedroom, located off the kitchen. It was convenient and included a trundle bed, an ironing board and my sewing table which was a small dining room table. I stored my fabric and other craft items in the closet. I used our kitchen table for a cutting table. It worked well. When the kids moved out and I retired, I turned the room into a dedicated sewing room. I visited IKEA and purchased Kallax shelving units, a large adjustable height crank table, and a large stationary table that I placed on a 8 x 2 Kallax unit and 2 table legs. I love my new room and it makes me happy to work there.
Creating a sewing space that makes you happy is the absolute most important part of the process Sounds like your space is a huge success!
What a great article! We’ve been in our current home 6 years; I’m still tweaking my sewing space. It’s changed so many times, but hopefully I’m on the verge of the best/final set up. The article and readers’ comments caused me to look back at various sewing spaces I’ve had since I started seriously quilting in 1993 with a card table in the corner of my bedroom. Supplies were stored in a box underneath and I had to fold the table down to get into my closet every morning. Soon I promoted to a table and teeny closet in the family room where a hanging shoe bag housed fabric/supplies. As skills, tools and supplies grew, so did my children. Eventually they left the nest, which left me with more space for creative endeavors. Now I claim the entire upstairs of our current home (two bedrooms, three closets and a small attic space) as my kindgom. I have to clean up when out of town kiddos and grandchildren come to visit, but that’s a good thing! Thanks, Laura and team for so much good information. I hope to use it to improve my space. Looking forward to reading “Part 2.”
What a wonderful example of the ways a sewing space can change over time! Thanks for reading and sharing your story 🙂
I loved this article. *Very* useful! I do have a question about the ironing board featured here. I want an adjustable-height surface to stand at when I hand quilt my throw-sized quilts and I was wondering if you thought this ironing board was sturdy enough to use in this way? I could put those connectable baby foam mat tiles on top of the ironing board cover (underneath the quilt) so I wouldn’t sew the quilt to the ironing board cover with my needle! And as a tip, I use these same baby foam mat tiles, which we have in the house for visiting young grandchildren, upside down (white-side) on my not quite wide enough dining table to lay out my quilt blocks before sewing them together. I also lay out my quilt sandwich on this set up, too, and pin baste. The foam saves the table from scratches from pin scratches and I use the tiles upside down, so the top of the mat doesn’t have pin pricks either. Thank you!
Nice tip! We haven’t tried out an ironing board that way before, but it’s worth a try! An adjustable height desk might be a really good idea though — it has more space so it will hold more of the weight of the quilt while working.
Where can I purchase the rectangular ironing board? I love it!
Hi Ellen! If you click the link that says “Large Ironing Board” you’ll be taken directly to where you can order your own. Enjoy!
So jealous of such a large quilting room – and so many wonderful ideas to make a smaller space work. One table I love using is my Ikea adjustable height table. It will raise for cutting and pinning and lower for design and sewing work. I loved the lamps you showed. Will you share the brand?
Thanks so much for all the beautiful quilt patterns and ideas, I just can’t get enough of them.
Barb from South Carolina
Hi Barb! All of the lamps are made by Daylight Company and if you click on the name of each lamp (in gold colored text) you’ll be taken directly to where you can order one!
In order to keep the little nieces and nephew out of the sewing room, I put an exterior door knob with a pushbutton lock code. It is the same as the house code, so the adults can get in easily. When the code is put in wrong, it starts beeping, so I know the kids are trying to get in.
Safety first with quilting supplies! 🙂