Planetarium Quilt Sew Along Week 4: Assemble Quilt
It's the fourth and final week in our Planetarium quilt sew along! Star Command, permission to get a bit sappy? Over the last few weeks we have traveled through space and time together — it's been a journey. I have asked you to conquer more sewing techniques in this pattern than ever before! But have you risen to the occasion? YES.
You have triumphed over templates, quelled finicky curves, prevailed against points, humbled half square triangles, and thwarted all troubleshooting issues along the way. As your captain I am not just proud, I am honored to call you fellow star-gazers and moon-makers. You did it!
If I'm extra emotional about ending this sew along it's because it's my last one for a while. In seven weeks I'm having a baby and I'm leaving the door open to what that maternity leave will look like. Hopefully this baby has a quilt-buddy disposition, but you just never know!
So thank you, friends, for coming with me on another quilt-making adventure and I hope you enjoyed our time together making this Planetarium quilt as much as I have.
Planetarium Quilt Sew Along Schedule
For the first time, we will offer prizes both on Instagram AND in the Suzy Quilts Patterns Facebook group! Instructions for how to enter each giveaway are included at the bottom of this post.
Trending patterns!


Quilt Patterns


Quilt Patterns


Quilt Patterns


Quilt Patterns


Quilt Patterns


Quilt Patterns


Quilt Patterns


Quilt Patterns


Quilt Patterns
- Week 1, January 26: Pick fabric
Instagram Sponsor: Going Coastal Fabrics - Planetarium throw kit + pattern
Facebook Sponsor: Sarah Made - Planetarium throw kit + pattern
IG LIVE — @suzyquilts: Tuesday, January 30 @ 1pm Central - We will discuss fabric selection + Q&A. If you have specific questions you want covered, post them in the blog comments below. - Week 2, February 2: Cut fabric
Instagram Sponsor: Sewing Arts Center - $100 gift card
Facebook Sponsor: Global Fiber Shop - $100 gift card - Week 3, February 9: Sew units
Instagram Sponsor: Art Gallery Fabrics - Evolve by Suzy Quilts fabric bundle
Facebook Sponsor: Art Gallery Fabrics - Evolve by Suzy Quilts fabric bundle - Week 4, February 16: Assemble quilt
Instagram Sponsor: Trace Creek Quilting - Longarm quilting for a Planetarium quilt, batting and return shipping if needed. Additional services not included.
Facebook Sponsor: Jenn B Quilts - Longarm quilting for a Planetarium quilt, does not include batting or return shipping.
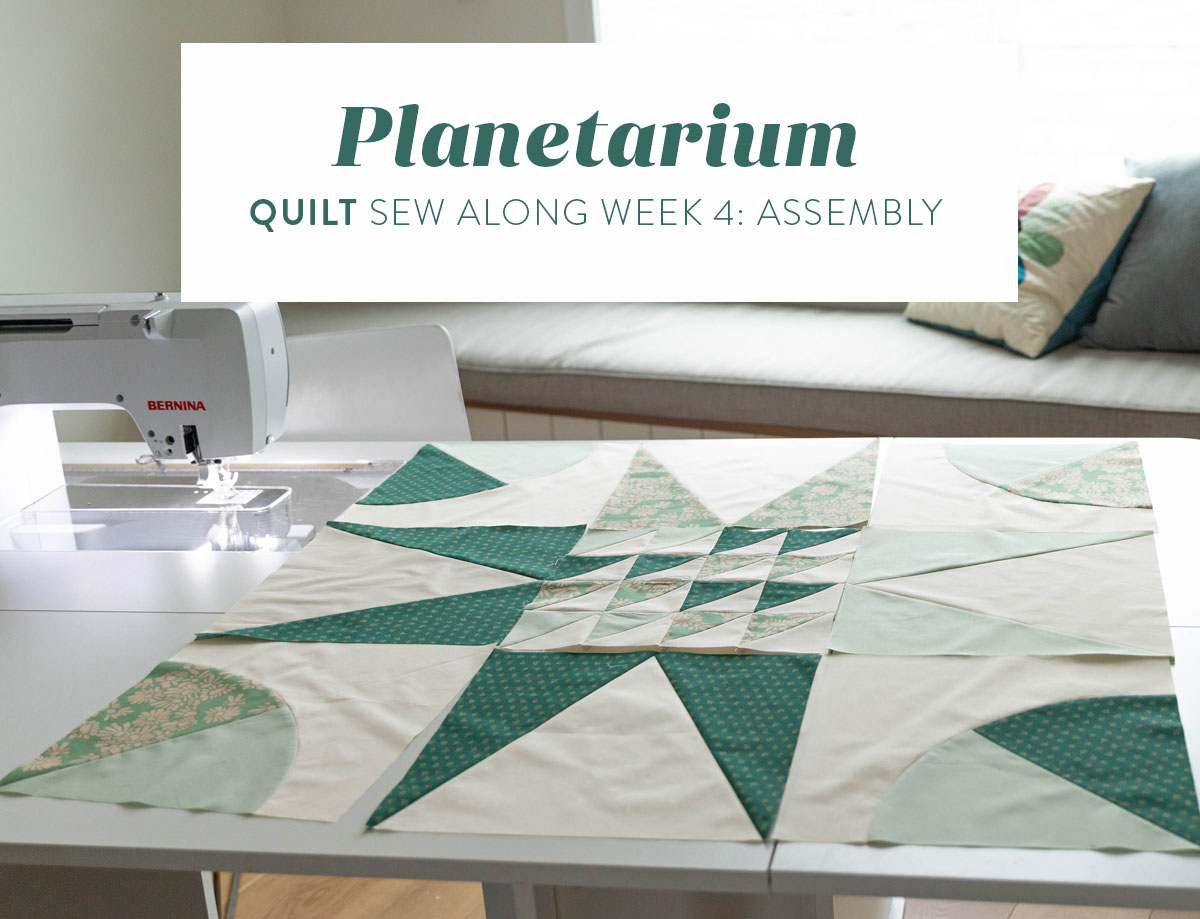
Week 4 Assignment: Assemble quilt
Before we get into assembling our Planetarium quilts, let's start with a little troubleshooting from last week. I trust that after sewing curves last week your fear of them has mostly evaporated. That you now may be wondering about are the triangles that make up your star points. The pressing question? Will my points stay pointy?
Troubleshooting Tip!
The first part of this video shows you a simple little technique for both answering that question and then solving the problem if, in fact, your points are not all that pointy. In the end my advice is to try to get them to look as good as you can without stressing out about it.
Tip #1: Lay out your block units.
These blocks are BIG! As you can see in this photo below, I can just barely fit one of my four blocks on my sewing surface. If you need to move your entire sewing setup to the dining room table or work off the floor, do whatever you need to do so that while you are sewing these blocks together you can keep all of the pieces laid out.

Tip #2: Double check the pattern layout.
Once you have a block, or if you have the space, the entire quilt, laid out double check the pattern to make sure every unit is where it's supposed to be. The HST orientation is up to you, so you can decide for yourself how you want them to face.
Tip #3: Use pins when sewing your units together.
It's the home stretch and you're almost at the finish line! This is the time when your brain is telling you to speed through the assembly and rush the process, but don't! Don't let senior-itis hit you at this stage. Continue to take your time — pinning and making sure the rows are nesting together and lining up. I know you can do it!
Tip #4: Press your final seams open.
What do I mean by "final seams"? I just mean the seams the join the four blocks together. I like to press those open (and use a tailor's clapper, of course) just so that the quilt top lays flat.
Planetarium Quilting Options
When choosing a quilting design the main question I ask myself is, "How much time do I want to spend?" Of course there are other factors like cost and overall aesthetic, but time is a biggie. I've fallen on two ends of the spectrum with my Planetarium quilts — my first one I fully hand quilted. My second one for this sew along I sent it to a longarm quilter to finish for me.
If you're wondering how long it took to hand quilt a 72" square throw, the answer is... I really couldn't say because I didn't time myself and I take lots of breaks. But, if you really pressed me, I might say...40 hours? That's a rough estimate, but you get the picture. It took a looooong time.


You can see more pics of my hand-quilting process in this post.
Isn't it crazy how much the quilting changes the look and feel of a quilt? This next one was longarm quilted by Trace Creek Quilting using my Boho Birds panto. This panto design is perfect with my print collections because it uses motifs pulled straight from the fabric!


So let's dive into your quilting options, shall we?
Quilting Option #1: Longarm Quilting
You'll see me using this option a lot simply because I don't have enough time to quilt all of the pattern samples I make. This is the quickest way to quilt a quilt because you are most likely giving it to someone else to finish.
The downside to this is that hiring someone else to do your quilting is the most expensive option. Depending on the size of your quilt, and whether or not you go with a custom design or an all-over quilting design, this can cost between $60 and $200.
Longarm Quilting Related Posts:
- Hiring A Longarm Quilter: An In-Depth Guide
- The Ultimate Guide To Longarm Quilters In The USA And Canada
Longarm Quilting Tips:
- A curving panto design will work best for this quilt pattern. Since this quilt pattern has a grid-like appearance I think a flowing, curved panto that very clearly is not trying to line up with the quilt pattern works best.
- Choosing a thread color: my simplest rule of thumb is to match the thread to either the background fabric or the lightest/second lightest shade of fabric in the top. If your quilt uses a wide range of light to dark fabric, a medium-light shade is best. Something too light will stand out more than you probably want. Below is a good example of using a medium-light thread color rather than the lightest thread color.


Quilting Option #2: Free Motion Quilting
Free motion quilting is a lot of fun, but does have a learning curve. You will need to practice for a bit before doing this on an actual quilt you care about. True story, I sped through the practicing part, jumped into free motion quilting a baby quilt, and made such a mess of it, I ended up throwing the baby quilt away. Eeek! I do not recommend that!
This quilting technique would be perfect for the Planetarium baby quilt or tote — those are perfect sizes. Free-motion quilting a 72" square throw on your domestic machine will be a challenge. That's a lot of quilt to fit through your sewing machine.
Free Motion Quilting Related Posts:
Quilting Option #3: Walking Foot Quilting
My favorite way to quilt with my walking foot is simple straight vertical lines. I have a helpful blog post on that, so I won't go into too much detail here. (Link below)

Above is the Triangle Jitters quilt pattern, available in the shop!
If you would like to branch out of vertical line quilting, I highly suggest marking your quilt with some guide marks so you know where to sew. This video shows how I mark with a hera marker.
Below we are using a disappearing marker and a stencil before machine quilting. You can find lots of fun quilting stencils online!

Also be sure to check out the walking foot tutorials and books writen by Jacquie Gering. She's brilliant at walking foot quilting on a domestic machine. Her two books I highly recommend are:
- WALK: Master Machine Quilting with your Walking Foot
- WALK 2.0: More Machine Quilting with Your Walking Foot
Walking Foot Quilting Related Posts:
Quilting Option #4: Hand Quilting
Last, but of course not least, we have hand quilting. If you are new to hand quilting, I suggest you first machine quilt in the ditch (that means machine quilt in/close to the seams of the piecing) then add some hand quilting. I show this technique in the video below.
I'm currently hand quilting a wall hanging for the Aurifil Thread QuiltCon booth! That will hang next week at the 2024 show. I'm using my brand new 8wt. thread collection and let me tell you it's sooooo fun! These colors are just scrum-diddly-umptious!

Can you see a connection between the two designs?

Quilting Option #5: Quilt Ties
Finishing a quilt with quilt ties is the fastest and most inexpensive way to secure a quilt. You can use yarn, embroidery floss, or thick hand quilting thread (like the 8wt thread above). In the video, I first machine quilted my quilt a little bit, and then added quilt ties for some decoration and added security between layers.
Hand Tying Related Posts:

The ties pictured above use 8wt thread with the tails on the back and the ties pictured below use yarn with the tails on the front of the quilt.


Don't get overwhelmed by the possibilities.
Friends, there are A LOT of quilting options and many possibilities within each option. If you find yourself feeling overwhelmed, just get back to the basics and keep it simple. Your patchwork is beautiful and speaks for itself. The simplest quilting will only add to its beauty.
Additional Resources on Batting, Basting, & Binding
Yay, you've made it to the end of this epic post! Before you go, I have some more blog posts to tell you about that may help on your quilting journey. Don't forget that you can find these posts by using the different Quilting 101 categories on our Blog page.
Batting Resources
- Why Cotton Batting Is The Most Popular Choice For Quilters
- How To Choose The Right Quilt Batting
- Is There A Right Side To Quilt Batting?
- The Truth About Black Batting: When & Why To Use It
- Quilting On A Budget With Poly-Blend Batting
- Why Bamboo Batting Makes The Perfect Summer Quilt
- Why Wool Batting Makes The Warmest Quilts
- Fusible Batting Tape: Why You Need It & How To Use It
Basting Resources
Binding Resources
How did I bind my two quilts?
Well of course I needed to use my Bound to Evolve binding fabric for my Evolve Planetarium quilt. I also picked my favorite print from the collection as the backing — Meadow Matcha.


Here's what the other side of the binding fabric would have looked like...

If you look past my husbands sexy legs 😉 you can see that I used fabric from my Color Groups to scrap together a pretty rainbow binding. Based on the fabric requirements for the Color Groups, you won't have enough leftover to fully binding your quilt, but if you get a bit extra of one of your Color Groups, you will.

Week 4 Sponsors & Prizes
Our week four sponsors are Trace Creek Quilting for Instagram and Jenn B Quilts for Facebook!
Trace Creek Quilting is offering free longarm quilting for a throw-sized Planetarium quilt (or throw quilt of your choice if you have other quilting plans for the Planetarium quilt). Batting and return shipping are included if needed. Other services are not included.
Jenn B Quilts is offering free longarm quilting for a throw-sized Planetarium quilt. Batting and return shipping are included if needed.
Here's how to win one of these out-of-this-world prizes!
How to Win on Instagram
- Post a pic to Instagram. The photo prompt for Instagram this week is to post a picture of your finished (or nearly finished) quilt top. Use #PlanetariumQuiltSA in the caption.
- You must have a public Instagram profile to participate.
- Each photo posted is an entry and you can enter as many times as you want in a single week. Once the week is over, those posts do not count in the next week's giveaway. Every week we start fresh.
- Your photo must be posted between Friday, February 16 and Friday, February 23. The winner will be picked randomly from all qualifying posts and announced at approximately 2:00 p.m. Central on the 23rd. Good luck!
How to Win on Facebook
- Post a pic in the Suzy Quilts Patterns Facebook group. The photo prompt for Facebook this week is to post a picture of your finished (or nearly finished) quilt top. IMPORTANT: We use hashtags less frequently on Facebook, but in order for us to see each post and randomly select a winner, be sure to use #PlanetariumQuiltSA in the caption of your picture.
- You must be a member of the Suzy Quilts Patterns Facebook group to participate. You do not need to have a public Facebook profile.
- Each photo posted is an entry and you can enter as many times as you want in a single week. Once the week is over, those posts do not count in the next week's giveaway. Every week we start fresh.
- Your photo must be posted between Friday, February 16 and Friday, February 23. The winner will be picked randomly from all qualifying posts and announced at approximately 2:00 p.m. Central on the 23rd. Good luck!


