How to Make a Modern Quillow (or Quilt Pillow Pocket)
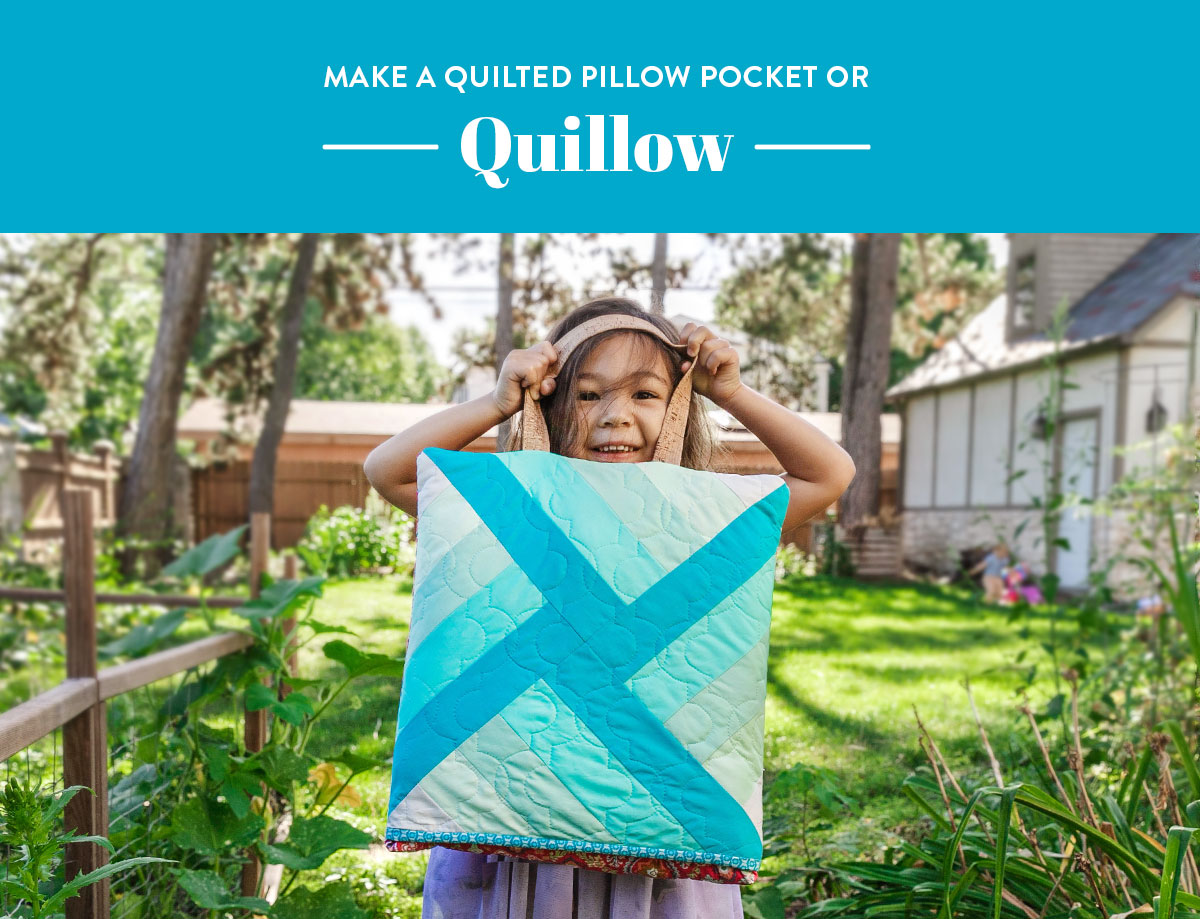
This simple tutorial will show you the best way to make a quillow, or quilt pillow pocket, using the Adventureland quilt pattern. Have you ever heard of a quillow? Until a few months ago I hadn't! A quillow is an added pocket sewn to the back of a quilt. By folding your quilt into this pocket you can easily transport it or even use it as a simple pillow. How fun, right?
We promise that this simple, striking quilt design will receive oooh and ahhhs from passers by while you're out and about. Whether you're heading to the park for a picnic or exploring nature on a long camping trip, this adorable quillow will surely become your favorite go-to cozy travel companion!
Our guest blogger this week is Paige Lisowski of Quilting Wemple. She has written a fantastic tutorial on how to make a quillow. Because this tutorial uses one of our fastest quilt patterns, Adventureland, you'll be able to make your own quillow in a flash!
For a limited time, you can also get a kit to make this exact Adventureland quillow from Global Fiber Textiles & Notions. And the best part? Because the pillow pocket is made using Adventureland scraps, you don't even need to buy extra fabric!

You May Also Like...
 Use leftover scraps from making the popular Adventureland quilt pattern to add a pocket for easy folding and travel! suzyquilts.com #sewingDIY #quiltpattern")
It’s officially picnic season and it’s a well known fact that no picnic is complete without a quilt to sit. What better way to relax in the shade while chatting, snacking and blockading ants from crumbs. To make your adventures feel easy breezy, I'll show you how to add a quilt pillow pocket to your Adventureland quilt to make it a bit more manageable on the go.
So come with me as we turn that beautiful quilt into a quillow by using scraps from the very same quilt top to do it!
Trending patterns!


Quilt Patterns


Quilt Patterns


Quilt Patterns


Quilt Patterns


Quilt Patterns


Quilt Patterns


Quilt Patterns


Quilt Patterns


Quilt Patterns
 Use leftover scraps from making the popular Adventureland quilt pattern to add a pocket for easy folding and travel! suzyquilts.com #sewingDIY #quiltpattern")
What Is a Quillow (or Quilt Pillow Pocket)?
The convertible of quilts, a quillow is a quilt that has a pillow pocket on the back that allows you to fold up your quilt into a tidy pillow, or unfold it into a full-size quilt whenever you like!
Why would you ever want to make your quilt into a quillow? I’m glad you asked! Here are a few of my favorite ways to use a quillow:
- A delightful and colorful picnic with family and friends.
- A comfy place to cuddle during an outdoor concert.
- Something a bit softer to sit on when you’re watching a school sports game on the field.
- Added back support on long car rides.
- Maybe you ate SO MUCH at that picnic that you need a nap, right there on the sunny grass, and a quillow for under your head is calling your name.
 Use leftover scraps from making the popular Adventureland quilt pattern to add a pocket for easy folding and travel! suzyquilts.com #sewingDIY #quiltpattern")
 Use leftover scraps from making the popular Adventureland quilt pattern to add a pocket for easy folding and travel! suzyquilts.com #sewingDIY #quiltpattern")
Excited about all these quillow opportunities but your Adventureland quilt is already finished and bound? Fear not! The addition of a quillow pocket actually happens AFTER the quilt is entirely finished. So you can make this small quilty upgrade even if you've already been enjoying your Adventureland quilt.
And because picnics always end up with too much food and not enough hands, I’m also going to throw in how to add an optional handle to make quilt traveling as simple as possible.
Adventureland Quillow Supplies
- Finished Adventureland quilt, quilted and bound (be sure not to trim your strips when making your quilt so you have the scraps needed for your quillow!)
- 4 Adventureland strip set scraps left over from your quilt top
- 18" square piece of batting (the same type used for the full quilt)
- Cork for handle (This is optional. I got the cork for this quillow at a Joanns near the upholstery/heavy duty fabric section. They had options on bulk rolls as well as on bolts nearby depending on how fancy you wanted to go. The work linked here is the same thing.)
- 8" square of leftover background fabric
- 2 binding strips cut according to page 8 of your Adventureland pattern
 Use leftover scraps from making the popular Adventureland quilt pattern to add a pocket for easy folding and travel! suzyquilts.com #sewingDIY #quiltpattern")
Can you make a quillow from other Suzy Quilts patterns?
Heck yeah you can! This may come as a shock to you, but quillow math doesn't need to be an exact science. A finished Adventureland throw quilt is 60" square, so a nice pillow size for the attached quillow is 15" finished. If you did the math on that, it means you can fold your quilt up into fourths. (60 divided by 4 is 15).
You can apply this same approximation to other Suzy Quilts patterns. An added fun twist is to use the coordinating pillow patterns for the quillow! Here are some patterns that have pillow instructions. Note: In many instances border strips are added to the outside of the quilt block to make the pillow 18". If turning that into a quillow, leave off the border strips to make the quilt pocket smaller.
Other Quillow-rific Suzy Quilts Patterns
- Shining Star Quilt & Pillow Pattern Bundle (pillow included)
- New Horizons (pillow included)
- Shine (pillow included)
- Sugar POP (pillow included)
- Modern Fans (pillow included)
- Grow Pillow (free tutorial, full pattern sold separately)
- Maypole Pillow Extension Pattern (full pattern sold separately)
- Reflections Wall Hanging & Pillow Extension Pattern (full pattern sold separately)
- Bohemian Garden (This is perfect for a pillow because it can easily be made in any size.)
- Kris Kross (The blocks are 6", so it's easily converted into a smaller quillow)
Step 1: Create the Pillow Pocket Top
Grab your Adventureland scraps and your sewing machine. Oh, and your trusty seam ripper. I know you know where it is. 😉 This time that ripper is going to actually help us save those scraps and give us a top AND a backing out of the same scraps for this quillow pocket.
Stay with me now, this will be the most efficient seam ripping you’ve ever done.
 Use leftover scraps from the Adventureland quilt pattern and add a pocket! suzyquilts.com")
Starting at the longest strip, count four strips in and seam rip between the fourth and fifth strip. Repeat with all four strip set scraps until you have 8 separate pieces.
 Use leftover scraps from the Adventureland quilt pattern and add a pocket! suzyquilts.com")
Set the longer sets aside for now, because we’re going to start with the smaller sets. Start by squaring up any rough edges and arranging them the same way you did for the full-size Adventureland quilt.
 Use leftover scraps from the Adventureland quilt pattern and add a pocket! suzyquilts.com")
Assemble the pieces according to Figure 12 and 13 of the pattern until you have a single piece that measures over 15" square.
Don’t stress if it isn’t perfectly square now (mine definitely wasn’t either), we’ll worry about cutting it down to size later.
 Use leftover scraps from the Adventureland quilt pattern and add a pocket! suzyquilts.com")
Set the top aside for now, time to spend some time on the backing.
Step 2: Create the Pillow Pocket Backing
Remember those longer sections? It’s officially their time to shine. But before we get there, cut your background triangles, just like you did when making the Adventureland quilt.
With the 8" scrap of background fabric, follow the directions on page 5 of the pattern to cut it into quarters so you are left with 4 triangle pieces.
 Use leftover scraps from the Adventureland quilt pattern and add a pocket! suzyquilts.com")
Set them aside while you prep the longer strip sections. Square up the ends just like you did for the pocket top so everything is clean and even. You may need to re-press the strip sets if the sections ended up sitting around the sewing room while you finished the full-size quilt.
And if they need a serious lint roll because your cat laid on them while you quilted the full-size quilt, no one will judge you. Especially not me 🙂
Sew the background pieces to the shortest edge of the strip set just like you did for the full-size quilt. The background triangle will not likely reach the end of the strip set, that’s okay. We’ll trim it off later just as you did for the full quilt.
 Use leftover scraps from the Adventureland quilt pattern and add a pocket! suzyquilts.com")
Assemble the pieces according to page 7 in the pattern.
You may notice that it doesn't quite look like a tiny Adventureland quilt once you’ve finished, so next we’ll use page 6 of the pattern to trim off the excess to get it to look square again. Note that you're doing these two steps in a different order than when making your full-size Adventureland quilt to ensure that your small pillow pocket version is square.
 Use leftover scraps from the Adventureland quilt pattern and add a pocket! suzyquilts.com")
Press everything so it lays flat and you’ve got yourself two beautiful little Adventureland minis!
Tip! If you aren’t interested in using all of your leftover strips for a double-sided pocket, you can also use leftover backing fabric for the backing of your pocket.
Step 3: Baste the Pillow Pocket
If you decide on a double-sided pocket like mine, lay the larger Adventureland mini (the one with the added background pieces) right side down on the table with your batting layer on top.
Put a pin directly through the center of your smaller pocket top and push it through the layers making sure it comes out through the center of the backing where the four sections meet. This will make sure the backing and the front are both centered later.
 Use leftover scraps from the Adventureland quilt pattern and add a pocket! suzyquilts.com")
Once the centers are matched up, move out to the corners and do your best to nest the seams of the backing and the front (through the batting) to line up the corners.
Use pins to keep the corners in place and then fill in the rest of the pocket with pins to keep the layers secured.
I am usually a spray basting kinda girl, but where this project needed very particular placement and took a little bit to get right, pin basting is definitely the least fussy option. If you need a brush-up on your pin-basting skills like I did, be sure to check out Suzy’s tutorial here!
 Use leftover scraps from the Adventureland quilt pattern and add a pocket! suzyquilts.com")
Step 4: Quilt the Pillow Pocket
Using any quilting designs you like to quilt the pocket. You can pick the same pattern as the rest of your Adventureland quilt, something coordinating, or entirely different.
Tip! If you are thinking about sending your Adventureland quilt to a longarm quilter for finishing, sending them the pillow pocket as well! I do, however, have one suggestion. Because longarm quilters need 4" of overhang on all sides, either add 4" strips to one of the mini Adventureland pockets you made or just use some more backing fabric for the inside of the pillow. Once the quilt is unfolded this will totally blend in to the backing fabric.
I wanted something a little different than my usual straight line quilting so I decided to use an arabesque pantograph stencil for this project. Stencils make it super easy to get that computer quilted accuracy with your basic home sewing machine so I try to use them whenever I can!
When you are finished quilting it, square the project to a 15.5" square.
 Use leftover scraps from the Adventureland quilt pattern and add a pocket! suzyquilts.com")
Step 5: Add Optional Handle
For the quillow on the go, sometimes a handle is an easy addition with amazing practicality. I decided to go for a fun cork handle for mine but you can make one out of any material you like.
When choosing what to make your handle out of, just remember that it will sit underneath your quilt when you have it opened up. The more flexible your handle is, the less you’ll notice it when the quilt is unwrapped.
How to Make a Quillow Handle
The raw cork edge doesn’t fray so since the material was so stiff, all I did was cut a single 3" wide piece and folded it in thirds the long way giving me roughly a 1" wide handle. I used wonder clips to hold it while I top stitched the two edges to stabilize it and give it a finished look.
If I were working with a cotton fabric instead I would have gone with the two 1.5" wide pieces sewn right sides together and flipped though. I settled on a final handle length of 15" but it can definitely be cut to whatever length you like.
If you decided on a double-sided quilt pocket, now is the time to decide which side will face outward when it’s all folded up. In my case, I wanted to show off the blue side.
How to Add a Quillow Handle
Lay that side facing up. Mark the center of one of the sides and pin the two ends of the handle 3" to either side of the mark. Take it to the sewing machine and secure those edges by sewing over them two to three times keeping the stitch line about 1/8" from the edge so they hide in the binding later.
Once you’ve got the handle in place, bind the whole thing using your preferred method taking care when sewing over the edges of the handle. The binding should cover the raw edges of the handle when folded over.
Step 6: Attach the Quilt Pillow Pocket to the Back of the Adventureland Quilt
It’s time to put this quillow amazing-ness together and get on the road! That picnic’s a-callin'! For the last step, place your finished full-size Adventureland quilt face down on the floor or table so the backing is facing up.
 Use leftover scraps from the Adventureland quilt pattern and add a pocket! suzyquilts.com")
Make sure the edge that you want to attach the pocket to is closest to you. Find the center of the full-size Adventureland quilt edge. You can either fold the quilt edge in half or use a measuring tape.
Next, find the center of the pillow pocket edge. If you added a handle, find the center of the edge with the handle. If you didn’t add one, you can choose any edge you like. Mark the center of each using a pin or water-soluble pen.
Set the quilt pillow pocket face down on the full-size quilt, matching up the two center marks. The handle should be pointed towards the center of the quilt sandwiched between the pocket and the quilt with your pocket backing facing up. The edge of the pocket should line up with the inside edge of the binding.
Now pin that puppy down! But don’t go crazy on me, we only need three sides pinned — left, right, and bottom. The top of the pocket is what your quilt will fold into!
 Use leftover scraps from the Adventureland quilt pattern and add a pocket! suzyquilts.com")
Top stitch the left, right, and bottom edges of the quilt pillow pocket to the quilt. Stitch in the ditch along your binding edge. Backstitch to secure the stitches at the start and end.
The side of the pocket closest to the center of the quilt should be left open. And that’s it! Your quillow is officially ready for use!
 Use leftover scraps from the Adventureland quilt pattern and add a pocket! suzyquilts.com")
Bonus: How To Fold a Quillow!
I got so excited about making a quillow I almost forgot to tell you how it actually folds up!
- Lay the quilt on the ground with the quilt top facing up.
- Grabbing both edges of the quilt that are adjacent to the edge with the pocket, fold in half way to the nearest pocket seam.
- Fold one edge, stopping when you hit the opposite side of the pocket. Repeat the process on the opposite side. Your quilt should now be folded up in a long rectangle that is slightly smaller than the width of your pocket.
- Next, turn the pocket inside out so your pocket top and handle are on the outside, folding the very end of the quilt into the pocket.
- Fold the end of the quilt without the pocket over three times until you’ve reached the top edge of the pocket. Here’s where the magic happens...
- Fold the quilt over one more time, pushing it inside of the pocket and wrapping up all that Adventureland goodness inside. It may need a little bit of adjustment to get it to lay nice and flat.
Your pocket’s quilted top should be showing on top and your handle (if you opted for it) should be pointed out for an easy grab and go!
 Use leftover scraps from making the popular Adventureland quilt pattern to add a pocket for easy folding and travel! suzyquilts.com #sewingDIY #quiltpattern")
How Will You Use Your Adventureland Quillow?
You’re officially ready for any activity that could benefit from the addition of a quilt (which is every activity, right?)
Let us know in the comments if this is your first time hearing about a quillow or if you have a fun quillow story of your own! Do you plan on making this Adventureland quillow? If so, share it with us on Instagram and in the Suzy Quilts Patterns Facebook group using #AdventurelandQuilt and #SuzyQuiltsPatterns!
 Use leftover scraps from making the popular Adventureland quilt pattern to add a pocket for easy folding and travel! suzyquilts.com #sewingDIY #quiltpattern")


Very clever! & your model really sells it 🙂 Thanks for sharing!
As the owner of multiple quillows I can say they are a GREAT car blanket solution. They also can double as a throw pillow in a casual room, and if you happen to be lounging under your quillow and your feet are cold, the pocket makes a great foot warmer 😉
Yes!!!! Great for warming up your feet and snuggling up with a movie🥰
Omg ! I’m so excited! I remember Quillows from when I was little. I probably am about 20 years older than you Suzy so I totally get you not knowing them. I am absolutely joining this train 😉
Thank you for the quillow tutorial. I am making a Rock steady throw for my husband and he wants a pocket for his feet. I’ve made a planket with fleece before, but wasn’t quite sure how to do the pocket for a quilt. Thanks again.
Love this idea! Can you share a link to the quilting stencil you used? I love that design!
May I make copies of your instructions of how to fold a quillow to include with gifted quillows?
Sure!