Star Crossed 2.0 Sew Along (The Highlights)
Hey friends, welcome back to round two in our abbreviated Star Crossed sew along. Last week we covered the ins and outs of making the original Star Crossed quilt in this post. This week we are talking about Star Crossed 2.0 — the pointier, slightly more advanced version of this pattern.
Don't forget that you can purchase both of these patterns in a bundle for a discounted price — Star Crossed & Star Crossed 2.0 Bundle.
These patterns have a lot of similarities, which makes them easy companions. It also means that once you sew one, sewing the other version will feel much easier. Because there are so many similarities between these patterns, these sew along posts may feel redundant. There will be repeat content, so if you see a tip from last week, and you've already engrained it into your brain, just skip it and move on to the next one.
I will break this quilt down into three sections:
- Picking fabric
- Cutting & Organization
- Assembly
Even though this is a shortened three-week sew along, we still have some fantastic discounts on longarm quilting running.
Trending patterns!


Quilt Patterns


Quilt Patterns


Quilt Patterns


Quilt Patterns


Quilt Patterns


Quilt Patterns


Quilt Patterns


Quilt Patterns


Quilt Patterns
- Jenn B Quilts is offering 25% off longarm quilting on all Star Crossed quilts through November.
- Trace Creek Quilting is offering 25% off all Star Crossed quilts that arrive at their studio by the end of November. This includes a guaranteed holiday finish too! You can find all of the details on the Trace Creek Quilting blog.
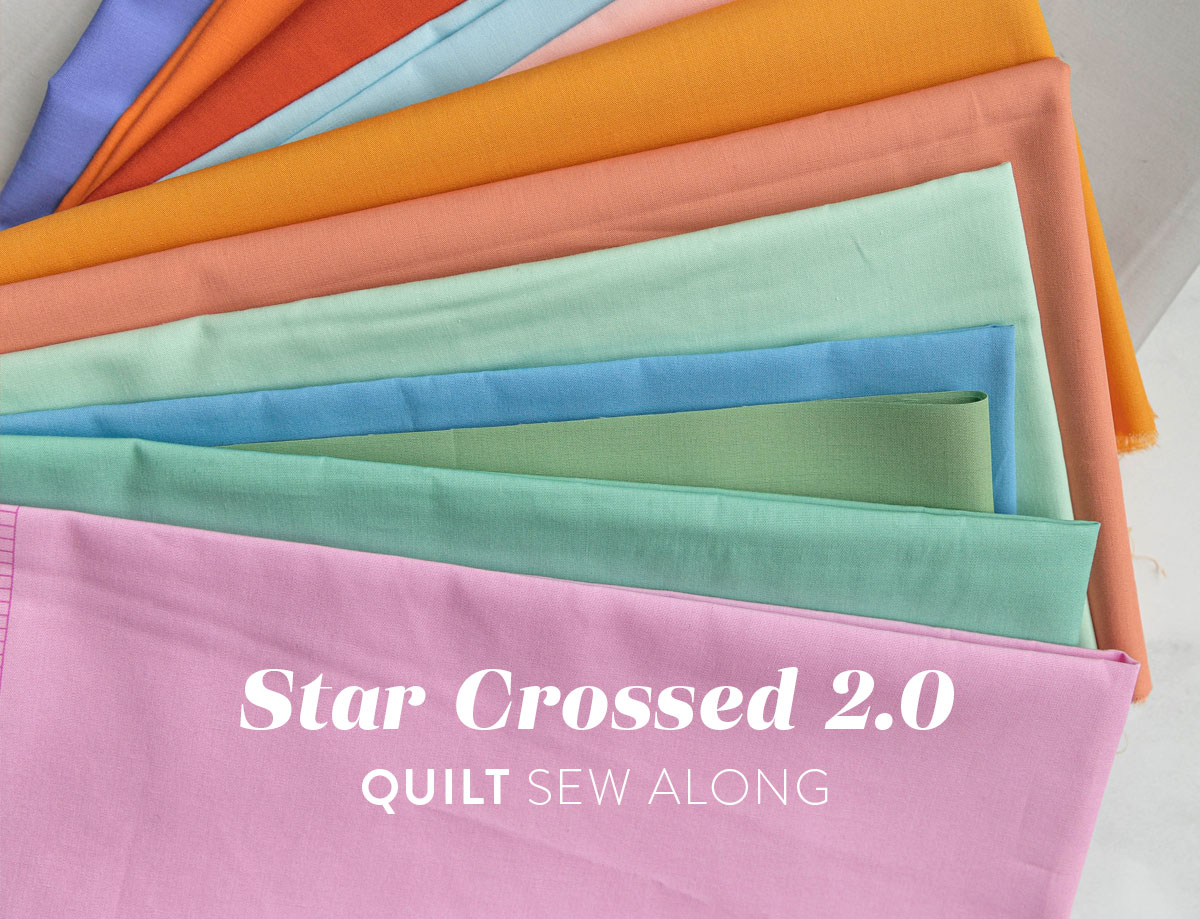
Star Crossed 2.0: Pick Fabric
Below are the fabric requirements for both the multi-colored version and the limited-color version. Check out this blog post to see finished examples of both!

For a list of the fabrics used in this multi-colored cover quilt, check out the inspiration post I reference above (here it is again). It even lists my fabulous 108" wideback backing fabric 🙂


Fabric for this limited-color Christmas version are also listed in that post (here it is again).

I recently saw this Star Crossed 2.0 quilt on Instagram. Isn't it stunning?? I love the bold dark background. It was made by Mandy Schetter with this fabric:
- AGF Pure Solids: Magnetism and Terra Cotta
- Fableism Sprout Wovens: Almond and Rose Clay
My Star Crossed 2.0 Fabric
I'm a little bit torn about which fabric pull to go with. On the one hand, I have desperately been wanting to make this spunky bright quilt ever since I came up with the Just Roll With It mockup in the pattern (page 16).
This will be my first time mixing my Suzy Quilts Signature PURE Solids with the rest of the AGF PURE Solids collection. So exciting!

Fabric:
- Colors 1-12: All AGF PURE Solids in Hydrangea, Dried Carrot, Poppy, Tranquil Waters, Crystal Pink, Queen Bee, Snapdragon, Tender Green, Aero Blue, Matcha, Warm Wave, Cosmos
- Background: AGF PURE solid Mystic Gray
- Backing: AGF Flower Child in Flannel


On the other hand, I also got this pretty little FQ bundle of Sharon Holland's newest fabric collection, Juniper. The background fabric is AGF PURE Solid Evergreen and the backing is Juniper Grove Flannel. What do you think I should do??
Hop on over to this post on Instagram to enter a giveaway to get one of these bundles!


In the mockup below, I substituted two of the FQs for Suzy Quilts Signature Solids Queen Bee and Pistachio. I thought there needed to be a little more balance between the center star and the solid background. With the addition of the solid strips, it looks like a well-thought out, woven together composition, rather than prints sitting on top of solids.


Star Crossed 2.0: Cut & Organize
Cut & Organize Tip #1: Print and use the labels from the pattern.
Just like in the Star Crossed pattern, I highly suggest you print and use the labels provided in the pattern. Each label not only has the coordinating letter from the diagram, but also the cutting measurements so you can double-check yourself.
Cut & Organize Tip #2: Use the guides on your ruler, not on your mat.
If you're new to quilting, cutting yardage can be intimidating. In this video I show you some best practices for both accuracy and safety.
If you're making the multi-colored version, you will be cutting FQs, which can be a bit easier because they are smaller. You don't need to prewash them, because I'd hate for them to shrink up on you, but do get them nice and flat. Here's a helpful video...
Cut & Organize Tip #3: Stack your strips
This pattern requires you to cut a lot of 4 1/4" strips. To speed up the process, stack a few fabrics on top of each other and slice them at the same time. Once it comes to sub-cutting, you may need to slow down and stack less.
I can't say this enough (because somehow I mess up my cutting in half my quilts) double check your pattern every time you make a cut. This will prevent you needing to buy more fabric because you cut something wrong.

Cut & Organize Tip #4: Save your scraps for binding!
If you're making the multi-colored version, you will have a nice chunk of fabric left over after making all of your 4 1/4" cuts. Save this fabric for a scrappy quilt binding! Never made a scrappy binding before? Oh you're going to love the way it looks.
For some more details on how cute scrappy binding can be, check out this tutorial, How To Use Adventureland Scraps For Quilt Binding.

Cut & Organize Tip #5: Watch this video on cutting a large square of fabric.
If you're making the throw size, you need to cut a 37" square — which I'm guessing is bigger than any ruler you own. It may even be bigger than your cutting mat! If that's the case, follow along with me as I show you how to measure and cut a large square of fabric.
After posting that video, someone in the comments suggested I try this little shortcut. After making three cuts, fold one corner of fabric to the other corner as seen below. Now cut along the edge of the folded fabric. I doubled checked to make sure I was actually cutting a 37" square before slicing, and sure enough, this works!
You can use your ruler and rotary cuter, or draw a guideline and use scissors.

Cut & Organize Tip #6: Use batting tape to stabilize your triangle bias edges.
My favorite batting tape here! I love this batting tape because it is 1.5" thick, giving me lots of stability and wiggle room for ironing and cutting.
About 10 minutes into the video above, I bring out some batting tape. What is batting tape you ask? Well, here's an article all about it and why I love it — Fusible Batting Tape: Why You Need it & How To Use It.
This video uses batting tape in a different way, however. Instead of fusing together small bits of quilt batting, I am ironing it onto the two diagonal marks where I will cut my triangles. Two sides of each triangle will have bias edges. The batting tape will stabilize the bias edges and keep them from stretching and distorting.
In short, when fabric is cut vertically or horizontally, it is cut on grain and does not stretch very much. But when fabric is cut off grain it gets stretchier. In quilting, you typically don't need to worry about this, because we piece together lots of small pieces and stabilize them with multiple seams. This does matter a bit more when working with large pieces of fabric — like the base triangles in this pattern.
Star Crossed 2.0: Assembly
Assembly Tip #1: Lay out your units and chain piece.
Chain piece as much as you can in this pattern. The center section is a great time to chain piece units and then rows. Only do this if you can stay organized. It won't save you time if you have to continually rip seams out because pieces got mixed up. (Been there. Done that.)
Assembly Tip #2: Use a leader piece.
New to leader pieces? I'm sure you've played follow the leader at some point in your life. A leader piece is just like that game. Now that you are a pro at chain piecing, you know firsthand how much stronger stitches are that start as part of a chain rather than a couple loose threads.
Start your sewing with a scrap of fabric (mine is an old piece of fleece that I also use to wipe away lint.) Once your leader piece is through the feed dogs, send your fabric through. You will avoid loose stitches and your feed dogs eating the corners of your fabric. You'll also avoid knotted "bird's nest" threads that can happen when you first start stitching.

Assembly Tip #3: Use fork pins if you've got 'em.
Fork pins are the best at locking your seams in place while you're sewing. Here's more details on fork pins if you're new to them, Fork Pins: The Best Way To Match Seams Perfectly.

Assembly Tip #4: Use two wool mats for pressing.
This can be a quicker work around from using a tailor's clapper all the time. Don't get me wrong, I still love my tailor's clapper, but if you press your seams with steam and then let them cool under a wool mat, you will achieve similar results as using a clapper — immovably flat seams!

Assembly Tip #5: Measure twice and cut once.
I found it a little intimidating to trim these strip sets. I don't know why, but I just kept second guessing myself and getting worried that I would mess up my fabric. If you feel this way, just double check the pattern, mark your shorter strip accordingly, use the 45-degree guide on your ruler, and cut. You got this!

Assembly Tip #5: Watch this video on Y-seams.
The four Y-seams will probably be the trickiest part of the whole pattern. When I was refreshing myself on Y-seams, I actually found it helpful to watch a few different people do it on YouTube. It's sometimes nice to see it from different angles.
I will also say that if this is your first time, give yourself a little grace if your Y-seam is slightly puckery. You can rip the seam and try a little more or a little less overhang of your background corner. The most important thing is to make sure you're sewing a 1/4" seam to the same point that matches the 1/4" seam of the next square side.
Was that sentence confusing? That's where watching videos can really help. 😉
In this YouTube short I show you in less than a minute how to sew a Y-seam.
Assembly Tip #6: Trim on the floor or on a large table.
With this tip and with the final trim, it's the exact same situation as the Star Crossed quilt. You can see more details in that post. For now, I better get to my Star Crossed 2.0 or I won't finish it in time! Two quilts in two weeks might have been overly ambitious of me. Ha!

Let me know in the comments if you have any questions and use #StarCrossedQuilt on social media to post pics of your quilt and see what others are making too! Next week we will go over quilting options for both Star Crossed and Star Crossed 2.0.


You need to make the dark green. What a great quilt this is!
The green is perfect for Christmas but just about any time of the year
The green is just gorgeous
Thank you!
Hello!
I love this pattern and am enjoying it so much! I have a question. When I line up my 45 degree ruler onto my offset strips, it doesn’t hit at around 9 1/4 – more like 8 1/2-8 3/4. Am I doing something wrong? Thanks!
My suggestion is to try a ruler like I use here in this example. The angle of 9 1/4″ to 21″ should be 45 degrees. Feel free to email me a photo of what you’re talking about if you think that would help me understand better.
Thank you! Well, I was excitedly impatient this morning, and I cut it at what my mat and ruler showed as 45 degrees! I’m waiting for the batting tape to arrive in the mail tomorrow so that I can cut my background fabric, but in the mean time, when I pin my two slanted strip sections together, it looks like they form a 90 degree angle, in which my background fabric should line up perfectly – is that right? There are no tricky quilting maths in which this isn’t how it’s supposed to work, I hope?? Thanks for you help – because I am so excited to complete this quilt and not have to start over!
Thank you so much! I finally received my batting tape and was able to cut and sew the background onto my other pieces. My angle math guess seems to have worked & it’s looking good! I *really* appreciated your offer of help — made me keep going! Can’t wait to carve out some time this weekend to finish it up and hopefully get it off to the quilters! I have never done that before & with the sew along discount, I can try it out. Thank you!
Batting tape for biased edges…. BRILLIANT! Thank you so much for that tip!!!
Page 5 that has the multi version diagram block layout is missing
Hey Melanie, We’ve noticed that because of the file size, some people who purchased the Star Crossed pattern bundle have had pages missing. If you contact us at [email protected] we will email you a PDF with no missing pages. Sorry about the hassle!